Configuration of Aurora push environment for Android
Register APP KEY
First of all, we register for the account on the official website of Aurora push to enter the developer service.
Click to create app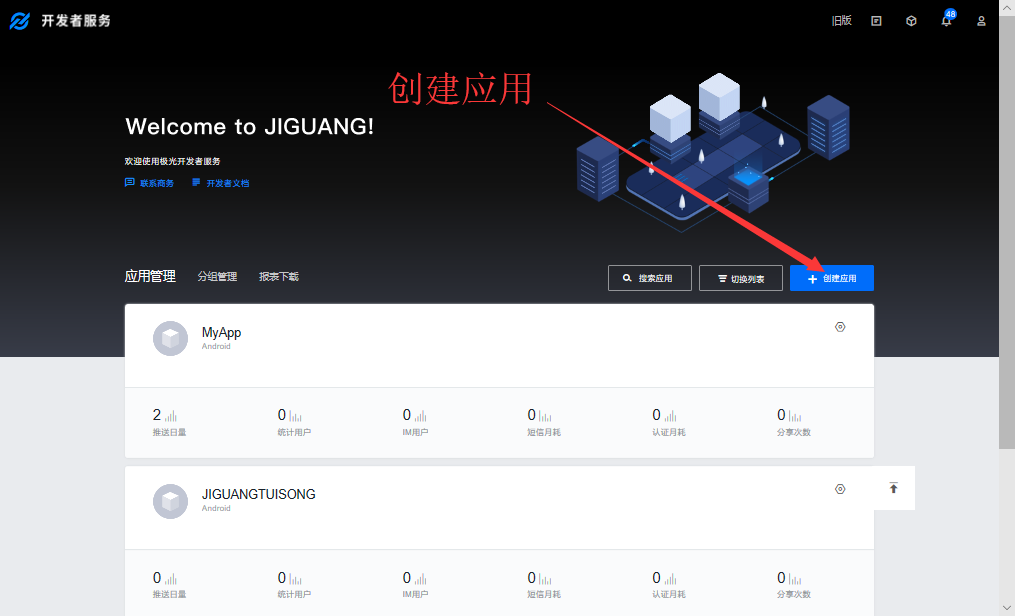
The second step:
Define the name of the application freely, and do not upload the picture
The third step:
Click push settings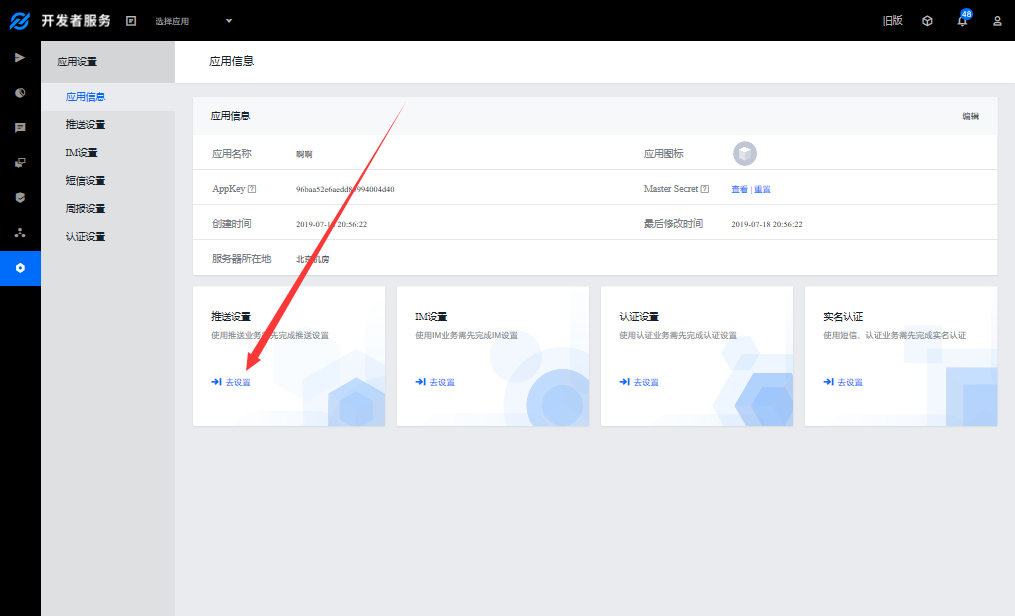
Enter the name of our new android project package into it
Click Save to download Demo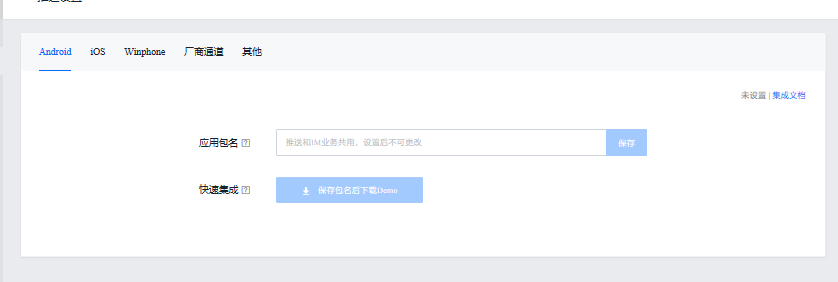
Android Studio configuration
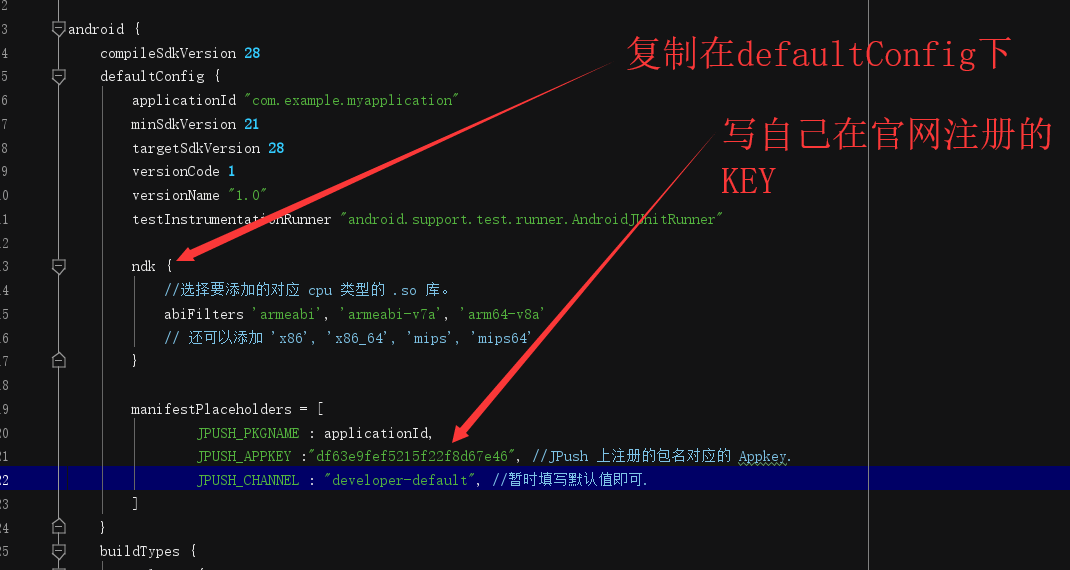
Now import the dependency and key name in the build.gradle file:
   implementation 'cn.jiguang.sdk:jpush:3.3.4'  // Take jpush version 3.3.4 as an example.
    implementation 'cn.jiguang.sdk:jcore:2.1.0'  // Take jcore version 2.1.0 as an example.
ndk {
            //Select the. so Library of the corresponding cpu type to add.
            abiFilters 'armeabi', 'armeabi-v7a', 'arm64-v8a'
            // You can also add 'x86', 'x86_', 'MIPS',' MIPS64 '
        }

        manifestPlaceholders = [
                JPUSH_PKGNAME : applicationId,
                JPUSH_APPKEY :"df63e9fef5215f22f8d67e46", //The Appkey corresponding to the package name registered on JPush.
                JPUSH_CHANNEL : "developer-default", //Fill in the default value temporarily.
        ]
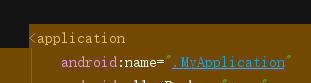
Then write the Application file and register it in the manifest file
public class MyApplication extends Application {

    @Override
    public void onCreate() {
        super.onCreate();

        //Aurora push
        JPushInterface.setDebugMode(true);
        JPushInterface.init(this);
    }

}
Then write in the manifest file:
Remove the existing activity tag and copy the package name.
<?xml version="1.0" encoding="utf-8"?>
<manifest xmlns:android="http://schemas.android.com/apk/res/android"
    package="com.example.myapplication">
    <permission android:protectionLevel="signature" android:name="com.example.myapplication.permission.JPUSH_MESSAGE"/>

    <!-- Required Some permissions required by the system, such as access to the network, etc.-->
    <uses-permission android:name="com.example.myapplication.permission.JPUSH_MESSAGE"/>
    <uses-permission android:name="android.permission.RECEIVE_USER_PRESENT"/>
    <uses-permission android:name="android.permission.INTERNET"/>
    <uses-permission android:name="android.permission.READ_PHONE_STATE"/>
    <uses-permission android:name="android.permission.WRITE_EXTERNAL_STORAGE"/>
    <uses-permission android:name="android.permission.READ_EXTERNAL_STORAGE"/>
    <uses-permission android:name="android.permission.WRITE_SETTINGS"/>
    <uses-permission android:name="android.permission.MOUNT_UNMOUNT_FILESYSTEMS"/>
    <uses-permission android:name="android.permission.ACCESS_NETWORK_STATE"/>
    <uses-permission android:name="android.permission.ACCESS_WIFI_STATE"/>

    <application
        android:name=".MyApplication"
        android:allowBackup="true"
        android:icon="@mipmap/ic_launcher"
        android:label="@string/app_name"
        android:roundIcon="@mipmap/ic_launcher_round"
        android:supportsRtl="true"
        android:theme="@style/AppTheme">
        <activity android:name=".MainActivity">
            <intent-filter>
                <action android:name="android.intent.action.MAIN" />

                <category android:name="android.intent.category.LAUNCHER" />
            </intent-filter>
        </activity>


        <service android:name=".PushService" android:exported="false" android:process=":pushcore">
        <intent-filter>
        <action android:name="cn.jpush.android.intent.REGISTER"/>
        <action android:name="cn.jpush.android.intent.REPORT"/>
        <action android:name="cn.jpush.android.intent.PushService"/>
        <action android:name="cn.jpush.android.intent.PUSH_TIME"/>
    </intent-filter>

    </service>
        <receiver android:name=".MyReceiver" android:exported="false" android:enabled="true">
        <intent-filter>
        <action android:name="cn.jpush.android.intent.REGISTRATION"/>
        <!--Required User registration SDK Of intent-->
        <action android:name="cn.jpush.android.intent.MESSAGE_RECEIVED"/>
        <!--Required User reception SDK News intent-->

        <action android:name="cn.jpush.android.intent.NOTIFICATION_RECEIVED"/>
        <!--Required User reception SDK Of notification bar information intent-->
        <action android:name="cn.jpush.android.intent.NOTIFICATION_OPENED"/>
        <!--Required User opens the intent-->
        <action android:name="cn.jpush.android.intent.CONNECTION"/>
        <!-- Receive network change connection/To break off since 1.6.3 -->
        <category android:name="com.example.myapplication"/>
    </intent-filter>
    </receiver>


        <receiver android:name=".MyJPushMessageReceiver">
        <intent-filter>
        <action android:name="cn.jpush.android.intent.RECEIVE_MESSAGE"/>
        <category android:name="com.example.myapplication"/>
    </intent-filter>
    </receiver>
        <!-- Required . Enable it you can get statistics data with channel -->
        <meta-data android:name="JPUSH_CHANNEL" android:value="${JPUSH_CHANNEL}"/>
        <meta-data android:name="JPUSH_APPKEY" android:value="${JPUSH_APPKEY}" />
    </application>

</manifest>
Note that the area marked in red is your own package name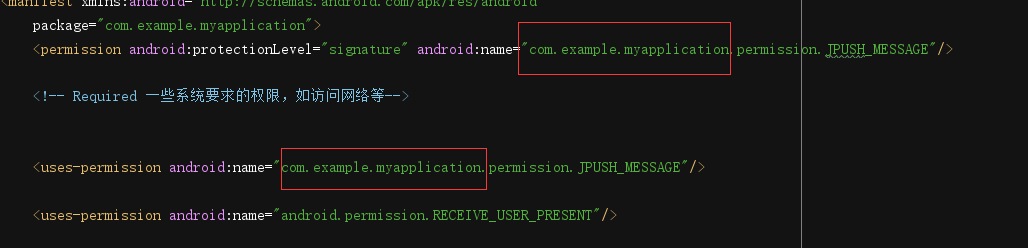
Then open the downloaded Demo
Copy several necessary classes into your own project
It can also be copied completely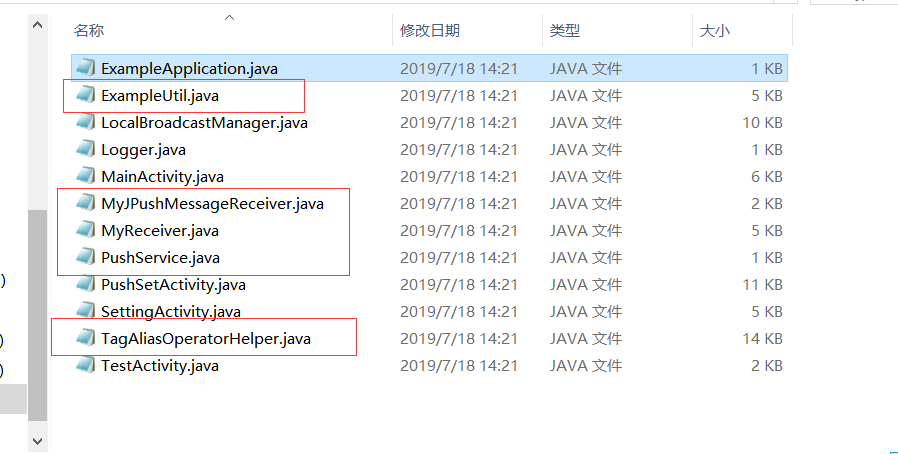
Then, the error reporting package in the class is imported.
Finally, change the name attribute of the service we copied in the manifest file to its own path.


Finally, we can send the push on Aurora's official website.
