Environmental Science;
centos 7 192.168.10.10 master
centos 7 192.168.10.129 minion
1. For the convenience of closing the firewall
[root@localhost ~]# systemctl disable firewalld  // No firewall startup
[root@localhost ~]# systemctl stop firewalld  // Stop firewall
2. Install salt master on the 192.168.10.10 host
[root@localhost ~]# yum install salt-master -y
Salt master listens to 2 ports by default:
4505: publish? Port provides remote command sending function
4506: ret_port provides authentication, file service, result collection and other functions
In order to ensure that the client and server can communicate normally through two ports, the firewall is closed in advance.
3. Set configuration file
The default / etc/salt/master configuration file is all commented. We can set our own functions. It is a good habit to back up the configuration file before modifying it.
[root@localhost salt]# vim master
[root@localhost salt]# grep -v ^# /etc/salt/master | grep -v ^$  // Filter out our configuration
interface: 0.0.0.0
publish_port: 4505
user: root
worker_threads: 5
ret_port: 4506
pidfile: /var/run/salt-master.pid
auto_accept: False    // Auto receive secret key
log_file: /var/log/salt/master
OK, let's temporarily configure the 192.168.10.10 (master) host here, and install 192.168.10.129 (minion) below
4. Install 192.168.10.129 (minion)
[root@localhost ~]# yum install salt-minion -y
5, adjust the configuration file of 192.168.10.129 (minion) after installation.
[root@localhost salt]# vim minion
[root@localhost salt]# grep -v "^#" /etc/salt/minion |grep -v "^$"
master: 192.168.10.10
master_port: 4506
user: root
id:192.168.10.129
log_file: /var/log/salt/minion
6. Start salt master (192.168.10.10) and salt minion (192.168.10.129) respectively
[root@localhost ~]# systemctl start salt-master  // Host 192.168.10.10
[root@localhost ~]# systemctl start salt-minion  // Host 192.168.10.129
7. View the secret key
[root@localhost ~]# salt-key -f 192.168.10.129 // At 192.168.10.10 View up

[root@localhost ~]# salt-call --local key.finger // View locally

[root@localhost ~]# salt-key -L // List all key information (in 192.168.10.10 Execution)

At this time, the relationship has not been really established.
[root@localhost ~]# salt-key -a 192.168.10.129 // Receive 192.168.10.129 Key to build a relationship

Common commands for key management;
[root@linux-node1 ~]# salt-key -L

#Common parameters
-L  #View KEY status
-A  #Allow all
-D  #Delete all
-a  #Verify the specified key
-d  #Delete the specified key
-r  #Log off the specified key (the status is not authenticated)
So far, the installation of the salt master of 192.168.10.10 (Master) and the installation and establishment of the relationship of 192.168.10.129 (salt minion) have been completed. Here is a simple command:
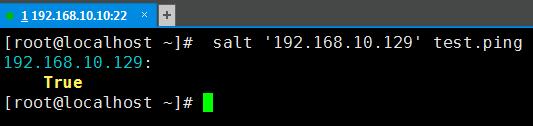
1. Check whether 192.168.10.129 survives
[root@localhost ~]# salt '192.168.10.129' test.ping // '*'To view all minion
Common commands:
[root@localhost ~]# salt '192.168.10.129' cmd.run 'ps -ef|grep python'
salt '192.168.10.129' pkg.install "nginx"  // Remote installation nginx
salt 'slave' pkg.remove "nginx"            // Remote unloading nginx
salt 'slave' pkg.version "nginx"           // View remote nginx Edition

salt 'slave' service.start "nginx"   // remote boot nginx service
salt 'slave' service.stop "nginx"    // Remote stop nginx service
salt 'slave' service.status "nginx"  // Remote view nginx state
salt --out=json '*' cmd.run_all 'hostname'  // Control output format, view all minion Hostname

salt-cp '*' Local file /opt/    // Send local files to all minion Of opt Directory

[root@localhost ~]# salt  '192.168.10.129' grains.items  // View the details of the specified target host
salt '*' saltutil.running        // View running tasks, find jid
salt '*' saltutil.kill_job jid   // according to jid Kill the mission
salt '*' saltutil.clear_cache    // Eliminate minion cache