Environmental Science
-
cas-server-4.1.8
-
cas-client-3.4.0
-
Java-8
-
Maven-3
-
Tomcat-7.0.72
CAS Server Installation
Click here to enter the CAS download list and select cas-4.1.8.zip to download.
https://github.com/apereo/cas/releases
Unzip cas-4.1.8.zip and enter the cas-server-webapp directory. Open cmd in the current directory and execute the installation command.
mvn -e -ff clean install -Dmaven.test.skip=true
After personal testing (self-pulled telecommunications 12M network), the installation process is very long, mainly due to mirror reasons, relying on package download is very slow, this process needs to wait. Or download the cas.war file that I have packed directly (Note: The dependent package version of this file has been slightly modified, which does not affect normal use).
After installation, you can see the cas.war file in the cas-server-webapp/target directory, which is the war package of the CAS server application service.
cas server security certification is based on https. In this paper, JDK keytool tool is used to generate digital certificates. The application of production environment system needs to purchase certificates from certificate provider. The generation of certificates and the configuration of Tomcat can be referred to in the article: keytool to generate digital certificates - Tomcat HTTPS configuration.
https://fanlychie.github.io/post/java-keytool-tomcat-https.html
First, make sure that Tomcat's HTTPS are accessible properly. Copy the cas.war file to apache-tomcat-7.0.72/webapps for publication. Start Tomcat and visit https://www.fanlychie.com:8443/cas.
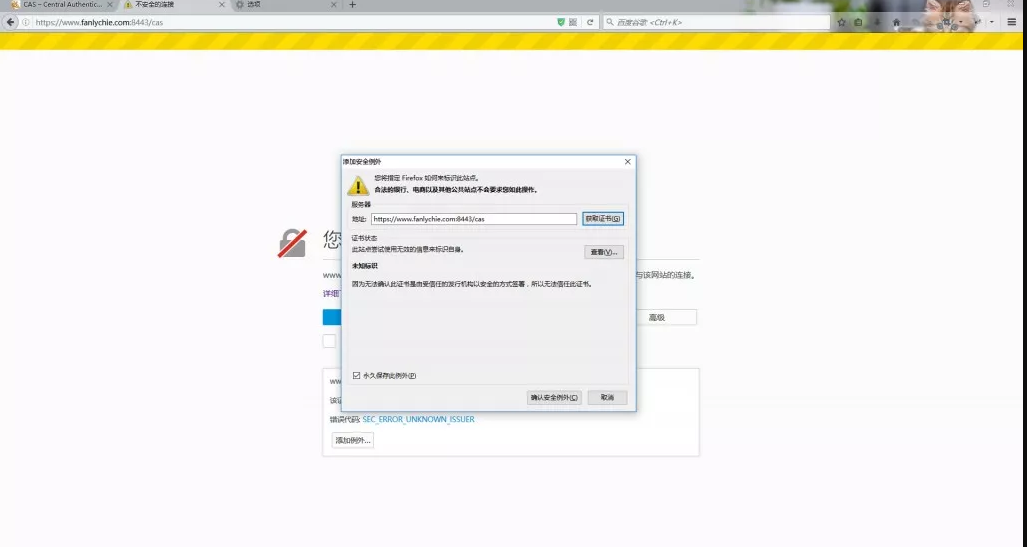
The above image is a link opened by Firefox Browser. Select Advanced - > Add Exceptions - > Confirm Security Exceptions.
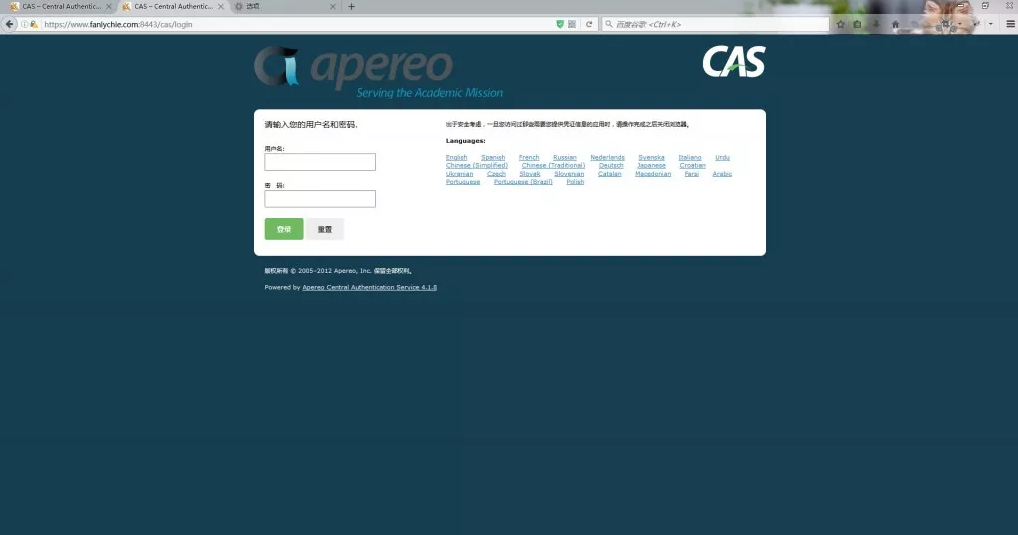
The username and password are found and opened in the apache-tomcat-7.0.72/webapps/cas/WEB-INF/deployer ConfigContext.xml configuration file, about 105 lines
<bean id="primaryAuthenticationHandler"
    class="org.jasig.cas.authentication.AcceptUsersAuthenticationHandler">
    <property name="users">
        <map>
            <entry key="casuser" value="Mellon" />
        </map>
    </property>
</bean>
You can see that the default user name is casuser and the password is Mellon.
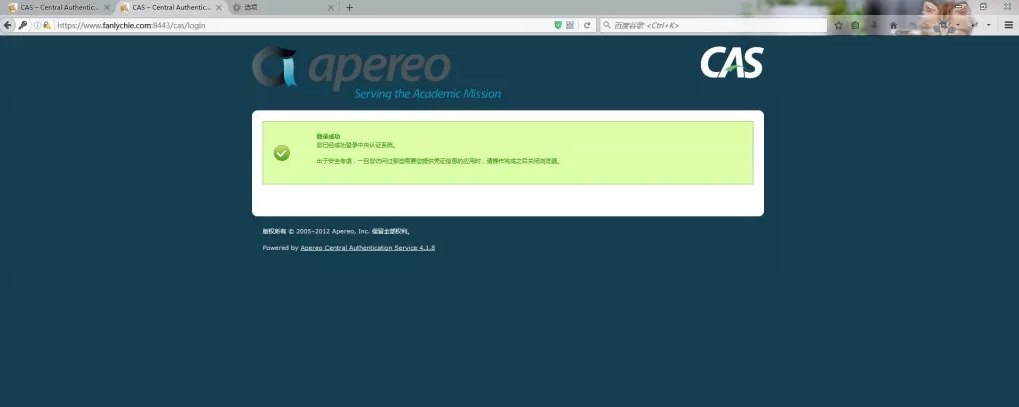
Seeing the page above shows that cas server has been successfully deployed.
CAS Server Configuration Based on Database User Authentication
Go back to the uncompressed directory of cas-4.1.8.zip and enter the cas-server-support-jdbc directory. Open cmd in the current directory and execute the installation command.
mvn -e -ff clean install -Dmaven.test.skip=true
After installation, the cas-server-support-jdbc-4.1.8.jar file is available in the target directory.
Copy the file to the apache-tomcat-7.0.72/webapps/cas/WEB-INF/lib directory and add c3p0-0.9.1.2.jar, mysql-connector-java-5.1.17.jar to the directory. If you are in trouble, click here to download the compressed package files of the three jar packages.
http://pan.baidu.com/s/1pLIrdWn
http://pan.baidu.com/s/1pLIrdWn
Open the apache-tomcat-7.0.72/webapps/cas/WEB-INF/deployer ConfigContext.xml file again, probably in line 54.
<bean id="authenticationManager" class="org.jasig.cas.authentication.PolicyBasedAuthenticationManager">
    <constructor-arg>
        <map>
            <!--
               | IMPORTANT
               | Every handler requires a unique name.
               | If more than one instance of the same handler class is configured, you must explicitly
               | set its name to something other than its default name (typically the simple class name).
               -->
            <entry key-ref="proxyAuthenticationHandler" value-ref="proxyPrincipalResolver" />
            <!-- Cancel this item
            <entry key-ref="primaryAuthenticationHandler" value-ref="primaryPrincipalResolver" />
            -->
            <!-- Add this item -->
            <entry key-ref="myAuthenticationHandler" value-ref="primaryPrincipalResolver" />
        </map>
    </constructor-arg>
    <!-- Uncomment the metadata populator to capture the password.
    <property name="authenticationMetaDataPopulators">
       <util:list>
           <bean class="org.jasig.cas.authentication.CacheCredentialsMetaDataPopulator"/>
       </util:list>
    </property>
    -->
    <!--
       | Defines the security policy around authentication. Some alternative policies that ship with CAS:
       |
       | * NotPreventedAuthenticationPolicy - all credential must either pass or fail authentication
       | * AllAuthenticationPolicy - all presented credential must be authenticated successfully
       | * RequiredHandlerAuthenticationPolicy - specifies a handler that must authenticate its credential to pass
       -->
    <property name="authenticationPolicy">
        <bean class="org.jasig.cas.authentication.AnyAuthenticationPolicy" />
    </property>
</bean>
Log out the second entry and add an entry according to the above configuration. Then add two bean configurations later.
<bean id="dataSource" class="com.mchange.v2.c3p0.ComboPooledDataSource" destroy-method="close"> <property name="jdbcUrl" value="jdbc:mysql://127.0.0.1:3306/cas_test_db?autoReconnect=true&useUnicode=true&characterEncoding=utf-8" /> <property name="user" value="root" /> <property name="password" value="root" /> <property name="driverClass" value="com.mysql.jdbc.Driver" /> <property name="initialPoolSize" value="10" /> <property name="maxIdleTime" value="1800" /> <property name="maxPoolSize" value="60" /> <property name="acquireIncrement" value="5" /> <property name="acquireRetryAttempts" value="60" /> <property name="acquireRetryDelay" value="2000" /> <property name="breakAfterAcquireFailure" value="false" /> <property name="autoCommitOnClose" value="false" /> <property name="checkoutTimeout" value="30000" /> <property name="idleConnectionTestPeriod" value="900" /> </bean> <bean id="myAuthenticationHandler" class="org.jasig.cas.adaptors.jdbc.QueryDatabaseAuthenticationHandler" p:dataSource-ref="dataSource" p:sql="SELECT passwd FROM user WHERE name = ?" />
The user table statement in cas_test_db database is
CREATE TABLE `user` (
  `id` int(11) NOT NULL AUTO_INCREMENT,
  `name` varchar(255) NOT NULL,
  `passwd` varchar(255) NOT NULL,
  PRIMARY KEY (`id`)
)
Restart Tomcat and visit https://www.fanlychie.com:8443/cas. Log in with name/passwd in the database as user name and password. If the login is successful, the configuration is successful.
CAS Client Client Client User and Configuration
Use maven to create two web projects, cas-client1 and cas-client2. Click here to download the demo file.
Cas-client 1 project pom.xml configuration
<dependencies>
    <dependency>
        <groupId>org.jasig.cas.client</groupId>
        <artifactId>cas-client-core</artifactId>
        <version>3.4.0</version>
    </dependency>
    <dependency>
        <groupId>org.slf4j</groupId>
        <artifactId>slf4j-log4j12</artifactId>
        <version>1.7.12</version>
    </dependency>
</dependencies>
<build>
    <plugins>
        <plugin>
            <groupId>org.apache.tomcat.maven</groupId>
            <artifactId>tomcat7-maven-plugin</artifactId>
            <version>2.2</version>
            <configuration>
                <path>/</path>
                <port>8881</port>
                <httpsPort>8081</httpsPort>
                <uriEncoding>UTF-8</uriEncoding>
                <protocol>org.apache.coyote.http11.Http11NioProtocol</protocol>
                <clientAuth>false</clientAuth>
                <keystoreFile>C:\Users\fanlychie\.keystore\selfissue.jks</keystoreFile>
                <keystorePass>123654</keystorePass>
                <keystoreType>JKS</keystoreType>
                <url>http://localhost:8081/manager/html</url>
            </configuration>
        </plugin>
    </plugins>
</build>
First, we must ensure that the project https protocol can be accessed normally, otherwise cas server cannot be authenticated.
Select the project - > Run As - > Maven build... -> Tomcat 7:run
Visit https://www.fanlychie.com:8081, and if you can, Tomcat is ready.
web.xml configuration for cas-client 1 project
<?xml version="1.0" encoding="UTF-8"?>
<web-app version="2.5" xmlns="http://java.sun.com/xml/ns/javaee" xmlns:xsi="http://www.w3.org/2001/XMLSchema-instance" xsi:schemaLocation="http://java.sun.com/xml/ns/javaee http://java.sun.com/xml/ns/javaee/web-app_2_5.xsd">
    <listener>
        <listener-class>org.jasig.cas.client.session.SingleSignOutHttpSessionListener</listener-class>
    </listener>

    <filter>
        <filter-name>CAS Single Sign Out Filter</filter-name>
        <filter-class>org.jasig.cas.client.session.SingleSignOutFilter</filter-class>
        <init-param>
            <param-name>casServerUrlPrefix</param-name>
            <!-- The configuration here is cas server address -->
            <param-value>https://www.fanlychie.com:8443/cas</param-value>
        </init-param>
    </filter>
    <filter-mapping>
        <filter-name>CAS Single Sign Out Filter</filter-name>
        <url-pattern>/*</url-pattern>
    </filter-mapping>

    <filter>
        <filter-name>CAS Authentication Filter</filter-name>
        <filter-class>org.jasig.cas.client.authentication.AuthenticationFilter</filter-class>
        <init-param>
            <param-name>casServerLoginUrl</param-name>
            <!-- The configuration here is cas server Login address -->
            <param-value>https://www.fanlychie.com:8443/cas/login</param-value>
        </init-param>
        <init-param>
            <param-name>serverName</param-name>
            <!-- The current project address is configured here, And must be used https service, otherwise cas server Unable to authenticate -->
            <param-value>https://www.fanlychie.com:8081</param-value>
        </init-param>
    </filter>
    <filter-mapping>
        <filter-name>CAS Authentication Filter</filter-name>
        <url-pattern>/*</url-pattern>
    </filter-mapping>
    <filter>
        <filter-name>CAS Validation Filter</filter-name>
        <filter-class>org.jasig.cas.client.validation.Cas20ProxyReceivingTicketValidationFilter</filter-class>
        <init-param>
            <param-name>casServerUrlPrefix</param-name>
            <!-- The configuration here is cas server address -->
            <param-value>https://www.fanlychie.com:8443/cas</param-value>
        </init-param>
        <init-param>
            <param-name>serverName</param-name>
            <!-- The current project address is configured here, And must be used https service, otherwise cas server Unable to authenticate -->
            <param-value>https://www.fanlychie.com:8081</param-value>
        </init-param>
    </filter>
    <filter-mapping>
        <filter-name>CAS Validation Filter</filter-name>
        <url-pattern>/*</url-pattern>
    </filter-mapping>
    <filter>
        <filter-name>CAS HttpServletRequest Wrapper Filter</filter-name>
        <filter-class>org.jasig.cas.client.util.HttpServletRequestWrapperFilter</filter-class>
    </filter>
    <filter-mapping>
        <filter-name>CAS HttpServletRequest Wrapper Filter</filter-name>
        <url-pattern>/*</url-pattern>
    </filter-mapping>
    <filter>
        <filter-name>CAS Assertion Thread Local Filter</filter-name>
        <filter-class>org.jasig.cas.client.util.AssertionThreadLocalFilter</filter-class>
    </filter>
    <filter-mapping>
        <filter-name>CAS Assertion Thread Local Filter</filter-name>
        <url-pattern>/*</url-pattern>
    </filter-mapping>
    <welcome-file-list>
        <welcome-file>index.jsp</welcome-file>
    </welcome-file-list>
</web-app>
The above is the cas client standard configuration, which can be referred to at https://github.com/apereo/java-cas-client.
The configuration of cas-client 2 is basically the same as that of cas-client 1. Details can be seen in demo. Start both projects at the same time.
cas-client1 - https://www.fanlychie.com:8081
cas-client2 - https://www.fanlychie.com:8082
Visit one of the projects https://www.fanlychie.com:8081 and it will automatically jump to
https://www.fanlychie.com:8443/cas/login?service=https%3A%2F%2Fwww.fanlychie.com%3A8081%2F.
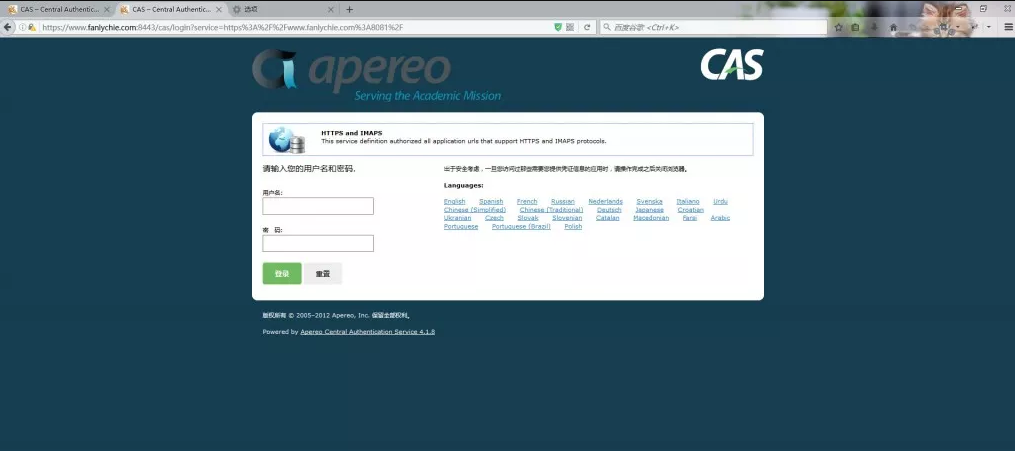
Since the CAS authentication system has not been logged in yet, the CAS authentication system intercepts your access and enters the login interface of the authentication system. When the login is successful, the CAS service will jump to the address you just visited.

When you visit https://www.fanlychie.com:8082, you do not need to log in.
At this point, CAS implements SSO single sign-on system.