How do I use Kotlin in Android Studio?
1. Using Android Studio plugins
2. Upgrade Android Studio to version 3.0: Not recommended at this time because version 3.0 is still the Dev Channel channel, i.e. the development channel, which has not yet been officially released
So today we're going to talk about how to create the first Kotlin project using the first method:
Plug-in Installation:
1. Enter Plugins\Install JetBrains plugins and install after searching Kotlin
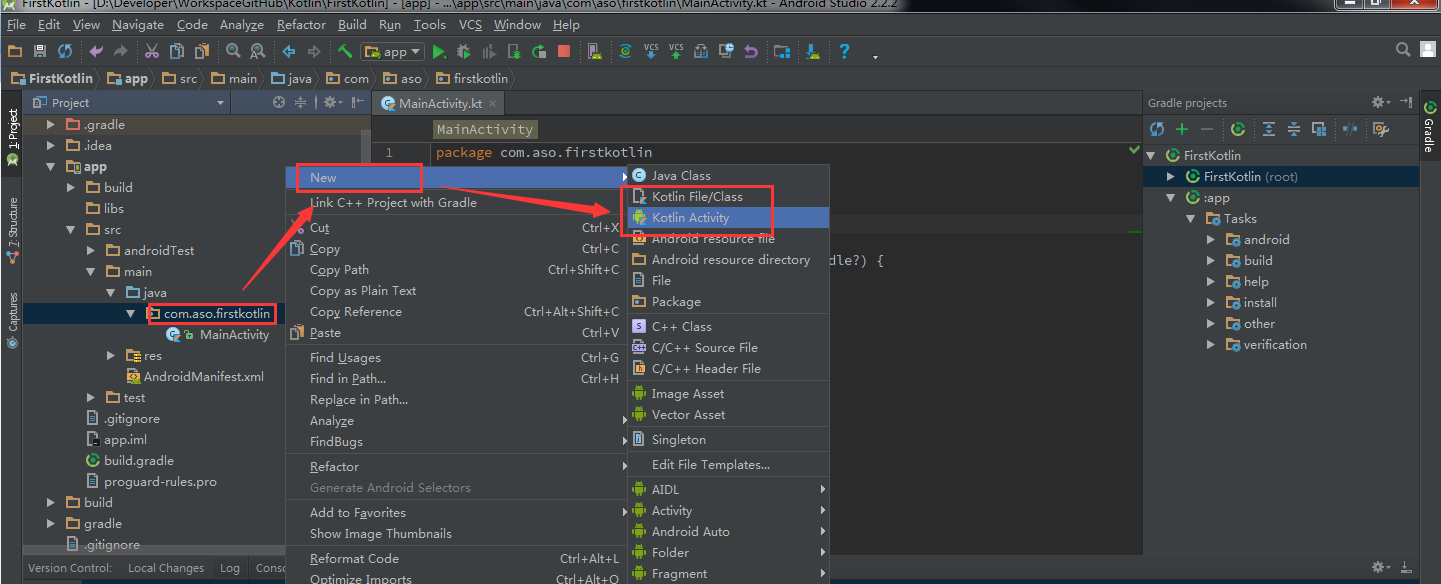
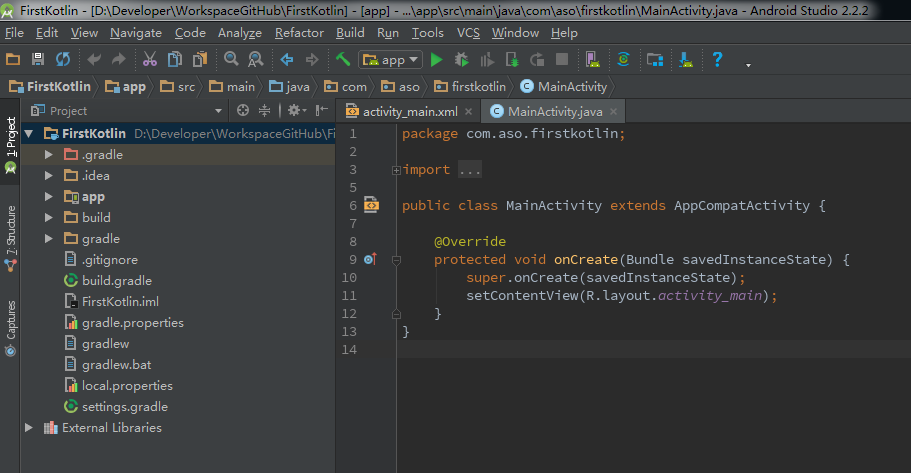
2. Create an Android project normally (how do you normally create it now or how do you create it). The screenshots are as follows
This way, I upload it to my Github Top, which makes it easy to keep track of every change
3. Convert java source files into Kotlin using conversion tools
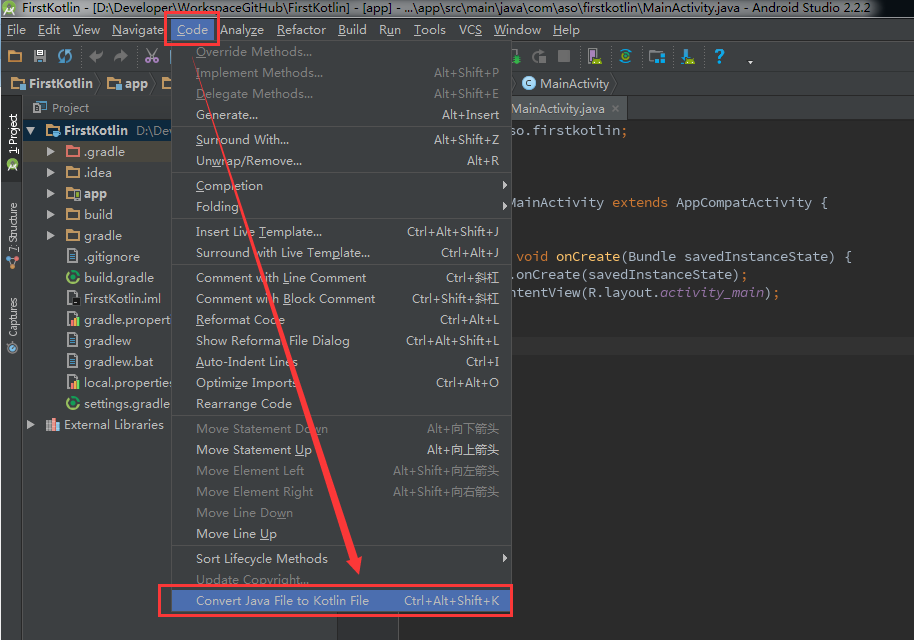
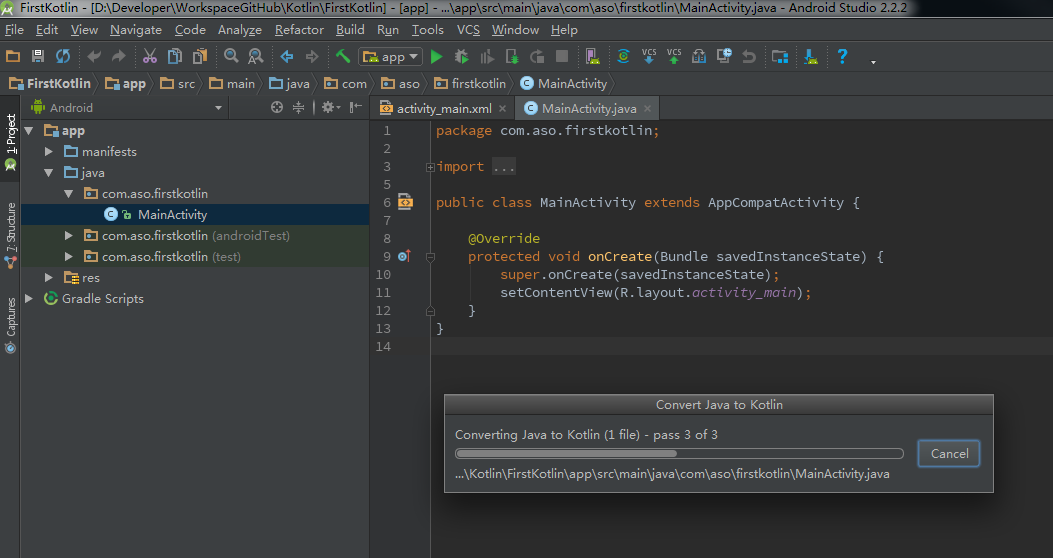
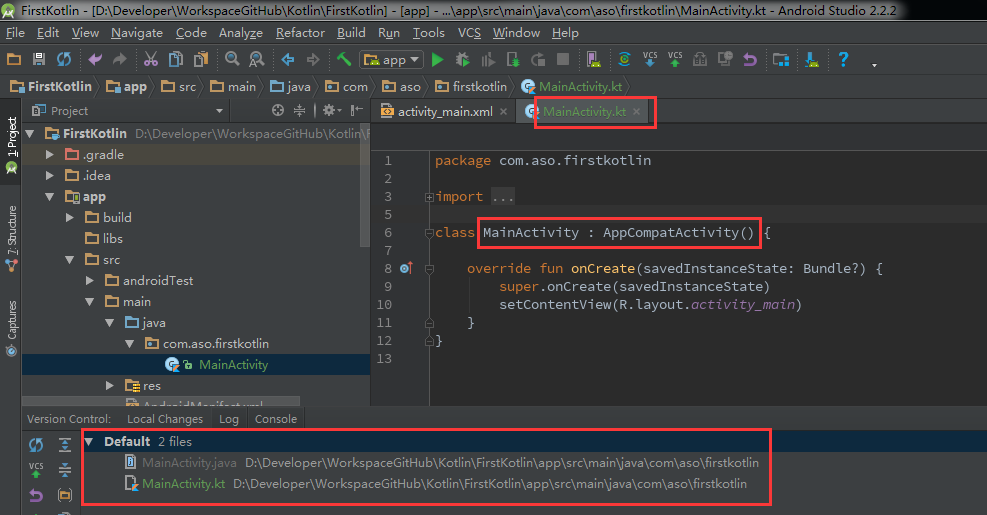
The result of the conversion is as follows: the suffix of the java source file becomes.kt, and the inheritance of the class changes
4. Configure Kotlin's dependency
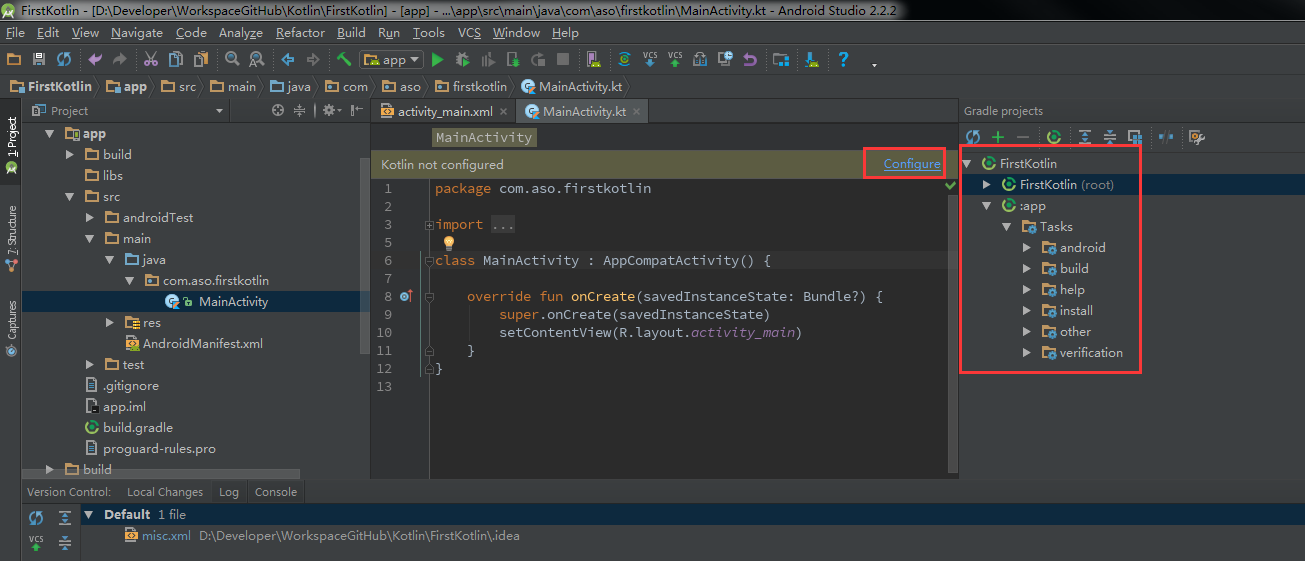
This adds a red label to the Project's build.gradle file
 1 // Top-level build file where you can add configuration options common to all sub-projects/modules.
 2
 3 buildscript {
 4     ext.kotlin_version = '1.1.2-3'//Kotlin Extended Properties
 5     repositories {
 6         jcenter()
 7     }
 8     dependencies {
 9         classpath 'com.android.tools.build:gradle:2.2.2'
10         classpath "org.jetbrains.kotlin:kotlin-gradle-plugin:$kotlin_version"//classpath required for sub-modules to build scripts
11
12         // NOTE: Do not place your application dependencies here; they belong
13         // in the individual module build.gradle files
14     }
15 }
16
17 allprojects {
18     repositories {
19         jcenter()
20     }
21 }
22
23 task clean(type: Delete) {
24     delete rootProject.buildDir
25 }
Add red labels to build.gradle in the sub-module (app module)
 1 apply plugin: 'com.android.application'
 2 apply plugin: 'kotlin-android'//Introduce the Kotlin plug-in, or'kotlin'plug-in if it is a java module
 3
 4 android {
 5     compileSdkVersion 25
 6     buildToolsVersion "25.0.2"
 7     defaultConfig {
 8         applicationId "com.aso.firstkotlin"
 9         minSdkVersion 15
10         targetSdkVersion 25
11         versionCode 1
12         versionName "1.0"
13         testInstrumentationRunner "android.support.test.runner.AndroidJUnitRunner"
14     }
15     buildTypes {
16         release {
17             minifyEnabled false
18             proguardFiles getDefaultProguardFile('proguard-android.txt'), 'proguard-rules.pro'
19         }
20     }
21 }
22
23 dependencies {
24     compile fileTree(dir: 'libs', include: ['*.jar'])
25     androidTestCompile('com.android.support.test.espresso:espresso-core:2.2.2', {
26         exclude group: 'com.android.support', module: 'support-annotations'
27     })
28     compile 'com.android.support:appcompat-v7:25.3.1'
29     testCompile 'junit:junit:4.12'
30     compile "org.jetbrains.kotlin:kotlin-stdlib-jre7:$kotlin_version"//Kotlin Dependent Package
31 }
32 repositories {
33     mavenCentral()
34 }
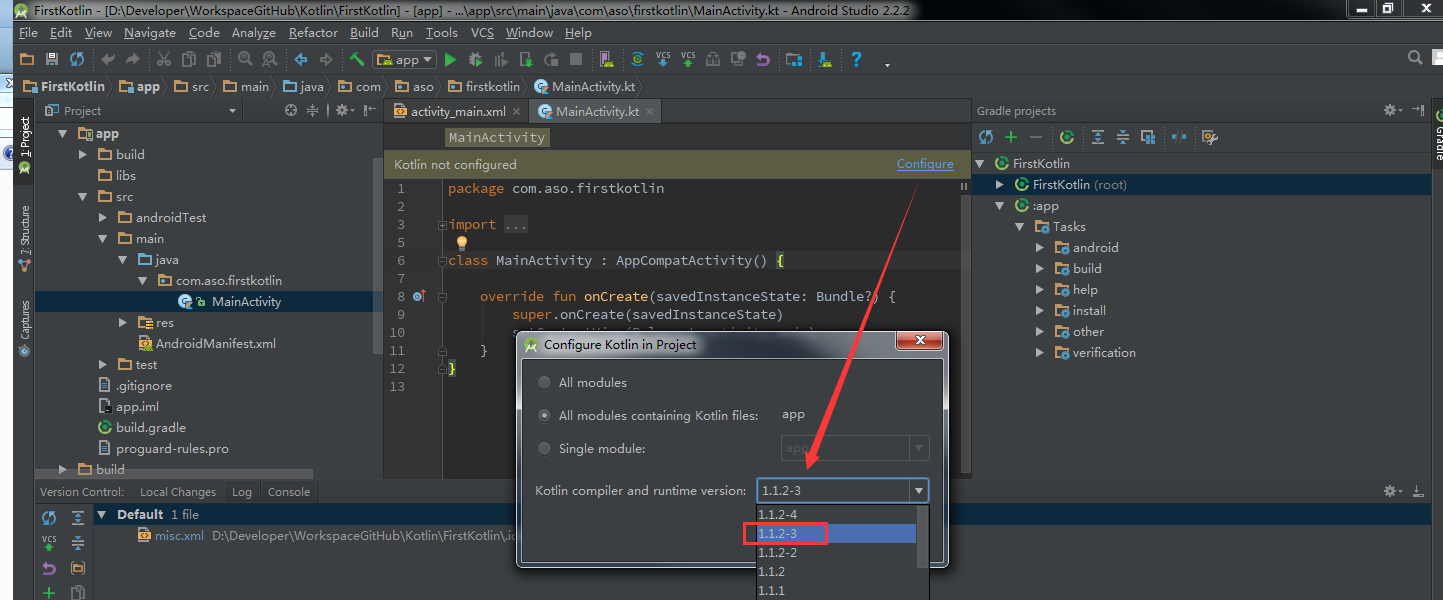
5. Select Sync Gradle (Sync Now Event) after the above 4 steps have been completed. Congratulations, our first Kotlin project has been created and configured.
6. Next, because we have the Kotlin plug-in installed, when we create a new file, we will have more options as shown in red, then create it as needed.