Environmental Science:
Virtual machine: VMware 12 Pro
Linux: rhel-server-6.4-x86_64
MYSQL: 5.7.21
1. Download mysql
In official website: http://dev.mysql.com/downloads/mysql/ , select the following version of mysql to download:
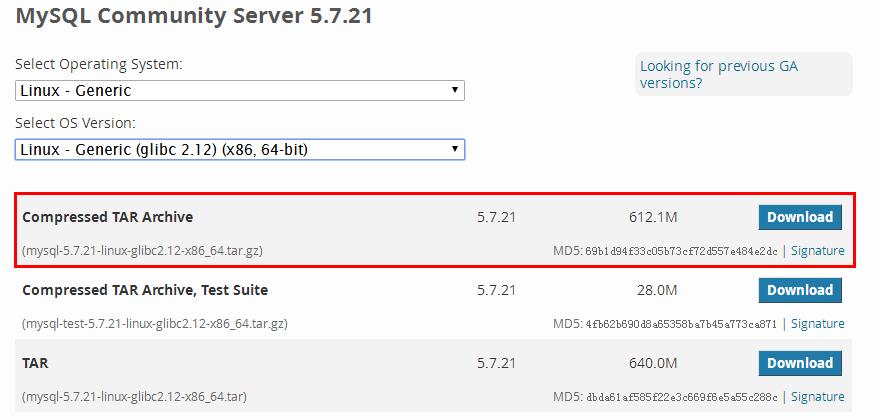
2. Unzip the installation package in / usr/local and rename it mysql
[root@mysql ~]# cd /usr/local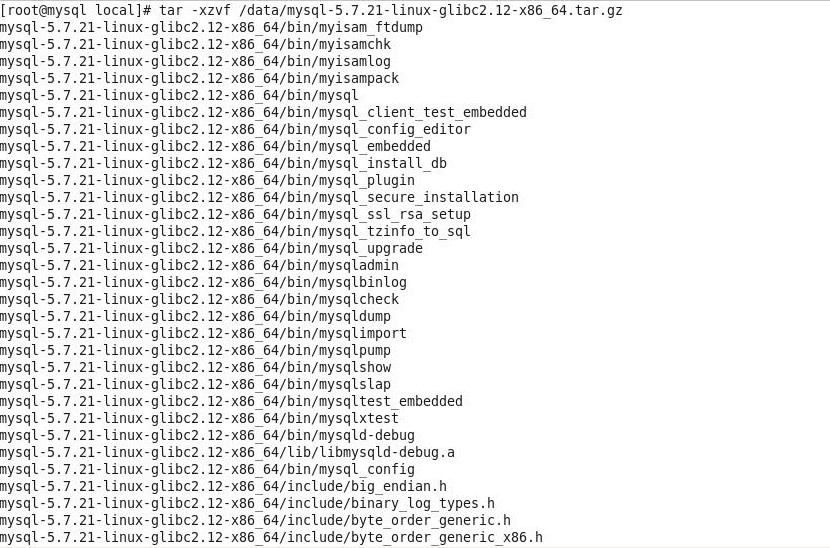
[root@mysql local]# mv mysql-5.7.21-linux-glibc2.12-x86_64.tar.gz mysql3. Create user group mysql, create user MySQL and add it to user group mysql, and give read-write permission

4. Create profile save and exit
[root@mysql local]# vi /etc/my.cnfCopy the following
[client]
port = 3306
socket = /tmp/mysql.sock
[mysqld]
character_set_server=utf8
init_connect='SET NAMES utf8'
basedir=/usr/local/mysql
datadir=/usr/local/mysql/data
socket=/tmp/mysql.sock
log-error=/var/log/mysqld.log
pid-file=/var/run/mysqld/mysqld.pid
\#Case insensitive
lower_case_table_names = 1
sql_mode=STRICT_TRANS_TABLES,NO_ZERO_IN_DATE,NO_ZERO_DATE,ERROR_FOR_DIVISION_BY_ZERO,NO_AUTO_CREATE_USER,NO_ENGINE_SUBSTITUTION
max_connections=5000

default-time_zone = '+8:00'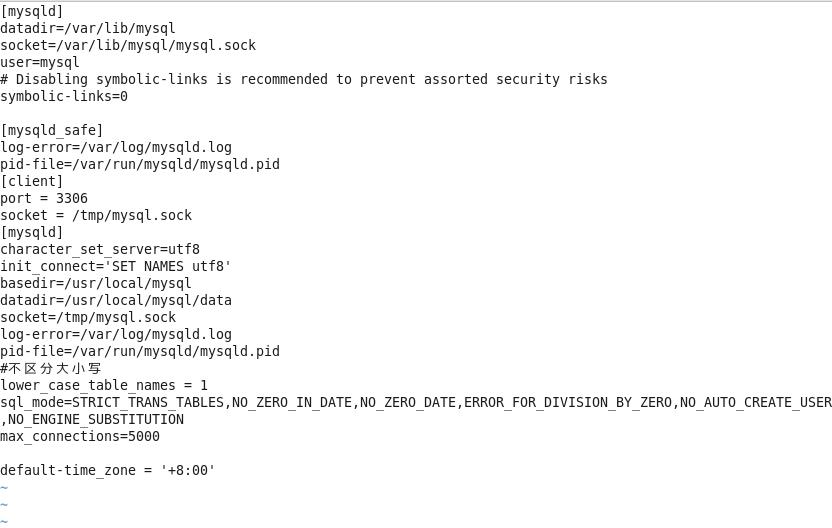
5. Initialize database
Install this package first, or the initialization may report an error 
1)build yum Warehouse
[root@mysql ~]# yum list all
[root@mysql ~]# mount /dev/cdrom -o loop /mnt / / mount the CD to the / mnt directory
2) Switch to yum.repo.d Directory
[root@mysql ~]# cd /etc/yum.repos.d/
3) Create any filename with suffix.repo Documents
[root@mysql ~]# vi server.repo
4) Edit the file as follows
[root@mysql ~]# vi server.repo
[server]
name=MYSQL //Name is optional
baseurl=file:///mnt/Server
enabled=1 //Enable yum warehouse, which is enabled by default
gpgcheck=0 //Verify set to no
Tips:
//Execute yum list all to verify whether the yum warehouse is configured.
//If the configuration is wrong, clean it with yum clean all and execute yum list all again
yum install libaio* -y 
Edit the log file manually, do not write anything, save directly and exit
[root@mysql ~]# cd /var/log/
[root@mysql log]# vi mysqld.log
:wq
[root@mysql log]# chmod 777 mysqld.log
[root@mysql log]# chown mysql:mysql mysqld.log
[root@mysql log]# /usr/local/mysql/bin/mysqld --initialize --user=mysql --basedir=/usr/local/mysql --datadir=/usr/local/mysql/data --lc_messages_dir=/usr/local/mysql/share --lc_messages=en_US
6. View initial password
[root@mysql log]# cat /var/log/mysqld.logThe last line is root @ localhost: tuhde < ptl81n, which is the initial password 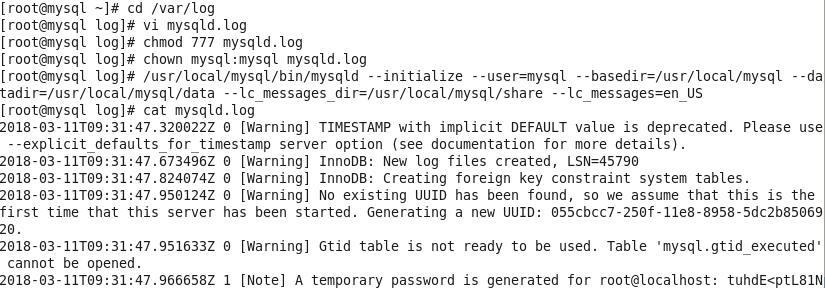
7. Start the service, enter mysql, and change the initial password
Then perform the following operations to open mysql service and set related permissions
[root@mysql log]# cd /var/run/
[root@mysql run]# mkdir mysqld
[root@mysql run]# chmod 777 mysqld
[root@mysql run]# cd mysqld
[root@mysql mysqld]# vi mysqld.pid
[root@mysql mysqld]# chmod 777 mysqld.pid
[root@mysql mysqld]# chown mysql:mysql mysqld.pid
[root@mysql mysqld]# /usr/local/mysql/support-files/mysql.server start

[root@mysql mysqld]# /usr/local/mysql/bin/mysql -uroot -p
Enter the initial password of step 6: tuhde < ptl81n 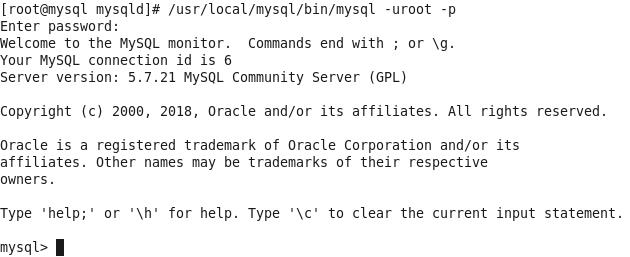

Prompt for password reset 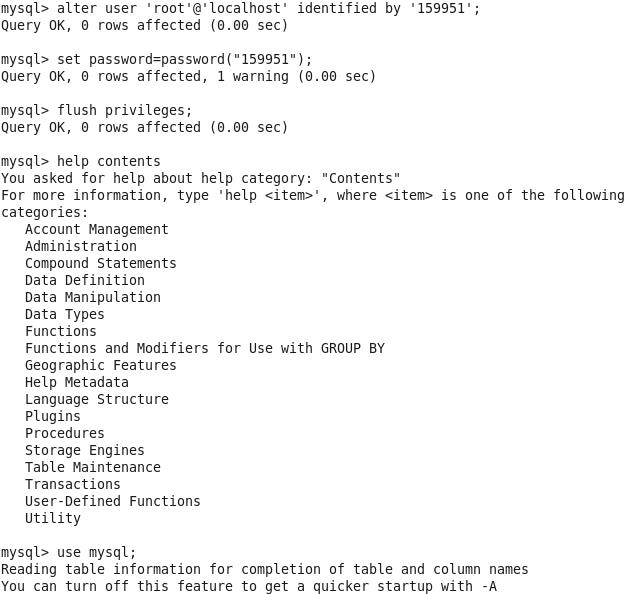
8. Start up automatically
