Engineering Overview
All means aimed at improving efficiency, reducing cost and quality assurance belong to engineering
Create project
- Create project structure with scaffolding tools
code
- formatting code
- Compile, build, package
Preview / test
- Web Server/Mock
- HMR
- Source Map
Submit
- Git Hooks
- Continuous integration
deploy
- CI/CD
- Auto publish
Scaffolding tools
Essence: create project infrastructure and provide project specifications and conventions
Yeoman (Universal scaffold tool)
Basic use
Install yeoman
npm install -g yo
Then install the required Generators, which are npm packages called generator XYZ. Install node generator here
npm install -g generator-node
Implement new scaffolding projects
yo node
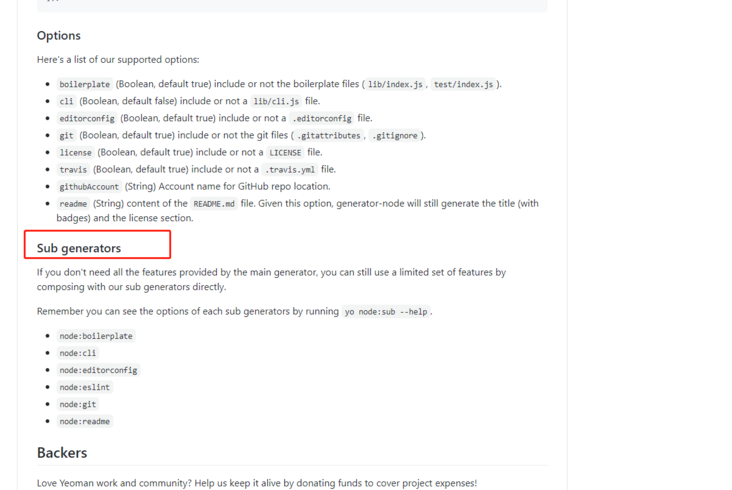
Sub Generator
You need to determine whether there is a Sub Generator according to the corresponding Generator document

Install the corresponding sub Generator
yo node:cli
Link current module to global
npm link
Execute view results
my-module --help

// output
  testing

  Usage
    $ my-module [input]

  Options
    --foo  Lorem ipsum. [Default: false]

  Examples
    $ my-module
    unicorns
    $ my-module rainbows
    unicorns & rainbows
Summary of use steps
- Identify requirements and find the right Generator
- Global installation of generators found
- Run the corresponding Generator through yo
- Fill in options interactively through the command line
- Generate the required project structure
Custom Generator

Installing the generator base class
yarn add yeoman-generator
Create generators/app/index.js as the core entry of the Generator
// This file serves as the core entry for the Generator
// You need to export a type that inherits from Yeoman Generator
// Yeoman Generator will automatically call some life cycle methods defined in this type when working
// In these methods, we can call some tools and methods provided by the parent class to realize some functions, such as file writing

const Generator = require("yeoman-generator");

module.exports = class extends Generator {
  writing() {
    // Yeoman automatically calls this method during the file generation phase
    this.fs.write(this.destinationPath("temp.txt"), Math.random().toString());
  }
};
After npm link is executed, a new module is created and executed
yo sample
Create files from templates
// Template
module.exports = class extends Generator {
  writing() {
    // Template file path
    const tmpl = this.templatePath("foo.txt");
    // Output file path
    const output = this.destinationPath("foo.txt");
    // Template data context
    const context = { title: "hello", success: true };
    this.fs.copyTpl(tmpl, output, context);
  }
};
Receive user input
module.exports = class extends Generator {
  prompting() {
    // Yeoman will automatically call this method when asking the user
    // In this method, you can call the prompt() method of the parent class to issue a command-line query to the user
    return this.prompt([
      {
        type: "input", // User input class
        name: "title", // Key to receive parameters
        message: "message title", // Tips
        default: "hello", // Default value
      },
      {
        type: "input", // User input class
        name: "success", // Key to receive parameters
        message: "message status", // Tips
        default: false, // Default value
      },
    ]).then((answer) => {
      this.answer = answer;
    });
  }
  writing() {
    // Template file path
    const tmpl = this.templatePath("foo.txt");
    // Output file path
    const output = this.destinationPath("input.txt");
    // //Template data context
    // const context = { title: "hello", success: true };
    this.fs.copyTpl(tmpl, output, this.answer);
  }
};
Drop (create a specific type of file)
Basic use
- Install the plop module as a project development dependency
- Create a plopfile.js file in the root directory of the project
- Define scaffolding tasks in the plopfile.js file
- Write templates for generating specific types of files
- Run scaffolding tasks through cli provided by plop
Installing the plop extension module
yarn add plop --dev
Create the plopfile.js entry file in the project root directory
// The plop entry file needs to export a function
// This function receives a plop object and the user creates a generator task

module.exports = (plop) => {
  plop.setGenerator("component", {
    description: "create component",
    prompts: [
      {
        type: "input",
        name: "name",
        message: "component name",
        default: "myComponent",
      },
    ],
    actions: [
      {
        type: "add",
        path: "src/components/{{name}}/index.js",
        templateFile: "templates/component.js.hbs",
      },
      {
        type: "add",
        path: "src/components/{{name}}/index.css",
        templateFile: "templates/component.css.hbs",
      },
      {
        type: "add",
        path: "src/components/{{name}}/index.html",
        templateFile: "templates/component.html.hbs",
      },
    ],
  });
};
Write a template component.html.hbs for generating a specific type of file
console.log("{{name}}")function
yarn plop component
Principle of scaffold tools
- Ask user questions through command line interaction
- Generate files according to the results of user answers
The entry configuration of Node CLI is bin in package.json file. The application entry file must have such a file header. In case of Linux or macOS system, the read-write permission of this file needs to be modified to 755
#!/usr/bin/env node
File configuration
#!/usr/bin/env node

console.log("start......");

const inquirer = require("inquirer");
const fs = require("fs");
const path = require("path");
const ejs = require("ejs");

inquirer
  .prompt([
    {
      type: "input",
      name: "name",
      message: "project name",
    },
  ])
  .then((answer) => {
    console.log(answer);

    // templates directory
    const tmplDir = path.join(__dirname, "templates");
    // Target directory
    const destDir = process.cwd();

    // Convert all files under the template to the target directory
    fs.readdir(tmplDir, (err, files) => {
      if (err) throw err;
      files.forEach((file) => {
        // Render files through the template engine
        ejs.renderFile(path.join(tmplDir, file), answer, (err, result) => {
          if (err) throw err;

          // Write results to destination file path
          fs.writeFileSync(path.join(destDir, file), result);
        });
      });
    });
  });