1. Encapsulation and snapshot creation of RHEL 6.5
## Since the specific encapsulation steps are consistent with those of RHEL version 7.5, the repetitive contents are not redundant, but the different operations are simply explained.
(1) configure ip, gateway, DNS, host name and local resolution
(2) Turn off iptables,ip6tables,selinux, and turn off boot-up self-start
(3) Build yum source, install common software such as vim,lftp, openssh, etc.
(4) Delete the inappropriate rules and delete the files in the root user's home directory
(5) Check the settings again after reboot and shut down
(6) Clear the cache, delete the shortcut of the mother disk in virt-manager, and create a snapshot
Note: There is no system CTL command in Enterprise 6, and all software runs scripted to start.
/ etc/init.d/iptables stop # Enterprise 6 does not have firewalld by default, but there are iptables and ip6tables
/etc/init.d/ip6tabls stop
Chekconfig iptables off # # # Turn off boot-up self-startup method
chkconfig ip6tables off
Vim/etc/sysconfig/network # Method of changing host name and need to be restarted before it can take effect
 Cd/etc/udev/rules.d/ View the local rule file, because there may be rules in Enterprise 7 version, which can not be used in Enterprise 6, and there may be problems without deleting the later operation.
Rm-fr 70-*  Delete Enterprise 7 Version Rules
2. Construction of Graphical Website Management
1. Environmental preparation:
In order to save resources, only two virtual machines server1 and server2 are used in this experiment. Serr1 is both a management node and a cluster node, and server2 is only a cluster node.
## In this experiment, server 1's ip is 172.25.21.1, and server 2's ip is 172.25.21.2.
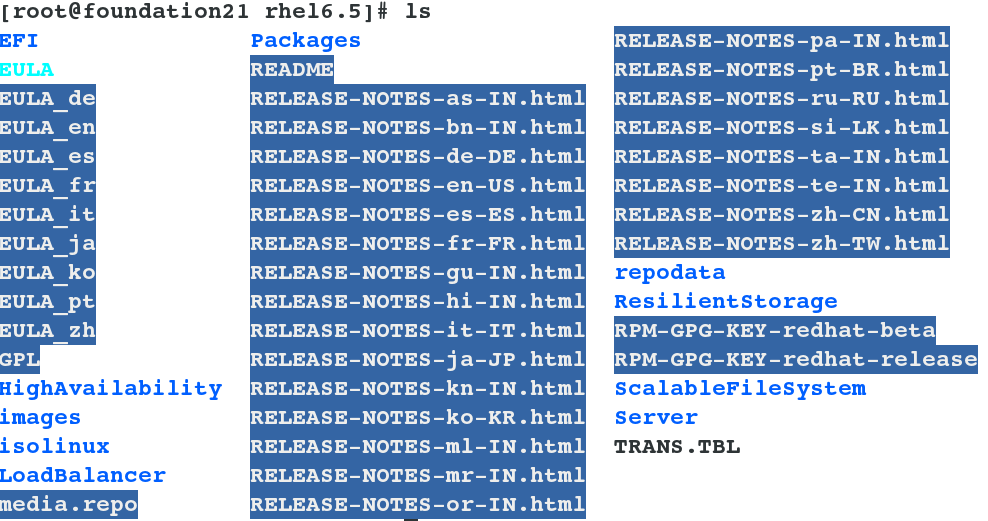
Because installation packages such as high availability and load balancing are not on their own yum Source, so you need to reconfigure it yum source
vim /etc/yum.repo.d/rhel6.repo				##Add the following, server1 and server2 do this setting
[HighAvailability]
name=HighAvailability
baseurl=http://172.25.21.250/rhel6.5/HighAvailability
gpgcheck=0

[LoadBalancer]
name=LoadBalancer
baseurl=http://172.25.21.250/rhel6.5/LoadBalancer
gpgcheck=0

[ResilientStorage]
name=ResilientStorage
baseurl=http://172.25.21.250/rhel6.5/ResilientStorage
gpgcheck=0

[ScalableFileSystem]
name=ScalableFileSystem
baseurl=http://172.25.21.250/rhel6.5/ScalableFileSystem
gpgcheck=0

2. Service construction:
(1)Install software and open services
[root@server1 ~]# yum install ricci luci -y			##It is both a management node and a cluster node.
[root@server2 ~]# yum install -y ricci

//The roles of the two softwares are as follows:
ricci It is installed on each node at each back end. luci Managing the nodes on the cluster is through and on the nodes. ricci Communicate, ricci Listen in11111upper
luci It is used to configure and manage clusters, listening in8084upper

id ricci				##You can see that the system generates a ricci user
passwd ricci			##Give this user a password that will be used when landing on the graphical web interface. It is recommended that server1 and server2 use the same password.
/etc/init.d/ricci start		##Open Services
chkconfig ricci on			##Setting up service boot-up self-start(Because you will restart the node when you manage the web page, not setting self-startup will cause the service to fail.)
[root@server1 ~]# /etc/init.d/luci start		##Open Management Services and Set Self-Start
[root@server1 ~]# chkconfig luci on
chkconfig --list			##Viewing the status of software running in script mode, not all of which is off, is considered self-startup
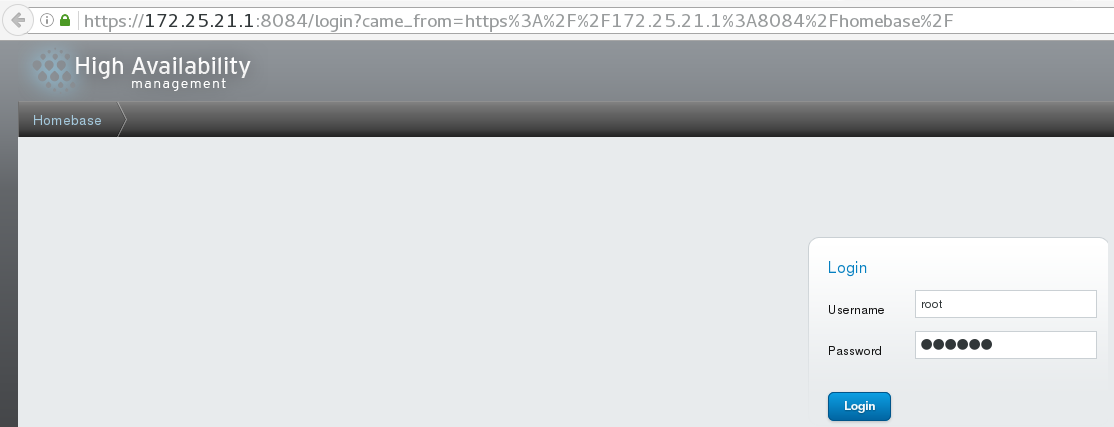
(2) Cluster creation and node addition
 Enter https://172.25.21.1:8084 into the high-availability graphics management interface and log in as root user. There may be a warning after login, just click ok.
After entering, the initial management interface should be as follows:
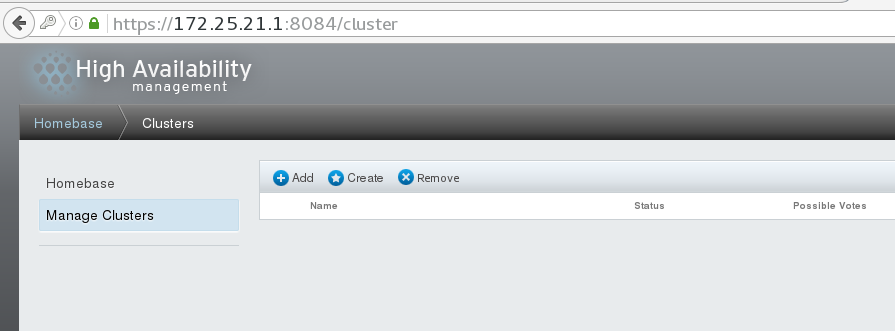
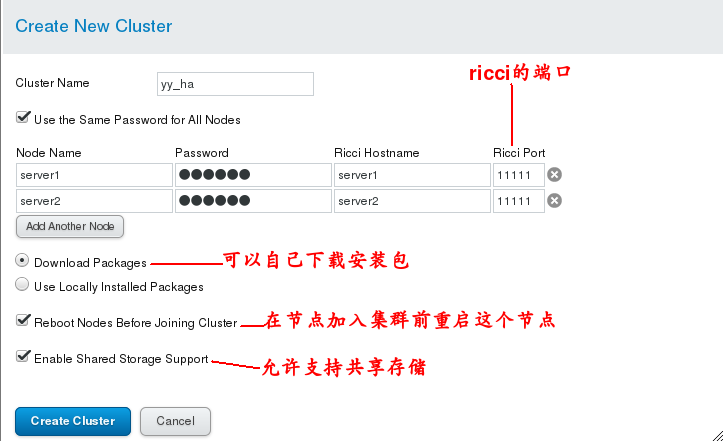
## First click Manage Clusters, then click Create to create a cluster and add server1 and server2 as nodes to the cluster.
## Add good information and click create to wait. Note: If you have been waiting for startup, it may be that ricci and luci services have not set up startup self-startup.
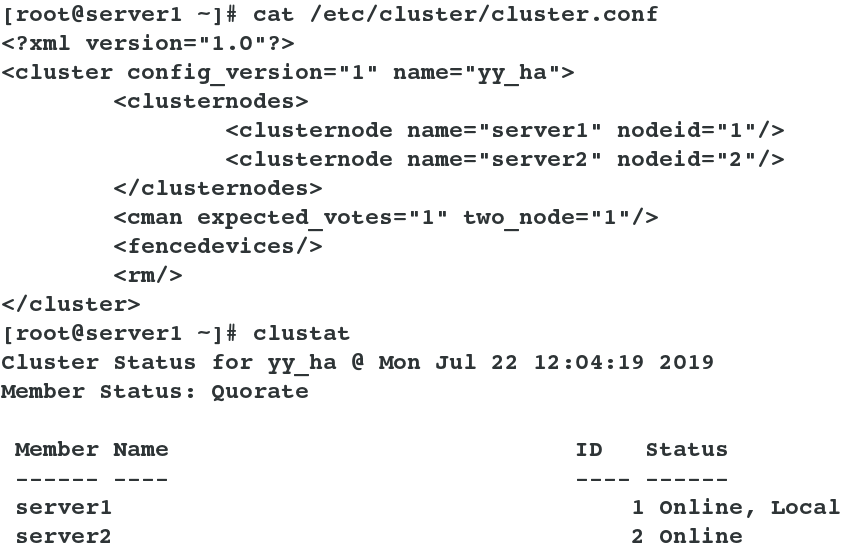
When the cluster is created, it should be as follows:
## Cluster policy and status information can also be viewed from the command line:
Save file of cat/etc/cluster/cluster.conf cluster information
 clustat # View the status of nodes in the cluster

3.fence management:
At this point, another host is needed to manage the two nodes as a fence host. Here we use the real machine to manage the two nodes.

## Its working principle is:
When an unexpected cause causes the host to be abnormal or downtime, the standby opportunity first calls the FENCE device, then restarts the abnormal host or isolates it from the network through the FENCE device, when the FENCE operation is successful.
After execution, the information is returned to the standby machine, which starts to take over the service and resources of the host after receiving the successful information of FENCE. In this way, the resources occupied by abnormal nodes are carried out through FENCE devices.
Release ensures that resources and services are always running on one node.

## It can be divided into software and hardware.
Hardware Fence: Power Fence, kick out the bad server by turning off the power supply
 Software Fence: Fence Card (Smart Card), which kicks out bad servers through cables and software
(1)fence Settings on the host:
yum install -y fence-virtd.x86_64 fence-virtd-libvirt.x86_64 fence-virtd-multicast.x86_64	##Install fence management software
fence_virtd -c			##Initialization settings, except that the network card is modified to the bridge br0 of the real machine, all of them use the default, return directly, and finally replace the configuration file.
					//Choose yes when

mkdir /etc/cluster		##Manually generate a key based on the location of the key file in the last step(Write whatever you are there.)
cd /etc/cluster			##Enter the catalogue
dd if=/dev/urandom of=/etc/cluster/fence_xvm.key bs=128 count=1		##Generate a key file

scp fence_xvm.key root@172.25.21.1:/etc/cluster/		##The key is sent to two nodes separately, which is verified by the key in management.
scp fence_xvm.key root@172.25.21.2:/etc/cluster/
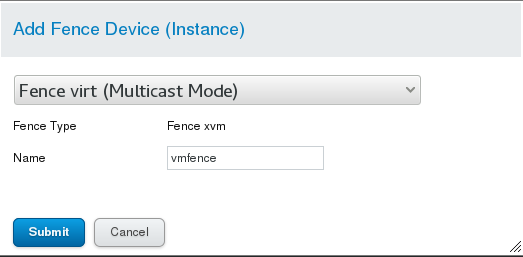
(2) The setting of graphical interface:
Firstly, add a fence device in Fence Devices. Set the parameters as follows:
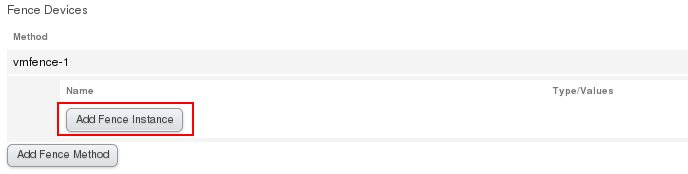
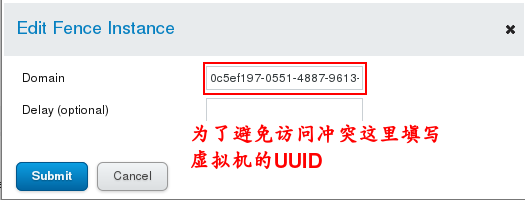
Then click Nodes and click server1 and server2 to complete the settings. The settings are as follows


(3) Testing:
At this point, server 2 can be directly powered off by command on server 1, and vice versa.
System CTL start fence_virtd.service # Opens fence service on fence management host
[root@server2 ~]# fence_node server1 # Close server1 on server2
 Cat/etc/cluster/cluster.conf # View the configuration file to see the fence policy
 Netstat-antuple | grep 1229 # View the port of the fence service

## Note: The firewall and selinux of the fence host should allow fence services, otherwise they will fail without reporting errors

4. Cluster apache service management:
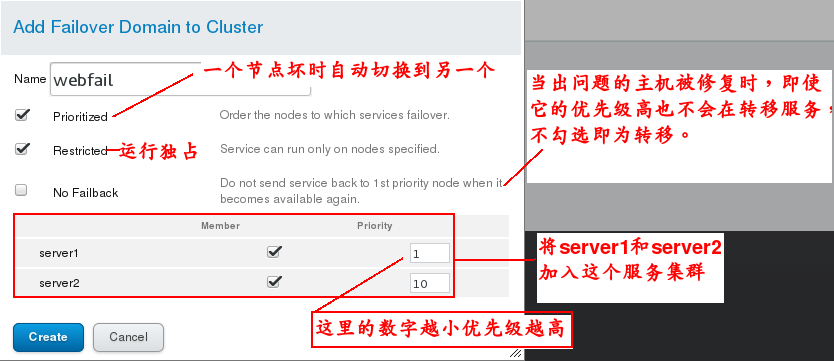
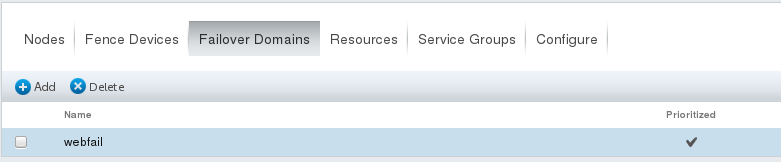
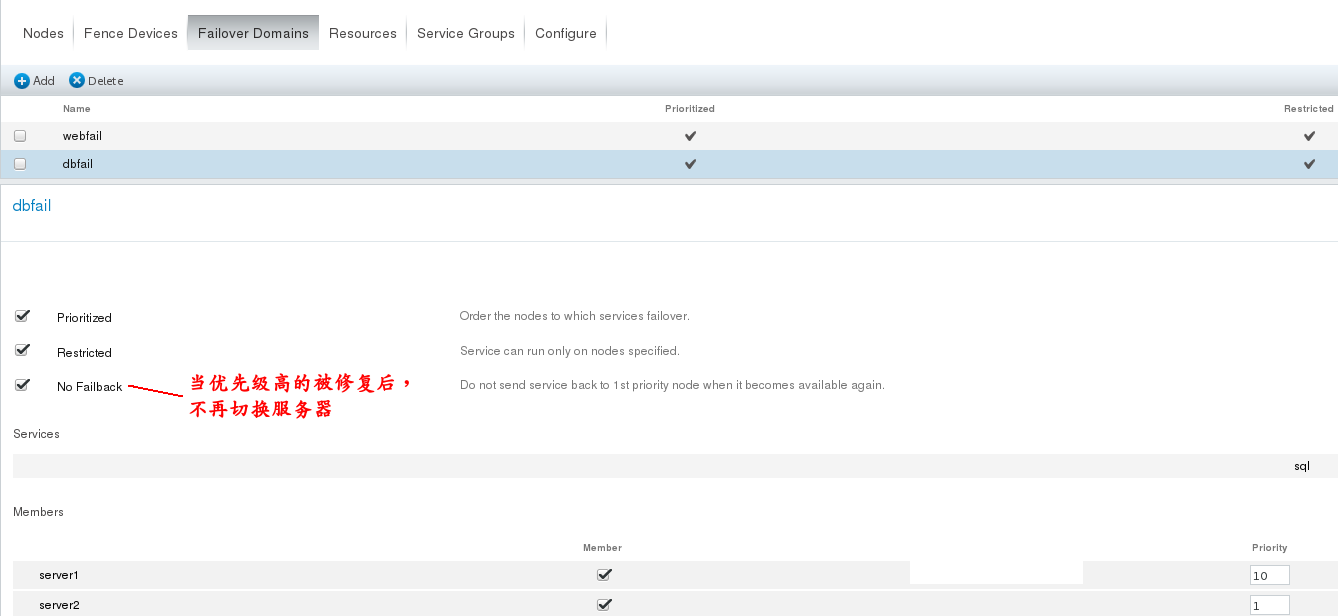
(1)
First, add a service cluster by clicking Add on Failover Domanns and select the member nodes
 After the creation, the following figure is shown:
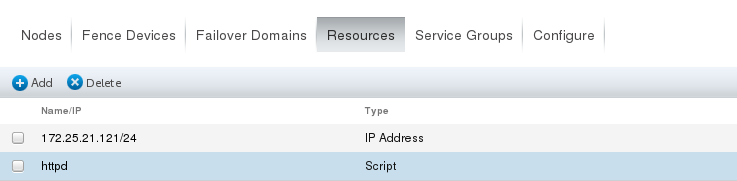
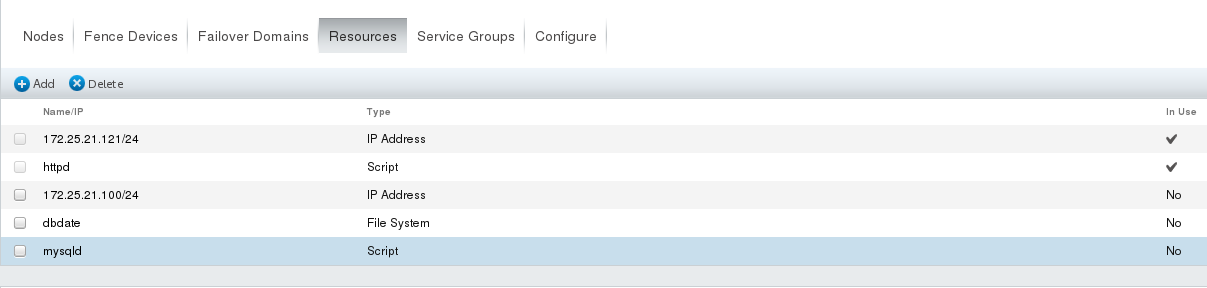
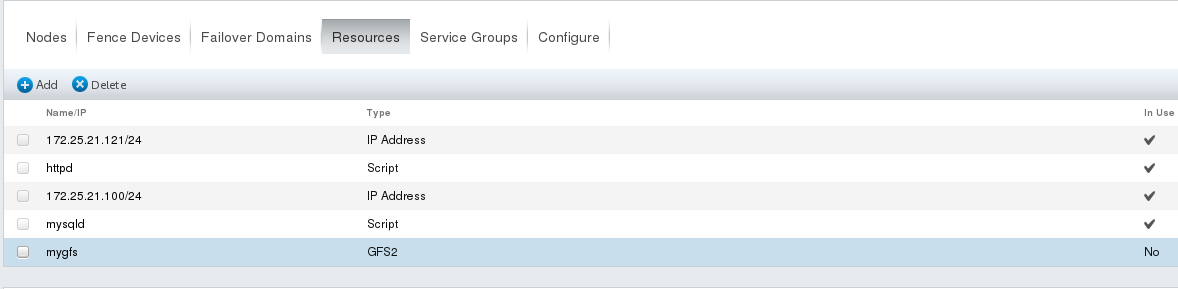
(2) In Resources, click Add to add resources:
## The addition process and completion effect should be shown in the following figure

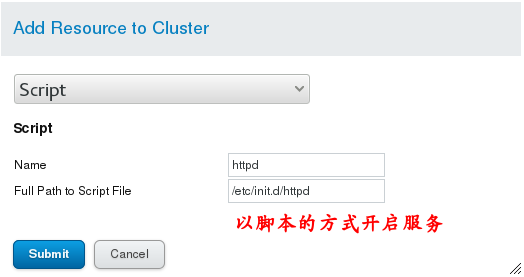
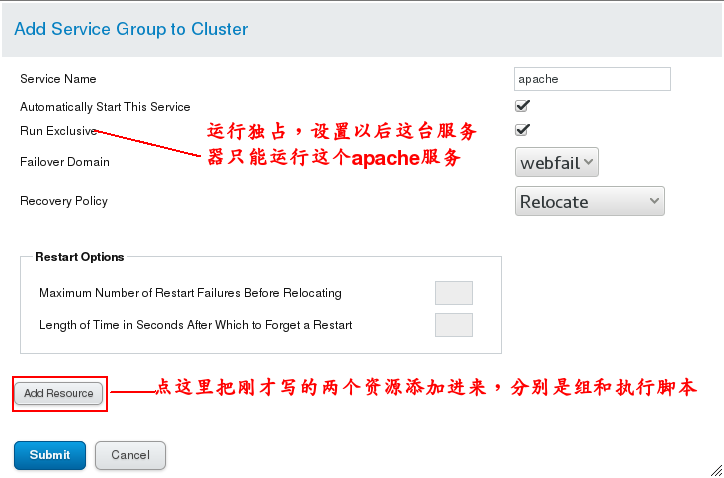
(3)
# Install apache on server1 and server2 and write a default publishing file, but without opening the service, the cluster will automatically open after the graphical interface is configured.
# Then add resource Resources to a group in the graphical management interface, that is, create a group in Service Groups and add apache Resources to it.

Yum install-y httpd # install apache
 Vim/var/www/html/index.html # Write a default publishing file

The graphics management interface operation is shown in the following figure:
Note: Remember to add resources, otherwise there is no service running

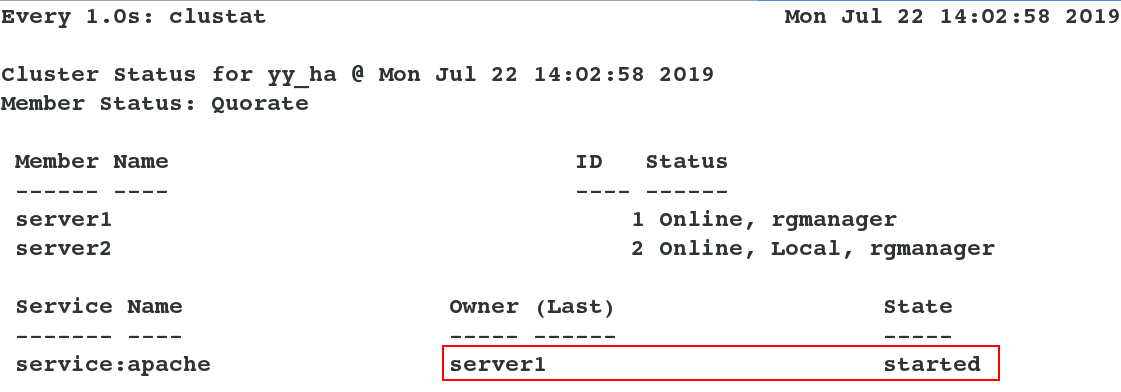
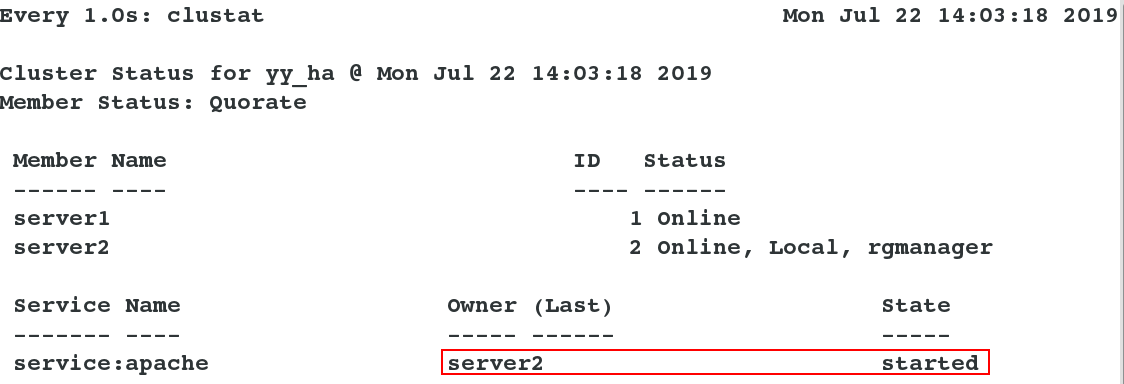
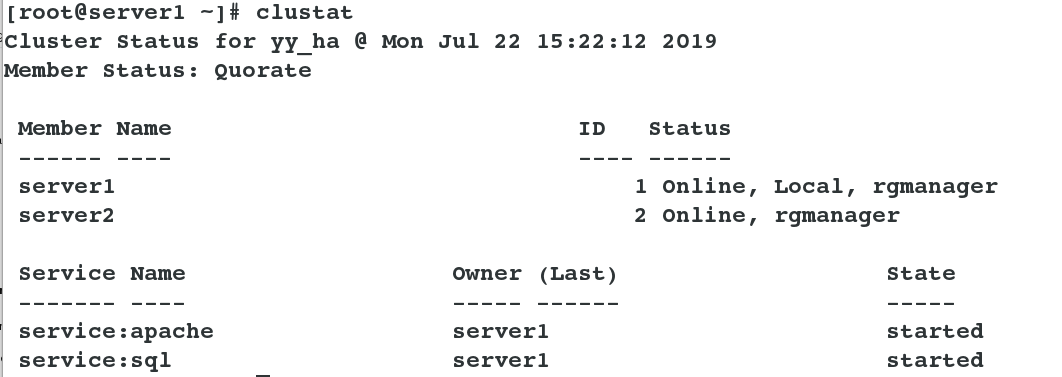
Test: Simulate the problem and turn off server1. You can see that the service automatically switches to server2.

[root@server2~] watch-n1 clustat  listens for cluster changes on server2, and then turns off server1
 ## You can see the increase and removal of ip in the log

5. Graphical Preparations for Cluster Shared Data Storage Service (Take mysql Service as an example)
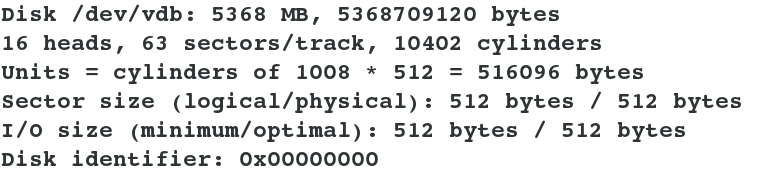
(1)
For environment preparation, a server dedicated to shared devices is needed, and a virtual machine server 3 is added here.
And add a 5g storage hard disk to server3 as a shared device, providing services for shared devices as iscsi

Fdisk-l # View the size and name of the added hard disk
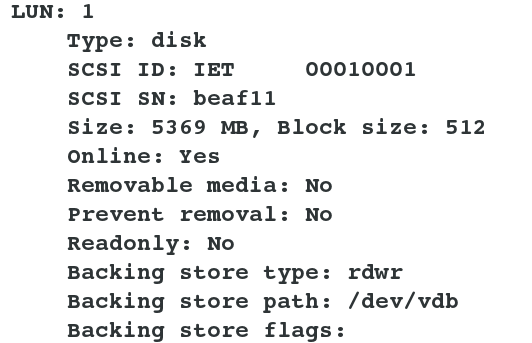
(2)
server3 Shared service settings:
yum install scsi-* -y			##Install iscsi service
vim /etc/tgt/targets.conf		##Modify configuration files
/etc/init.d/tgtd start			##Open the iscsi service

ps aux							##You should see two tgtd processes
tgt-admin --s					##Shared device information can be viewed when the service is turned on and executed

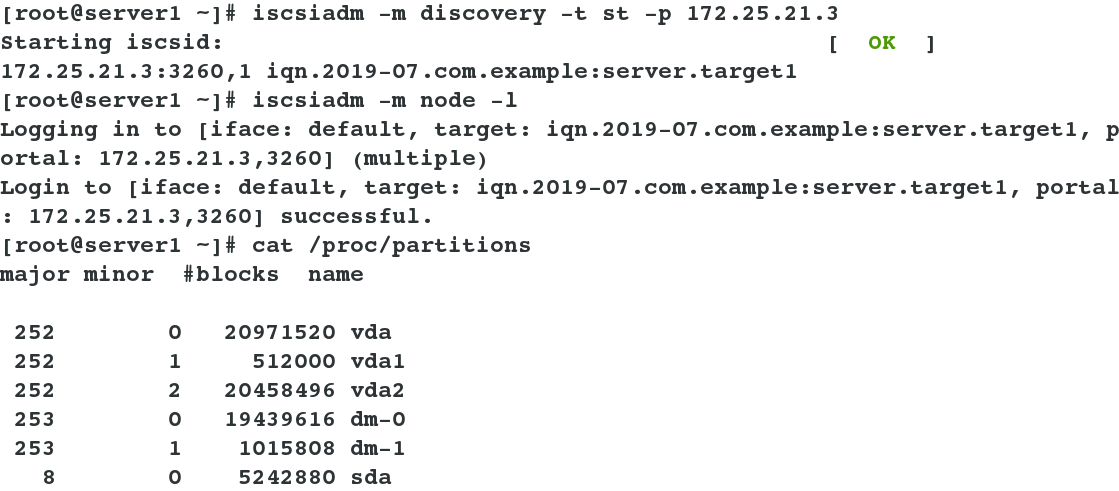
server1 and server2 Settings on:(Two hosts have the same settings without special instructions)
yum install -y iscsi-*								##Install iscsi client service
iscsiadm -m discovery -t st -p 172.25.21.3			##Discovery of shared devices
iscsiadm -m node -l									##Mount shared devices locally
cat /proc/partitions								##Check to see if there is a shared device in the local device. The common name is sda.

fdisk -cu /dev/sda									##Create a partition
mkfs.ext4 /dev/sda1									##Format file system

//Note: In general, in order to avoid the problem of losing partition boot tables and causing data unreachable, active backup or partitioning should be done.
server1 and server2 Continue setting:
yum install -y mysql-server				##Install database software
mount /dev/sda1 /var/lib/mysql/			##Mount the device you just formatted into mysql's data directory
ll -d /var/lib/mysql/					##View permission can see that it is root, because this is mysql software running to store data, so change back to mysql
chown mysql.mysql /var/lib/mysql/
/etc/init.d/mysqld start				##Start up service
ls /var/lib/mysql/						##You can see that the data is generated.
/etc/init.d/mysqld stop					##Out of Service
umount /var/lib/mysql/					##unmount

(3)
Start graphical management settings
Addition of Resources (two services can't use the same ip, otherwise there will be conflicts, so set up a different IP here):


# Setting of Service Group: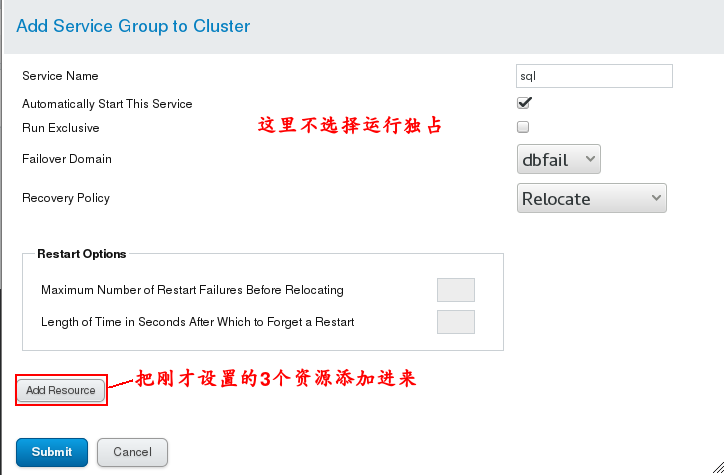

(4)
Test:
Cancel apache's runtime exclusivity so that they can run on a host because Apache automatically switches to the highest priority
 So we let mysql run on apache's host

6. Graphical Implementation of Cluster Shared Data Storage Service (gfs2: A host can write files to database data directory and another host can also see after mounting)
(1)Set in the form of a command line:
server1 and server2 Settings:
/etc/init.d/clvmd status	##Make sure that the storage service is open before the shared service is opened, otherwise there will be conflicts later.
vim /etc/lvm/lvm.conf		##Check whether the shared device mode is cluster mode 3
lvmconf --disable-cluster	##Recoverable default mode 1
lvmconf --enable-cluster	##If it's not mode 3, you can use this command to change to mode 3

fdisk -cu /dev/sda
mount /dev/sda1 /var/lib/mysql	##Permissions for a new device are still root, so permissions need to be changed
chown mysql.mysql  /var/lib/mysql

pvcreate /dev/sda1			##Delete the original device and create a new device to share
vgcreate clustervg /dev/sda1
lvcreate -L 2G -n demo clustervg

clustat						##Confirm the name of the cluster before using gfs2 formatting, and write whatever your cluster name is.
mkfs.gfs2 -t yy_ha:mygfs2 -p lock_dlm -j 2 /dev/clustervg/demo		##Format it in gfs2 format. Examples of usage can be viewed by man
blkid						##Looking at the local device information, you can see that the uuid on server1 and server2 is the same
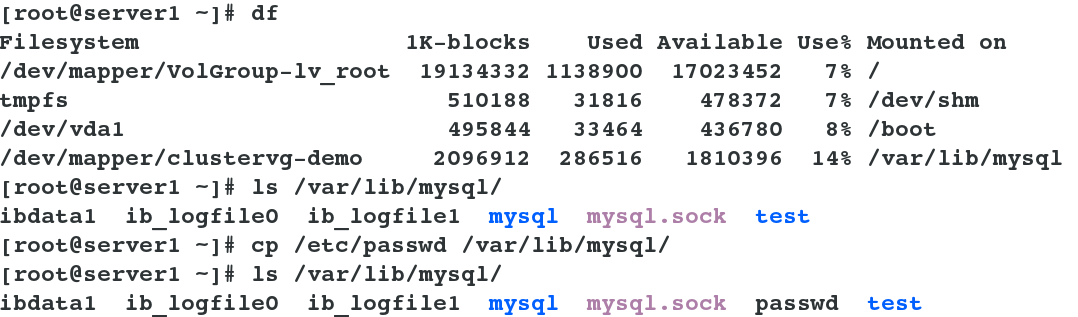
(2) Testing:
Write a file to server 1, and you can see the same content when mounted on server 2

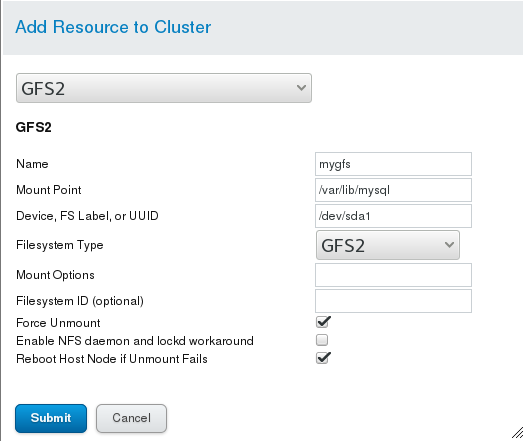
(3) Setting up the sharing method in a graphical way: (Note that the existing equipment is also used here, so the last experiment has to be completed.
First stop the sql service in Service Groups, then delete the Filesystem resource, and then delete and rewrite the Filesystem in Resources.
After writing, add resources to the service group and restart the service.

The experimental phenomena of graphical interfaces should be the same as those of command-line operations.
3. A Solution to the Error of Graphical Interface Management Restart Service
1. Errors are as follows: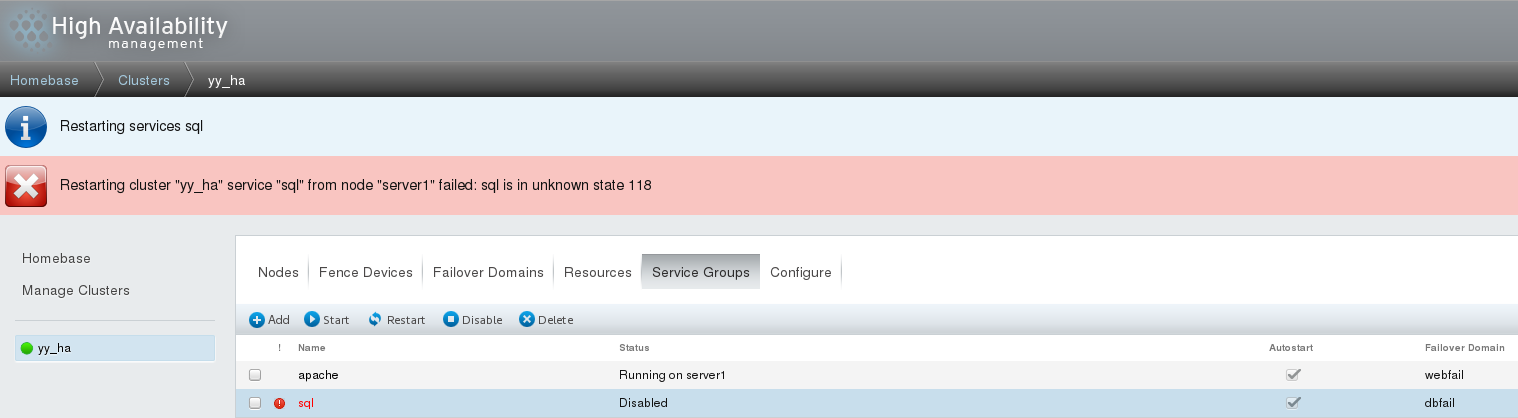
Reasons for errors: It is likely that the data in the back end does not match the data updated in the front end, and most of the errors occur after modifying the data, resulting in the location of the node.

Solution:
(1) Restart the cluster management service cman, but you need to shut down other services before you can shut down cman
 / etc/init.d/clvmd stop \\ All closed and started
/etc/init.d/rgmanager stop
/etc/init.d/cman stop
/etc/init.d/ricci stop
/etc/init.d/luci stop

(2) If the execution method is not good enough, restart server1 and server2, and login here to refresh the page, you can see that the service started directly.
