Environmental preparation
1. Configure YUM software warehouse
server and desktop machine do the same operation!!!!
# // server:
$ vim /etc/yum.repos.d/base.repo
[rhce]
name = EX300
gpgcheck = 0
baseurl = http://classroom.example.com/content/rhel7.0/x86_64/dvd/

### Clear the previous software warehouse cache
$ yum clean all
### Refresh software warehouse
$ yum repolist

### Copy to desktop
$ scp /etc/yum.repos.d/base.repo root@172.25.0.10:/etc/yum.repos.d/
Start answering questions
1. Configure SELinux
SELinux for virtual machine server and desktop must be running in Enforcing mode.
$ vim /etc/selinux/config
$ grep -v ^# /etc/selinux/config
SELINUX=enforcing
SELINUXTYPE=targeted
### Modify the current mode to enforce
$ setenforcing 1
$ sestatus
...
Current mode:                   enforcing
Mode from config file:          enforcing
...
2. Configure ssh access
Configure SSH access as follows
Users can remotely access your two virtual machine systems through SSH from clients within domain example.com
Clients in the domain my133t.org cannot access your two virtual machines
#//server
### Check if the firewall is on
$ systemctl status firewalld.service
...
Active : active (running)
...
$ firewall-cmd --permanent --add-service=ssh
$ firewall-cmd --permanent --add-rich-rule 'rule family=ipv4 source address=172.25.10.0/24 service name=ssh reject'
$ firewall-cmd --reload
### inspect
$ firewall-cmd --list-all

#//desktop does the same thing
3. Custom user environment
Create custom command on system server0 and desktop0 for qstat this definition command will execute the following command:
/bin/ps -Ao pid,tt,user,fname,rsz
This command is valid for all users in the system.
#//server
$ echo "alias qstat='/bin/ps -Ao pid,tt,user,fname,rsz'" >> /etc/bashrc
$ source /etc/bashrc
### Check it out.
$ qstat

#//desktop does the same thing
4. Configure port forwarding
Configure port forwarding on system server0 as follows:
In the 172.25.0.0/24 network, the local port 5423 accessing server0 will be forwarded to 80
This setting must be permanent.
#//server
$ firewall-cmd --permanent --add-rich-rule 'rule family=ipv4 source address=172.25.0.0/24 forward-port port=5423 protocol=tcp to-prot=80'
$ firewall-cmd --reload
### inspect
firewall-cmd --list-all
Or execute
#//server
$ firewall-cmd --permanent --add-forward-port=port=5423:proto=tcp:toport=80
$ firewall-cmd --reload
### inspect
$ firewall-cmd --list-forward-ports
5, Configure link aggregation
Configure a link between server0.example.com and desktop0.example.com as follows:
This link uses interfaces eth1 and eth2
This link still works when an interface fails
This link server0 uses the following address 172.16.1.65 / 255.255.255.0
This link desktop0 uses the following address 172.16.1.75 / 255.255.255.0
This link remains normal after the system restarts.
If you are not familiar with commands, you can use the help file. Skip help if familiar.
-----help --- split line--------
$man nmcli examples
$man team. Conf -- > here are two core help
"Runner": {"name": "activebackup"} -- > use this help
$cat / usr / share / Doc / team-1.9/example \ ifcfgs / ifcfgs-team \ Test0 -- > see here, too
-----help --- split line--------
#//server $ nmcli connection add type team con-name Team0 ifname team0 config '{"runner": {"name":"activebackup"}}' --->Note single and double quotes ### inspect $ ip a s ... $ nmcli connection add type team-slave con-name Team0-port1 ifname eth1 master team0 $ nmcli connection add type team-slave con-name Team0-port2 ifname eth2 master team0 $ nmcli connection modify Team0 ipv4.addresses '172.16.1.65/24' ipv4.method manual $ nmcli connection reload $ nmcli connection up Team0 ### Verification $ teamdctl team0 state
#//desktop -- do the same
Note ip address: nmcli connection modify team0 ipv4.addresses' 172.16.1.75/24 'ipv4.method manual
6. Configure IPv6 address
Configure the interface eth0 on your test system to use the following IPv6 address:
The address on server0 should be 2014:ac18::a/64
The address on desktop0 should be 2014:ac18::b/64
The two systems must be able to communicate with the system in network 2014:ac18/64
Address must be valid after restart
Both systems must maintain the current IPv4 address and be able to communicate.
#//server
$ nmcli connection modify 'System eth0' ipv6.addresses '2014:ac18::a/64' ipv6.method manual
$ nmcli connection reload
### activation
$ nmcli connection up 'System eth0'

#//server
### Verification
$ ping 172.25.0.10
#//desktop
$ nmcli connection modify 'System eth0' ipv6.addresses '2014:ac18::b/64' ipv6.method manual
$ nmcli connection reload
### activation
$ nmcli connection up 'System eth0'

#//desktop
### Verification
$ ping6 2014:ac18::a
7. Configure local mail service
Configure mail service on system server0 and desktop0 to meet the following requirements:
These systems do not receive messages sent from outside
Any messages sent on these systems are automatically routed to classroom.example.com
Messages sent from these systems appear to be from example.com
You can test your configuration by sending an email to the local user hal. The system classroom.example.com has configured to send this user's email to the following URL:
http://classroom.example.com/cgi-bin/recevied_mail
### To view the question requirements, one is to do email forwarding, the other is to do email alias
#//server
$ cd /etc/postfix/
$ cp -a main.cf{,.bak}

//Modify the configuration file / etc/postfix/main.cf to modify the following lines:
$ vim /etc/postfix/main.cf
83 mydomain = example.com                      --->field
99 myorigin = $mydomain                        --->Configure mail source domain
164 mydestination = ""                         --->Configure mail destinations
316 relayhost = [classroom.example.com]       --->Configure mail routing host

$ systemctl restart postfix.service

### test
$ echo "$HOSTNAME" |mail -s "nullclient" hal@classroom.example.com
$ mailq
Mail queue is empty --->No, it's a success
#//desktop
$ scp /etc/postfix/main.cf root@desktop0:/etc/postfix/
--->yes,Then input root Password

### test
$ echo "$HOSTNAME" |mail -s "nullclient" hal@classroom.example.com
$ mailq
8. Share directory through SMB
Configure SMB service on server0
Your SMB server must be a member of the STAFF Workgroup
Share / groupdir directory share name must be common
Only clients in the example.com domain can access the common share
common must be browsable
User barney must be able to read the content in the share, and if necessary, the password to be verified is flectrag
#//server
$ yum -y install samba samba-client
$ systemctl enable smb nmb        --->Boot up

$ mkdir /groupdir
$ setfacl -m u:barney:rx   /groupdir     --->Notice this is rx ,If written rw implement ls No permission will be prompted

$ chcon -t samba_share_t /groupdir        --->This and the next line can be found at/etc/samba/smb.conf Found in file SELINUX Location view of
$ setsebool -P samba_export_all_ro 1

$ cp -a /etc/samba/smb.conf{,.bak}        --->Backup is very important, add -a Copy the permission bit
$ vim /etc/samba/smb.conf
89    workgroup = STAFF
95    hosts allow = 127.   172.25.0.     --->Domains allowed, 172.25.0. yes example.com All clients in the domain
321   [common]                           --->Shared name
322   path = /groupdir                   --->Shared directory
323   browseable = yes                   --->Browable

$ systemctl start smb nmb     --->start-up

$ smbpasswd -a barney
New SMB password: [flectrag]
Retype new SMB password: [flectrag]
$ pdbedit -L
barney : 1001 :
###test
$ smbclient //server0.example.com/common -U barney
Enter barney's password: [flectrag]
Domain=[STAFF] OS=[Unix] Server=[Samba 4.1.1]
smb: \> ls
...
40913 blocks of size 262144. 28449 blocks available
smb: \> exit
9. Configure multi-user SMB mount
Share on server0 through SMB directory / data to meet the following requirements:
Share name is data
Shared directory data can only be used by clients in the example.com domain
Shared directory data must be browsable
The user manager must be able to access the share in a read mode, and the access password is flectrag
The user wolfery ne must be able to access this share in a read-write way, and the access password is flectrag
This share is permanently mounted in the / mnt/multi directory on desktop0.example.com, and uses the user manager as the authentication. Any user can obtain the write permission temporarily through the user wolfery ne.
#//server
$ mkdir /data
$ setfacl -m u:manager:rx /data
$ setfacl -m u:wolferyne:rwx /data   --->Notice this is rwx ,Be sure to add. x Executive authority

$ chcon -t samba_share_t /data          --->This and the next line can be found at/etc/samba/smb.conf Found in file SELINUX Location view of
$ setsebool -P samba_export_all_rw 1

$ cp -a /etc/samba/smb.conf{,.bak2}
$ vim /etc/samba/smb.conf
324      [data]
325      path = /data
326     public = yes
327     writable = yes
328     write list = wolferyne

$ smbpasswd -a manager              --->Set up smb User password
New SMB password: [flectrag]
Retype new SMB password: [flectrag]
$ smbpasswd -a wolferyne            --->Set up smb User password
New SMB password: [flectrag]
Retype new SMB password: [flectrag]

$ systemctl restart smb nmb

//Add firewall policy
$ firewall-cmd --permanent --add-service=samba
$ firewall-cmd --reload
Client configuration
#//desktop
$ yum -y install samba-client cifs-utils
$ mkdir /mnt/multi

--->Check the help of mount, execute man -k mount, and find mount.cifs to check the details
$VIM / root / mysmb -- > create credentials authentication file for smb
username=manager
password=flectrag

$VIM / etc / fstab -- > set boot auto mount
//server0.example.com/data    /mnt/multi     cifs     defaults,credentials=/root/mysmb,multiuser   0     0

$mount - a -- > reload everything in / etc/fstab
//Be sure to add the samba firewall policy on server0 first, or you will be prompted Unable to find suitable address
//Or prompt: connection to server0.example.com failed (error NT? Status? Host? Unreachable)
###test
$ su - wolferyne
$ cifscreds add server0
Password: [flectrag]
$ cd /mnt/multi/
$ touch a
$ exit
10. Configure services for NFS
To configure the NFS service on server0, the requirements are as follows:
Share directory as read-only / public can be accessed by the system in the example.com domain
Shared directory in read-write mode / protected can be accessed by the system in the example.com domain
Access to / protected requires Kerberos security encryption, and you can use the key provided by the following URL:
http://classroom.example.com/pub/keytabs/server0.keytab
Directory / protected should contain a subdirectory named restricted with owner ldapuser0
User ldapuser0 can access / protected/restricted in read-write mode
#//server
$ wget -O /etc/krb5.keytab http://classroom.example.com/pub/keytabs/server0.keytab
 --->Download to/etc/krb5.keytab Corresponding/etc/exports In configuration sec=krb5p
 ---> kerberos Time synchronization required $ system-config-date -—->$ chronyc sources -v
 ---> Otherwise mount -a Will prompt for access denied.

$ mkdir /public
$ chown nfsnobody /public

$ vim /etc/exports
/public  *.example.com(ro)   --->Share directories read-only /public Can be example.com System access in domain

$ mkdir -p /protected/restricted
$ chown nfsnobody /protected
$ chown ldapuser0 /protected/restricted  --->Catalog /protected/restricted Owner ldapuser0

$ vim /etc/exports
/protected  *.example.com(rw,sync,sec=krb5p)  --->Share directories read and write /protected Can be example.com System access in domain
/public  *.example.com(ro)

$ exportfs -avr      --->Boot sharing

$ systemctl enable nfs-server nfs-secure-server
$ systemctl start nfs-server nfs-secure-server
--->If rpcbind This service does not start, nfs Service will fail to start, nfs-secure-server rely on /etc/krb5.keytab

$ showmount -e       --->View sharing

#Add firewall
$ firewall-cmd --permanent --add-service=nfs
$ firewall-cmd --permanent --add-service=mountd    --->adopt mountd Service (cannot be remote if it is not turned on showmount)
$ firewall-cmd --permanent --add-service=rpc-bind  --->adopt rpc Service (if not turned on, rpcinfo Can't scan)
$ firewall-cmd --reload
11. Mount an NFS share
Mount an NFS share from server0.example.com on desktop0, and meet the following requirements:
/public is mounted on the following directory / mnt/nfsmount
/protected is mounted on the following directory / mnt/nfssecure and used in a safe way. The key Download URL is as follows:
http://classroom.example.com/pub/keytabs/desktop0.keytab
User ldapuser0 can create files on / mnt/nfssecure/restricted
These file systems mount automatically when the system starts.
#//desktop
$ wget -O /etc/krb5.keytab http://classroom.example.com/pub/keytabs/desktop0.keytab
  --->Download to/etc/krb5.keytab Corresponding /etc/fstab In configuration sec=krb5p, nfs-secure rely on /etc/krb5.keytab

$ systemctl enable nfs-secure
$ systemctl start nfs-secure

$ mkdir /mnt/nfsmount
$ mkdir /mnt/nfssecure

$ vim /etc/fstab
server0.example.com:/public   /mnt/nfsmount  nfs   defaults    0  0
server0.example.com:/protected   /mnt/nfssecure  nfs   defaults,sec=krb5p    0  0
$ mount -a  --->take/etc/fstab All content reloads for

$ df -Th
Filesystem                       Type  Size  Used  Avail    Use%  Mounted on
server0.example.com:/public      nfs4  11G   3.4G  7.5G     31%   /mnt/nfsmount
server0.example.com:/protected   nfs4  11G   3.4G  7.5G     31%   /mnt/nfssecure

$ su - ldapuser0
-bash-4.2$ kinit ldapuser0
Password for ldapuser0@EXAMPLE.COM: [kerberos]
-bash-4.2$ klist
...
-bash-4.2$ cd /mnt/nfssecure/restricted
-bash-4.2$ touch a
12. Implement a Web server
Configure a site http://server0.example.com on server0 and perform the following steps:
Download the file from http://classroom.example.com/materials/station.html and rename the file to index.html do not modify the contents of this file
Copy the file index.html to the DocumentRoot directory of your web server
Clients from the example.com domain can access this web service
Client from my133t.org domain denied access to this web service
#//server
$ yum -y install httpd
$ systemctl enable httpd
$ systemctl start httpd

$ wget -O /var/www/html/index.html http://classroom.example.com/materials/station.html
$ rpm -qd httpd          --->Find help
$ vim /etc/httpd/conf.d/site1.conf
<VirtualHost _default_:80>
   ServerName server0.example.com    --->Set site name
   <Directory "/var/www/html">       --->/var/www/html Is the default. DocumentRoot Catalog
      <RequireAll>
         Require all granted
         Require not ip 172.15.10.0/24
      </RequireAll>
   </Directory>
</VirtualHost>

$ systemctl restart httpd
//Add firewalld policy
$ firewall-cmd --permanent --add-service=http
$ firewall-cmd --reload
###Test to desktop
Test mode 1
$ firefox http://server0.example.com&
Test mode 2
$ yum -y install links
$ links http://server0.example.com
13. Configure secure web services
Configure TLS encryption for the site http://server0.example.com
Get the signed certificate from http://classroom.example.com/pub/tls/certs/server0.crt
Get the key of this certificate from http://classroom.example.com/pub/tls/private/server0.key
Get the signature authorization information for this certificate from http://classroom.example.com/pub/example-ca.crt
#//server
$ yum -y install mod_ssl    --->After installation, it will generate /etc/httpd/conf.d/ssl.conf

$ wget -P /etc/pki/tls/certs/ http://classroom.example.com/pub/tls/certs/server0.crt
$ wget -P /etc/pki/tls/private/ http://classroom.example.com/pub/tls/private/server0.key
$ wget -P /etc/pki/tls/certs/ http://classroom.example.com/pub/example-ca.crt

$ vim /etc/httpd/conf.d/ssl.conf ---> :%s/localhost/server0/g ---use server0 replace localhost
100   SSLCertificateFile      /etc/pki/tls/certs/server0.crt
107   SSLCertificateKeyFile   /etc/pki/tls/private/server0.key

$ systemctl restart httpd
//If firewalld is used, add a policy
$ firewall-cmd --permanent --add-service=https
$ firewall-cmd --reload
#//desktop
test
$ firefox https://server0.example.com &
--->Click the verification button to confirm
14. Configure virtual host
Expand your web server on server0, create a virtual host for the site http://www0.example.com, and then perform the following steps:
Set DocumentRoot to / var/www/virtual
Download the file from http://classroom.example.com/materials/www.html and rename it to index.html. Do not make any changes to the contents of index.html
Put the file index.html in the DocumentRoot directory of the virtual host
Make sure barney users can create files in / var/www/virtual directory
Note: the original site http://server0.example.com must still be accessible. The name server example.com provides domain name resolution for the host name www0.example.com.
#//server
$ mkdir /var/www/virtual
$ setfacl -m u:barney:rwx  /var/www/virtual     --->ensure barney Users can /var/www/virtual Create file in directory

$ wget -O /var/www/virtual/index.html http://classroom.example.com/materials/www.html

$ rpm -qd httpd --->Find help

$ vim /etc/httpd/conf.d/vhost-www0.conf
<VirtualHost *:80>
   ServerName   www0.example.com
   DocumentRoot /var/www/virtual
</VirtualHost>

$ systemctl restart httpd
#//desktop
//test
$ firefox http://www0.example.com &
15. Configure access to web content
Create a directory named confidential under the DocumentRoot directory of the web server on your server0. The requirements are as follows:
Download a copy of the file from http://classroom.example.com/materials/private.html to this directory and rename it index.html
Do not make any changes to the contents of this file
From server0, anyone can browse the contents of confidential, but the contents of this directory cannot be accessed from other systems
#//server
$ mkdir /var/www/html/confidential
$ cd /var/www/html/confidential
$ wget -O index.html http://classroom.example.com/materials/private.html

//Edit the configuration file / etc/httpd/conf.d/site1.conf and add the following lines
<Directory "/var/www/html/confidential">
   Require local
</Directory>

$ vim /etc/httpd/conf.d/site1.conf
<VirtualHost _default_:80>
   ServerName server0.example.com    --->Set site name
   <Directory "/var/www/html">       --->/var/www/html Is the default. DocumentRoot Catalog
      <RequireAll>
         Require all granted
         Require not ip 172.15.10.0/24
      </RequireAll>
   </Directory>
   <Directory "/var/www/html/confidential">
       Require local
    </Directory>
</VirtualHost>

$ systemctl restart httpd.service
#//desktop
//test
$ firefox http://server0.example.com/confidential &
16. Implementing dynamic web content
Dynamic web content is provided on server0. The requirements are as follows:
Dynamic content is provided by a virtual machine called transitional.example.com
Virtual machine listening on port 8989
Download a script from http://classroom.example.com/materials/script.wsgi and put it in the right place, never modify the contents of this file
Clients should receive dynamically generated web pages when visiting http://transitional.example.com: 8989 /
This http://transitional.example.com:8989/ must be accessible by all systems in the example.com domain
#//server
$ yum -y install mod_wsgi

$ rpm -qd mod_wsgi  --->Query help
/usr/share/doc/mod_wsgi-3.4/LICENCE
/usr/share/doc/mod_wsgi-3.4/README

//Edit the configuration file / etc/httpd/conf.d/site2.conf
$ vim /etc/httpd/conf.d/site2.conf
Listen 8989
<VirtualHost *:8989>
   ServerName   transitive.example.com:8989
   WSGIScriptAlias  /     /var/www/cgi-bin/script.wsgi
</VirtualHost>

$ wget -P /var/www/cgi-bin/ http://classroom.example.com/materials/script.wsgi

$ semanage port -l |grep 80
...
http_port_t       tcp 80,81,443,488,8008,8009,8443,9000
...
$ semanage port -a -t http_port_t -p tcp 8989
$ systemctl restart httpd.service

### Add firewall policy
$ firewall-cmd --permanent --add-port=8989/tcp
$ firewall-cmd --reload

### inspect
$ firefox http://transitive.example.com:8989/ &
17. Create a script
Create a script named / root/script.sh on server0 to provide the following features:
When running / root/script.sh all, the output is none
When running / root/script.sh none, the output is all
When no parameter or parameter is all or none, its error output produces the following information:
/root/script.sh all|none
#//server
$ touch /root/script.sh
$ chmod u+x /root/script.sh
$ vim /root/script.sh
#!/bin/bash
#/root/script.sh
case "$1" in
      all)
      echo "none"
      ;;
      none)
      echo "all"
      ;;
      *)
      echo "/root/script.sh all|none"
      ;;
esac
### Verification
$ /root/script.sh all
none
$ /root/script.sh none
all
18. Create a script to add users
Create a script named / root/makeusers on server0, which can create local users for system server0, and the user names of these users come from a file containing the user name list.
Meanwhile, the following requirements shall be met:
This script requires a parameter, which is the file containing the user list
If no parameters are provided, the script should give the following prompt: Usage: / root / makeusers < userfile > and exit with the corresponding value
If you provide a file name that does not exist, the script should give the following prompt, Iuput file not found, and then exit with the corresponding value
The user login shell created is / bin/false
This script does not need to set a password for the user
You can get the user list from the following URL for testing http://classroom.example.com/materials/ulist
#//server
$ touch /root/makeusers
$ chmod u+x /root/makeusers
//Method 1:
$ vim /root/makeusers
#!/bin/bash
#/root/makeusers
if [ $# -ne 1 ];then
   echo 'Usage:/root/makeusers <userfile>'
   exit 1
elif [ ! -f "$1" ];then
   echo 'Iuput file not found'
   exit 2
else
   for USER in $(cat "$1");do
      useradd -s /bin/false $USER
   done
fi
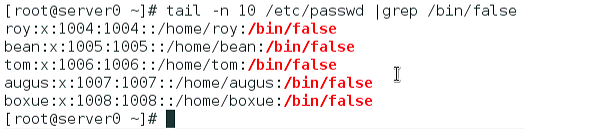
### Verification
$ wget http://classroom.example.com/materials/ulist
$ ./makeusers
$ ./makeusers ulist
$ tail -n 10 /etc/passwd |grep /bin/false
Method two:
$ vim /root/makeusers
#!/bin/bash
#/root/makeusers
if [ $# -eq 1 ];then
   if [ -f "$1" ];then
      while read username;do
         useradd -s /bin/false $username &>/dev/null
      done<$1
   else
      echo 'Iuput file not found'
   fi
else
   echo 'Usage:/root/makeusers <userfile>'
fi