1, redis compilation and installation
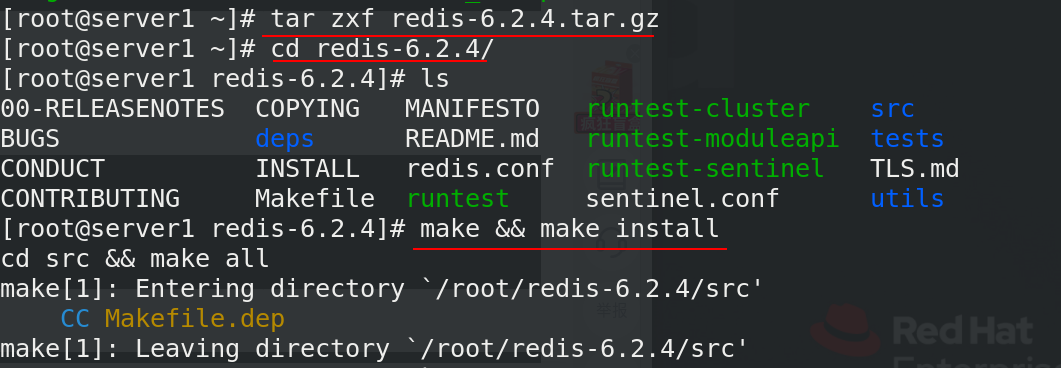
Download the installation package, unzip it and compile it
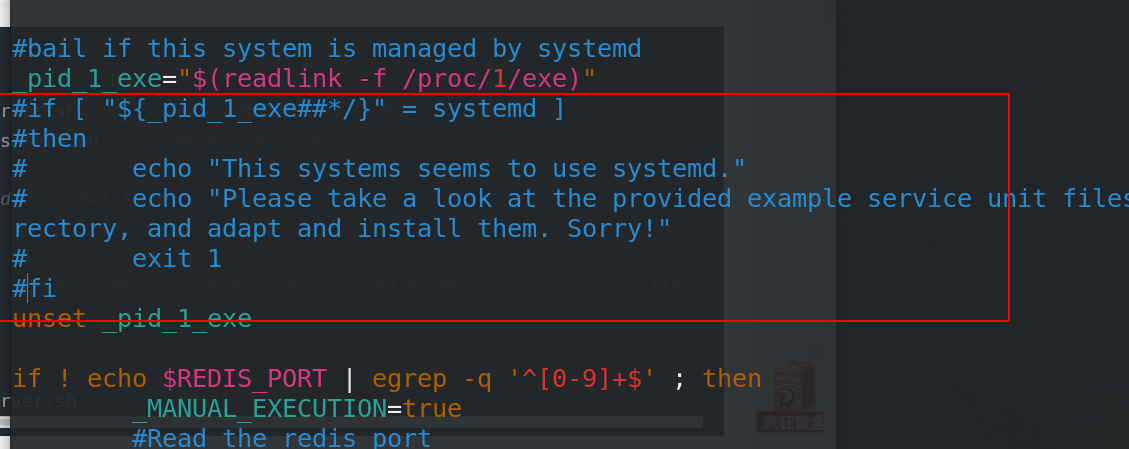
 Edit the script file of the built-in installer and comment the following
[root@server1 redis-6.2.4]# cd utils/
[root@server1 utils]# vim install_server.sh
[root@server1 utils]# ./install_server.sh  xs    ##Execute installation script
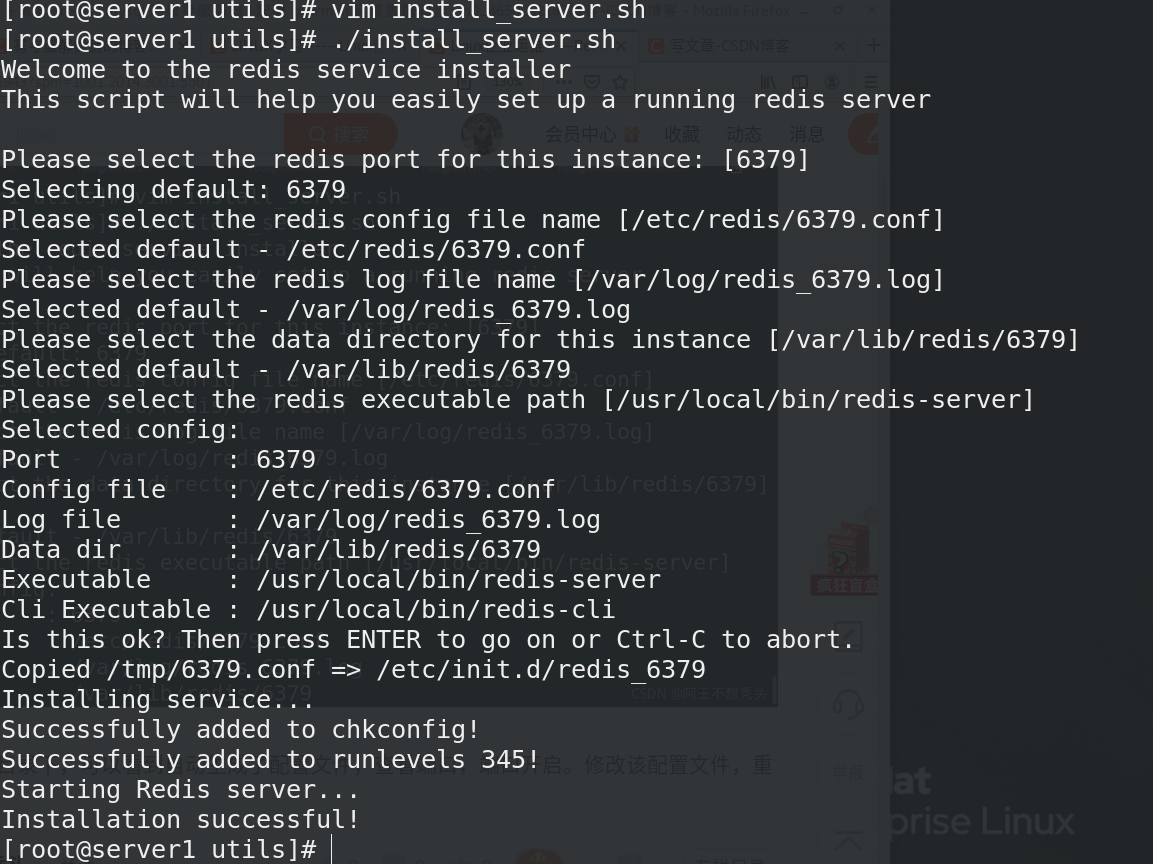
After successful installation, check that port 6379 has been opened successfully
[root@server1 utils]# netstat -antlp

Check that the redis configuration file in the etc directory has also been generated. Modify the configuration file and edit the configuration file

 Start redis
[root@server1 redis]# /etc/init.d/redis_6379 start
Similarly, both server2 and server3 are installed with redios
2, redis master-slave replication
Set server2 as the slave of server1. Set server1 as the master
Edit the redis configuration file on the server and add a master
[root@server2 utils]# vim /etc/redis/6379.conf
slaveof 172.25.1.1 6379

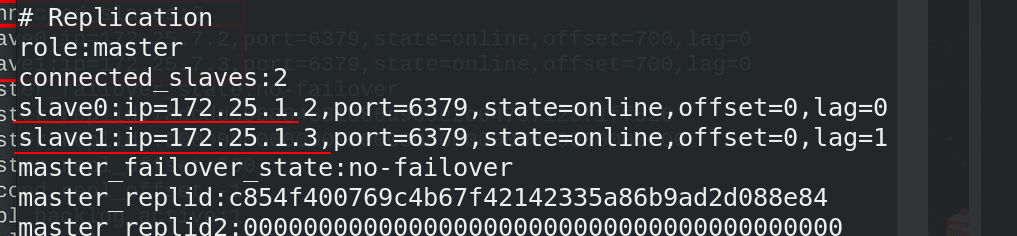
Restart redis 1 and 2, and check the info of redis in 1 to see that it has a slave
:[root@server1 redis]# redis-cli
127.0.0.1:6379> info
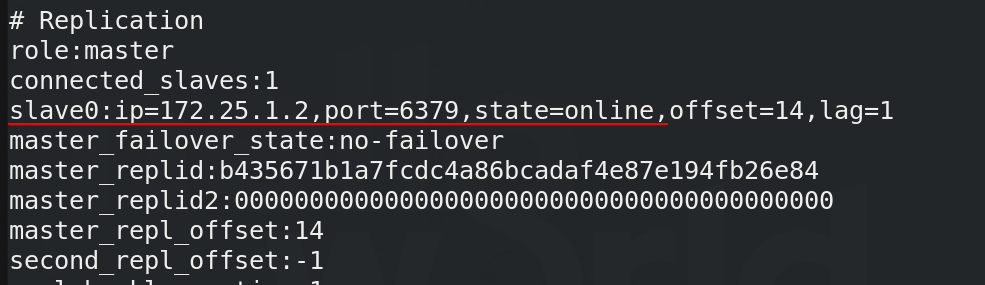
Add the master designation on the server and restart it. You can view one master and two slaves on server1
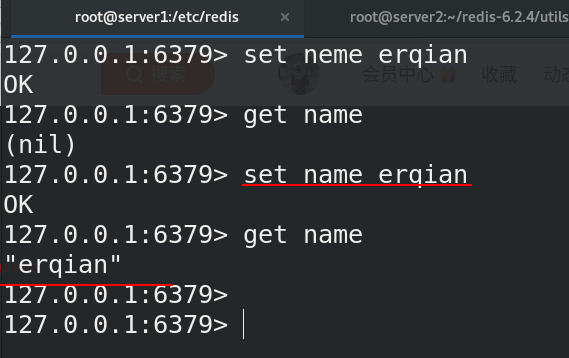
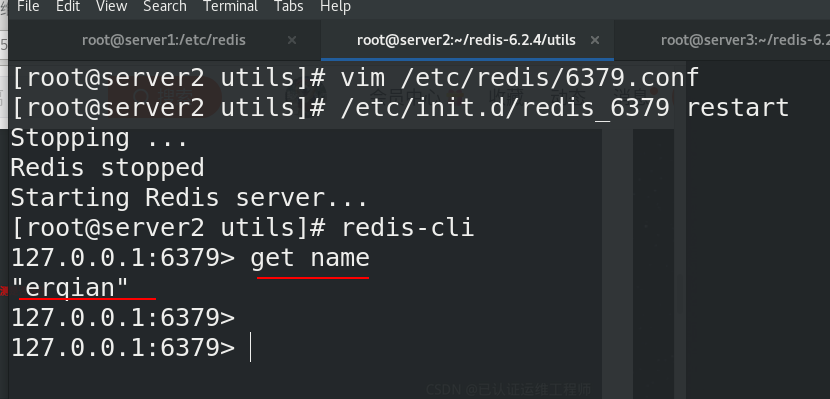
 At this time, the newly created database "2000" in 1 can be seen in 2 and 3
3, redis sentinel mode
Sentinel is a tool used to monitor the status of the Master in the redis cluster
Sentinel sentinel mode, a high availability solution, has been integrated in the version after redis 2.4. Sentinel is a highly available redis solution. Sentinel system can monitor one or more redis
Master services and all slave services of these master services; When a master service goes offline, it will automatically upgrade a service under the master from a service to a master service to replace the offline master service to continue processing requests.
Sentinel can enable redis to implement master-slave replication. When the master in a cluster fails, sentinel can elect a new master to automatically replace the master. Other redis servers in the cluster automatically point to the new master to synchronize data. It is generally recommended to use an odd number of sentinels to prevent false switching caused by a sentinel unable to connect to the master.
1. Configure sentinel
In the server1 host, configure sentinel and copy it to server2 and server3
Copy the template file in the decompression directory to the installation directory,
[root@server1 ~]# cd redis-6.2.4/
[root@server1 redis-6.2.4]# cp sentinel.conf /etc/redis/
[root@server1 redis-6.2.4]# vim /etc/redis/sentinel.conf
sentinel monitor mymaster 172.25.1.1    6379    2	##If the master is server1 and 2, it means that two votes are required to pass, and the host is deemed to be down
sentinel down-after-milliseconds mymaster 10000	##Modify the connection timeout to 10s
Copy the edited sentinel configuration file to 2 and 3

2 enable sentinel mode
[root@server3 utils]# redis-sentinel /etc/redis/sentinel.conf
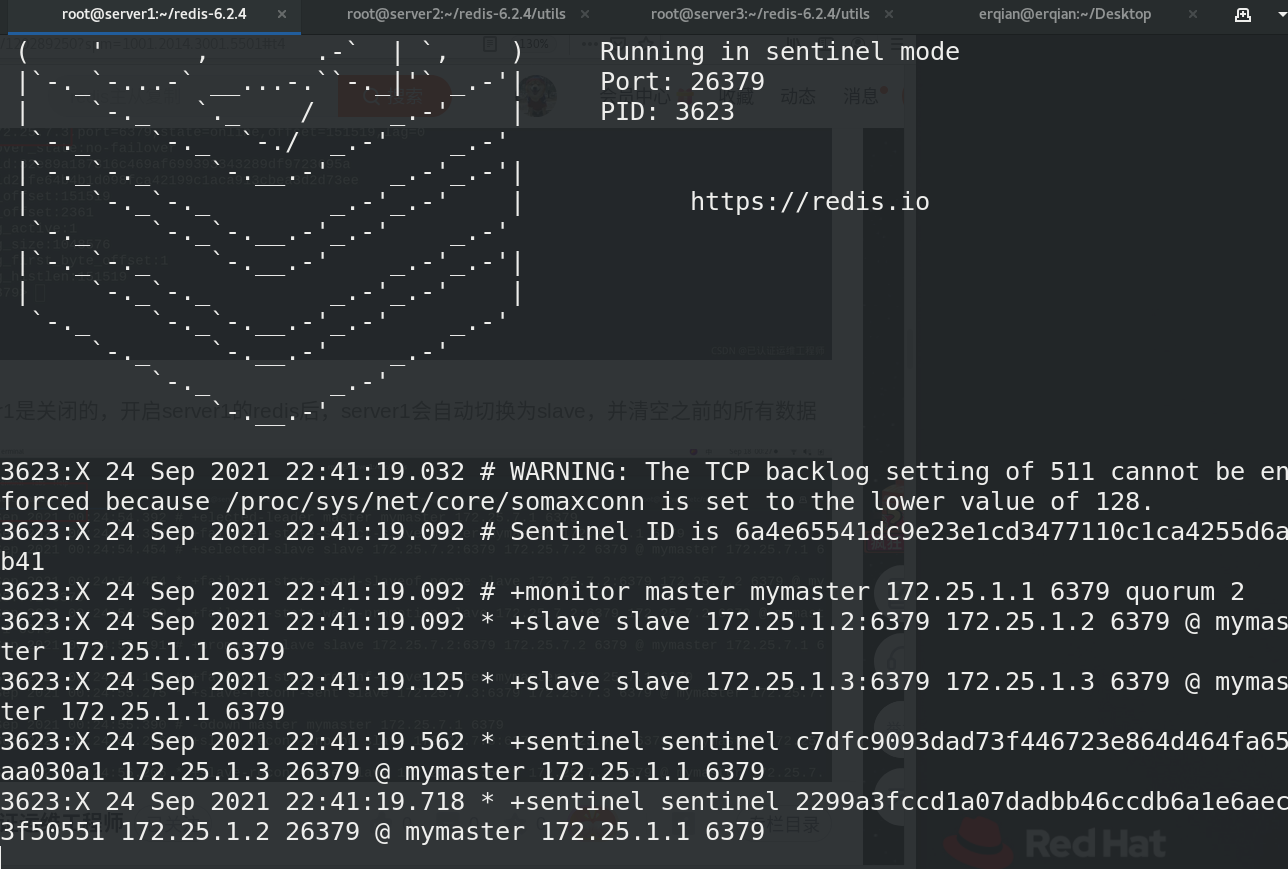
3. Observation effect
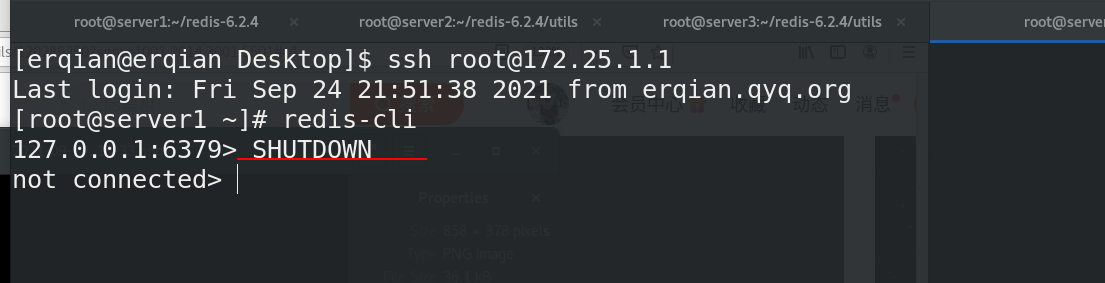
At this time, we open a new shell, connect to redis of server1, and manually shut down. At this time, the master is shut down, and the two slave s will vote and elect a new master
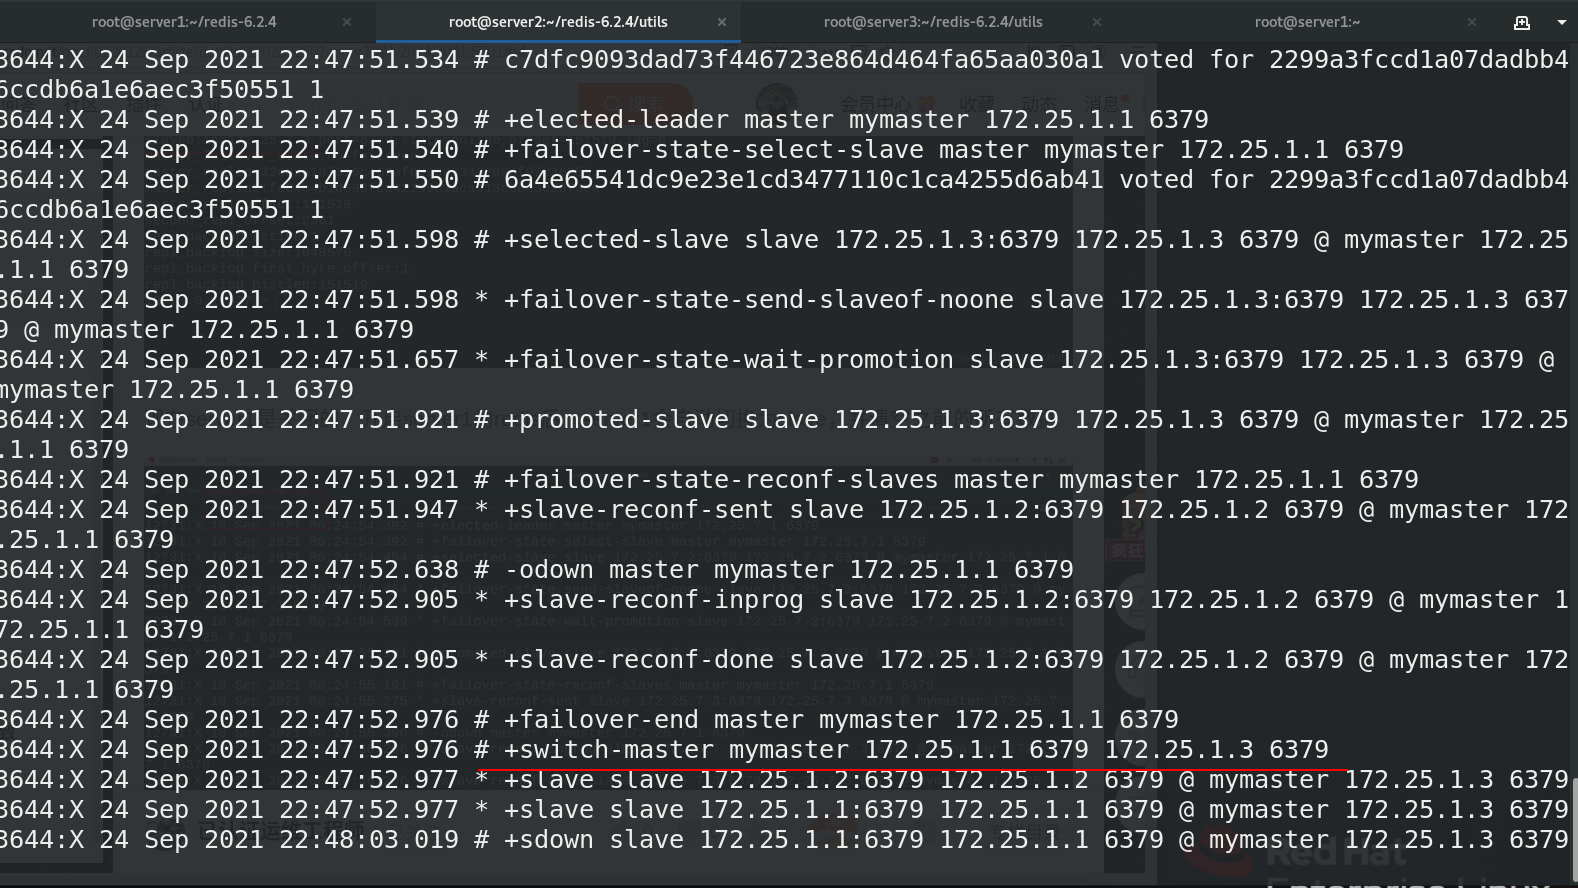
 You can clearly see the process of electing a new master. At this time, the master has automatically become 3
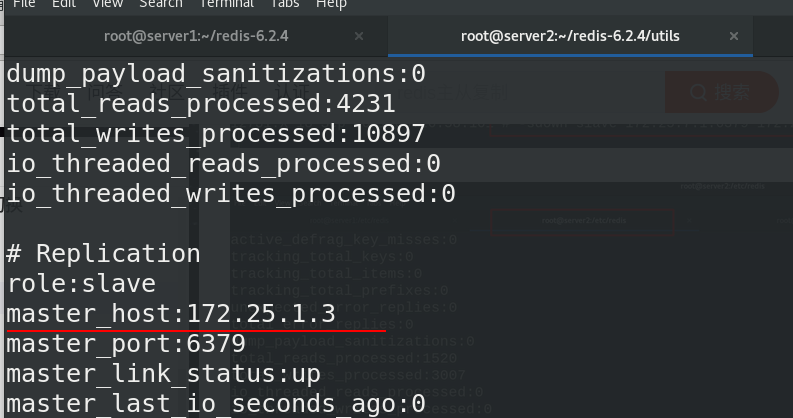
 Check the info information of 2. You can also see that the master has changed to 3
[root@server2 utils]# redis-cli
127.0.0.1:6379> info
When 1 is restarted, it will become a new slave and join the cluster
4, redis cluster
Several important features of Redis cluster:
1. The redis cluster is characterized by dividing the key space into 16384 slots, and each node is responsible for some of them.
2.Redis provides a certain degree of availability and can continue to process commands when a node is down or unreachable. (as long as most masters in the cluster can reach and at least one failed Master can reach, that is, the cluster is not in the Fail state, the cluster is available.)
3. There is no central node or proxy node in redis cluster. One of the main design objectives of the cluster is to achieve linear scalability
Redis3.0 or above
To make the cluster work normally, we need at least three master nodes. Here, we need to create six redis nodes, three of which are master nodes and three are slave nodes
1. Cluster construction
1) . build clusters manually
On the server3 host (master), restart redis, start the AOF mode, establish the media directory, establish the cluster 7001 ~ 7006 directory, enter 7001, modify the configuration file, and start the service. Copy the configuration file to several other instance directories and modify it as appropriate.
[root@server3 utils]# vim /etc/redis/6379.conf
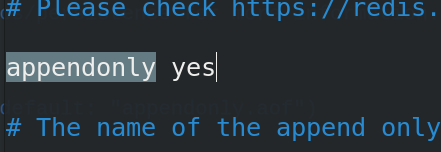
Turn on AOF mode
[root@server3 utils]# cd /usr/local/
[root@server3 local]# mkdir redis
[root@server3 local]# cd  redis
[root@server3 local]# mkdir 700{1..6}
[root@server3 local]# cd 7001/
[root@server3 7001]# vim redis.conf
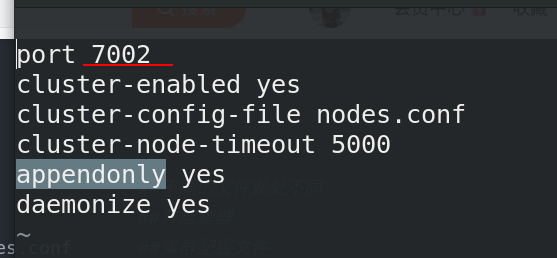
Edit profile
port 7001
cluster-enabled yes					##Start cluster
cluster-config-file nodes.conf		##Cluster profile
cluster-node-timeout 5000			##Node timeout
appendonly yes						##Turn on AOF mode
daemonize yes						`##Start with a daemon thread
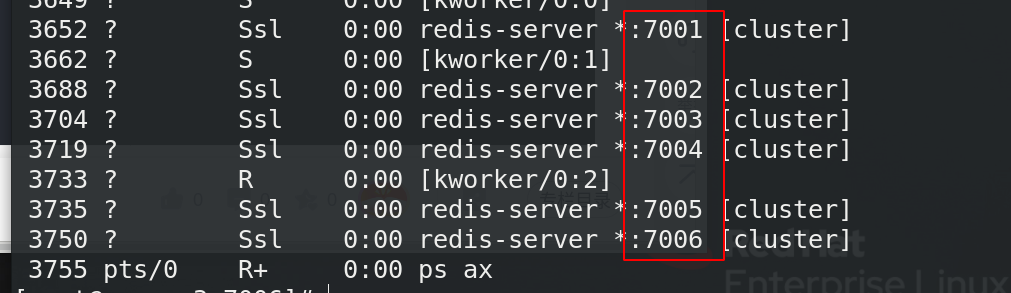
[root@server3 7001]# redis-server redis.conf ##Start service
At this point, we can see 7001

Copy the configuration file to the other five nodes and modify the port number
Then start the service
 cd uses redis cli to interact with the cluster. The client connects to any node. Use - c to log in as a cluster, and - p to specify the port.
[root@server3 ~]# redis-cli -c -p 7001
Create a cluster master-slave node. The – cluster replica parameter is a number. 1 means that each master node needs 1 slave node. Then check the cluster and view the cluster information.
[root@server3 redis]# redis-cli --cluster create 127.0.0.1:7001 127.0.0.1:7002 127.0.0.1:7003 127.0.0.1:7004 127.0.0.1:7005 127.0.0.1:7006 --cluster-replicas 1
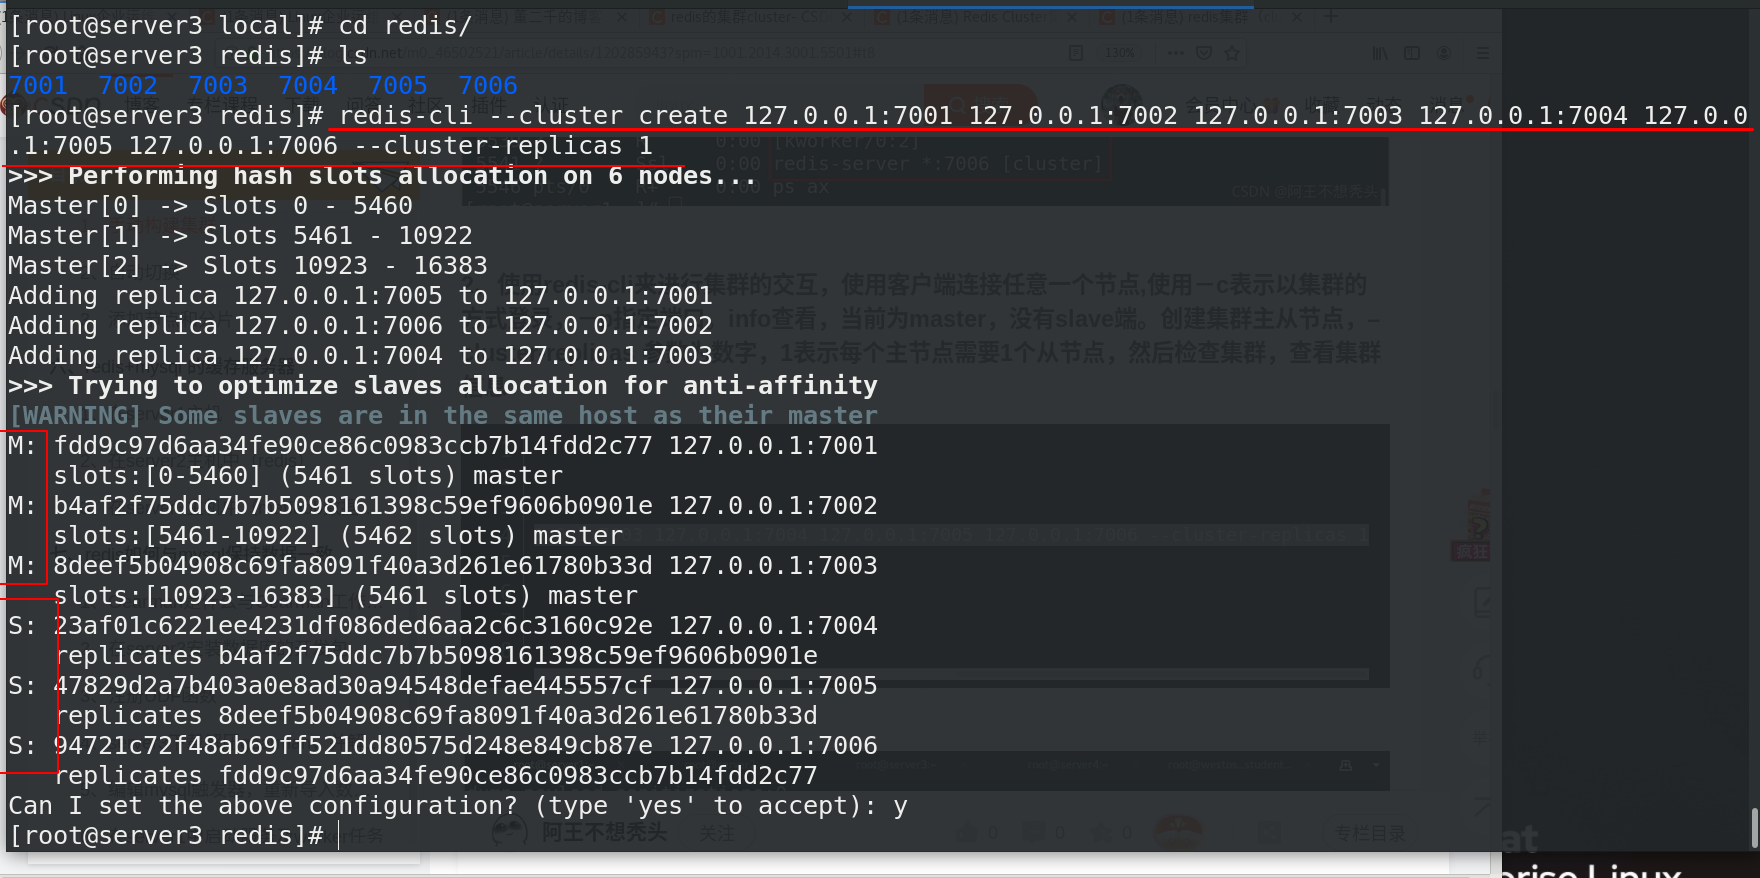 Create succeeded after entering yes
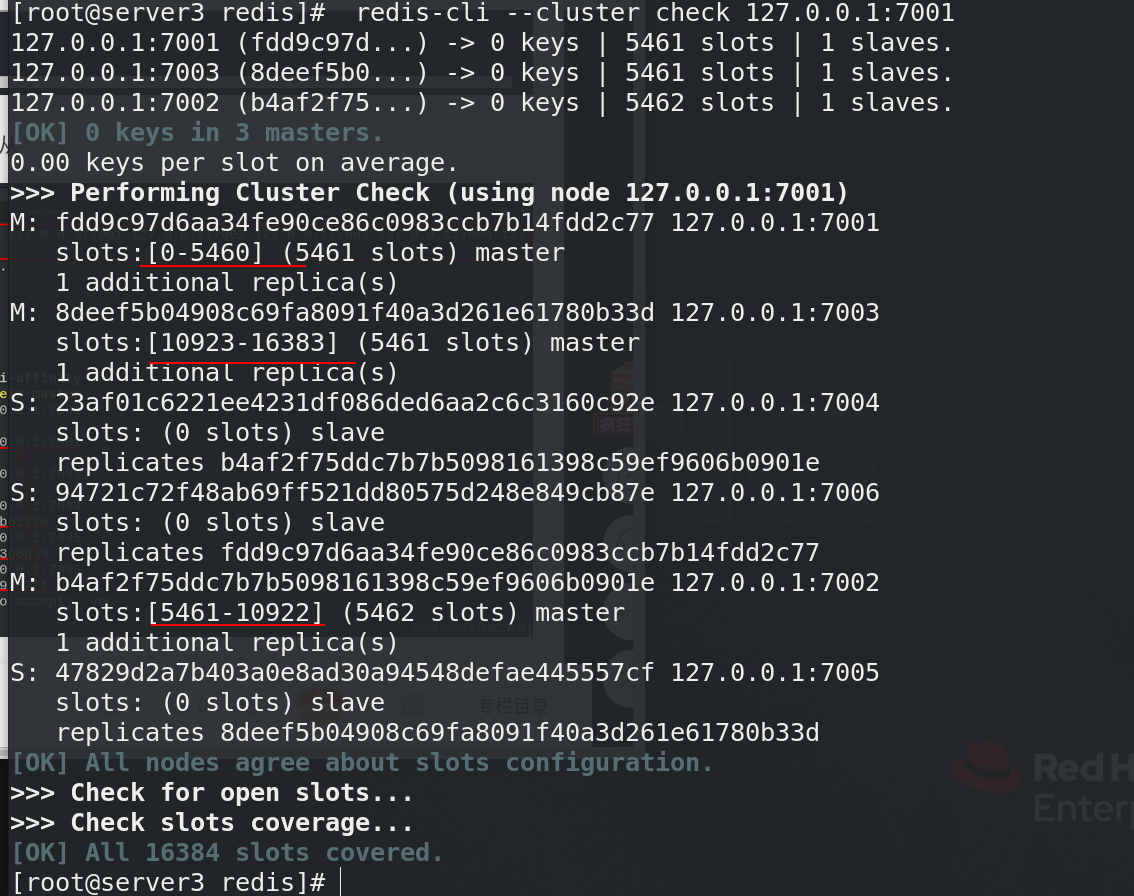
[ root@server3 Redis]# redis cli -- cluster check 127.0.0.1:7001 ## check cluster
[root@server3 redis]# redis-cli --cluster info 127.0.0.1:7001/ ## View cluster information

2) . build clusters with scripts
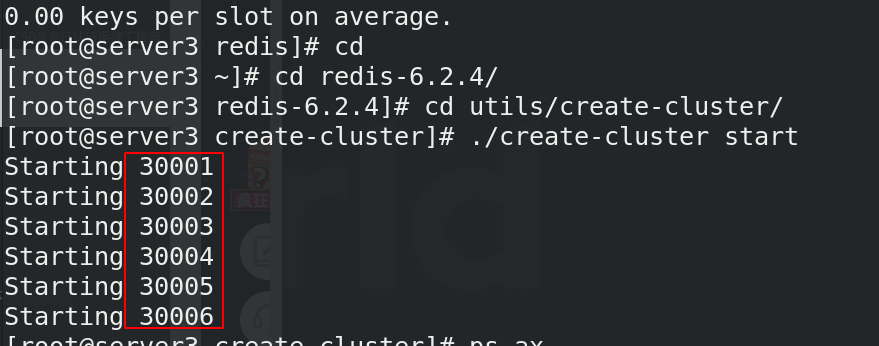
[root@server3 redis]# cd
[root@server3 ~]# cd redis-6.2.4/
[root@server3 redis-6.2.4]# cd utils/create-cluster/
[root@server3 create-cluster]# ./create-cluster start
[root@server3 create-cluster]# ./create-cluster stop
##Stop all instances and use the manually built cluster to do the next experiment
2. Automatic switching
According to the cheek information, the master-slave correspondence is 7006 and the slave is 7001
 When we manually close 7001
[root@server3 redis]# redis-cli -c -p 7001
127.0.0.1:7001> SHUTDOWN
not connected>
[root@server3 redis]# ps ax
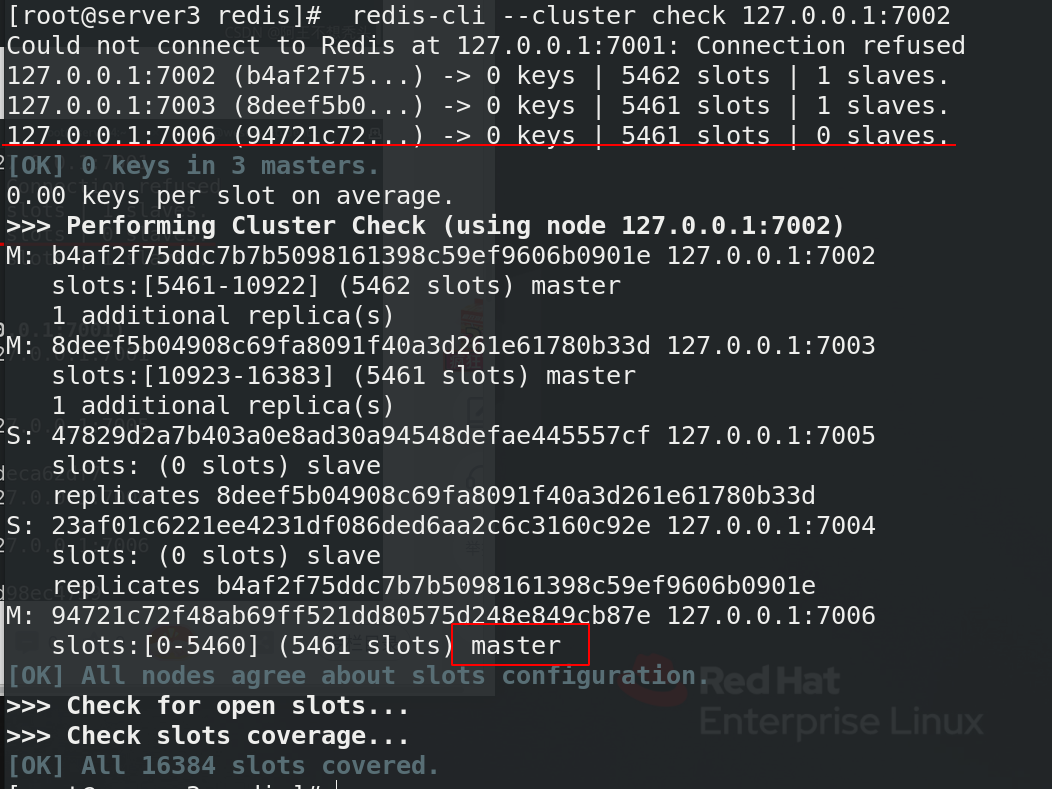
When the cheek cluster node is again, it is found that 7006 has become the master
3. Add nodes and shards
Create two more nodes in the same way as in Figure 1 to join the previous cluster
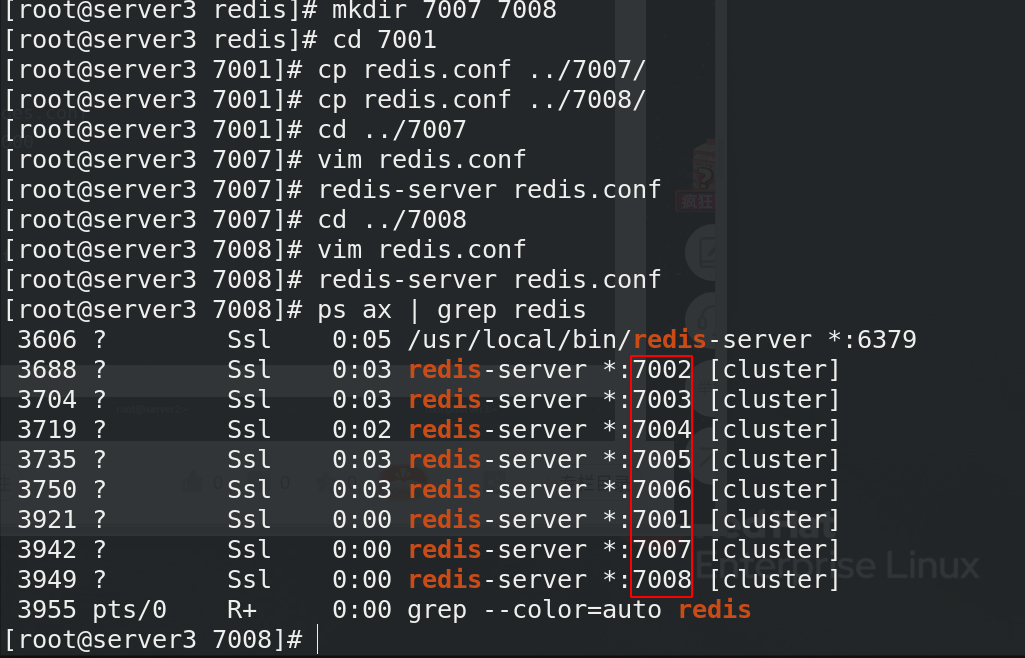
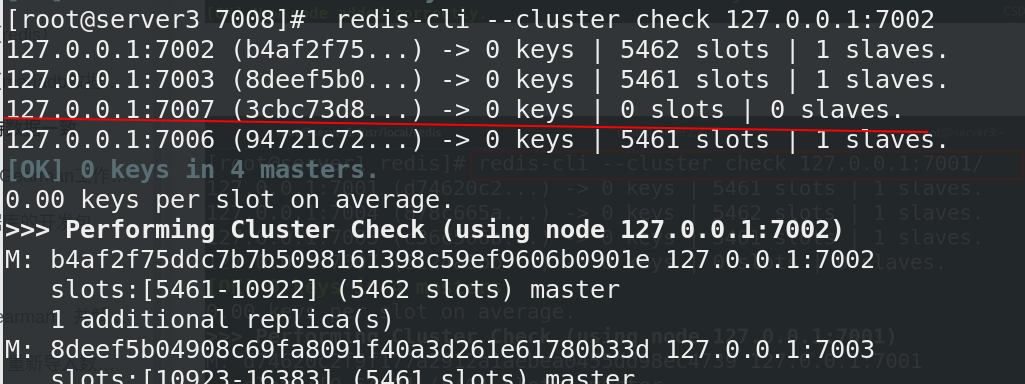
Join the 7007 node into the cluster and execute check to see
[root@server3 7008]# redis-cli --cluster add-node 127.0.0.1:7007 127.0.0.1:7001
[root@server3 7008]#  redis-cli --cluster check 127.0.0.1:7002
The 7007 node joined the cluster, but did not allocate slots, so this node did not really start to share the cluster work, so it should be partitioned. Repartition basically means moving Hashi slots from one set of nodes to another
[root@server3 7008]# redis-cli --cluster reshard 127.0.0.1:7001
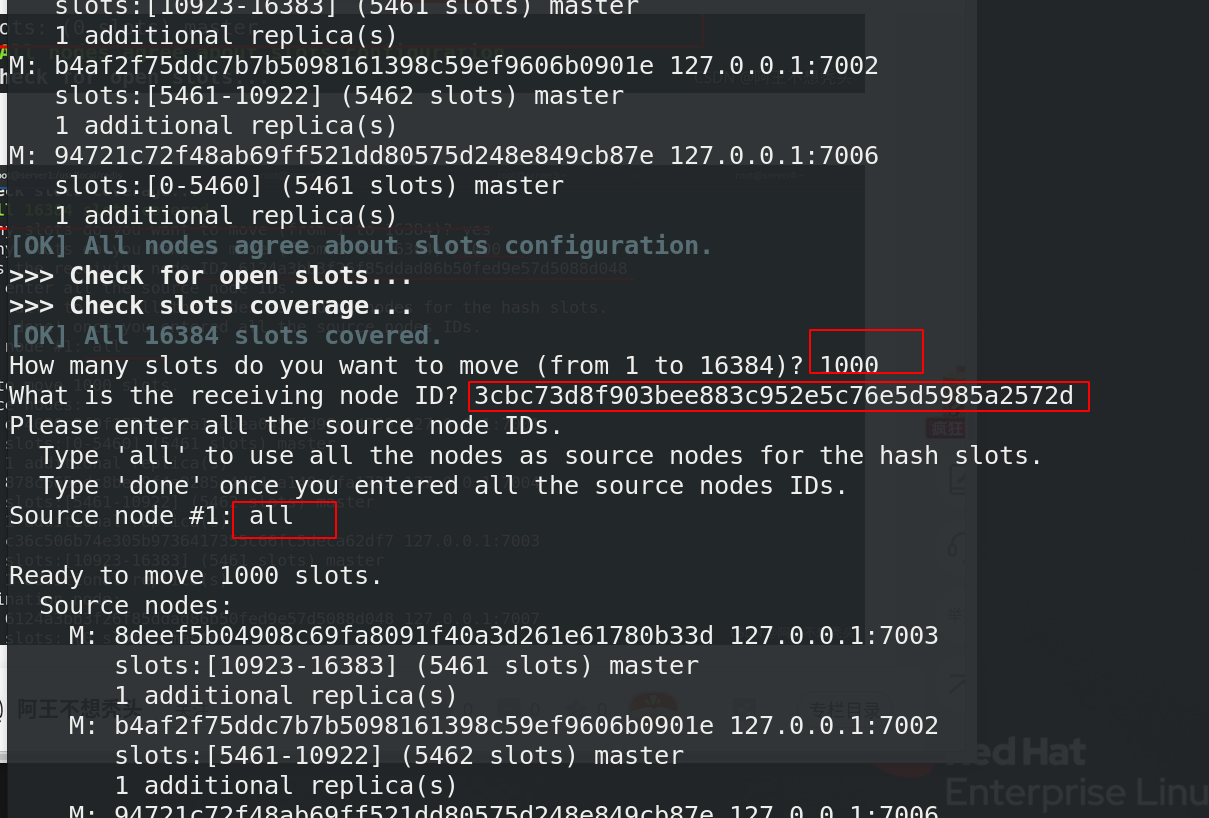
How many slots do you want to move (from 1 to 16384)? 1000				##Number of slots moved
What is the receiving node ID?	##ID of receiving node
Source node #1: all
##From which nodes to get these keys, type all to get hash slots from all other master nodes, and each node takes out some
Do you want to proceed with the proposed reshard plan (yes/no)? yes		##To determine whether to continue re slicing, enter yes
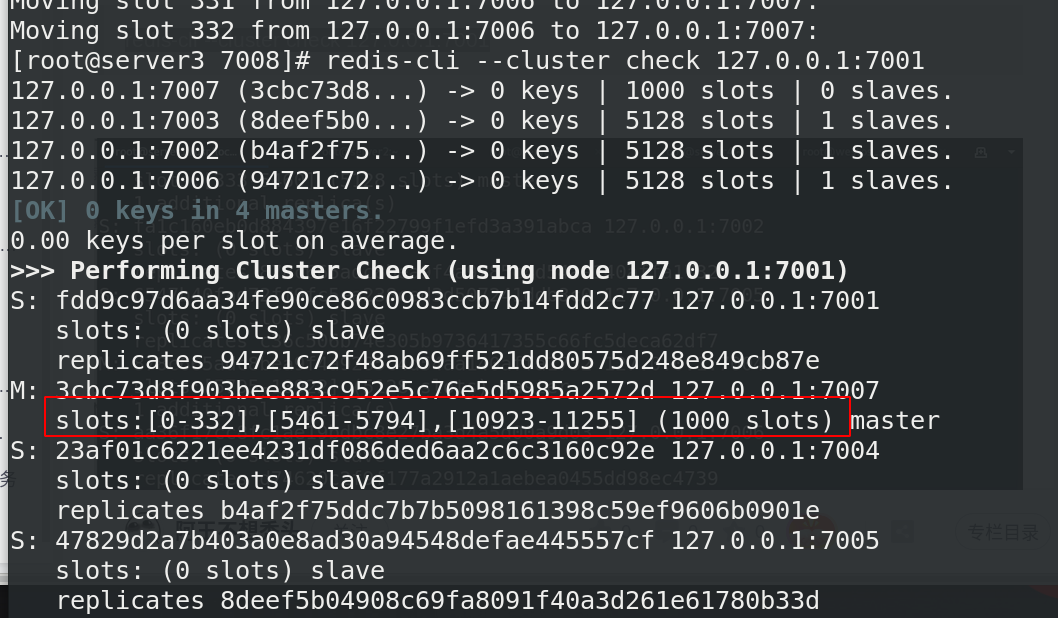
After slicing, the check shows that the 7007 has 1000 hashing slots, and the average source is from the other three master nodes
Now add 7008 node to the cluster of 7001 node, and specify it as the slave of 7007, and the ID is the ID of the primary node to be added
redis-cli --cluster add-node 127.0.0.1:7008 127.0.0.1:7001 --cluster-slave --cluster-master-id
check again to see that the node is added successfully
