Introduction to Redis cluster
Redis is an open source key value storage system. Due to its outstanding performance, most Internet enterprises use it for server-side caching. Before version 3.0, redis only supports single instance mode. Although it supports master-slave mode and sentinel mode to solve single point of failure, Internet companies are prone to hundreds of gigabytes of data, which is obviously unable to meet business needs. Therefore, redis launched the cluster mode after version 3.0.
Redis cluster adopts P2P mode and is completely decentralized. Redis divides all keys into 16384 slots, and each redis instance is responsible for some of the slots. All information in the cluster (nodes, ports, slots, etc.) is updated through regular data exchange between nodes.
The Redis client can make a request in any Redis instance. If the required data is not in the instance, guide the client to access the required instance through the redirection command.
First of all, this post is about setting up a Redis cluster. The premise of setting up a cluster is that Redis has been installed under Linux Before setting up a cluster, I'd like to talk about the rules for setting up a Redis cluster. Because the cluster requires at least six nodes (three master and three slave), but I don't have so many local machines for me to play, I choose to set up a cluster on a virtual machine, which is no different from that in the production environment Please note that all cluster environments below are based on the installed Redis
1. Create a folder
First, the port number of our cluster is 6301-6306, and the data is stored in the port number / data folder


mkdir /usr/local/redis-cluster
cd redis-cluster/
mkdir -p 6301/data 6302/data 6303/data 6304/data 6305/data 6306/data
2. Copy execution script
Create a bin folder in the / usr / local / Redis cluster directory to store the cluster running scripts and the installed Redis src Copy the running script under the path
mkdir redis-cluster/bin
cd /usr/local/redis-4.0.6/src/
cp mkreleasehdr.sh redis-benchmark redis-check-aof redis-check-dump redis-cli redis-server redis-trib.rb /usr/local/redis-cluster/bin
3. Copy a new Redis instance
Copy a new instance from the installed Redis to 6301 and modify its redis.config configuration

cp /usr/local/redis-4.0.6/* /usr/local/redis-cluster/6301

port 6301(Port number per node)
daemonize yes
#bind 127.0.0.1 (comment out)
dir /usr/local/redis-cluster/6301/data/(Data file storage location)
pidfile /var/run/redis_6301.pid(pid 6301 and port (to correspond)
cluster-enabled yes(Start cluster mode)
cluster-config-file nodes6301.conf(6301 and port (to correspond)
cluster-node-timeout 15000
appendonly yes
4. Copy other nodes
Because we have copied a node 6301 before, it's better to copy the other five nodes. Here, we choose to copy the 6301 instance to the other five nodes. Among them, all the port related information in the redis.config file needs to be modified


5. Modify the redis.config file of 6302-6306
This step is very simple, because an instance has been modified before (6301). You will find that only four points need to be modified through search. Let's replace it globally and enter the corresponding node folder for replacement. The command is very simple

vim redis.conf
:%s/6301/6302/g
Here, our basic environment has been built, and the rest is to start!!!
If we directly start six redis nodes to add things to them, an error will be reported: clusterdown hash slot not served.
Although we have configured and started the Redis cluster service, they are not in a cluster for the time being, can not find each other directly, and there is no storage location, which is the so-called slot.
So next, we need to install the software ruby required by the cluster
yum install centos-release-scl-rh//There will be one more CentOS-SCLo-scl-rh.repo source in / etc/yum.repos.d /
 yum install rh-ruby26  -y //Install directly using yum
 scl  enable  rh-ruby26 bash//Necessary step
 ruby -v//View installed version
 gem install redis
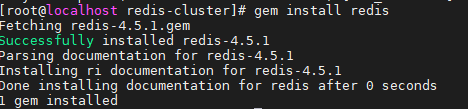
If used directly
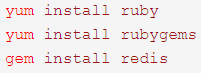
When installing ruby with these three commands, version 2.0.0 of ruby will be installed by default. At this time, the version incompatibility will occur, so this problem will not occur when using my yum installation method

Cluster setup command
Before entering the command, you need to ensure that the six redis nodes have been started
/usr/local/redis-cluster/bin/redis-trib.rb create --replicas 1 192.168.211.128:6301 192.168.211.128:6302 192.168.211.128:6303 192.168.211.128:6304 192.168.211.128:6305 192.168.211.128:6306
Then we call the ruby command to create cluster replicas 1, which indicates that the ratio of master to slave is 1:1. A master node corresponds to a slave node, and then we assign each master node and the corresponding slave node service and the size of solt by default. Because there are only 16383 solt in the Redis cluster, the default will be allocated equally to us, of course, you can specify. Subsequent increase / decrease nodes can also be reassigned.

This indicates that the cluster has been created successfully
cluster info
cluster nodes
Enter these two commands to view the status and node information of the cluster
To summarize
Building a redis cluster is still very simple, but the files that need to be modified are cumbersome and have no technical content. Follow this post step by step and you can build a redis cluster yourself!!!