Basic Use of RecyclerView Update and Principle and Separation Line Resolution
To put it another way: Startup page is not simply a few seconds into the home page, app startup speed has a lot to do with app startup page.
Commands can be used to detect startup speed, (hot and cold startup) how to optimize and accelerate application startup speed
Think about a question: If you don't configure Activity in androidmanifest.xml, will it report an error if you start the Activity?
If you read the startup process of source Activity carefully, you can solve this problem, and you can use the plug-in development of app.
1. source
RecyclerView is a control used by Google V7 packages to replace ListVIew and GridView. In the process of using, divider (line between item s) is often used. Recycler VIew doesn't wake up like ListView. Instead, classes like RecyclerView.ItemDecoration (support 25 has been added to the splitting line method) are needed, but ItemDecoration is an abstract class, and android does not have some effect implementations for it. Then we need to inherit and implement the method by ourselves. This article describes how to implement ItemDecoration under GridLayout Manager and Linear Layout Manager. As for the specific analysis of RecyclerView.ItemDecoration, you can take a look at this article.
http://blog.piasy.com/2016/03/26/Insight-Android-RecyclerView-ItemDecoration/ I will not elaborate too much here.
So why do you need controls like RecyclerView with ListView and GridView? Overall, RecyclerView architecture provides a plug-in experience, highly decoupled, exceptionally flexible, and achieves amazing results by setting up different Layout Managers, ItemDecoration, and ItemAnimator it provides.
1. If you want to control the way it is displayed, you need only one line of code through Layout Manager, ListView -> GridView -> Waterfall Stream.
2. If you want to control the interval between Items, please use ItemDecoration.
3. If you want to control the animation of adding or deleting Item, please use Item Animator.
4. If you want to control clicks and long press events, please write it yourself (this is Nima). 

2 Basic Use
First, we need to add the dependency package of RecyclerView and add the dependency in build.gradle:
compile 'com.android.support:recyclerview-v7:24.0.0'

 // Setting up layout management for recyclerView
// Linear Layout Manager - > ListView Style
// GridLayout Manager - > GridView Style
// Staggered Grid Layout Manager - > Waterfall Stream Style
LinearLayoutManager linearLayoutManager = new
      LinearLayoutManager(this);
mRecyclerView.setLayoutManager(linearLayoutManager);
Like ListView, it binds the data source to it by setting Adapter(), but before setting setLayoutManager(), this method is used to set the display effect (so we can display different effects by setting layout management: ListView, GridView, Waterfall Stream, etc.).
2.1 Adapter Writing
Next, we go to the background server to request data, and then we write the Adapter. We use Okhttp to get the server data directly. Let's not say much here. We mainly see how to write the Adapter. In ListView and GridView, we don't need ViewHolder. No one beats me anyway, but the data is likely to crash. But in RecyclerView, it forces us to use ViewHolder:
public class CategoryListAdapter extends RecyclerView.Adapter<CategoryListAdapter.ViewHolder> {

private List<ChannelListResult.DataBean.CategoriesBean.CategoryListBean> mList;
private Context mContext;
private LayoutInflater mInflater;

public CategoryListAdapter(Context context, List<ChannelListResult.DataBean.CategoriesBean.CategoryListBean> list) {
    this.mContext = context;
    this.mList = list;
    this.mInflater = LayoutInflater.from(mContext);
}

/**
      Create entry ViewHolder

  @param parent   RecyclerView
  @param viewType view The type of the list can be used to display multi-list layouts, and so on.
  @return
 **/
@Override
public ViewHolder onCreateViewHolder(ViewGroup parent, int viewType) {
    // Create Entry
    View itemView = mInflater.inflate(R.layout.channel_list_item, parent, false);
    // Create ViewHolder
    ViewHolder viewHolder = new ViewHolder(itemView);
    return viewHolder;
}

/**
  Binding ViewHolder Settings Data

  @param holder
  @param position current location
 **/
@Override
public void onBindViewHolder(ViewHolder holder, int position) {
    // Setting Binding Data
    ChannelListResult.DataBean.CategoriesBean.CategoryListBean item = mList.get(position);
    holder.nameTv.setText(item.getName());
    holder.channelTopicTv.setText(item.getIntro());
    String str = item.getSubscribe_count() + " Subscribe | " +
            "Total number of Posts <font color='#FF678D'>" + item.getTotal_updates() + "</font>";
    holder.channelUpdateInfo.setText(Html.fromHtml(str));
    // Is it up to date?
    if (item.isIs_recommend()) {
        holder.recommendLabel.setVisibility(View.VISIBLE);
    } else {
        holder.recommendLabel.setVisibility(View.GONE);
    }
    // Loading pictures
    Glide.with(mContext).load(item.getIcon_url()).centerCrop().into(holder.channelIconIv);
}

/**
  How many pieces of data are there altogether?
 **/
@Override
public int getItemCount() {
    return mList.size();
}

/**
  RecyclerView Adapter needs a ViewHolder that must extend the RecyclerView. ViewHolder
 **/
public static class ViewHolder extends RecyclerView.ViewHolder {
    public TextView nameTv;
    public TextView channelTopicTv;
    public TextView channelUpdateInfo;
    public View recommendLabel;
    public ImageView channelIconIv;

    public ViewHolder(View itemView) {
        super(itemView);
        // Find ViewById with the View passed in at creation time
        nameTv = (TextView) itemView.findViewById(R.id.channel_text);
        channelTopicTv = (TextView) itemView.findViewById(R.id.channel_topic);
        channelUpdateInfo = (TextView) itemView.findViewById(R.id.channel_update_info);
        recommendLabel = itemView.findViewById(R.id.recommend_label);
        channelIconIv = (ImageView) itemView.findViewById(R.id.channel_icon);
    }
}
}

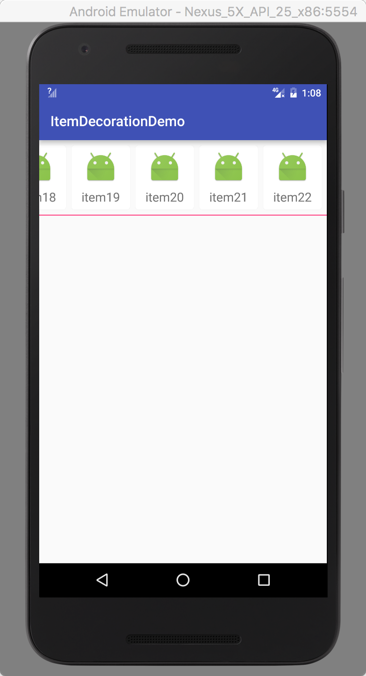
This is just for testing, not for the effect we need, just to say what both methods can do is how you want to do the splitting line. We usually use Drawable to draw, so we have to adjust to our final effect. The code is basically the same.
public class CategoryItemDecoration extends RecyclerView.ItemDecoration {
private Drawable mDivider;

public CategoryItemDecoration(Drawable divider) {
    // Drawing Segmentation Line with Drawable
    mDivider = divider;
}

@Override
public void onDraw(Canvas canvas, RecyclerView parent, RecyclerView.State state) {
    int childCount = parent.getChildCount();
    // Calculate the area to be drawn
    Rect rect = new Rect();
    rect.left = parent.getPaddingLeft();
    rect.right = parent.getWidth() - parent.getPaddingRight();
    for (int i = 0; i < childCount; i++) {
        View childView = parent.getChildAt(i);
        rect.top = childView.getBottom();
        rect.bottom = rect.top + mDivider.getIntrinsicHeight();
        // Drawing directly with Canvas
        mDivider.draw(canvas);
    }
}

@Override
public void getItemOffsets(Rect outRect, View view, RecyclerView parent, RecyclerView.State state) {
    // Draw a partition line under each sub-View
    outRect.bottom += mDivider.getIntrinsicHeight();
}
}
2.2 Customization of Separators
For the divider, it's also a pain, and you'll find that RecyclerView doesn't support properties like divider. So what do you do? You can write it directly in the layout when you create the item layout. Of course, this method is not elegant enough. We have already said that you can customize it freely.
Since it's troublesome, we can download one from github: Divider ItemDecoration for reference. I am here to write an effect directly, you can also find someone else's blog to see.
We use Recycler View's addItemDecoration (ItemDecoration from Html) to create a new class to see what it really is:
public class CategoryItemDecoration extends    RecyclerView.ItemDecoration {
@Override
public void onDraw(Canvas c, RecyclerView parent, RecyclerView.State state) {

}

@Override
public void getItemOffsets(Rect outRect, View view, RecyclerView parent, RecyclerView.State state) {

}
}


public class CategoryItemDecoration extends RecyclerView.ItemDecoration {
private Paint mPaint;

public CategoryItemDecoration(int color) {
    // Drawing colors directly is only for testing
    mPaint = new Paint();
    mPaint.setColor(color);
    mPaint.setAntiAlias(true);
}

@Override
public void onDraw(Canvas c, RecyclerView parent, RecyclerView.State state) {
    int childCount = parent.getChildCount();
    // Get the area to be drawn
    Rect rect = new Rect();
    rect.left = parent.getPaddingLeft();
    rect.right = parent.getWidth() - parent.getPaddingRight();
    for (int i = 0; i < childCount; i++) {
        View childView = parent.getChildAt(i);
        rect.top = childView.getBottom();
        rect.bottom = rect.top + 20;
        // Use Canvas directly to draw a rectangle where it is left.
        c.drawRect(rect, mPaint);
    }
}

@Override
public void getItemOffsets(Rect outRect, View view, RecyclerView parent, RecyclerView.State state) {
    // Leave 20px below each subview to draw the splitting line
    outRect.bottom += 20;
}
}
There are two methods, getItemOffsets(), where I usually specify the offset, that is, how high the partition line occupies, or where it is painted, and you always give me the position.
onDraw() We can draw directly, everything can be drawn because of Canvas, but usually draw Drawable, let's not say more about watching video here.
public class CategoryItemDecoration extends RecyclerView.ItemDecoration {
private Paint mPaint;

public CategoryItemDecoration(int color) {
    // Drawing colors directly is only for testing
    mPaint = new Paint();
    mPaint.setColor(color);
    mPaint.setAntiAlias(true);
}

@Override
public void onDraw(Canvas c, RecyclerView parent, RecyclerView.State state) {
    int childCount = parent.getChildCount();
    // Get the area to be drawn
    Rect rect = new Rect();
    rect.left = parent.getPaddingLeft();
    rect.right = parent.getWidth() - parent.getPaddingRight();
    for (int i = 0; i < childCount; i++) {
        View childView = parent.getChildAt(i);
        rect.top = childView.getBottom();
        rect.bottom = rect.top + 20;
        // Use Canvas directly to draw a rectangle where it is left.
        c.drawRect(rect, mPaint);
    }
}

@Override
public void getItemOffsets(Rect outRect, View view, RecyclerView parent, RecyclerView.State state) {
    // Leave 20px below each subview to draw the splitting line
    outRect.bottom += 20;
}
}
This is just for testing, not for the effect we need, just to say what both methods can do is how you want to do the splitting line. We usually use Drawable to draw, so we have to adjust to our final effect. The code is basically the same.
public class CategoryItemDecoration extends RecyclerView.ItemDecoration {
private Drawable mDivider;
public CategoryItemDecoration(Drawable divider) {
    // Drawing Segmentation Line with Drawable
    mDivider = divider;
}

@Override
public void onDraw(Canvas canvas, RecyclerView parent, RecyclerView.State state) {
    int childCount = parent.getChildCount();
    // Calculate the area to be drawn
    Rect rect = new Rect();
    rect.left = parent.getPaddingLeft();
    rect.right = parent.getWidth() - parent.getPaddingRight();
    for (int i = 0; i < childCount; i++) {
        View childView = parent.getChildAt(i);
        rect.top = childView.getBottom();
        rect.bottom = rect.top + mDivider.getIntrinsicHeight();
        // Drawing directly with Canvas
        mDivider.draw(canvas);
    }
}

@Override
public void getItemOffsets(Rect outRect, View view, RecyclerView parent, RecyclerView.State state) {
    // Draw a partition line under each sub-View
    outRect.bottom += mDivider.getIntrinsicHeight();
}
}
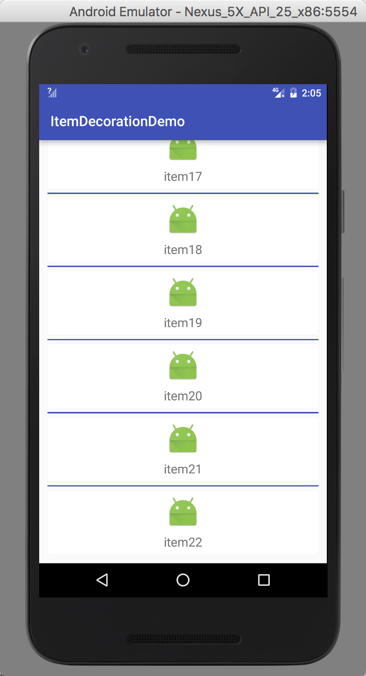
Next, we can create a new xxx.xml splitter file in drawable.
<?xml version="1.0" encoding="utf-8"?>

Basically no effect because the partition line is 0.5dp smaller, you can see it carefully, and finally declare that because the whole project involves a key to replace the skin, then congratulations do not have any eggs, we still have to write directly in the item layout, rather than using code to set the partition line.
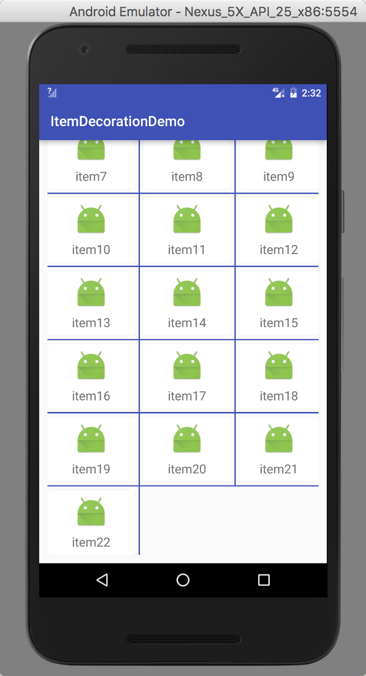
3. Customize RecyclerView.ItemDecoration to realize the equidistant segmentation of Item and the effect of segmentation line
3.1 Implementation of divider for basic Item
3.1.1 Create SpacesItemDecoration
public class SpacesItemDecoration extends RecyclerView.ItemDecoration {
private int leftRight;
private int topBottom;

public SpacesItemDecoration(int leftRight, int topBottom) {
    this.leftRight = leftRight;
    this.topBottom = topBottom;
}

@Override
public void onDraw(Canvas c, RecyclerView parent, RecyclerView.State state) {
  super.onDraw(c, parent, state);
}

@Override
public void getItemOffsets(Rect outRect, View view, RecyclerView parent, RecyclerView.State state) {

}}
Here we mainly implement onDraw and getItemOffsets, getItemOffsets determine the scope of divider, and onDraw is the specific implementation of divider.
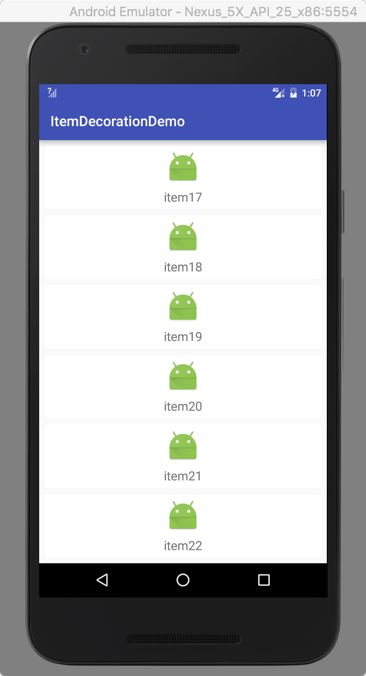
4.2 Implementation of divider under Linear Layout Manager
First, in the getItemOffsets method, it is necessary to determine which LayoutManager is currently used in RecyclerView. Note here that GridLayout Manager inherits Linear Layout Manager, so you need to first determine whether it is GridLayout Manager.
private SpacesItemDecorationEntrust getEntrust(RecyclerView.LayoutManager manager) {
    SpacesItemDecorationEntrust entrust = null;
    //Note that the GridLayout Manager on this side inherits the Linear Layout Manager, so first judge the GridLayout Manager.
    if (manager instanceof GridLayoutManager) {
        entrust = new GridEntrust(leftRight, topBottom, mColor);
    } else {//Others are computed as Linear s
        entrust = new LinearEntrust(leftRight, topBottom, mColor);
    }
    return entrust;
}
Then let's look at the specific implementation. First, we decide whether VERTICAL or HORIZONTAL is the best one. For VERTICAL, each item needs top, left and right, but the last item needs bottom. For HORIZONTAL, each item needs top, left and bottom, but the last item needs right.
@Override
public void getItemOffsets(Rect outRect, View view, RecyclerView parent, RecyclerView.State state) {
    LinearLayoutManager layoutManager = (LinearLayoutManager) parent.getLayoutManager();
    //Vertical
    if (layoutManager.getOrientation() == LinearLayoutManager.VERTICAL) {
        //The last requirement is bottom
        if (parent.getChildAdapterPosition(view) == layoutManager.getItemCount() - 1) {
            outRect.bottom = topBottom;
        }
        outRect.top = topBottom;
        outRect.left = leftRight;
        outRect.right = leftRight;
    } else {
        //The last requirement is right
        if (parent.getChildAdapterPosition(view) == layoutManager.getItemCount() - 1) {
            outRect.right = leftRight;
        }
        outRect.top = topBottom;
        outRect.left = leftRight;
        outRect.bottom = topBottom;
    }
}
In this way, the divider effect is achieved (without any color, of course). The invocation method is only needed.
int leftRight = dip2px(7);
  int topBottom = dip2px(7);
  rv_content.addItemDecoration(new SpacesItemDecoration(leftRight, topBottom));
Of course, you can also use multiple ItemDecoration s
 int leftRight = dip2px(10);
  int topBottom = dip2px(10);
  rv_content.addItemDecoration(new SpacesItemDecoration(leftRight, topBottom));
  rv_content.addItemDecoration(new SpacesItemDecoration(dip2px(2), dip2px(2), getResources().getColor(R.color.colorPrimary)));
4.2 Implementation under Grid Manager
_The steps of implementation under Grid Manager are similar to those under Linear Manager, but the difference is to determine the area where the partition line is drawn. The area of its dividing line is between adjacent item s, which need to have dividing line. No more nonsense, code first.
@Override
public void onDraw(Canvas c, RecyclerView parent, RecyclerView.State state) {
GridLayoutManager layoutManager = (GridLayoutManager) parent.getLayoutManager();
if (mDivider == null || layoutManager.getChildCount() == 0) {
return;
}
// Determine whether the total quantity can be divisible
int totalCount = layoutManager.getItemCount();
int surplusCount = totalCount % layoutManager.getSpanCount();
    int left;
    int right;
    int top;
    int bottom;

    final int childCount = parent.getChildCount();
    if (layoutManager.getOrientation() == GridLayoutManager.VERTICAL) {

        for (int i = 0; i < childCount; i++) {
            final View child = parent.getChildAt(i);
            final RecyclerView.LayoutParams params = (RecyclerView.LayoutParams) child.getLayoutParams();
            //Get its position in the total
            final int position = parent.getChildAdapterPosition(child);
            //Place the colored partition line in the middle
            final float centerLeft = (layoutManager.getLeftDecorationWidth(child) - leftRight) / 2;
            final float centerTop = (layoutManager.getTopDecorationHeight(child) - topBottom) / 2;
            //Is it the last row?
            boolean isLast = surplusCount == 0 ?
                    position > totalCount - layoutManager.getSpanCount() - 1 :
                    position > totalCount - surplusCount - 1;
            //Underneath, the last row doesn't need to be painted.
            if ((position + 1) % layoutManager.getSpanCount() == 1 && !isLast) {
                //Calculate the following
                left = layoutManager.getLeftDecorationWidth(child);
                right = parent.getWidth() - layoutManager.getLeftDecorationWidth(child);
                top = (int) (child.getBottom() + params.bottomMargin + centerTop);
                bottom = top + topBottom;
                mDivider.setBounds(left, top, right, bottom);
                mDivider.draw(c);
            }
            //Draw on the right, divisible without the right, and when the number is insufficient, the last item does not need the right.
            boolean first = totalCount > layoutManager.getSpanCount() && (position + 1) % layoutManager.getSpanCount() != 0;
            boolean second = totalCount < layoutManager.getSpanCount() && position + 1 != totalCount;
            if (first || second) {
                //Calculate the right side
                left = (int) (child.getRight() + params.rightMargin + centerLeft);
                right = left + leftRight;
                top = child.getTop() + params.topMargin;
                //The first row doesn't need to lose the top one.
                if (position > layoutManager.getSpanCount() - 1) {
                    top -= centerTop;
                }
                bottom = child.getBottom() - params.bottomMargin;
                //The last row doesn't need the bottom one.
                if (!isLast) {
                    bottom += centerTop;
                }
                mDivider.setBounds(left, top, right, bottom);
                mDivider.draw(c);
            }
        }
    } else {

        for (int i = 0; i < childCount; i++) {
            final View child = parent.getChildAt(i);
            final RecyclerView.LayoutParams params = (RecyclerView.LayoutParams) child.getLayoutParams();
            //Get its position in the total
            final int position = parent.getChildAdapterPosition(child);
            //Place the colored partition line in the middle
            final float centerLeft = (layoutManager.getLeftDecorationWidth(child) - leftRight) / 2;
            final float centerTop = (layoutManager.getTopDecorationHeight(child) - topBottom) / 2;
            //Is it the last row?
            boolean isLast = surplusCount == 0 ?
                    position > totalCount - layoutManager.getSpanCount() - 1 :
                    position > totalCount - surplusCount - 1;
            //Draw on the right. The last row doesn't need to be drawn.
            if ((position + 1) % layoutManager.getSpanCount() == 1 && !isLast) {
                //Calculate the right side
                left = (int) (child.getRight() + params.rightMargin + centerLeft);
                right = left + leftRight;
                top = layoutManager.getTopDecorationHeight(child);
                bottom = parent.getHeight() - layoutManager.getTopDecorationHeight(child);
                mDivider.setBounds(left, top, right, bottom);
                mDivider.draw(c);
            }
            boolean first = totalCount > layoutManager.getSpanCount() && (position + 1) % layoutManager.getSpanCount() != 0;
            boolean second = totalCount < layoutManager.getSpanCount() && position + 1 != totalCount;
            //Draw the bottom, divisible without the bottom
            if (first || second) {
                left = child.getLeft() + params.leftMargin;
                if (position > layoutManager.getSpanCount() - 1) {
                    left -= centerLeft;
                }
                right = child.getRight() - params.rightMargin;
                if (!isLast) {
                    right += centerLeft;
                }
                top = (int) (child.getBottom() + params.bottomMargin + centerTop);
                bottom = top + topBottom;
                mDivider.setBounds(left, top, right, bottom);
                mDivider.draw(c);
            }
        }
    }
}
We will analyze it in the case of VERTICAL. First, we need to draw the horizontal segmentation line when the item on the left is drawn. Of course, the last row is unnecessary.
if ((position + 1) % layoutManager.getSpanCount() == 1 && !isLast) {
                //Calculate the following
left = layoutManager.getLeftDecorationWidth(child);
right = parent.getWidth() - layoutManager.getLeftDecorationWidth(child);
top = (int) (child.getBottom() + params.bottomMargin + centerTop);
bottom = top + topBottom;
mDivider.setBounds(left, top, right, bottom);
mDivider.draw(c);
}
Horizontal partitioning lines are computed in a similar way to those under Linear Layout Manager. I'm not going to elaborate on that here. There are some differences in the vertical direction. Because of the GridLayout Manager, the number of items may not exactly divide the number of rows. So the drawing area on this side is determined according to each item.
_can be divided or when the number is insufficient, the last one does not need a vertical dividing line. At the same time, attention should be paid to the completion of centerTop (the position of the segmentation line drawn in the middle area).
 //Draw on the right, divisible without the right, and when the number is insufficient, the last item does not need the right.
  boolean first = totalCount > layoutManager.getSpanCount() && (position + 1) % layoutManager.getSpanCount() != 0;
  boolean second = totalCount < layoutManager.getSpanCount() && position + 1 != totalCount;
 if (first || second) {
 //Calculate the right side
    left = (int) (child.getRight() + params.rightMargin + centerLeft);
    right = left + leftRight;
    top = child.getTop() + params.topMargin;
    //The first row doesn't need to lose the top one.
if (position > layoutManager.getSpanCount() - 1) {
      top -= centerTop;
   }
bottom = child.getBottom() - params.bottomMargin;
 //The last row doesn't need the bottom one.
    if (!isLast) {
   bottom += centerTop;
   }
    mDivider.setBounds(left, top, right, bottom);
    mDivider.draw(c);
 }
_The situation under HORIZONTAL can be analyzed similarly. The code is called in the same way as under Linear Layout Manager.