Introduction and Import of RecyelerView and CardView
RecyelerView and CardView are new controls in the 5.0, support-v7 package. The effect is as follows: 
If you use it, you still need to import it. After all, it's not self-contained.
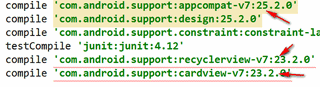
Modle's build.gradle adds:
 dependencies {
      compile 'com.android.support:recyclerview-v7:25.2.0'
      compile 'com.android.support:cardview-v7:25.2.0'
 }
Keep in mind that the imported version must be consistent with the appcompat version or it will be wrong
2. Differences between RecyelerView, ListView and GrideView
RecyelerView provides three layout managers that inherit from the abstract class LayoutManager:
Linear Layout Manager
GridLayout Manager
Staggered Grid Layout Manager.
It is a powerful control that integrates ListView and GridView. It can not only realize the horizontal scroll of listview and gridview, but also realize the effect of waterfall flow. It is easy to use and powerful.
Look at the effect: 
CardView: A FrameLayout with rounded corners and shaded backgrounds.
The above animations are all cardview, so let's take a look at the layout file.
 <?xml version="1.0" encoding="utf-8"?>
 <android.support.v7.widget.CardView
    xmlns:android="http://schemas.android.com/apk/res/android"
   xmlns:app="http://schemas.android.com/apk/res-auto"
  android:id="@id/cardView"
  android:clickable="true"
  android:focusable="true"
  android:layout_width="match_parent"
  android:layout_height="wrap_content"
  android:layout_margin="7dp"
  app:cardElevation="10dp"
 >
<LinearLayout
    android:layout_width="match_parent"
    android:layout_height="100dp"
    android:clickable="true"
    android:foreground="?android:attr/selectableItemBackgroundBorderless"
    >

    <ImageView
        android:id="@id/image1"
        android:layout_width="150dp"
        android:layout_height="match_parent"
        android:layout_margin="5dp"
        android:scaleType="centerCrop"
        android:src="@drawable/androidimage2" />

    <LinearLayout
        android:layout_width="match_parent"
        android:layout_height="match_parent"
        android:orientation="vertical">

        <TextView
            android:id="@id/textView1"
            android:layout_width="match_parent"
            android:layout_height="wrap_content"
            android:layout_marginTop="20dp"
            android:gravity="center"
            android:text="Here is CardView"
            android:textSize="18sp"
            android:textStyle="bold" />

        <TextView
            android:id="@id/textView2"
            android:gravity="center"
            android:layout_width="match_parent"
            android:layout_height="wrap_content"
            android:layout_marginTop="10dp"
            android:text="Cool effects hey" />
    </LinearLayout>
  </LinearLayout>
</android.support.v7.widget.CardView>
There are several key attributes to be mentioned here.
1. Shadow effect deepening or cardview control Z-axis promotion properties:
* app:cardElevation="10dp" *
2. Add water ripple to the click. Attributes need to be added to the child controls to be effective:
* android:foreground="? android:attr/selectableItemBackgroundBorderless"*
Also add
** android:clickable="true"
android:focusable="true" **
Only then.
4. RecyelerView and CardView Code Implementation
1. Add RecyelerView to the layout page:
  <?xml version="1.0" encoding="utf-8"?>
   <RelativeLayout xmlns:android="http://schemas.android.com/apk/res/android"
   android:orientation="vertical"
   android:layout_width="match_parent"
    android:layout_height="match_parent"
  >
   <android.support.v7.widget.RecyclerView
    android:id="@id/recycleview"
    android:layout_width="match_parent"
    android:layout_height="match_parent"
   ></android.support.v7.widget.RecyclerView>
</RelativeLayout>
2. Create a new card_view.xml under the Layout folder. The layout file code is in Chapter 3 above.
3. Customize Adapter.
public class Adapter extends RecyclerView.Adapter<ViewHolder> {
    private Context mContext;
    ArrayList<ArrayList> mlist;
    TextView tv1;
    TextView tv2;
    ImageView iv;
    CardView cv;

 public Adapter(Context context, ArrayList<ArrayList> list) {
    this.mContext = context;
    this.mlist=list;
}

@Override
public int getItemCount() {
    return mlist.size();
}

@Override
public ViewHolder onCreateViewHolder(ViewGroup parent, int arg1) {
    View view = LayoutInflater.from(mContext).inflate(R.layout.card_view,parent,false);
    cv = (CardView)view.findViewById(R.id.cardView);
    tv1 = (TextView) view.findViewById(R.id.textView1);
    tv2 = (TextView) view.findViewById(R.id.textView2);
    iv = (ImageView) view.findViewById(R.id.image1);
    ViewHolder viewHolder = new ViewHolder(view){};
    return viewHolder;
}

@Override
public void onBindViewHolder(ViewHolder holder, int position) {
    tv1.setText((String)mlist.get(position).get(0));
    tv2.setText((String)mlist.get(position).get(1));
    iv.setImageResource((int)mlist.get(position).get(2));
  }
 }
4. Initialization code:
 RecyclerView rv = (RecyclerView)view.findViewById(R.id.recycleview);
  LinearLayoutManager layoutManager= new LinearLayoutManager(getActivity());
 //GridLayoutManager layoutManager=new GridLayoutManager(getActivity(),3);
 //StaggeredGridLayoutManager layoutManager = new StaggeredGridLayoutManager(3, StaggeredGridLayoutManager.VERTICAL);
 rv.setLayoutManager(layoutManager);
 rv.setAdapter(new Adaper(getActivity(),inintList()));


       public ArrayList inintList() {
    ArrayList<ArrayList> list = new ArrayList<ArrayList>();
    list.add(inintmLis("Here is CardView","Cool effects hey",R.drawable.android1));
    list.add(inintmLis("Here is CardView","Cool effects hey",R.drawable.android1));
    list.add(inintmLis("Here is CardView","Cool effects hey",R.drawable.android1));
   }
   private ArrayList inintmLis(String str1,String str2,int s) {
     ArrayList list1 = new ArrayList();
    list1.add(str1);
    list1.add(str2);
    list1.add(s);
    return list1;
  }
LinearLayoutManager,GridLayoutManager,StaggeredGridLayoutManager
Initialize whatever layout manager you need.
summary
These are some of the most basic knowledge, I hope we work together to enter the Android family.