This is an article on configuring the server environment (for Python projects) (nanny tutorial)
I can only say that configuring the server is really too simple. Just have a hand
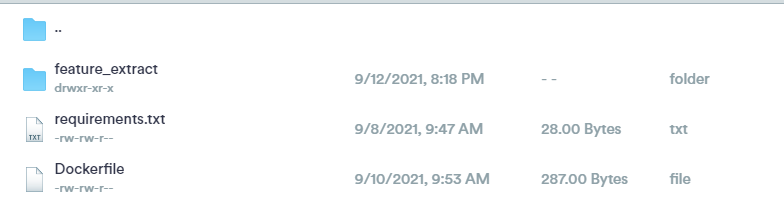
1: Prepare the necessary documents
The documents are as follows:
- Dockerfile
- Project code
- requirements.txt
As shown in the figure:
You need to create these three files under windows system, and then migrate them to linux server before running
Next, I will introduce how to create Dockerfile and requirements.txt
1.1 requirements.txt creation
I read many methods on the Internet. Some use the PIP free > command, but it's not good. I read several tools and think pipreqs is relatively easy and good.
- Install pipreqs
You can install pipreqs directly through pip. The installation commands are as follows:
pip install pipreqs
- Using pipreqs
The command is as follows:
pipreqs ./ --encoding=utf-8
 Note that you need to enter the project to run
Then you create requirements.txt
1.2 Dockerfile creation
Let's take a look at the general content first
FROM python:3.8
# Add the current file to the code directory
ADD . /code
# Switch directory
WORKDIR /code
# Installation dependency
RUN pip3 install -r requirements.txt -i https://mirrors.aliyun.com/pypi/simple/
# Switch to project directory
WORKDIR /code/feature_extract
# Project run command
CMD ["bash", "run.sh"]
The creation process is as follows:
- Right click to create Dockerfile in Windows. No suffix is required
- Write Dockerfile, done
Cough, it's actually that simple, but you need to talk about the contents of Dockerfile.
- A very important command in from Python 3.8 dockerfile is used to specify a basic image to build the process. Here, we can choose Python 3.8, according to our own project
- Add. / code this means to add all the files in your current path to the code directory in the docker container
- WORKDIR /code this is the directory of the switching container, because the environment dependent installation needs to be performed in the code directory (requirements.txt in this directory, we ADD put the three files we created)
- RUN pip3 install -r requirements.txt -i https://mirrors.aliyun.com/pypi/simple/ Installation dependency is over
- WORKDIR /code/feature_extract here is to switch to our code file directory, because we need to run our run.sh script file to start our Python project
- CMD ["bash", "run.sh"] executes script files. Because our python project needs to run multiple. py files, it is written into one. sh script.
The contents of run.sh can be written according to their own project logic. The corresponding contents of this project are as follows. Please see my Readme.md document for details
nohup python3.8 generate_static_feature_csv.py --screen-data 1
wait
nohup python3.8 1disasseble.py
wait
nohup python3.8 2bytecode_extract.py
wait
nohup python3.8 3top500_n_gram_test.py
wait
nohup python3.8 top_intent_test.py
wait
nohup python3.8 4ngram_vec_test.py
wait
nohup python3.8 generate_static_feature_csv.py --screen-data 0
wait
nohup python3.8 merge_csv.py
wait
cat ./nohup.out

# just keep this script running
while [[ true ]]; do
    sleep 1
done
Wait: wait until the last command is run, instead of running py files in parallel.
The function of the last infinite loop: keep the container running without stopping for subsequent operations.
2: Create Docker container
First, move the file to a place under the linux server
- To build a mirror, the command is as follows
Docker build - T < name >. Name is the name of the image created by yourself. The specific output process will not be attached
- You can use docker images to view the images you have created
- Start the container with the following command
Docker run - it -- name < name > repname – name specifies a container name, otherwise a new container will be created every docker run, which is not good. Repname is your image name, that is, the name created earlier.
- Using docker ps -a, we can find that the container we just started has been Exited, so we need to restart it. The command is as follows:
docker start ContainerName ContainerName is the name of the container created by the previous command
- After startup, the container will run all the time, which can be seen by docker ps.
- In this way, the Docker container is established, and then some things need to be added for our project.
3: Add our ApkTool, ApkTool.jar to the docker container
This time, we need to operate inside the container. The command is as follows:
docker exec -it ContainerName /bin/bash
After entering, ls view the file as follows:
[fangzy-stu@70 feature_extract]$ docker exec -it droidfeature /bin/bash
root@dd0a2477c0fe:/code/feature_extract# ls
1disasseble.py        3top500_n_gram_test.py  README.md    apktool      dataset
infrastructure        nohup.out               permission_list2.txt      requirements.txt
top_intent_test.py    2bytecode_extract.py    4ngram_vec_test.py        __pycache__
apktool.jar           generate_static_feature_csv.py                    merge_csv.py
permission_list.txt   permission_list3.txt    run.sh                    utils.py
You can see that we are now in / code / feature_ Under the extract directory, which corresponds to the WORKDIR command in Dockerfile. You can view the root directory of the docker container by yourself.
3.1 update apt get
Command: apt get update
3.2 installation vim
Command: apt get install VIM
3.3 installing java environment (required by ApkTool)
First, you need to find the java installation package for linux and go to Official website Note that you need to copy the link in the browser pop-up download window after verification
wget <link>
mkdir /usr/local/java
tar -zxvf jdk-8u301-linux-x64.tar.gz -C /usr/local/java
3.4 setting java environment variables
vim /etc/profile
Add at the end
export JAVA_HOME=/usr/local/java/jdk1.8.0_301
export JRE_HOME=${JAVA_HOME}/jre
export CLASSPATH=.:${JAVA_HOME}/lib:${JRE_HOME}/lib
export PATH=${JAVA_HOME}/bin:$PATH
Make environment variables effective
source /etc/profile
Add soft link
ln -s /usr/local/java/jdk1.8.0_301/bin/java /usr/bin/java
inspect
java -version
3.5 install ApkTool (of course, you can manually add the ApkTool that has been downloaded. The following is from wget)
wget https://raw.githubusercontent.com/iBotPeaches/Apktool/master/scripts/linux/apktool -O /usr/local/bin/apktool

chmod a+x /usr/local/bin/apktool

wget https://bitbucket.org/iBotPeaches/apktool/downloads/apktool_2.6.0.jar

mv apktool_2.6.0.jar /usr/local/bin/apktool.jar
inspect
apktool
4: Some other considerations
In the code file, i.e. the. py file, variables about the path:
- Replace \ \ with/
- The current path does not use. / and can be written to a file directly. For example,. / dataset/malware - < dataset/malware >