Chapter III experimental operation environment
The operation of the experimental results is mainly divided into two cases: floppy disk image startup (floppy) and hard disk image startup (hasr disk),
hard disk can be started on U SB flash disk or bochs, and floppy can be started on VMware and bochs.
Therefore, there are two img files in the book, floppy disk image demo.img and hard disk image c.img.
The difference between floppy disk and hard disk
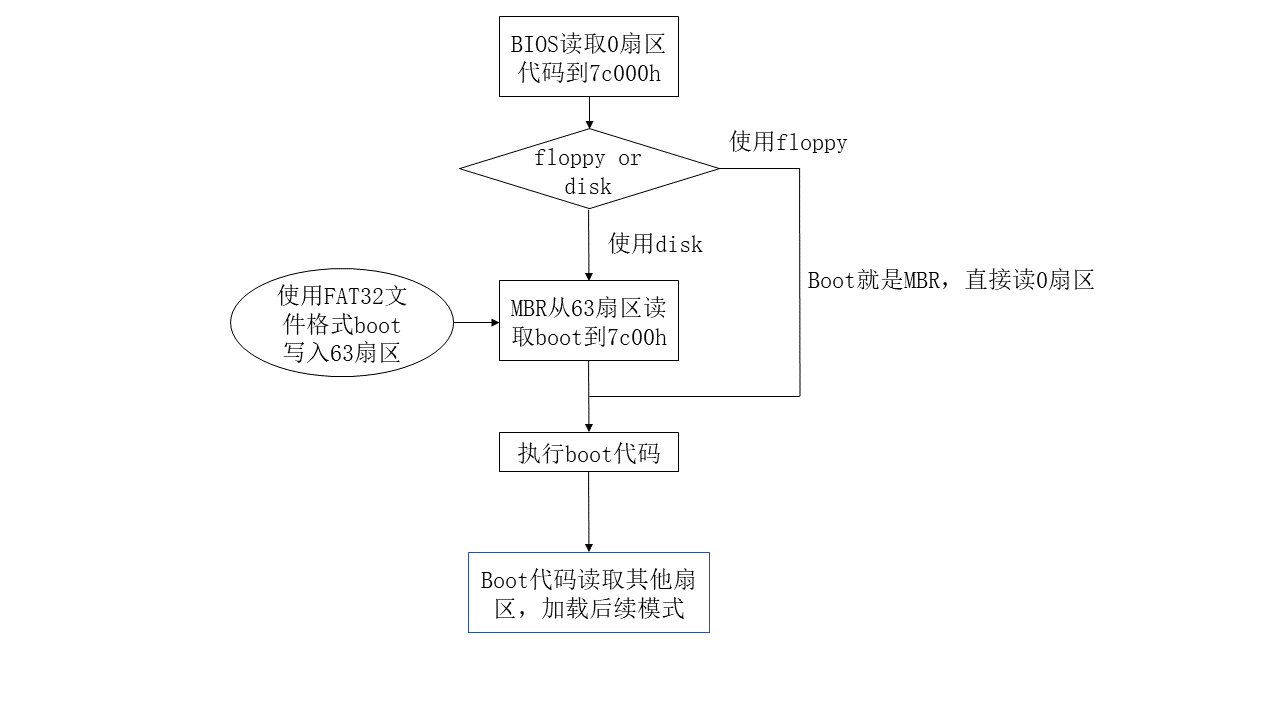
When the floppy disk starts, the boot code is directly written in sector 0. When the hard disk starts, if the boot code is directly written to sector 0, some machines will not start.
Floppy disk startup: the boot code is directly written in the MBR, that is, sector 0. In this way, the boot code is our MBR program. The BIOS will read sector 0 (boot code) of the floppy disk to 7c00h of the memory.
Hard disk boot: the boot code is written into the img file or sector 63 of the USB flash disk. The BIOS will read the code of sector 0 of the img file or USB flash disk (MBR code generated by the FAT32 format boot disk) to 7c00h, and then read the boot code from MBR to sector 63.
The boot code finally runs in 7c00h memory and is responsible for loading subsequent modules (lib16, lib32, lib64, protected mode and long mode).
Environment construction
Compiler nasm, running environment bochs
Start the experiment
1. Generate a blank image file
demo.img is a floppy disk image file, 1.44MB in size is enough, and nasm is used to generate it; c.img is a hard disk image file with a size of 10MB, which is generated through the bximage of bochs.
1.1 floppy disk image file
Assembly code demo.asm generates demo,img
;demo.asm
;2021.9.25

;Create a 1.44MB of floppy Image file, demo.img
;Build command: nasm demo.asm -o demo.img

;Fill 1 with 0.44MB of floppy space

times 0x168000-($-$$) db 0
After compiling nasm, a bin file - demo.img, a blank floppy disk image file, is generated.
1.2 hard disk image file
Using the bximage that comes with bochs, you can make either a floppy disk or a hard disk. cmd runs bximage
E:\learn-file\5-X86\code\L03\first>bximage
========================================================================
                                bximage
  Disk Image Creation / Conversion / Resize and Commit Tool for Bochs
         $Id: bximage.cc 13481 2018-03-30 21:04:04Z vruppert $
========================================================================
1. Create new floppy or hard disk image
2. Convert hard disk image to other format (mode)
3. Resize hard disk image
4. Commit 'undoable' redolog to base image
5. Disk image info
0. Quit
Please choose one [0] 1
Create image
Do you want to create a floppy disk image or a hard disk image?
Please type hd or fd. [hd] hd

What kind of image should I create?
Please type flat, sparse, growing, vpc or vmware4. [flat] flat

Choose the size of hard disk sectors.
Please type 512, 1024 or 4096. [512] 512

Enter the hard disk size in megabytes, between 10 and 8257535
[10] 10

What should be the name of the image?
[c.img] c.img

Creating hard disk image 'c.img' with CHS=20/16/63 (sector size = 512)

The following line should appear in your bochsrc:
  ata0-master: type=disk, path="c.img", mode=flat
(The line is stored in your windows clipboard, use CTRL-V to paste)

Press any key to continue
At this point, the 10MB blank hard disk image file has been created.
2. Set bochs configuration file
Find bochsrc-sample.txt in the installation directory of Bochs, copy it to your working directory and make changes:
**megs:32

romimage:file=$BXSHARE/BIOS-bochs-latest

vgaromimage:file=$BXSHARE/VGABIOS-lgpl-latest

#floppya:1_44=demo.img,status=inserted
ata0-master: type=disk, path="c.img", mode=flat, cylinders=2, heads=16, spt=63
#boot:floppy
boot:disk
log:bochsout.txt
mouse:enabled=0
keyboard: keymap=$BXSHARE/keymaps/x11-pc-de.map**
The above file contains two ways to start, because both floppy disk and hard disk can be started with bochs.
3. Compile source code
The structure tree code / directory of the source code contains all the source code and the required libraries.
inc defines all source code support header files, and defines some constants and macros;
lib library function implementation code, all source codes need to use these libraries;
common general code, including boot.asm, setup.asm, etc. required later;
L * * code of each chapter.
Compilation of source code
For asm programs, nasm is used to compile them. The compilation commands are as follows:
nasm setup.asm -o nasm.bin
//-o specify the file name of the output
4. Organization structure in image file
After compiling the source files into bin files, we need to write these bin files into the image file. How to determine the writing order involves how to organize the bin files in the image file.
Floppy disk image file demo.img
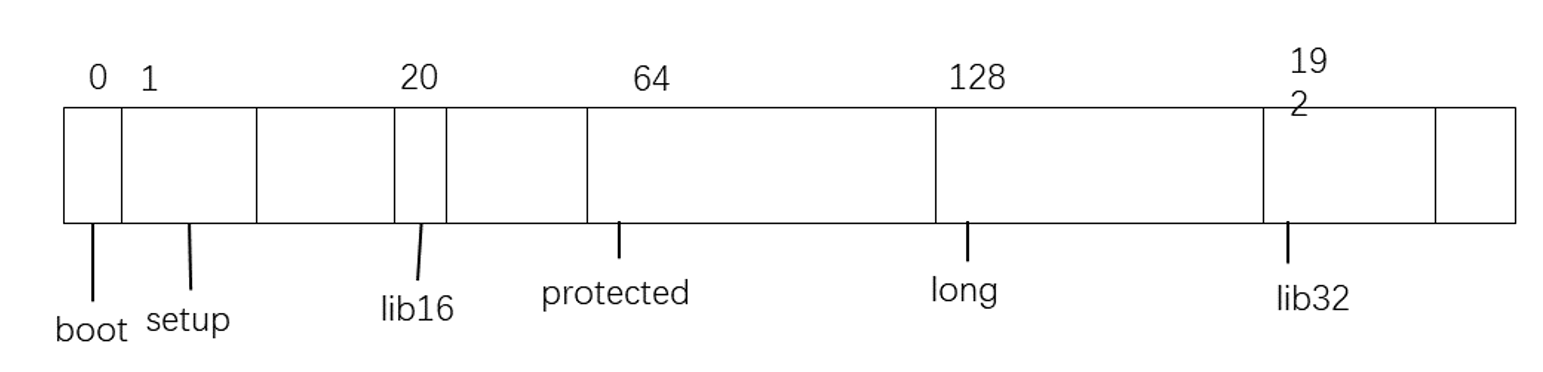
- boot: sector 0;
- setup: start from sector 1;
- lib16: start from sector 20;
- protected: start from sector 64;
- long: start from sector 128;
- lib32: start from sector 192;
Hard disk image file c.img
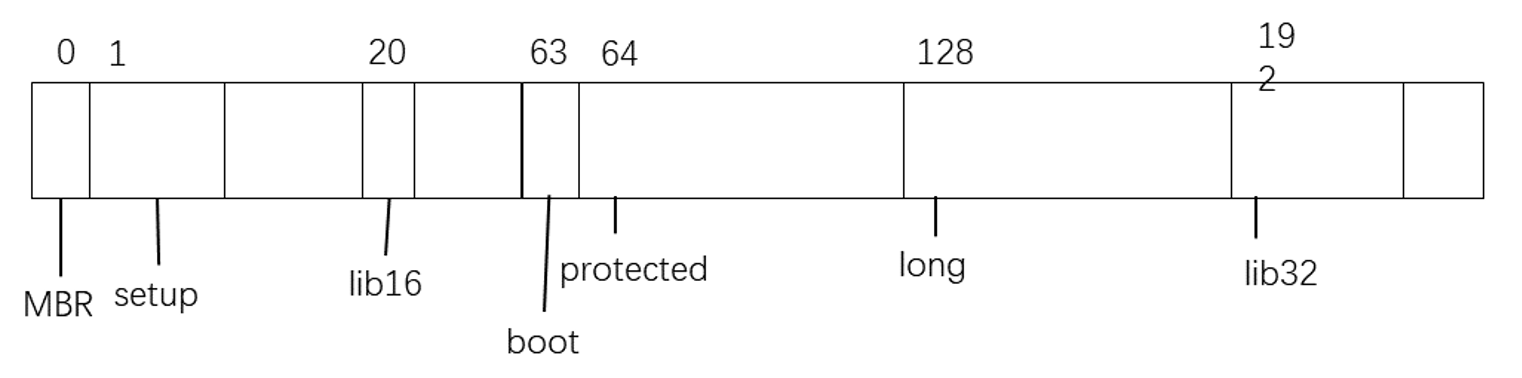
The boot code of hard disk and floppy disk is put into sector 63. Sector 0 is the MBR of FAT32 format file. The MBR loads the boot code of sector 63 into memory 0x7c00, and then the boot loads the contents after sector 20 to start the machine.
5. merge
After knowing the organization order of the bin file, you need to write the bin file to the image file once
- Hex uses the hex software Zhuge to write the bin file into the image file c.img;
- dd dd can copy / write / merge disks / files.
dd if=boot of=c.img count=2
if provides the input file, of provides the output file, and count provides the quantity (buy 12 bytes in block). This command is to write boot to the beginning of 0 of c.img (i.e. sector 0 of the image file).
dd if=boot of=c.img count=1 seek=1
Write to sector 1 through boot, and seek can be skipped. - The merge book comes with the configuration file config.txt in the current directory for writing.
# Input file, input file offset, output file, output file offset, number of written blocks (1 block = 512 bytes)
# **Each item is separated by a dash****
# example:
#
#Module name offset output file name offset count (1 count = 512 bytes)
#-------------------------------------------------
# boot,		0,	demo.img,	0,	1
# setup,	0,	demo.img,	1,	2
# init,		0,	demo.img,	3,	5
#
# intend:
# The boot module writes demo.img from block 0. The write position is block 0 and 1 block is written
# The setup module starts from block 0 to write demo.img. The writing position is block 1 and two blocks are written
# The init module starts from block 0 to write demo.img. The writing position is block 3 and five blocks are written
7. boot code
The main function of boot code is to display information and read sectors from disk to memory. The main codes are:
; boot.asm
; 2021.9.25

; floppy disk
; The compile command is: nasm boot.asm -o boot
; generate boot The module then writes demo.img(Sector 0 of disk image)(MBR)
; Hard disk
; nasm boot.asm -o boot -d uboot
; generate uboot The module then writes c.img(Sector 63 of disk image)

%include "..\inc\support.inc"
%include "..\inc\ports.inc"
        bits 16
;--------------------------------------
; now, the processor is real mode
;--------------------------------------
; Int 19h load sector 0 (MBR) get into BOOT_SEG paragraph, BOOT_SEG Defined as 0 x7c00
        org BOOT_SEG
start:
        cli
; enable a20 line
        FAST_A20_ENABLE
        sti
; set BOOT_SEG environment
        mov ax, cs
        mov ds, ax
        mov ss, ax
        mov es, ax
        mov sp, BOOT_SEG                        ; set up stack Bottom BOOT_SEG

        call clear_screen
        mov si, hello
        call print_message

        mov si, 20                              ; setup The module is in sector 20
        mov di, SETUP_SEG - 2
        call load_module                        ; use load_module() Read multiple sectors

        mov si, SETUP_SEG
        call print_message

        mov si, word [load_message_table + eax * 2]
        call print_message
next:
        jmp $
The above is the topic code of boot, which will call various processes defined in boot.asm, including:
- First, you need to judge whether the BIOS supports the int 13h function and whether to use the int 13h/ah=02h or int 13h/ah=42h extended function to read the disk.
- Use the extended int 13h function, int 13h/ah=42h, and use LBA;
- Using the old int 13h function, int 13h/ah=02h, using CHS, LBA needs to be converted to CHS(LBA_to_CHS() completes the conversion).
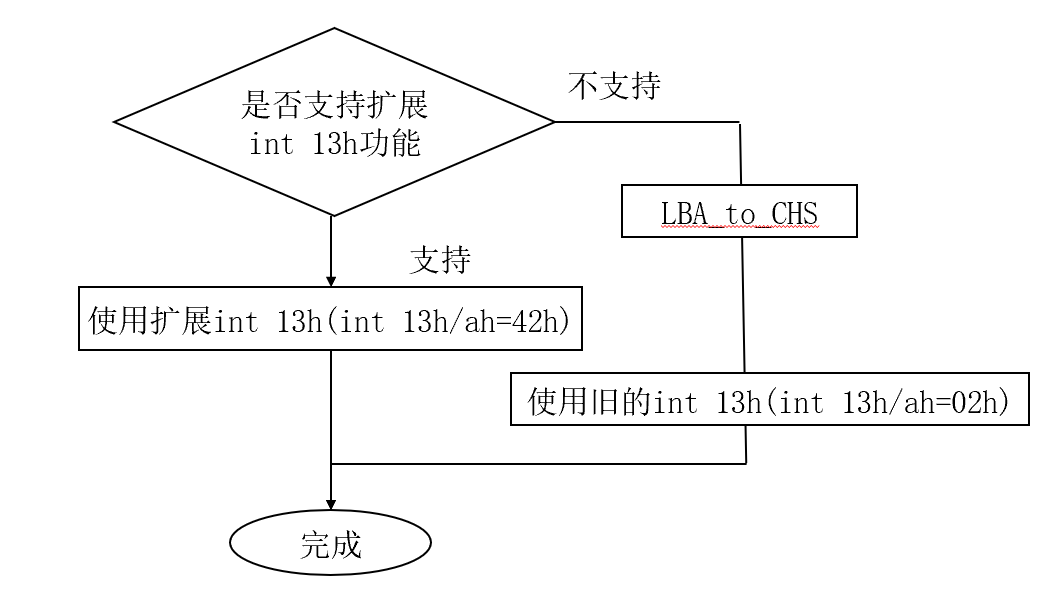
All examples in this article are in LBA mode. If the BIOS does not support the extension function of int 13h, you need to convert LBA to CHS.
Experiment, use floppy disk and hard disk to start
Hard disk
nasm -I..\ second\boot.asm -o second\boot -d UBOOT
floppy disk
nasm -I..\ second\boot.asm
merge write
merge
E:\learn-file\5-X86\code\L03\second>merge
entry #0:       uboot ---> c.img:       success
entry #1:       setup ---> c.img:       success
entry #2:       boot ---> demo.img:     success
entry #3:       setup ---> demo.img:    success
Start the command bochs -f bochsrc-sample.txt
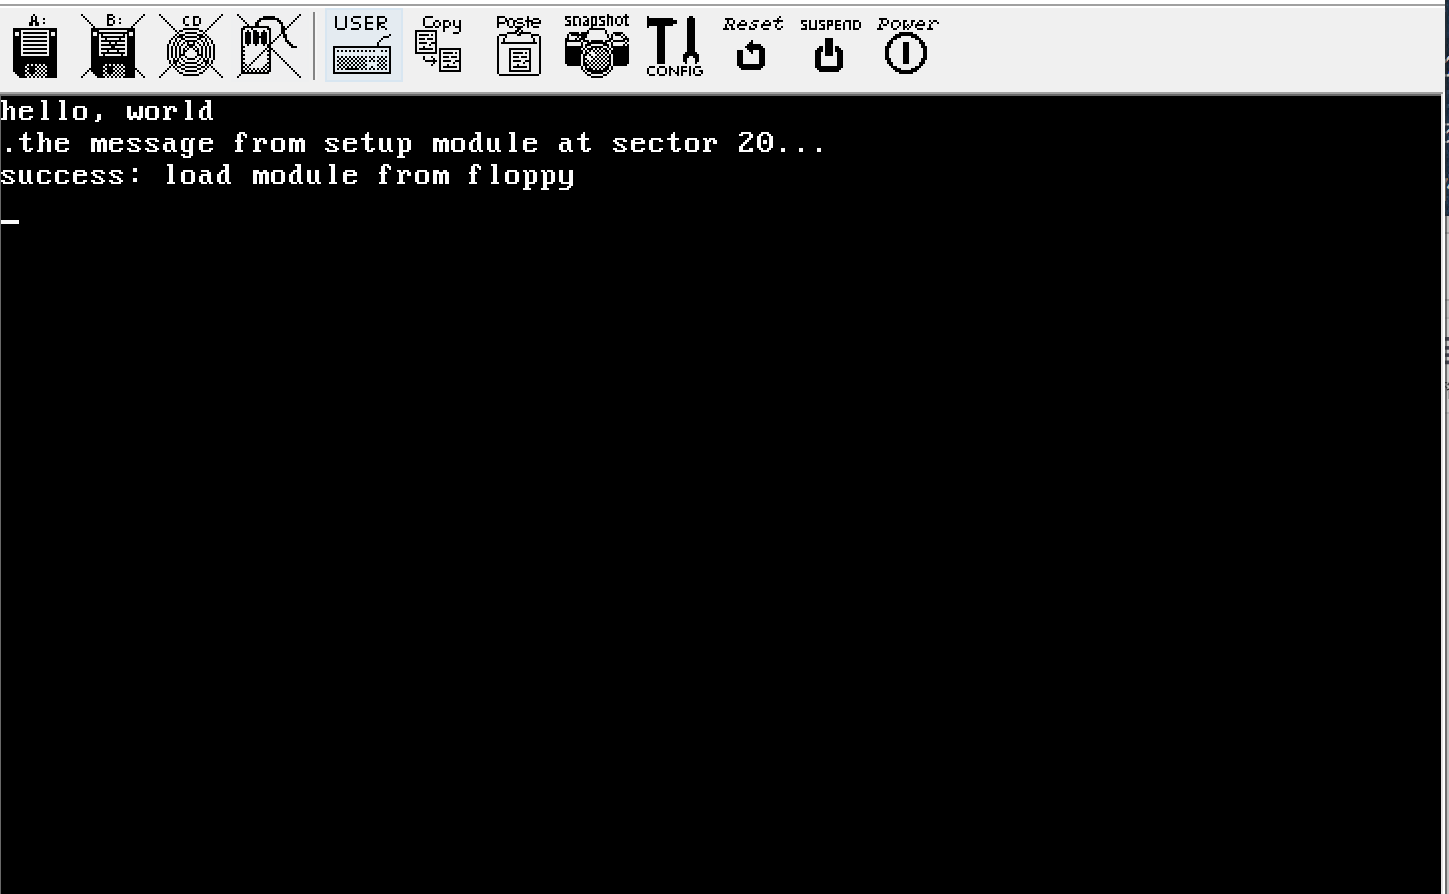
Floppy disk boot effect
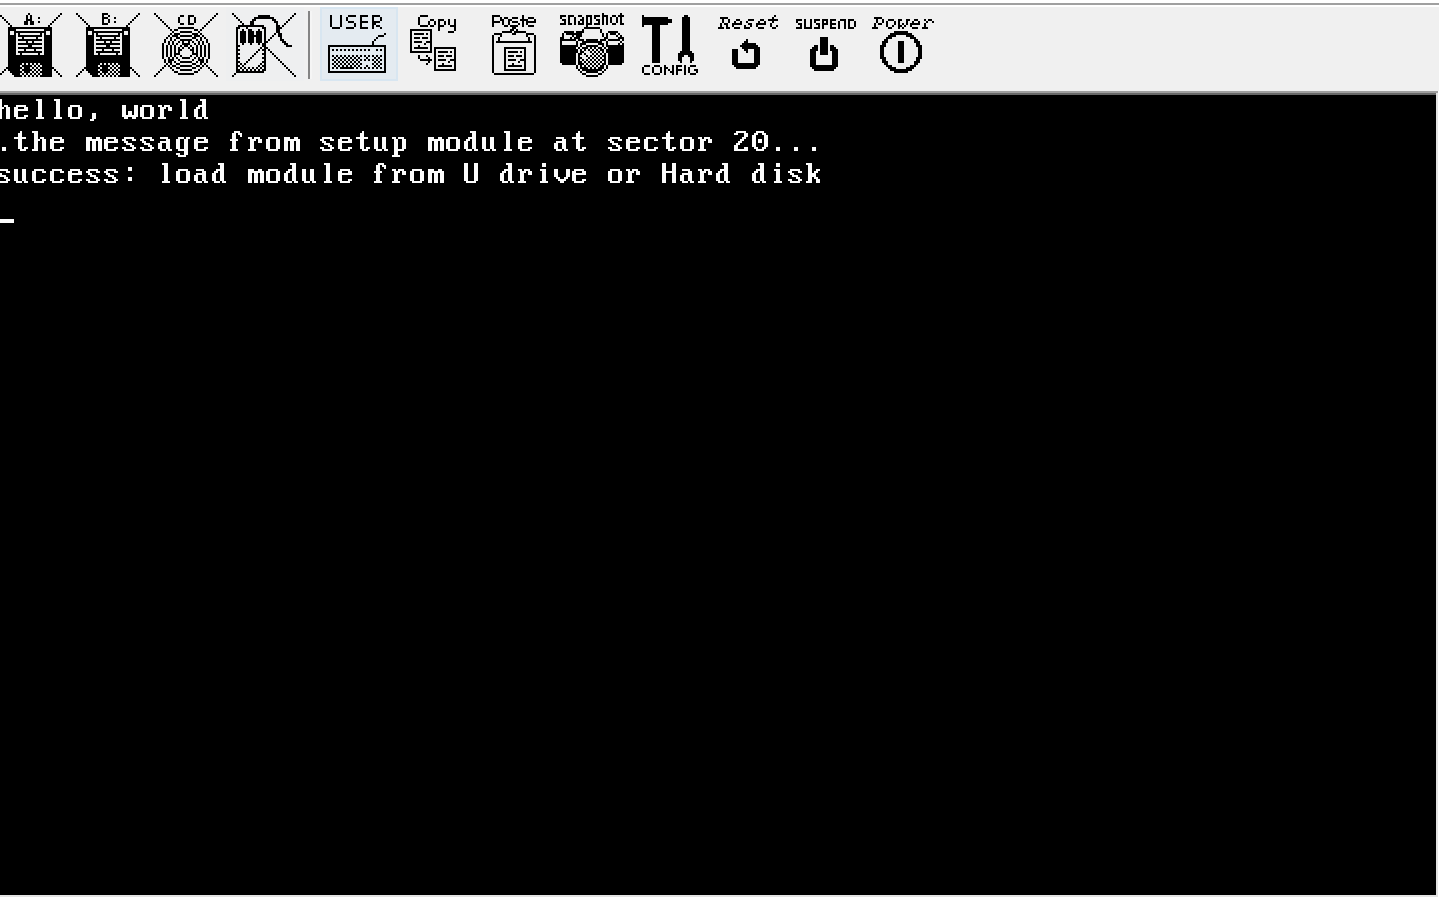
Hard disk boot effect
8. Summary
- boot.asm, boot, uboot boot source code
- setup.asm, setup source code
- bochsrc-sample.txt bochs startup configuration file
- Configuration file for conifg merge
- demo.img floppy disk image file
- c.img hard disk image file