Knowledge points:
- webpack with react environment
- Realize adaptation
- Configure dynamic routing
webpack with react environment
Installation dependency
- npm init -y
- cnpm install react react-dom @types/react @types/react-dom react-router-dom @types/react-router-dom antd redux react-redux @types/react-redux react-thunk redux-logger @types/redux-logger redux-promise @types/redux-promise connected-react-router classnames @types/classnames react-transition-group @types/react-transition-group express express-session body-parser cors axios redux-persist immer redux-immer --save
cnpm i webpack webpack-cli webpack-dev-server html-webpack-plugin babel-loader typescript @babel/core @babel/preset-env @babel/preset-react @babel/preset-typescript babel-plugin-import style-loader css-loader postcss-loader less-loader less autoprefixer px2rem-loader lib-flexible eslint @types/eslint cross-env --save-dev - tsc --init
{
  "compilerOptions": {
    //Module parsing rules
    "moduleResolution": "Node",
    //Output port
    "outDir": "./dist",
    //Mapping file
    "sourceMap": true,
    //Value types cannot be hidden through any
    "noImplicitAny": true,
    // Compilation target
    "target": "es5",
    //Module type
    "module": "ESNext",
    // The react mode will generate React.createElement, so there is no need to continue the conversion operation before use.
    "jsx": "react",
    // Module converter, which supports mutual reference between esmodule and commonjs
    "esModuleInterop": true
  },
  //Files to be converted
  "include": [
    "./src/**/*"
  ]
}
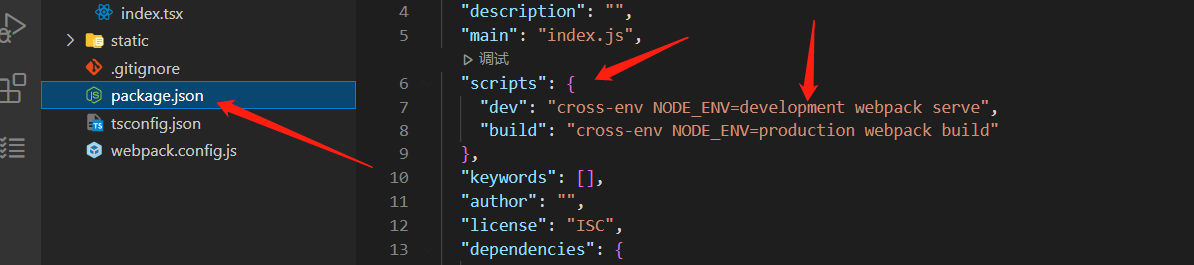
Change the scripts of package.json. NODE_ENV can assign a value to process.env. webpack serve will start webpack by default through the webpack.config.js file
Create the webpack.config.js file
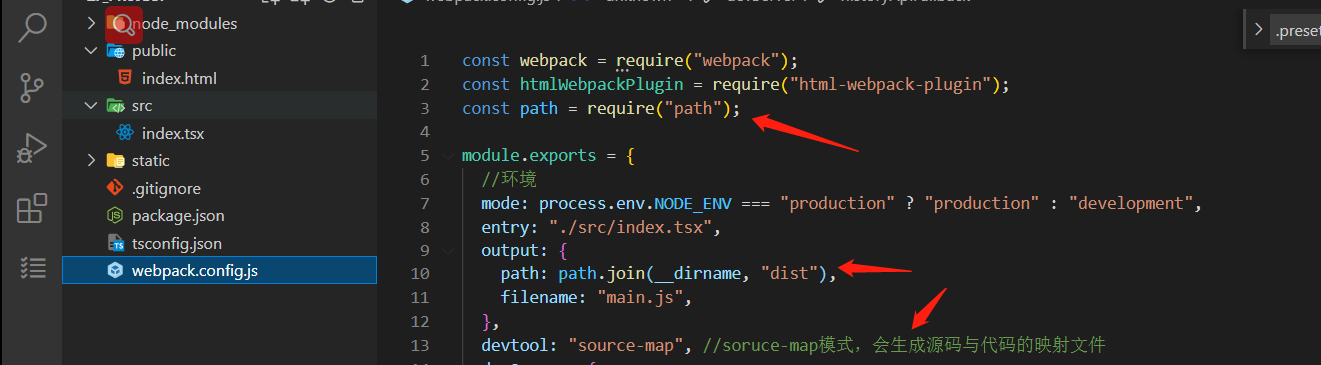
Configure Mode mode, entry, exit, and devtool.
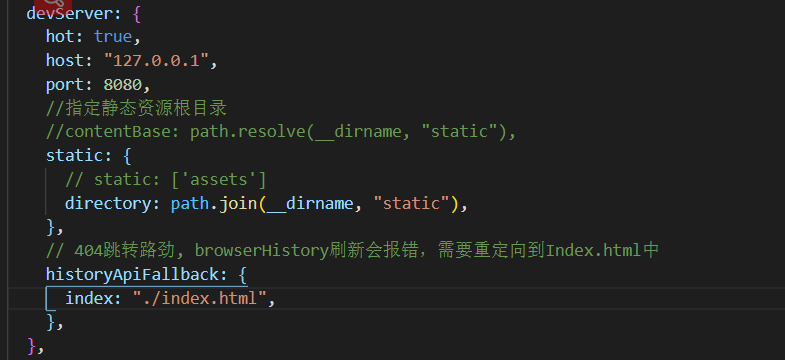
For the setting of devServer, note that the contentBase here has become static after webpack5. If it is not set, it will be taken from the public file by default.
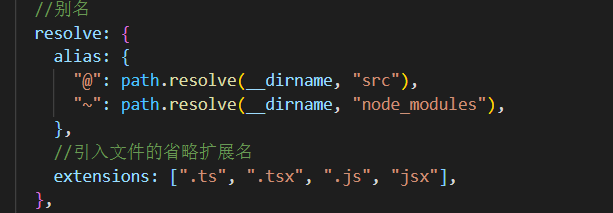
Configure aliases and extensions.
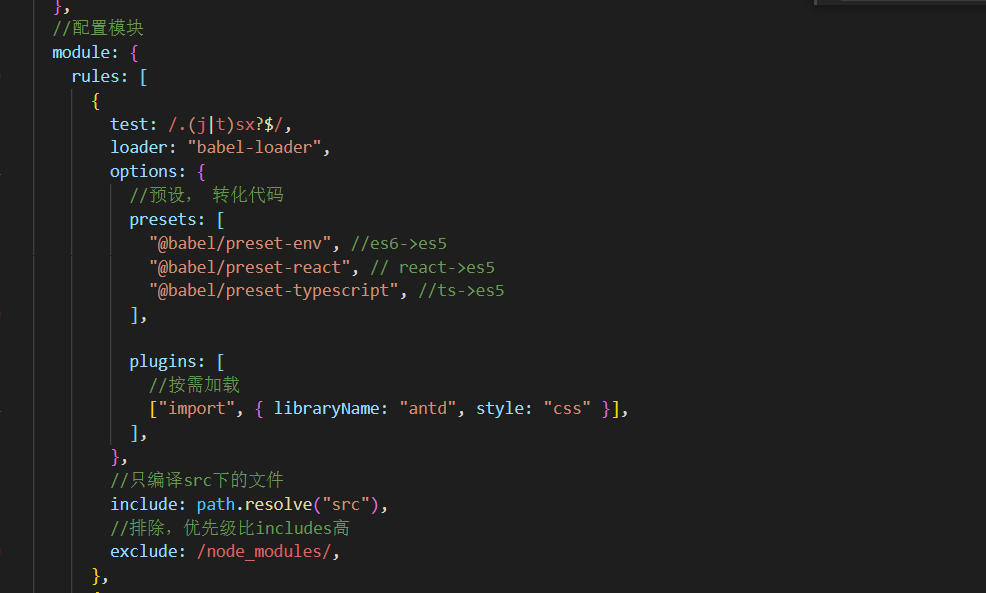
In the configuration module, first configure and convert react, and convert the code through Babel loader and some presets. By configuring the on-demand loading of antd through plugins, you can control where only the code is compiled.
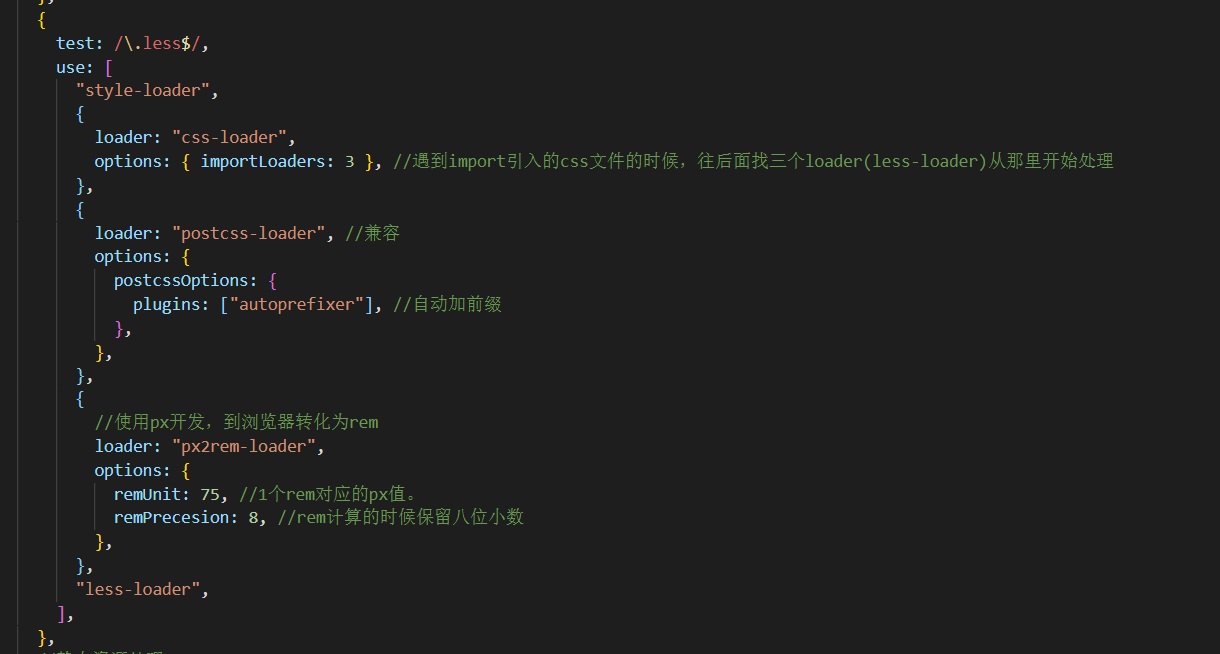
Less processing shows that less loader is transformed into css, then isomorphic px2rem loader is transformed into REM, then compatible through postcss loader, then processed through css loader, and finally rendered on the page through style loader.

For static resource processing, file loader and URL loader are not required after wbepack5. They can be configured through asset.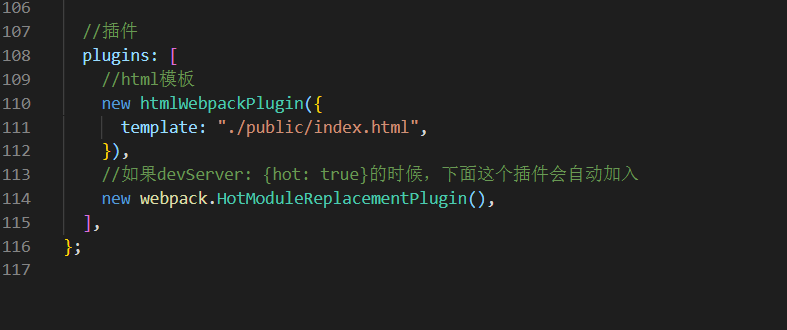
Plug in, such a simple development environment is good, through npm run dev

Adaptation
Then continue to watch px turn rem
- If there is draft paper, the appropriate conversion rules are:
The true width of the screen / the width of the draft paper is the ratio.
For example, the ratio of screen 500 and draft paper 500 is 1, and the thing of draft paper 10px is the size of screen 10px.
If the screen is 1000 and the draft paper is 500, then their ratio is 2. If the draft paper is 10px, the size of the screen is 20px, which must be multiplied by 2.
Plus our own defined multiples, such as 10. that
500/500 * 10 = 10px. Take it as the fontSize of the Html at that time, corresponding to 1rem.
Monitor the screen resize event when the real width is 1000
1rem corresponds to 1000/500 * 10 = 20px, which is exactly twice. The adaptation is completed, so the adaptation can be realized as long as you follow this rule and add the px2rem loader plug-in to convert all PX into rem. - If there is no draft paper, it is easier to use multiple directly. For example, if the real width is 100, the multiple is 10, and 1rem is 100/10 = 10px. After converting 10px to 1rem, when the screen is enlarged to 1000px, 1rem = 1000/10 = 100px, and the magnification is the same.
- Then we need to pay attention when developing
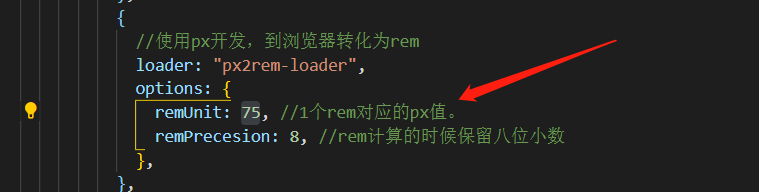
For example, in 750px development, the draft paper is 350px. According to the operation rules, 750/350*10 = 20px, 1rem = 20px, then 25px needs to be filled in here. In this way, if you write a 10px thing on the draft paper, you need to write 20px when developing. This will be converted normally.
import { useEffect } from "react";

class Px2Rem {
  pWidth = 1285; //Draft width
  cWidth = 1285; //Screen width
  pRem = 100; //Conversion multiple
  constructor(pWidth: number, pRem: number) {
    this.pWidth = pWidth;
    this.pRem = pRem;
  }
  setRem = (): void => {
    const html = document.getElementsByTagName("html")[0];
    const realCwidth =
      document.body.clientWidth || document.documentElement.clientWidth; //Get true width
    this.cWidth = realCwidth > 750 ? 750 : realCwidth < 350 ? 350 : realCwidth;
    //For conversion, the rule is true width / width of draft paper * multiple = 1rem
    // For example, when the grass paper is 500px and the real width is 500px, 10px is 20px when the real width is 1000px, and their multiple is 1000 / 500 = 2
    // pRem is a multiple, which is convenient for calculation. For example, when the real width is 10 times 500px, 100px will be changed to 10rem, while when it is 1000px, 10rem = 10* 1000/500*10 = 200px, which is just 2 times
    html.style.fontSize = (this.cWidth / this.pWidth) * this.pRem + "px";
  };
  getRemToPx = (rem: number): number => {
    return (this.cWidth / this.pWidth) * this.pRem * rem;
  };
}

//Draft width 350
export const px2Rem = new Px2Rem(750, 10);

const setRem = () => {
  px2Rem.setRem();
};

export const useSetRem = () => {
  useEffect(() => {
    //componentDidMount
    setRem(); //initialization
    window.addEventListener("resize", setRem);
    return () => {
      //componentWillUnMount
      window.removeEventListener("resize", setRem);
    };
  }, []);
};
route:
Use the sixth version of react router dom
characteristic
1 useHistory => useNavigate
2. The component of route becomes element
3. Add useRoutes
4 Navigate instead of Redirect
5 switch becomes Routes
6. Route supports nesting
7. Use the router view of the Outlet similar to vue
. . . .
See the official website for details.
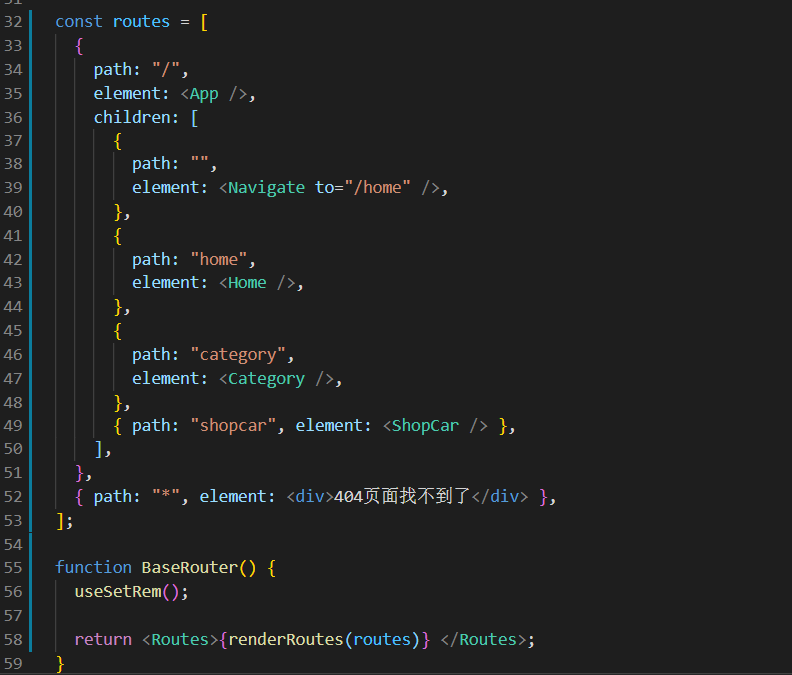
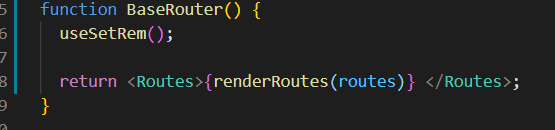
useRoutes is not used here, because 6.0.2 seems to have an endless loop bug when used with outlets. Therefore, we still use our own encapsulated functions for dynamic configuration. As above,
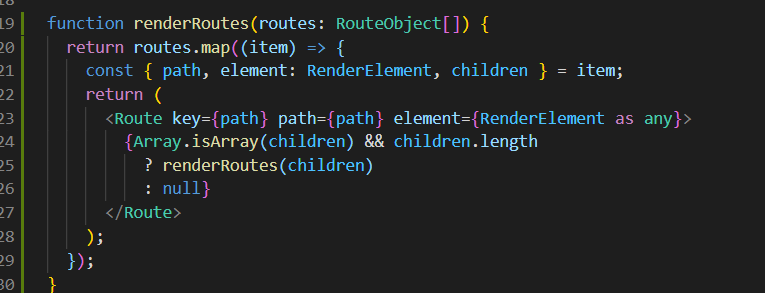
Use this to render the routes we write into routes. The advantage of v6 is that routes can be nested, as long as you use outlets. as
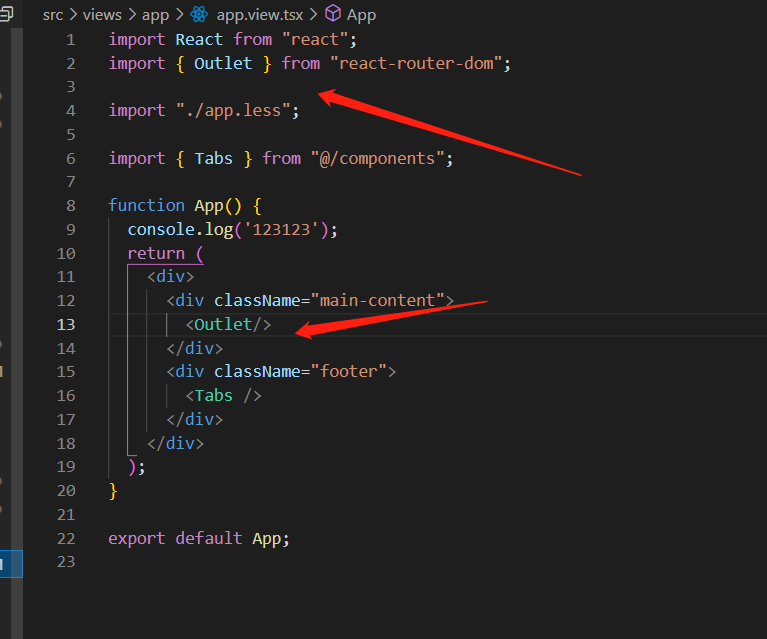
The three components under the app will be rendered here in the Outlet.