Simple voting DApp
Next, we will start to make a DApp. Although it is a very simple voting application, it will contain a complete workflow and interaction page. The main steps to build this application are as follows:
- We first install an analog blockchain called ganache, which can let our program run in the development environment.
- Write a contract and deploy it to ganache.
- Then we will interact with ganache through the command line and web page.
The way we communicate with blockchain is through RPC (Remote Procedure Call). Web3js is a JavaScript library, which abstracts all RPC calls so that you can interact with blockchain through JavaScript. Another advantage is that web3js allows you to build great web applications using your favorite JavaScript framework.
Development preparation Linux
Here is the Linux based installation guide. This requires us to install nodejs and npm in advance, and then use npm to install Ganache cli, web3 and solc. Then we can proceed to the next step of the project.
mkdir simple_voting_dapp
cd simple_voting_dapp
npm init
npm install ganache-cli web3@0.20.1 solc
node_modules/.bin/ganache-cli
If the installation is successful, run the command node_modules /. Bin / Ganache cli, and you should be able to see the output shown in the figure below.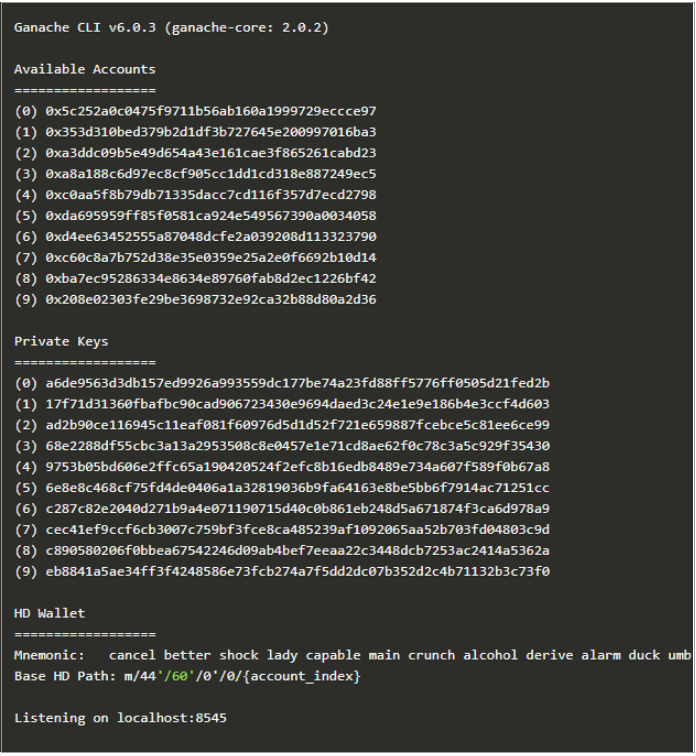
To facilitate testing, ganache will create 10 accounts by default, each with 100 ethers.. You need to use one of these accounts to create transactions, send and receive ethers.
Of course, you can also install the GUI version of Ganache instead of the command line version. Download the GUI version here: http://truffleframework.com/ganache/
Solidity contract
We will write a contract called voiting, which has the following contents:
- A constructor to initialize some candidates.
- A method for voting (add 1 to the number of votes)
- A method to return the total number of votes obtained by the candidate
When you deploy the contract to the blockchain, you call the constructor and only once. Unlike in the web world, each time you deploy code, it will cover the old code. The contracts deployed on the blockchain cannot be changed. That is to say, if you update the contracts and deploy them again, the old contracts will still exist on the blockchain, and the data will still exist. The new deployment will create a new instance of the contract.
Code and interpretation
pragma solidity ^ 0.4 .22;
contract Voting {
	mapping(bytes32 => uint8) public votesReceived;
	bytes32[] public candidateList;
	constructor(bytes32[] candidateNames) public {
		candidateList = candidateNames;
	}

	function totalVotesFor(bytes32 candidate) view public
	returns(uint8) {
		require(validCandidate(candidate));
		return votesReceived[candidate];
	}

	function voteForCandidate(bytes32 candidate) public {
		require(validCandidate(candidate));
		votesReceived[candidate] += 1;
	}

	function validCandidate(bytes32 candidate) view public
	returns(bool) {
		for (uint i = 0; i < candidateList.length; i++) {
			if (candidateList[i] == candidate) {
				return true;
			}
		}
		return false;
	}
}
We must specify which version of compiler the code will compile
Line 3. mapping is equivalent to an associative array or dictionary, and is a key value pair. The key for mapping votesReceived is the name of the candidate and is of type bytes32. The value of mapping is an unassigned integer and stores the number of votes.
Line 4. In many programming languages (for example, dictionaries in java and python < hashtable inherits from dictionary >), all candidate names can be obtained only through votesReceived.keys. However, there is no such method in solidity, so we have to manage a candidate array, candidelist, separately.
Note that votesReceived[key] has a default value of 0, so you don't need to initialize it to 0, just add 1.
You will also notice that each function has a visibility specifier (such as public in this case). This means that functions can be called from outside the contract. If you don't want anyone else to call this function, you can make it private. If you do not specify visibility, the compiler throws a warning. Recently, the solidity compiler has made some improvements. If the user forgets to mark the private function, the compiler will catch this problem.
You will also see a modifier view on some functions. It is often used to tell the compiler that a function is read-only (that is, when called, the blockchain state does not update).
Next, we will use the solc library installed in the previous section to compile the code. If you remember, we mentioned before that web3js is a library that allows you to interact with blockchain through RPC. We will use this library to deploy the contract in the node console and interact with the blockchain.
Compilation contract
In the node console> Web3 = require('web3')
> web3 = new Web3(new
Web3.providers.HttpProvider("http://localhost:8545"));
> web3.eth.accounts
['0x5c252a0c0475f9711b56ab160a1999729eccce97'
'0x353d310bed379b2d1df3b727645e200997016ba3']
> code = fs.readFileSync('Voting.sol').toString()
> solc = require('solc')
> compiledCode = solc.compile(code)
First, run the node in the terminal to enter the node console, initialize the web3 object, and query the blockchain to obtain all accounts.
Make sure ganache is running in another window at the same time
To compile the contract, first load the code from voing.sol and bind it to a variable of type string, then compile the contract as shown on the right.
When you successfully compile the contract and print the compiledCode object (you can see the content by entering compiledCode directly in the node console), you will notice that there are two important fields, which are very important. You must understand:
- Compiledcode. Contracts [': voing']. Bytecode: This is the bytecode after voing.sol is compiled. It is also the code to be deployed to the blockchain.
- Compiledcode. Contracts [': voing']. Interface: This is the interface or template of a contract (called ABI definition), which tells the user what methods are available in this contract. In the future, whenever you want to interact with any contract, you will need this ABI definition. You can see more about ABI here. In future projects, we will use the truffle framework to manage compilation and interaction with blockchain.
However, before using any framework, it's helpful to have an in-depth understanding of how it works, because the framework abstracts that out.
Deployment contract
Let's continue with the course and now deploy the contract to the blockchain. To do this, you must first create a contract object, the VotingContract, by passing in the abi definition. This object is then used to deploy and initialize the contract on the chain.
Execute this in your node console:
> abiDefinition =
JSON.parse(compiledCode.contracts[':Voting'].interface)
> VotingContract = web3.eth.contract(abiDefinition)
> byteCode = compiledCode.contracts[':Voting'].bytecode
> deployedContract =
VotingContract.new(['Alice','Bob','Cary'],{data: byteCode, from:
web3.eth.accounts[0], gas: 4700000})
> deployedContract.address
'0x0396d2b97871144f75ba9a9c8ae12bf6c019f610'
// Your address will be different
> contractInstance = VotingContract.at(deployedContract.address)
VotingContract.new deploy the contract to the blockchain.
The first parameter is an array of candidates who will compete for the election, which is easy to understand. Let's look at what's in the second parameter:
- data: This is the bytecode that we compiled and deployed to the blockchain.
- From: blockchain must track who deployed the contract. In this case, we are only the first account returned from the call to web3.eth.accounts as the account to deploy the contract. Remember, web3.eth.accounts returns an array of 10 test accounts created by ganache. Before you can trade, you must have the account and unlock it. When you create an account, you will be asked to enter a password, which is what you use to prove your ownership of the account. In the next section, we will give a detailed introduction. For convenience, Ganache will unlock 10 accounts by default.
- Gas: it costs money to interact with blockchain. This money is used to pay the miners because they help you include the code in the blockchain. You have to specify how much money you are willing to spend to include your code in the blockchain, which is to set the value of "gas". The ETH balance in your "from" account will be used to purchase gas. The price of gas is set by the network. We have deployed the contract and have a contract instance (variable contractInstance), which we can use to interact with the contract.
There are thousands of contracts on the blockchain. So, how do you identify that your contract is on the chain? The answer is to find the address of the deployed contract. deployedContract.address. When you need to interact with the contract, you need the deployment address and the abi definition we talked about earlier.
Communication through console
In your node console: > contractInstance.totalVotesFor.call('Rama') { [String: '0'] s: 1, e: 0, c: [ 0 ] } > contractInstance.voteForCandidate('Rama', {from:
web3.eth.accounts[0]})
'0xdedc7ae544c3dde74ab5a0b07422c5a51b5240603d31074f5b75c0ebc78
6bf53'
> contractInstance.voteForCandidate('Rama', {from:
web3.eth.accounts[0]})
'0x02c054d238038d68b65d55770fabfca592a5cf6590229ab91bbe7cd72da
46de9'
> contractInstance.voteForCandidate('Rama', {from:
web3.eth.accounts[0]})
'0x3da069a09577514f2baaa11bc3015a16edf26aad28dffbcd126bde2e71f
2b76f'
>
contractInstance.totalVotesFor.call('Rama').toLocaleString()'3
'
{[String: '0'] s: 1, e: 0, C: [0]} is the scientific notation of the number 0. The value returned here is a bigNumber object, and its. toNumber() method can be used to display the number:
contractInstance.totalVotesFor.call('Alice').toNumber()
	web3.fromWei(web3.eth.getBalance(web3.eth.accounts[1]).toNumber(),'ether'
)
BigNumber values are stored in the form of symbols, exponents, and coefficients in decimal floating-point format. s is the sign sign sign, i.e. positive and negative; E is the exponent index, which indicates that there are several zeros after the highest bit; c is the coefficient of coefficient, which is the actual effective number; the input parameter of BigNumber constructor is limited to 14 bits, so the coefficient represents an array truncated from the back to the front, once for 14 bits. Vote for the candidates and view the number of votes to continue the course, call the voteForCandidate and totalVotesFor methods in your node console and view the results.
Each time you vote for a candidate, you get a transaction id: for example: '0xdedc7ae544c3dde74ab5a0b0742c5a51b5240603d31074f5b75c0ebc786bf53'. The transaction id is the evidence of the transaction. You can reference the transaction at any time in the future. The deal is immutable. For blockchain like Ethereum, immutability is one of its main characteristics. In the next chapter, we will use this feature to build applications.
Webpage interaction
So far, most of the work has been completed. What we need to do is to create a simple HTML with the name of the candidate and call the voting command (we have tried it in the nodejs console). You can find HTML code and js code on the right. Put them in the chapter1 directory and open index.html in the browser.
index.html
<!DOCTYPE html>
<html>
	<head>
		<title>
			Voting DApp
		</title>
		<link href='https://maxcdn.bootstrapcdn.com/bootstrap/3.3.7/css/boot
		strap.min.css' rel='stylesheet' type='text/css'>
	</head>
	<body class="container">
		<h1>
			A Simple Voting Application
		</h1>
		<div class="table-responsive">
			<table class="table table-bordered">
				<thead>
					<tr>
						<th>
							Candidate
						</th>
						<th>
							Votes
						</th>
					</tr>
				</thead>
				<tbody>
					<tr>
						<td>
							Alice
						</td>
						<td id="candidate-1">
						</td>
					</tr>
					<tr>
						<td>
							Bob
						</td>
						<td id="candidate-2">
						</td>
					</tr>
					<tr>
						<td>
							Cary
						</td>
						<td id="candidate-3">
						</td>
					</tr>
				</tbody>
			</table>
		</div>
		<input type="text" id="candidate" />
		<a href="#" onclick="voteForCandidate()" class="btn
		btn-primary">
			Vote
		</a>
	</body>
	<script src="https://cdn.jsdelivr.net/gh/ethereum/web3.js/dist/web3.mi
	n.js">
	</script>
	<script src="https://code.jquery.com/jquery-3.1.1.slim.min.js">
	</script>
	<script src="./index.js">
	</script>

</html>
Tips:
<head>Of use link Form introduction bootstrap Of css Type library, following container,table-responsive etc. class All come from bootstrap<th>The header cell, table cell and the cell after the candidate's name are the number of votes id Differentiate for writing, after js The corresponding relationship is dead in Chinese<input>An input box, defining id Convenient in js Value in<a>Hyperlinked keys btn,href="#”To jump to this page, i.e. not jump; onclick points to the method in js. To simplify the project, we have hard coded the candidate name. If you like, you can adjust the code to dynamically select candidates.
index.js
web3 = new Web3(new Web3.providers.HttpProvider("http://localhost:8545"));
abi = JSON.parse('[{"constant":false,...}]') VotingContract = web3.eth.contract(abi);
contractInstance = VotingContract.at('0x329f5c190380ebcf640a90d06eb1db2d68503a53');
candidates = {
	"Alice": "candidate-1",
	"Bob": "candidate-2",
	"Cary": "candidate-3"
};
function voteForCandidate(candidate) {
	candidateName = $("#candidate").val();
	try {
		contractInstance.voteForCandidate(candidateName, {
			from: web3.eth.accounts[0]
		},
		function() {
			let div_id = candidates[candidateName];
			$("#" + div_id).html(contractInstance.totalVotesFor.call(candidateName).toString());
		});
	} catch(err) {}
}
$(document).ready(function() {
	candidateNames = Object.keys(candidates);
	for (var i = 0; i < candidateNames.length; i++) {
		let name = candidateNames[i];
		let val = contractInstance.totalVotesFor.call(name).toString() $("#" + candidates[name]).html(val);
	}
});
On line 4, replace the contract address in the code with your own. The contract address is the previous deployedContract.address
If all goes well, you should be able to enter the name of the candidate in the text box, and then the number of votes should be increased by 1.
Note: due to network reasons, web3.js may not be available and can be downloaded to local import.
If you can see the page, vote for the candidates, and see the number of votes increase, you have successfully created the first contract. Congratulations! All votes will be saved on the blockchain and are immutable. Anyone can independently verify how many votes each candidate gets. Of course, all our work is done in a simulated block chain. In the next lesson, we will deploy this contract to the real public chain. In Part 2, we will deploy contracts to the public chain called Ropsten testnet, and learn how to use the truffle framework to build contracts and manage dapp s.
To summarize, here's what you've done so far:
- By installing node, npm and ganache, you have already configured the development environment.
- You code a simple voting contract, compile it and deploy it on the blockchain.
- You interact with web pages and contracts through the nodejs console.