I run the tool Xshell
1, Install pagoda panel
Skip directly installed
yum install -y wget && wget -O install.sh http://download.bt.cn/install/install_6.0.sh && sh install.sh 6dca892c
Enter the command in the Xshell 6 command window and press enter. The installation will be successful in 10 minutes
Note: remember to register after installation
Website address, user name and password
AC group 178019303
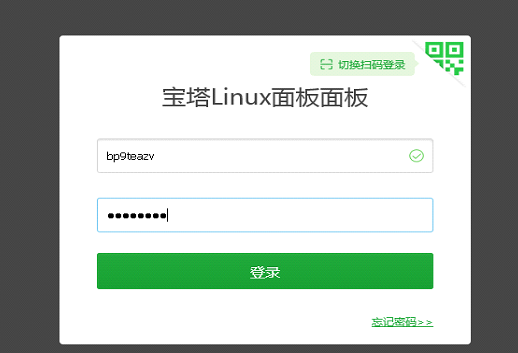
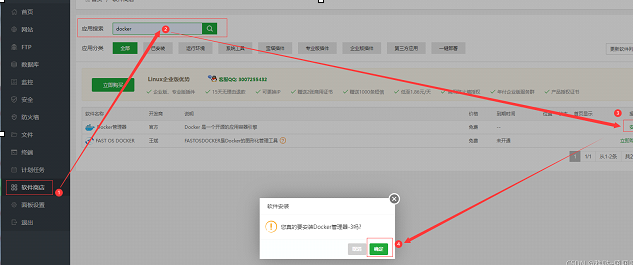
Log in to the pagoda panel and install the DOCKER manager
Install docker container
------------------------------------------------------------------------
2, Setting environment variables
Set direct skip
Open the etc/profile file with final shell or other sftp software, copy the following contents and paste them into the last line of the profile file
export GO111MODULE=on
export GOPROXY=https://goproxy.cn
export GOROOT=/usr/local/go
export GOPATH=/usr/local/go/path
export PATH=$PATH:$GOROOT/bin:$GOPATH/bin
- After saving, return to the SSH tool and enter the command
source /etc/profile ##Read and execute the commands in the profile in the current bash environment.
3, Install GO
If GO is not installed, enter the following code
rm -rf /usr/local/go && cd /usr/local && wget https://golang.google.cn/dl/go1.17.linux-amd64.tar.gz -O go1.17.linux-amd64.tar.gz && tar -xvzf go1.17.linux-amd64.tar.gz && source /etc/profile && yum install -y git && git clone https://ghproxy.com/https://github.com/Mrs4s/go-cqhttp.git /root/cqhttp && cd /root && chmod 777 cqhttp && cd /root/cqhttp && go build && ./go-cqhttp
If you have installed GO, run the following code
yum install -y git && git clone https://ghproxy.com/https://github.com/Mrs4s/go-cqhttp.git /root/cqhttp && cd /root && chmod 777 cqhttp && cd /root/cqhttp && go build && ./go-cqhttp
Select 12 after operation
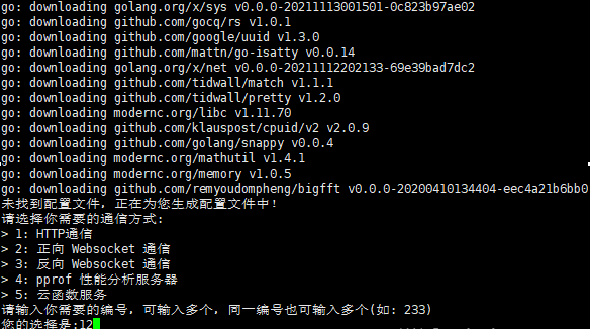
Automatically generate the config.yml file in the go cqhttp directory. Double click to modify the config.yml file.
The fourth line uin has 123456 by default, which can be deleted directly
The following modified can be applied directly
# Go cqhttp default profile

account: # Account related
  uin: # QQ account
  password: '' # When the password is empty, use code scanning to log in
  encrypt: false  # Turn on password encryption
  status: 0      # Online status please refer to https://docs.go-cqhttp.org/guide/config.html # online status
  relogin: # Reconnection settings
    delay: 3   # First reconnection delay, in seconds
    interval: 3   # Reconnection interval
    max-times: 0  # Maximum number of reconnections, 0 is unlimited

  # Whether to use the new address issued by the server for reconnection
  # Note that this setting may result in worse connectivity on overseas servers
  use-sso-address: true

heartbeat:
  # Heartbeat rate in seconds
  # -1 is to turn off heartbeat
  interval: 5

message:
  # Report data type
  # Optional: string,array
  post-format: string
  # Whether to ignore the invalid CQ code. If it is false, it will be sent as is
  ignore-invalid-cqcode: false
  # Whether to force fragment sending message
  # Sharding will bring faster speed
  # But there will be some problems with compatibility
  force-fragment: false
  # Whether to send url fragment
  fix-url: false
  # Download pictures and other requests network agent
  proxy-rewrite: ''
  # Whether to report your own message
  report-self-message: false
  # Remove the At attached to the Reply of the server
  remove-reply-at: false
  # Attach more information for Reply
  extra-reply-data: false
  # Skip Mime scan, ignoring error data
  skip-mime-scan: false

output:
  # Log level trace,debug,info,warn,error
  log-level: warn
  # The log aging unit is day. Logs before this time will be automatically deleted. Setting to 0 means permanent retention
  log-aging: 15
  # Whether to force the creation of a new file to store logs at each startup. If false, the log file created at the last startup will be renewed
  log-force-new: true
  # Enable DEBUG
  debug: false # Turn on debugging mode

# Default middleware anchor
default-middlewares: &default
  # The access key is strongly recommended to be set on the server of the public network
  access-token: ''
  # Event filter file directory
  filter: ''
  # API speed limit setting
  # This setting takes effect globally
  # The original cqhttp enabled rate_limit suffix, but there is basically no plug-in adaptation
  # At present, the speed limit is set as token bucket algorithm, please refer to:
  # https://baike.baidu.com/item/%E4%BB%A4%E7%89%8C%E6%A1%B6%E7%AE%97%E6%B3%95/6597000?fr=aladdin
  rate-limit:
    enabled: false # Whether to enable speed limit
    frequency: 1  # Token reply frequency in seconds
    bucket: 1     # Token bucket size

database: # Database related settings
  leveldb:
    # Enable built-in leveldb database
    # Enabling it will increase 10-20MB of memory and a certain amount of disk space
    # Close will not be able to use the recall reply_ MSG and other context sensitive functions
    enable: true

# Connection service list
servers:
  # Add method. You can add more than one connection method. Please refer to the document for specific configuration instructions
  #- http: # http communication
  #- ws:   # Forward Websocket
  #- ws-reverse: # Reverse Websocket
  #- pprof: #Performance analysis server
  # HTTP communication settings
  - http:
      # Server listening address
      host: 0.0.0.0
      # Server listening port
      port: 8500
  # Forward WS settings
  - ws:
      # Forward WS server listening address
      host: 0.0.0.0
      # Forward WS server listening port
      port: 8501
------------------------------------------------------------------------
The host part is directly changed to 0.0.0.0
The port below http is 8500,
The port below ws recommends 8501. The port number can be modified according to its own situation, but do not conflict with other programs. After the modification is saved, ssh tool will automatically upload the modified file.
Return to the Xshell and press CTRL+C to end
Then run
./go-cqhttp
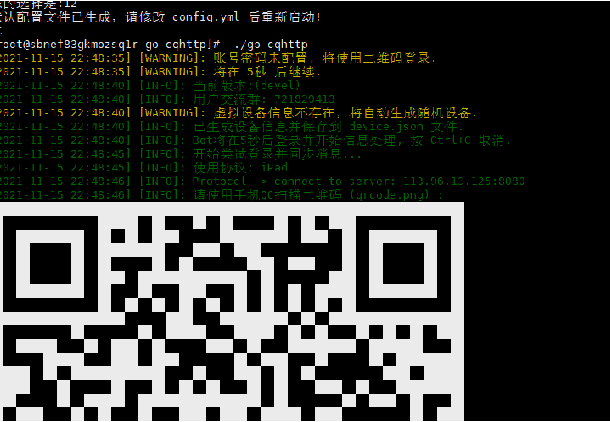
It will output QR code and scan the login robot QQ.
You need to replace the robot QQ number, delete the session.token file, repeat the above steps, and then scan the code again to log in.
Next, press CTRL+C to return.
function
./go-cqhttp -d #Background operation
---------------------------------------------------------------------------------
5, Pull BOT
-
docker pull asupc/qqbot && docker run --name qqbot1 -v /root/qqbot1/app:/app -p 5222:5010 asupc/qqbot -restart:always
cd /root/qqbot1 && git clone https://ghproxy.com/https://github.com/asupc/qqbot-multi-platform.git app && docker restart qqbot1
Don't worry if prompted.

6, qqbot configuration
The port is 5010
Open ip+5010 in the background with a browser to configure (change the ip to your own) cloud service. You need to release the 5010 port number.
The database will be configured with MySQL. No, don't change it.
Enter the user name and password to submit.
Restart qqbot after submitting
docker restart qqbot1 #Restart command
Open again after restart http://ip:5010
Enter user name and password to log in
You need to modify the port and enter the docker-compose.yml file for re editing
Change 5010 to the qqbot background port you want to change
If you forget the password, you can go to / root/qqbot1/app/config to find the InstallConfig.xml file and open it to modify the account password
Or directly delete the InstallConfig.xml file and rerun the web address to reconfigure
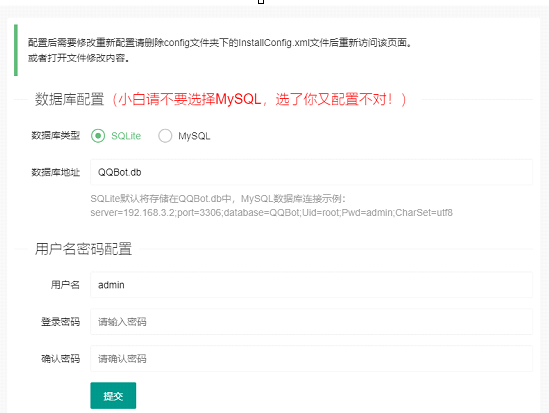
Just refer to the configuration method in the page (the page contains the configuration method of go cqhttp. If you run according to the above go cqhttp configuration, please ignore it. Just fill in the ip address and port number)
Then change the settings
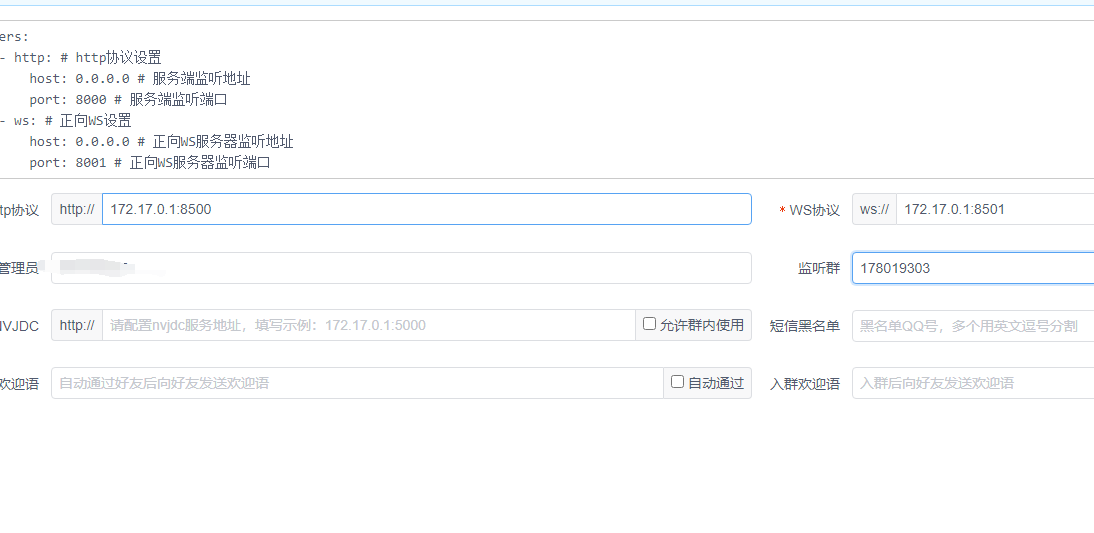
The general setting is
172.17.0.1:8500
172.17.0.1:8501
Save after setting parameters
HTTP protocol is filled in http://172.17.0.1:8500
ws protocol: ws://172.17.0.1:8501
Then fill in an administrator qq account. It can't be the same as robot qq.
Fill in and save
The configuration is correct. Your administrator qq will receive the following message
7, qqbot update
Execute the following command.
docker stop qqbot1 && cd /root/qqbot1/app && git pull && docker start qqbot1
AC group 178019303