Preface: Before that, we explained ----- Integration and Testing of Three Frameworks of this Project (Spring+SpringMVC+Mybatis) , we have a certain understanding of the integration of the three major frameworks today, so today we are talking about the implementation of the store management module, mainly explaining the front and back-end two modules, if you have any problems, you can leave a message to inform!
Rear part
1. Create a Door entity class to encapsulate all store information--skip it if you've created it before
package com.it.pojo;

/**
 * Store Information
 */
public class Door {
	private Integer id;	    //Store Number
	private String name;	//Store Name
	private String tel;	    //Store phone
	private String addr;	//Store Address

	//getter and setter methods
	public Integer getId() {
		return id;
	}
	public void setId(Integer id) {
		this.id = id;
	}
	public String getName() {
		return name;
	}
	public void setName(String name) {
		this.name = name;
	}
	public String getTel() {
		return tel;
	}
	public void setTel(String tel) {
		this.tel = tel;
	}
	public String getAddr() {
		return addr;
	}
	public void setAddr(String addr) {
		this.addr = addr;
	}
	//Override toString method
	@Override
	public String toString() {
		return "Door [id=" + id + ", name=" + name + ", tel=" + tel + ", addr=" + addr + "]";
	}
}
2. Create a mapping file for the Door entity class--DoorMapper.xml(resources/mybatis/mapper)
Configuration:
- 1. Query all store information
- 2. Delete store information based on id
- 3. Add store information
- 4. Query store information based on id
- 5. Modify store information based on id
If you are not familiar with the operation of the database, you can write it by me Database Details (including database installation/single/multiple tables, etc.) Understanding.
<?xml version="1.0" encoding="UTF-8"?>
<!DOCTYPE mapper
	PUBLIC "-//mybatis.org//DTD Mapper 3.0//EN"
	"http://mybatis.org/dtd/mybatis-3-mapper.dtd">
<!-- Mapping file for store table	namespace Value is the full path of the corresponding interface -->
<mapper namespace="com.it.mapper.DoorMapper">
	<!-- 1.Query all store information,
	       id Value is the name of the method in the corresponding interface
		   resultType Specify to which to encapsulate the results of the query pojo In object
	 -->
	<select id="findAll" resultType="com.it.pojo.Door">
		select * from tb_door
	</select>

	<!-- 2.according to id Delete store information -->
	<delete id="deleteById">
		delete from tb_door
		where id=#{id}
	</delete>

	<!-- 3.Add Store Information -->
	<insert id="addDoor">
		insert into tb_door
		values(#{id}, #{name}, #{tel}, #{addr})
	</insert>

	<!-- 4.according to id Query store information -->
	<select id="findById"
			resultType="com.it.pojo.Door">
		select * from tb_door
		where id=#{id}
	</select>

	<!-- 5.according to id Modify store information -->
	<update id="updateById">
		update tb_door set name=#{name},
		tel=#{tel}, addr=#{addr}
		where id=#{id}
	</update>

</mapper>
3. Code implementation of mapper (dao) layer
I am writing this project for beginners who are just beginning with SSM framework, so there are no nested or other complex SQL statements. So we can write it directly in the mapper layer, not in the xml file.
Let me give you an example:
Comment out this line of code in DoorMapper.xml first
	<!-- <select id="findAll" resultType="com.it.pojo.Door">
		select * from tb_door
	</select> -->
Add this line of code in DoorMapper.java:
/**
	 * Query all store information
	 */
	@Select("SELECT * FROM tb_door")
	public List<Door> findAll();
This approach is consistent with the approach in my project, and in my explanation I did not use @Select/@Insert/... to reference SQL statements.
DoorMapper.java from the original project is as follows:
Here you can also change the DoorMapper file as I've shown you
package com.it.mapper;

import java.util.List;
import com.it.pojo.Door;

/**
 * DoorMapper Interface
 * Declare ways to add, delete, and change store information
 * @author XINGGou
 */
public interface DoorMapper {

	/**
	 * 1.Query all store information
	 */
	public List<Door> findAll();

	/**
	 * 2.Delete store information based on id
	 * @param id
	 */
	public void deleteById(Integer id);

	/**
	 * 3.Add Store Information
	 * @param door
	 */
	public void addDoor(Door door);

	/**
	 * 4.Query store information based on id
	 * @param id
	 * @return
	 */
	public Door findById(Integer id);

	/**
	 * 5.Modify store information based on id
	 * @param door
	 */
	public void updateById(Door door);

}
4.service Layer Code Implementation
1 Create a DoorService interface and add a way to query all store information:
DoorService remembers that it is an interface, an interface, not a class
package com.it.service;

import java.util.List;
import com.it.pojo.Door;

public interface DoorService {

	/**
	 * Query all store information
	 */
	public List<Door> findAll();

	/**
	 * 2.Delete store information based on id
	 * @param id
	 */
	public void deleteById(Integer id);

	/**
	 * 3.Add Store Information
	 * @param door
	 */
	public void addDoor(Door door);

	/**
	 * 4.Query store information based on id
	 * @param id
	 * @return
	 */
	public Door findById(Integer id);

	/**
	 * 5.Modify store information based on id
	 * @param Door
	 * @return
	 */
	public void updateById(Door door);

}
2. Create an implementation class of DoorServiceImpl.java for the DoorServiceInterface, and implement the add-delete check method for the parent class interface
Many beginners here are in the hands of @Service and @Autowired
@Service is primarily used to create current objects for spring management and as a code identifier for the service layer
@Autowired is created by Spring as a mapper object and assigns values to attributes
package com.it.service;

import java.util.List;

import org.springframework.beans.factory.annotation.Autowired;
import org.springframework.stereotype.Service;

import com.it.mapper.DoorMapper;
import com.it.pojo.Door;
/**
 * @Service
 *    Role 1: Delegate creation of current object to spring management
 *    Role 2: Identify as business-tier code
 */
@Service
public class DoorServiceImpl implements DoorService{

	@Autowired
	private DoorMapper doorMapper;

	@Override
	public List<Door> findAll() {
		//1. Call the findAll method of DoorMapper to query all store information
		List<Door> list = doorMapper.findAll();
		//2. Return a List collection of all store information
		return list;
	}

	@Override
	public void deleteById(Integer id) {
		//Delete store information based on id
		doorMapper.deleteById(id);
	}

	@Override
	public void addDoor(Door door) {
	    //Add Store
		doorMapper.addDoor(door);
	}

	@Override
	public Door findById(Integer id) {
	    //Query store information based on id
		Door door = doorMapper.findById(id);
		return door;
	}

	@Override
	public void updateById(Door door) {
	    //Modify store information based on id
		doorMapper.updateById(door);
	}
}
Code implementation of 5controller layer
1. Create the DoorController class,
The controller s class is used to connect to the front-end and use @Autowired to invoke method classes in DoorService for add-delete and change checking
@Controller is the flag of the control layer for handing over the current object to Spring administration
package com.it.controller;

import java.util.List;

import org.springframework.beans.factory.annotation.Autowired;
import org.springframework.stereotype.Controller;
import org.springframework.ui.Model;
import org.springframework.web.bind.annotation.RequestMapping;

import com.it.pojo.Door;
import com.it.service.DoorService;

/**
 * @Controller
 *   Role 1: Delegate creation of current object to spring management
 *   Role 2: Identify as control layer code
 */
@Controller
public class DoorController {

	@Autowired	//Automatic injection (spring creates the current object and assigns values to attributes)
	private DoorService doorService;

	/** 1.Query all store information */
	@RequestMapping("/doorList")
	public String doorList(Model model){
		//Call the service layer findAll method to query all store information
		List<Door> list = doorService.findAll();

		//Store a list collection of all store information in the model and bring it to the JSP display
		model.addAttribute("list", list);

		return "door_list";
	}

	/**
	 * 2.Delete store information based on id
	 */
	@RequestMapping("/doorDelete")
	public String doorDelete(Integer id){
		//Call the deleteById method to delete the store based on the id
		doorService.deleteById(id);

		return "redirect:/doorList";
	}

	/** 3.Add Store Information */
	@RequestMapping("/doorAdd")
	public String doorAdd(Door door){
		//System.out.println(door);
		//1. Call the addDoor method of the DoorService layer to add store information
		doorService.addDoor(door);

		return "redirect:/doorList";
	}

	/** 4.Modify store information based on id
	 *  4.1.Query current store information based on id first */
	@RequestMapping("/doorInfo")
	public String doorInfo(Integer id, Model model){
		//1. Query store information based on id
		Door door = doorService.findById(id);
		System.out.println(door);

		//2. Store store information in the model (in the request domain)
		model.addAttribute("door", door);
		//3. Turn to door_update.jsp
		return "door_update";
	}

	/** 4.Modify store information based on id
	 *  4.1.Query current store information based on id first
	 *  4.2.Then change the information of the current store according to the id */
	@RequestMapping("/doorUpdate")
	public String doorUpdate(Door door){
		//System.out.println(door);
		//1. Call doorService's updateById method to modify store information
		doorService.updateById(door);
		//2. Turn to querying all stores
		return "redirect:/doorList";
	}
}
2. Create a common page Jump method
Placeholder for @PathVariable mapping URL binding
The {xxx} placeholder in the URL can be bound to the input of an action method through @PathVariable("xxx").
Example: To access the / WEB-INF/pages/index.jsp page now, as explained earlier, we will add a method to the Controller, for example:
@RequestMapping("/index")
public String xxx(){
	return "index";
}
If there are many such jsp pages that we need to visit?Do you want to add a method to the Controller for each jsp accessed?This is undoubtedly too cumbersome.
From the above observation, we can see that the names of'/index'in @RequestMapping ('/index') and'/index' in return'/index') are the same. In accordance with this rule, we can provide a common page Jump method to return to any JSP page under / WEB-INF/pages/ whatever the name is in the path.
Therefore, create the PageController class with the following code implementation:
package com.it.controller;

import org.springframework.stereotype.Controller;
import org.springframework.web.bind.annotation.PathVariable;
import org.springframework.web.bind.annotation.RequestMapping;

@Controller
public class PageController {
	/** General Page Jump Method
	 * For example, if the access path is'/index', then the method returns the value:'index'
	 * That is, ultimately return to/WEB-INF/pages/index.jsp
	 */
	@RequestMapping("/{page}")
    public String page(@PathVariable String page){
        return page;
    }
}
Front end
1. index.jsp
In this project, index.jsp is made up of three jsps, which divide the page into left and right upper three blocks
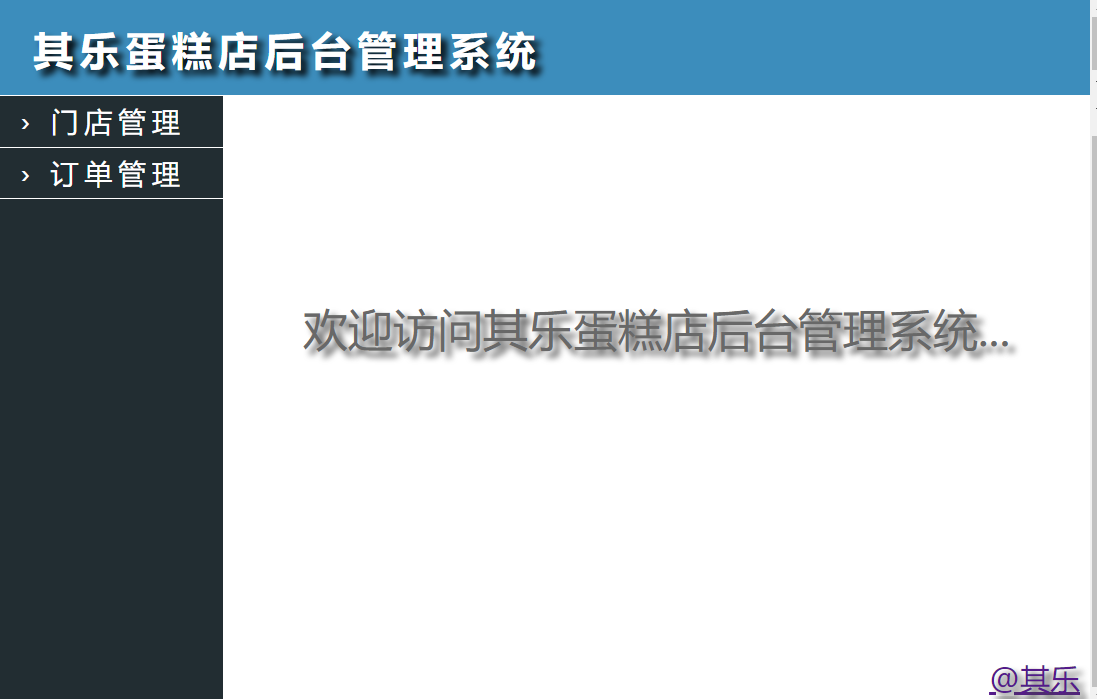
_top.jsp
Used to display headlines, also known as project names
<%@ page pageEncoding="utf-8"%>
<!doctype html>
<html>
<head>
<meta charset="utf-8"/>
<style>
	body{background:#3C8DBC;}
	h1{color:#fff;text-indent:20px;letter-spacing:5px;text-shadow:5px 5px 5px #000;}
</style>
</head>
<body>
	<h1>Background Management System of Qile Cake Store</h1>
</body>
</html>
_left.jsp
Used to display module information, if later made into a multi-module project, you can use a tree structure to display (tree)
<%@ page pageEncoding="utf-8"%>
<!doctype html>
<html>
<head>
<meta charset="utf-8"/>
<style>
	body{ background:#222D32;margin:0px; }
	.menu-bar a{ color:#fff;text-decoration:none; }
	.menu-bar{ font-size:22px;border-bottom:1px solid #fff;height:40px;line-height:40px;text-indent:18px;letter-spacing:5px; }
	.menu-bar:first-child{border-top:1px solid #fff;}
	.menu-bar:hover{background:#797979;}
</style>
</head>
<body>
	<div class="menu-bar">
		<a href="doorList" target="rightFrame">› Store Management</a>
	</div>
	<div class="menu-bar">
		<a href="orderList" target="rightFrame">› Order management</a>
	</div>
</body>
</html>
_right.jsp
It is used to display module content, such as the Welcome page, and then the Action page.
<%@ page pageEncoding="utf-8"%>
<!doctype html>
<html>
<head>
<meta charset="utf-8"/>
<style>
	body{ background:#ffffff; }
	#welcome{font-size:36px;color:#686868;text-align:center;text-shadow:5px 5px 5px #444;margin-top:180px;}
    #qile{font-size:24px;color:#686868;text-align:right;text-shadow:5px 5px 5px #444;margin-top:240px;}
</style>
</head>
<body>
	<div id="welcome">
		Welcome to Kele Cake Store Background Management System...
	</div>
	<div id="qile">
	   <a href="https://My.oschina.net/u/4115134 ">@Qile"
	</div>
</body>
</html>
Finally, three pages are stitched together using index.jsp
<%@ page pageEncoding="utf-8"%>
<!doctype html>
<html>
<head>
<meta charset="utf-8"/>
</head>
	<!--
	frameset Labels must be placed on head and body Between
	 -->
	<frameset rows="14%,86%" frameborder="0">
		<frame src="_top" />
		<frameset cols="180px,*">
			<frame src="_left" />
			<frame src="_right" name="rightFrame"/>
		</frameset>
	</frameset>

<body>

</body>
</html>
Door Page
door_list.jsp
Assign data information by <c:forEach items="${list}" var="door" varStatus="status">tag. If you want to know more about the <c:foreach>tag, you can do so by --> Properties and usage of varStatus="stat"
<%@ page pageEncoding="utf-8"%>
<%-- Introduce JSTL Label Library --%>
<%@ taglib prefix="c" uri="http://java.sun.com/jsp/jstl/core" %>
<!DOCTYPE HTML>
<html>
<head>
<title>Store Management</title>
<meta http-equiv="content-type" content="text/html; charset=UTF-8">
<style type="text/css">
	body{ font-family: "Microsoft YaHei"; background-color: #EDEDED; }
	h2{ text-align: center;}
	table{ width:96%; margin: 0 auto; text-align: center; border-collapse:collapse; font-size:16px;}
	td, th{ padding: 5px;}
	th{ background-color: #DCDCDC; width:120px; }
	th.width-40{ width: 40px; }
	th.width-70{ width: 70px; }
	th.width-80{ width: 80px; }
	hr{ margin-bottom:20px; border:1px solid #aaa; }
	#add-door{text-align:center;font-size:20px;}
</style>

<script type="text/javascript">

</script>
</head>
<body>
	<h2>Store Management</h2>
	<div id="add-door">
		<a href="door_add" target="rightFrame">New Store</a>
	</div>
	<hr/>
	<table border="1">
		<tr>
			<th class="width-40">Sequence Number</th>
			<th>Store Name</th>
			<th class="width-80">Contact number</th>
			<th>Store Address</th>
			<th class="width-80">Operation</th>
		</tr>

		<!-- Template data -->
	<c:forEach items="${ list }" var="door"
		varStatus="status">
		<tr>
			<td>${ status.count }</td>
			<td>${ door.name }</td>
			<td>${ door.tel }</td>
			<td>${ door.addr }</td>
			<td>
				<a href="doorDelete?id=${ door.id }">delete</a>
				|
				<a href="doorInfo?id=${ door.id }">modify</a>
			</td>
		</tr>
	</c:forEach>


	</table>
</body>
</html>
door_add.jsp
He is a page added by a store and you jump by clicking on a new store in door_list.jsp. The code for how to do this in door_list is as follows:
<div id="add-door">
		<a href="door_add" target="rightFrame">New Store</a>
	</div>
door_add.jsp:
This uses a post request to submit data entered by the client to the database, such as <input type="text" name="name"/>, which is named="name" in the tag, i.e. assignment, and submits the information entered by the client to the name of the Door entity class in the database (this is my understanding, if you have a better understanding, please leave a message, thank you).
<%@ page pageEncoding="utf-8"%>
<!DOCTYPE HTML>
<html>
<head>
<title>New Store</title>
<meta http-equiv="content-type" content="text/html; charset=UTF-8">
<style type="text/css">
	body{ font-family: "Microsoft YaHei"; background-color: #EDEDED; }
	h2{ text-align: center;font-size:26px; }
	table{ margin: 30px auto; text-align: center; border-collapse:collapse; width:50%; }
	td, th{ padding: 7px;font-size:18px;}
	hr{ margin-bottom:20px; border:1px solid #aaa; }
	input,select,textarea{ width:284px; height:30px; background:#EDEDED; border:1px solid #999; text-indent:5px; font-size:18px; }
	input[type='submit']{ width:130px; height:36px; cursor:pointer; border-radius:5px 5px 5px 5px; background:#ddd; }
	select{text-indent:0px;}
	textarea{height:100px;font-size:22px;}
</style>

<script type="text/javascript">
</script>
</head>
<body>
	<h2>New Store</h2>
	<hr/>
	<form action="doorAdd" method="POST">
		<table border="1">
			<tr>
				<td width="30%">Store Name</td>
				<td>
					<input type="text" name="name"/>
				</td>
			</tr>
			<tr>
				<td>Contact number</td>
				<td>
					<input type="text" name="tel"/>
				</td>
			</tr>
			<tr>
				<td>Store Address</td>
				<td>
					<input type="text" name="addr"/>
				</td>
			</tr>

			<tr>
				<td colspan="2">
					<input type="submit" value="carry 	hand over"/>
				</td>
			</tr>
		</table>
	</form>
</body>
</html>
door_update.jsp
Looking at the name, you should know that this is the store information modification page.
<%@ page pageEncoding="utf-8"%>
<!DOCTYPE HTML>
<html>
<head>
<title>Modify the store</title>
<meta http-equiv="content-type" content="text/html; charset=UTF-8">
<style type="text/css">
	body{ font-family: "Microsoft YaHei"; background-color: #EDEDED; }
	h2{ text-align: center;font-size:26px; }
	table{ margin: 30px auto; text-align: center; border-collapse:collapse; width:50%; }
	td, th{ padding: 7px;font-size:18px;}
	hr{ margin-bottom:20px; border:1px solid #aaa; }
	input,select,textarea{ width:284px; height:30px; background:#EDEDED; border:1px solid #999; text-indent:5px; font-size:18px; }
	input[type='submit']{ width:130px; height:36px; cursor:pointer; border-radius:5px 5px 5px 5px; background:#ddd; }
	select{text-indent:0px;}
	textarea{height:100px;font-size:22px;}
</style>

<script type="text/javascript">
</script>
</head>
<body>
	<h2>Modify the store</h2>
	<hr/>
	<form action="doorUpdate" method="POST">
		<!-- hidden Hidden Fields,Continue when submitting the form door.id Submit Together -->
		<input type="hidden" name="id" value="${ door.id }"/>
		<table border="1">
			<tr>
				<td width="30%">Store Name</td>
				<td>
					<input type="text" name="name" value="${ door.name }"/>
				</td>
			</tr>
			<tr>
				<td>Contact number</td>
				<td>
					<input type="text" name="tel" value="${ door.tel }"/>
				</td>
			</tr>
			<tr>
				<td>Store Address</td>
				<td>
					<input type="text" name="addr" value="${ door.addr }"/>
				</td>
			</tr>

			<tr>
				<td colspan="2">
					<input type="submit" value="carry	hand over" />
				</td>
			</tr>
		</table>
	</form>
</body>
</html>
Okay, that's where today's store management module comes in. Sparrows are all small and dirty. I hope they are useful to you. Please wait for the order module, goodbye!!!