1, Introduction
tochvision mainly processes image data, including some commonly used data sets, models, conversion functions, etc. torchvision is independent of PyTorch and requires special installation.
torchvision mainly includes the following three parts:
- torchvision.models: provide various classic network structures and pre trained models in in-depth learning, such as Alex net, VGG, ResNet, perception, etc.
- torchvision.datasets: provides common datasets, inheriting torch.utils.data.Dataset in design, mainly including MNIST, CIFAR10/100, ImageNet, COCO, etc.
- torchvision.transforms: provides common data preprocessing operations, mainly including operations on Tensor and PIL Image objects.
- torchvision.utils: tool classes, such as saving tensors as images to disk and creating an image grid for a small batch.
2, Installation
pip3 install torchvision
The torch vision should match the pytorch version and Cuda.
To query the versions of pytorch and torchvision, you can use the following statement:
import torch
import torchvision

print(torch.__version__)

print(torchvision.__version__)
3, Examples of the main functions of torchvision
1. Load model
(1) Load several pre training models
The pre training model can be loaded by pre trained = true. The default value of pre trained is False. If it is not assigned, the effect is the same as that of assigning False.
import torchvision.models as models

resnet18 = models.resnet18(pretrained=True)
vgg16 = models.vgg16(pretrained=True)
alexnet = models.alexnet(pretrained=True)
squeezenet = models.squeezenet1_0(pretrained=True)
densenet = models.densenet_161()
Expected input of pre training model:
- Mini batch of RGB image: (batch_size, 3, H, W), and H and W cannot be lower than 224.
- The pixel value of the image must be in the range [0,1] and normalized with mean=[0.485, 0.456, 0.406] and variance std=[0.229, 0.224, 0.225].
The downloaded model can be downloaded through state_dict() to print status parameters and cached dictionaries.
import torchvision.models as models

vgg16 = models.vgg16(pretrained=True)
# Returns a dictionary containing all States of the module, including parameters and cache
pretrained_dict = vgg16.state_dict()
(2) Only the model is loaded, and the pre training parameters are not loaded
If you only need the network structure and do not need to initialize with the parameters of the training model, you can set pre trained = false
# Import model structure
resnet18 = models.resnet18(pretrained=False)
# Load the pre downloaded pre training parameters to resnet18
resnet18.load_state_dict(torch.load('resnet18-5c106cde.pth'))
(4) Loading partial pre training model
In actual use, the pre training model may be adjusted, that is, the layers in the pre training model may be modified.
In the following example, the mismatched keys in the original model are deleted. Note that the name of the changed layer of the new model needs to be different from that of the corresponding layer of the original model. For example, the name of the last layer of resnet is fc (in pytorch), so the last layer of resnet we modified cannot take this name, but can be called fc_
import torchvision.models as models
resnet152 = models.resnet152(pretrained=True)
# Extract parameters
pretrained_dict = resnet152.state_dict()
# The pre training model can also be used through model_zoo download parameters
# pretrained_dict = model_zoo.load_url(model_urls['resnet152'])
model_dict = resnet152.state_dict()
# Pre trained_ Dict does not belong to model_ The key of dict is removed
pretrained_dict = {k: v for k, v in pretrained_dict.items() if k in model_dict}
# Update existing model_dict
model_dict.update(pretrained_dict)
# Load the state you really need_ dict
resnet152.load_state_dict(model_dict)
(5) Adjustment model
Some layers of the pre training model are not directly available and need to be slightly modified. For example, the last full connection layer of resnet is divided into 1000 categories, while we only have 21 categories; Or the channel received by the first layer convolution of resnet is 3, and the channel we may input the picture is 4, so it can be modified by the following methods:
# Modify the number of channels
resnet.conv1 = nn.Conv2d(4, 64, kernel_size=7, stride=2, padding=3, bias=False)
# Here 21 is the classification
resnet.fc = nn.Linear(2048, 21)
from torchvision import models
from torch import nn

# Load the pre trained model and save it to ~ /. torch/models /
resnet34 = models.resnet34(pretrained=True, num_classes=1000)
# The default is 1000 classification on ImageNet. Here, the last full connection layer is modified to 10 classification
resnet34.fc = nn.Linear(512, 10)
(6) Method of loading non pre training model
This has nothing to do with torch vision.
3.1.6.1 save and load the whole model
torch.save(model_object, 'resnet.pth')
model = torch.load('resnet.pth')
3.1.6.2 load the structure and parameters of the network respectively
# Will my_ The RESNET model dictionary is saved as my_resnet.pth
torch.save(my_resnet.state_dict(), "my_resnet.pth")
# Load RESNET and store the model in my_resnet.pth
my_resnet.load_state_dict(torch.load("my_resnet.pth"))
2. Load dataset
torchvision.datasets is a subclass from torch.utils.data.Dataset. You can use torch.utils.data.DataLoader for multithreading.
Official website reference address:
https://pytorch.org/vision/stable/datasets.html#

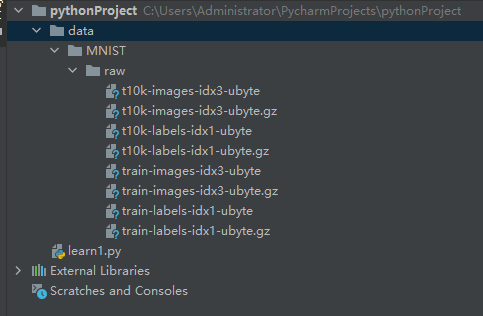
(1) Example: loading MNIST
from torchvision import datasets
dataset = datasets.MNIST('data/', download=True, train=False, transform=None)
(2) Example: loading fashion MNIST
from torchvision import datasets
dataset = datasets.FashionMNIST('data/', download=True, train=False, transform=None)
(3) ImageFolder implements data import
The datasets.ImageFolder method can import data.
ImageFolder(root,transform=None,target_transform=None,loader=default_loader)
Parameter Description:
- Root: find the image under the specified root path.
- Transform: receive the function / transform of PIL image and return the converted version. You can directly use the Compose method above to combine the required transformations.
- target_transform: transform the label.
- loader: Specifies the function to load pictures. The default operation is to read PIL image objects.
This method returns a list, which can be converted into Tensor data using data.DataLoader.
Example:
data_transforms = {
    'train': transforms.Compose([
        transforms.RandomResizedCrop(224), #Random cutting of an image (224, 224) from the original image
        transforms.RandomHorizontalFlip(), #Reversal at 0.5 probability level
        transforms.ToTensor(),  #Convert a PIL. Image with a range of [0,255] or numpy. ndarray to a shape of [C, H, W], and a FloadTensor with a range of [0,1.0].
        transforms.Normalize([0.485, 0.456, 0.406], [0.229, 0.224, 0.225]) #Normalization
    ]),
    'val': transforms.Compose([
        transforms.Resize(256),
        transforms.CenterCrop(224),
        transforms.ToTensor(),
        transforms.Normalize([0.485, 0.456, 0.406], [0.229, 0.224, 0.225])
    ]),
}

#image data file
data_root = ''
image_datasets = {x: datasets.ImageFolder(os.path.join(data_root, x),
                                          data_transforms[x]) for x in ['train', 'val']}
# wrap your data and label into Tensor
dataloders = {x: torch.utils.data.DataLoader(image_datasets[x],
                                             batch_size=10,
                                             shuffle=True,
                                             num_workers=4) for x in ['train', 'val']}
dataloaders are of type Variable and can be used as input parameters to the model.
3. transforms
transforms contains some image preprocessing operations that can be connected together for serial operations using torch vision. transforms. Compose.
These operations include:
__all__ = ["Compose", "ToTensor", "ToPILImage", "Normalize", "Resize", "Scale", "CenterCrop", "Pad",
           "Lambda", "RandomApply", "RandomChoice", "RandomOrder", "RandomCrop", "RandomHorizontalFlip",
           "RandomVerticalFlip", "RandomResizedCrop", "RandomSizedCrop", "FiveCrop", "TenCrop", "LinearTransformation",
           "ColorJitter", "RandomRotation", "RandomAffine", "Grayscale", "RandomGrayscale"]
- Compose(): used to manage all transforms operations.
- ToTensor(): convert the picture data into tensors and the conversion range is within the [0,1] interval.
- Normalize(mean, std): normalize.
- Resize(size): adjust the input PIL image to the specified size. The parameters can be int or int tuple.
- CenterCrop(size): center cut a given PIL Image to obtain a tuple of the specified size.
- RandomCrop(size, padding=0): random center point cutting.
- RandomHorizontalFlip(size, interpolation=2): randomly cut the given PIL Image and resize it.
- RandomHorizontalFlip(): randomly flip a given PIL Image horizontally.
- RandomVerticalFlip(): randomly flip the given PIL Image vertically.
- ToPILImage(): converts Tensor or numpy.ndarray to PIL Image.
- FiveCrop(size): crop a given PIL image into 4 corner areas and center areas.
- Pad(padding, fill=0, padding_mode = 'constant'): fill the PIL edge.
- RandomAffine(degrees, translate=None, scale=None): the image with the same center is subjected to random affine change.
- Random apply (transforms, P = 0.5): randomly select transforms.