Chapter 3 tkinter
3.1 First tkinter program
tkinter's program is easy to write.The difficulty is in the later layout and parameter transfer.Many widgets can be quickly found on the network.
A simple tkinter window program is as follows:
import tkinter
root = tkinter.Tk()
root.mainloop()
Result: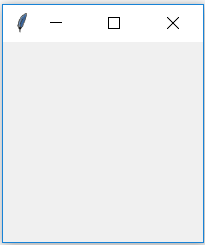
It's really simple to build a window program with only three lines of program.But this program is not very useful.The whole window is also empty.We'll add other controls in later chapters to make this window more functional.
Read the above program in detail:
(1)Import tkinter is the introduction of tkinter module.All controls (Widgets) are defined inside.
(2)root = tkinter.Tk() is the instantiated Tk class.The Tk class is the top-level control class that completes a series of initializations of the window.Interestingly, look at u init_u.py of the Tkinter class to see how Tk completes its initialization.
(3)root.mainloop() is the main window loop.
Basic Properties of 3.2 Window
Blank windows are of little use. This section describes some basic properties and functions of windows.
3.2.1 Window Title
Title the window to show what it does.Typically, it is the name of the display program.Or a dynamic prompt message, such as the name of an open file.
The statement that adds the title is:
root.title('Hello')
Add this statement before mainloop().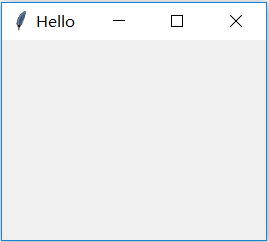
3.2.2 Set window size
Initialized window, is a very small window, even the title can not be displayed properly.So you need to set the window size at the beginning of the program.
The window has four size-dependent functions:
| function | Explain | Remarks |
|---|---|---|
| winfo_screenwidth() | Full screen width | Is the width of the computer screen |
| winfo_screenheight() | Full screen length | Is the length of the computer screen |
| winfo_reqwidth() | Window Width | |
| winfo_reqheight() | Window length |
With these four functions, we can easily resize the window and display it in the middle of the screen.If not, the tkinter window we created will appear on the screen at a different location each time.The following program can resize the window and display it in the center of the screen:
import tkinter  as tk
def get_screen_size(win):
    return win.winfo_screenwidth(),win.winfo_screenheight()
def center_window(root, width, height):
    screenwidth = root.winfo_screenwidth()
    screenheight = root.winfo_screenheight()
    size = '%dx%d+%d+%d' % (width, height, (screenwidth - width)/2, (screenheight - height)/2)
    root.geometry(size)
root = tk.Tk()
root.title('resize window')
center_window(root, 400, 320)
root.mainloop()
Result: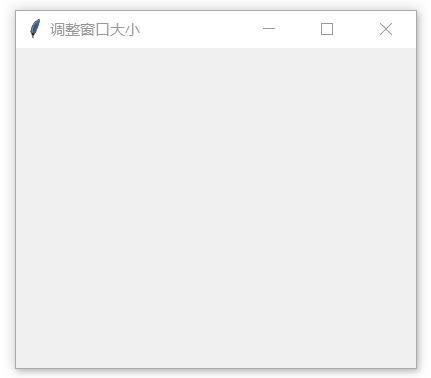
To set the size and position of the window, first get the size of the screen, and then determine the position of the upper right corner of the window on the screen based on the size of the window you want to set.That is (width of screen - width of window) / 2 (length of screen - length of window) / 2.These parameters are then combined into a string that is passed into the geometry function to display a window of the specified size at the specified location.
| function | Explain | Remarks |
|---|---|---|
| geometry(string) | Incoming width, height, relative position of upper left corner on screen | Is the character w*h+/-x+/-y |
| minsize(x,y) | Minimum window size.The window will not be smaller than this one. | |
| maxsize(x,y) | Maximum window size.The window won't be bigger than this |
Layout of controls in 3.2.3 windows
With a window, you can place controls on it.The control will be described in more detail in future chapters.In this chapter, the Label control is used to illustrate the layout.The layout of all controls is inherited from the same class, so the layout is handled exactly the same.
tkinter has three layout modes, pack,grid, and place.The pack is the simplest, the grid is the most common, and the placement is the least.
3.2.3.1 pack
The pack layout is very simple, you don't need to set it up too much, just use a pack function.The pack method places controls from top to bottom and from left to right.Of course, you can also specify the location of the control to achieve the specified effect, such as the exit button in the lower right corner.
3.2.3.1.1 pack option
The options available for pack include:
| Name | describe | Range of values |
|---|---|---|
| expand | The side option is not valid when the value is True.The control is displayed in the center of the parent control; if the fill option is both, the space for the parent control is filled. | "yes", "no", "y", "n" natural number, floating point number "no", 0,True,False (default value is "no" or 0) |
| fill | Fill in the space in the x(y) direction, the X direction when the property side="top" or "bottom"; the Y direction when the property side="left" or "right"; and the remaining space in the parent control when the expand option is "yes". | "x", "y", "both" |
| ipadx, ipady | The spacing between the interiors of the control in the x(y) direction. The default units are pixels. Optional units are c(c m), m(m m), i(inch), p(dot of the printer, i.e. 1/27 inch), which can be used by appending a suffix to the value. | Non-negative floating point number (default 0.0) |
| padx, pady | The distance between the outside of the control in the x(y) direction. The default units are pixels. Optional units are c(c m), m(m m), i(inch), p(the dot of the printer, i.e. 1/27 inch), which can be used by appending a suffix to the value. | Non-negative floating point number (default 0.0) |
| side | Defines which side of the parent control the control is close to. | "Top", "bottom", "left", "right" (default is "top") |
| before | Packaging this control before the selected component object is similar to creating this control before creating other controls. | Control object after pack |
| after | Packaging this control after the selected build object is similar to creating the selected control before the control. | Control object after pack |
| in_ | Make this control a child of the selected build object, similar to specifying that the master of this control is the selected control. | Control object after pack |
| anchor | The placement of controls.The default is centered.Left Alignment "w", Right Alignment "e", Top Alignment "n", Bottom Alignment "s".W and E can be combined with N and S | "n", "s", "w", "e", "nw", "sw", "se", "ne", "center" (default is "center") |
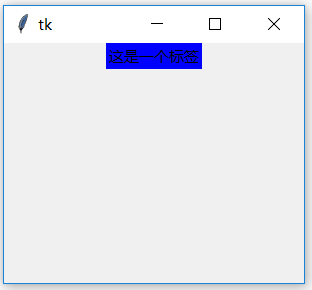
First this code creates a window and a label.Normally, pack is used, and the label is centered at the top of the window (with a blue background added to highlight the effect).
import tkinter as tk
root=tk.Tk()
root.geometry('300x240')
L = tk.Label(root,text='This is a label',bg='blue')
l.pack()
root.mainloop()
- Use of expand
By modifying the pack() function and setting expand='yes', you can see that the label selection is not only left-right centered, but also vertical centered.
import tkinter as tk
root=tk.Tk()
root.geometry('300x240')
l = tk.Label(root,text='This is a label',bg='blue')
l.pack(expand='yes')
root.mainloop()
Result: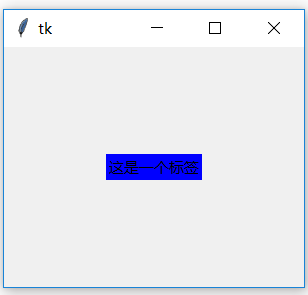
- Use of fill
The purpose of fill is to choose how to populate the parent control:
Fill ='x': means to fill the entire parent control horizontally
fill ='y': indicates filling the entire parent control vertically
fill ='both': indicates that the entire parent control is full
#fill=x
import tkinter as tk
root=tk.Tk()
root.geometry('300x240')
l = tk.Label(root,text='This is a label',bg='blue')
l.pack(expand='true',fill='x')
root.mainloop()
Result: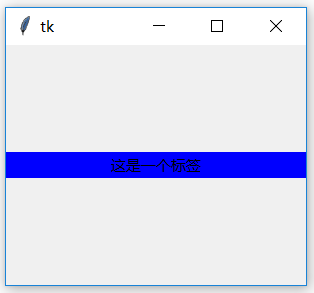
#fill=y
import tkinter as tk
root=tk.Tk()
root.geometry('300x240')
l = tk.Label(root,text='This is a label',bg='blue')
l.pack(expand='true',fill='y')
root.mainloop()
Result: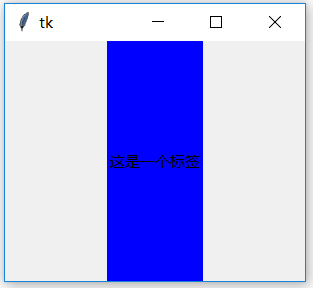
#fill=both
import tkinter as tk
root=tk.Tk()
root.geometry('300x240')
l = tk.Label(root,text='This is a label',bg='blue')
l.pack(expand='true',fill='both')
root.mainloop()
Result: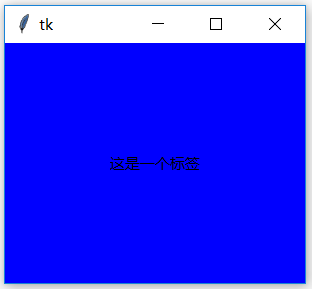
This is the case where there is only one control.What would happen if there were two controls?
import tkinter as tk
root=tk.Tk()
root.geometry('300x240')
r = tk.Label(root,text='A red label',bg='red')
b = tk.Label(root,text='A blue label',bg='blue')
r.pack(expand='true')
b.pack(expand='true',fill='both')
root.mainloop()
Result: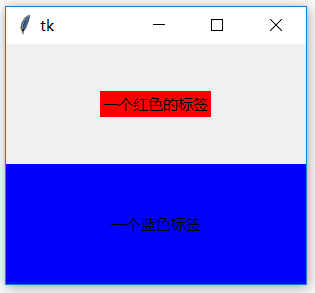
As you can see, the windows are divided equally between the two tabs.However, the lower half of the window will be filled with the fill option. For those without the fill option, only the upper half will be centered.
If the expand option is not turned on in the first half of the window, the red label is only displayed in the center at the top, and the remaining space is filled with the blue label.
import tkinter as tk
root=tk.Tk()
root.geometry('300x240')
r = tk.Label(root,text='A red label',bg='red')
b = tk.Label(root,text='A blue label',bg='blue')
r.pack()
b.pack(expand='true',fill='both')
root.mainloop()
Result: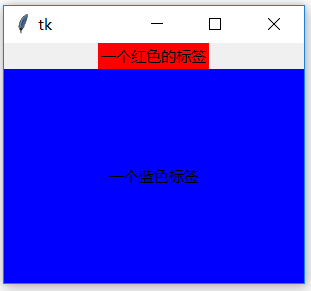
- The role of side
The side is where you place the control.There are four locations: left, right, top, bottom.You can enter a string or use the constants LEFT, RIGHT, TOP, BOTTOM in the tkinter module.
import tkinter as tk
root=tk.Tk()
root.geometry('300x240')
b1 = tk.Label(root,text='left')
b1.pack(side=tk.LEFT)
b2 = tk.Label(root,text='right')
b2.pack(side=tk.RIGHT)
b3 = tk.Label(root,text='top')
b3.pack(side=tk.TOP)
b4 = tk.Label(root,text='bottom')
b4.pack(side=tk.BOTTOM)
root.mainloop()
Result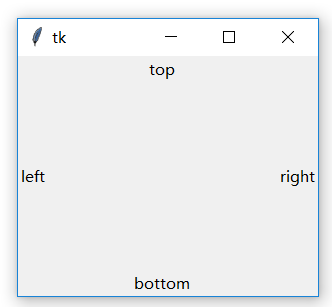
- Role of anchor
The main function is how to place the controls.If the anchor option is not specified, the control is placed top-down in the parent window.Anchor has eight options, which are actually eight directions in our usual sense.
import tkinter as tk
root=tk.Tk()
root.geometry('300x240')
b1 = tk.Label(root,text='1:anochor=\'e\'')
b1.pack(anchor='e')
b2 = tk.Label(root,text='2:anochor=\'w\'')
b2.pack(anchor='w')
b3 = tk.Label(root,text='3:anochor=\'n\'')
b3.pack(anchor='n')
b4 = tk.Label(root,text='4:anochor=\'s\'')
b4.pack(anchor='s')
b5 = tk.Label(root,text='5:anochor=\'ne\'')
b5.pack(anchor='ne')
b6 = tk.Label(root,text='6:anochor=\'se\'')
b6.pack(anchor='se')
b7 = tk.Label(root,text='7:anochor=\'nw\'')
b7.pack(anchor='nw')
b8 = tk.Label(root,text='8:anochor=\'sw\'')
b8.pack(anchor='sw')
root.mainloop()
Result: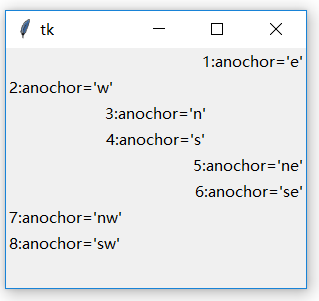
Both anchor and side are used to position controls.They can be combined.
- Use of ipadx and ipady
Ipadx and ipady are the size of the internal padding space.What does that mean?Is to expand the control's space outward.For example, the width and length of the control are 30 and 20.After using ipadx and ipady, the width and length of the controls are 30+ipadx and 20+ipady.
import tkinter as tk
root=tk.Tk()
root.geometry('300x240')
r = tk.Label(root,bg='red')
r.pack(expand='true',fill='both')
b = tk.Label(r,text='A blue label',bg='blue')
b.pack(expand='true',ipadx=10,ipady=20)
b2 = tk.Label(r,text='A blue label',bg='blue')
b2.pack(expand='true')
root.mainloop()
Result: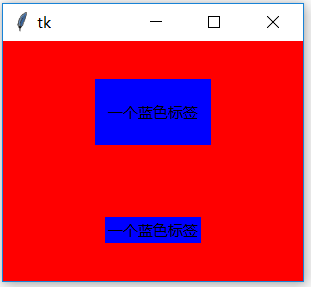
The blue labels below are for comparison.You can see that in the direction of x and y, the blue labels on top are enlarged.The additions are ipadx and ipady.A description of the units is given in the table above.Typically, the default unit is used: pixels.
- Use of padx and pady
padx and pady are external intervals, which are the intervals between two controls.
padx is the spacing in the x direction.The parameter can be a natural number or a tuple of natural numbers representing the left and right spacing, respectively.
This code is a case of natural numbers (text 3 is 30 pixels apart from text 2 and 4):
import tkinter as tk
root=tk.Tk()
root.geometry('300x240')
b1 = tk.Label(root,text='Text 1')
b1.pack(side='left')
b2 = tk.Label(root,text='Text2')
b2.pack(side='left')
b3 = tk.Label(root,text='Text 3')
b3.pack(side='left',padx=30)
b4 = tk.Label(root,text='Text 4')
b4.pack(side='left')
root.mainloop()
Result: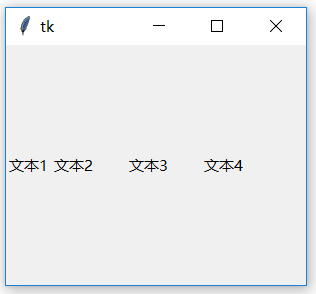
This is the case with an interval of (10,30).
import tkinter as tk
root=tk.Tk()
root.geometry('300x240')
b1 = tk.Label(root,text='Text 1')
b1.pack(side='left')
b2 = tk.Label(root,text='Text2')
b2.pack(side='left')
b3 = tk.Label(root,text='Text 3')
b3.pack(side='left',padx=(10,30))
b4 = tk.Label(root,text='Text 4')
b4.pack(side='left')
root.mainloop()
Result:
pady is similar to padx except for the y-direction interval.You can also use tuples to represent different intervals up and down
import tkinter as tk
root=tk.Tk()
root.geometry('300x240')
b1 = tk.Label(root,text='Text 1')
b1.pack()
b2 = tk.Label(root,text='Text2')
b2.pack()
b3 = tk.Label(root,text='Text 3')
b3.pack(pady=(10,30))
b4 = tk.Label(root,text='Text 4')
b4.pack()
root.mainloop()
Result:
- before, after, and in_
Before and after can change the order of the pack controls.It's normal to pack in the order of your code.However, before or after can be used when the order of packs needs to be advanced or postponed.For example, before=w1,after=w2, and so on.W1 and W2 are instances of the controls created.
The code below is pack label b3 first.Changed order.after does not show.It's very similar to before.
import tkinter as tk
root=tk.Tk()
root.geometry('300x240')
b1 = tk.Label(root,text='Text 1')
b1.pack()
b2 = tk.Label(root,text='Text2')
b2.pack()
b3 = tk.Label(root,text='Text 3 is advanced to text 2 pack')
b3.pack(before=b2)
root.mainloop()
Result:
In_because in is a python keyword, an underscore is added.In_sets the parent control of the current control, replacing the parent control at the time the control is initialized.In this example, root is replaced with b2.
import tkinter as tk
root=tk.Tk()
root.geometry('300x240')
b1 = tk.Label(root,text='Text 1')
b1.pack()
b2 = tk.Label(root,text='Text2',bg='blue')
b2.pack()
b3 = tk.Label(root,text='Text 3 is placed in Text 2')
b3.pack(in_=b2)
root.mainloop()
Result: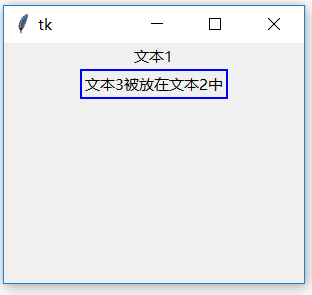
3.2.3.1.2 pack function
The functions of pack include:
| Function name | describe |
|---|---|
| slaves() | Returns all child control objects of this control in a list manner. |
| propagate(flag) | Setting to True means that the geometry size of the parent control is determined by the child control (the default value), and vice versa. |
| info() | Returns the value corresponding to the option provided by the pack, returned as a dictionary type |
| forget() | Removing a control from the current Control Manager actually hides the control and ignores the original settings. The object still exists and can be packed (option,...) Display it. |
| location(x, y) | x, y is a point in pixels, and the function returns whether or not the point is in a cell and in which cell.Returns the row and column coordinates of a cell, (-1, -1) indicating that they are not there. |
| size() | Returns the cells contained in the control, revealing the size of the control. |
- slaves() function
The slaves() function returns all child control objects of this control.If you do not use pack(), slaves () will not output a child control without a pack(), even if the child control has been instantiated.For example, b4 will not output.b2 and b3 are considered child controls of b1.
import tkinter as tk
root=tk.Tk()
root.geometry('300x240')
b1 = tk.Label(root,text='Text 1')
b1.pack()
b2 = tk.Label(b1,text='Text2')
b2.pack()
b3 = tk.Label(b1,text='Text 3')
b3.pack()
b4 = tk.Label(b1,text='Text 4')
print(b1.slaves())
root.mainloop()
Result:
[<tkinter.Label object .!label.!label>, <tkinter.Label object .!label.!label2>]
- propagate(flag) function
This function determines whether the size of a parent control is related to a child control.If flag is True, the size of the parent control is the size that includes the child control.If flag is False, it means that the size of the parent control is independent of the child control.However, geometry() invalidates propagate(), and the size of the window is determined by geometry().
import tkinter as tk
root=tk.Tk()
b1 = tk.Label(root,text='Text 1')
b1.pack()
b2 = tk.Label(root,text='Text2')
b2.pack()
b3 = tk.Label(root,text='Text 3')
b3.pack()
root.propagate(False)
root.mainloop()
import tkinter as tk
root=tk.Tk()
b1 = tk.Label(root,text='Text 1')
b1.pack()
b2 = tk.Label(root,text='Text2')
b2.pack()
b3 = tk.Label(root,text='Text 3')
b3.pack()
root.propagate(True)
root.mainloop()
Result: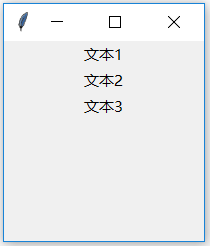
Note: You can see that window sizes are different when True or False is used.
- info() function
info() returns information about the control.This information is returned as a dictionary.
For example, the information for example b2 above is as follows:
import tkinter as tk
root=tk.Tk()
b1 = tk.Label(root,text='Text 1')
b1.pack()
print(b1.info())
root.mainloop()
Result:
{'in': <tkinter.Tk object .>, 'anchor': 'center', 'expand': 0, 'fill': 'none', 'ipadx': 0, 'ipady': 0, 'padx': 0, 'pady': 0, 'side': 'top'}
- forget() function
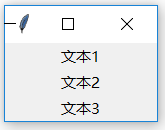
The forget() function hides the control.After invocation, the control disappears from the parent control.However, an instance of the control still exists.You can use pack() to restore the display of this control directly.To demonstrate this function, you need to add two buttons and two callback functions.The callback function b3_forget() hides the label b3, while b3_pack() displays the label b3.This time, the code will be completely pasted.
import tkinter as tk
root=tk.Tk()
root.geometry('300x240')
b1 = tk.Label(root,text='Text 1')
b1.pack()
b2 = tk.Label(root,text='Text2')
b2.pack()
b3 = tk.Label(root,text='Text 3')
b3.pack()
def b3_forget():
    b3.forget()
def b3_pack():
    b3.pack()
b4 = tk.Button(root,text='Hide Text 3',command=b3_forget)
b4.pack()
b5 = tk.Button(root,text='Display Text 3',command=b3_pack)
b5.pack()
root.mainloop()
#When you click the Hide Text 3 button, the label for Text 3 disappears.
#Click the'Show Text 3'button again to display'Text 3'
Result: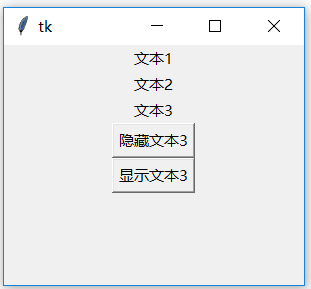
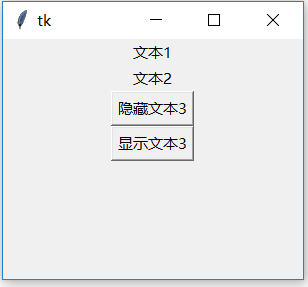
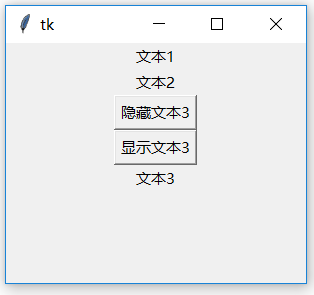
Note: Text 3 is displayed at the bottom.Because pack() comes in order.Take the order of pack () as the criterion, not the order of instantiation.
- location(x,y) function
This function is actually used for the grid layout method.It is also available in the pack method, but it returns (-1, -1) no matter what is called.That is, not in any cell.Indeed, the pack method does not have the concept of cells. How can there be cells that meet the criteria?
- size() function
The size() function is a cell that returns a control.As with the location() function, it is not valid in a pack.Because the return values of all controls are (0,0).