preface
This chapter needs to create Tencent cloud account + WeChat official account + python implementation.
And if you want to use your server to configure WeChat official account (you must have a domain name can't use ip address).
Here we use the Tencent cloud function (with its own domain name after successful creation). We just need to implement it according to the use method.
The official account of WeChat: https://developers.weixin.qq.com/doc/offiaccount/Getting_Started/Overview.html
Tencent cloud function usage document: https://cloud.tencent.com/document/product/583
1, Create Tencent cloud function
The process is as follows:
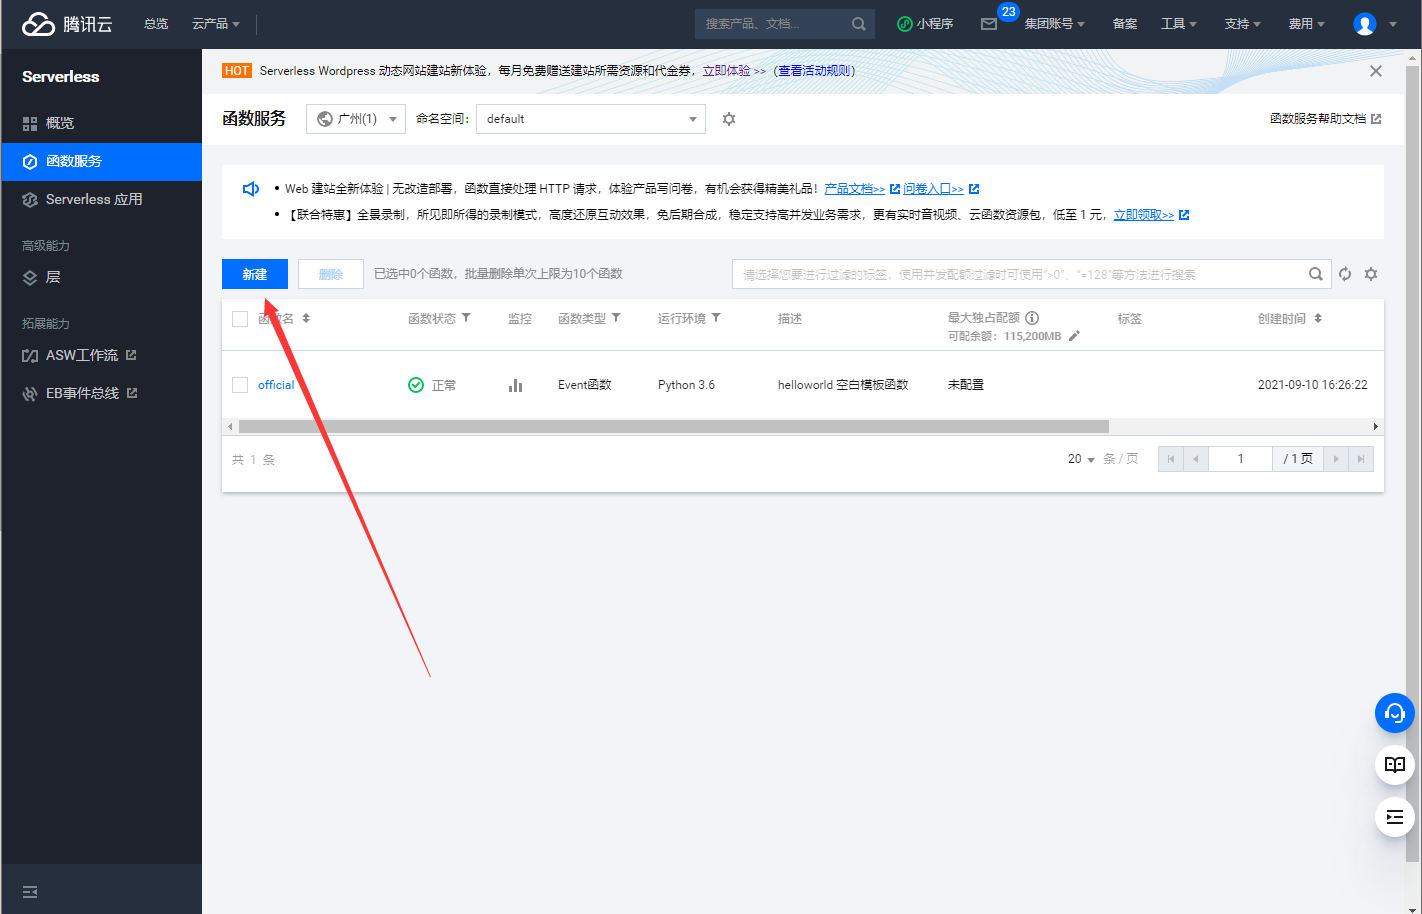
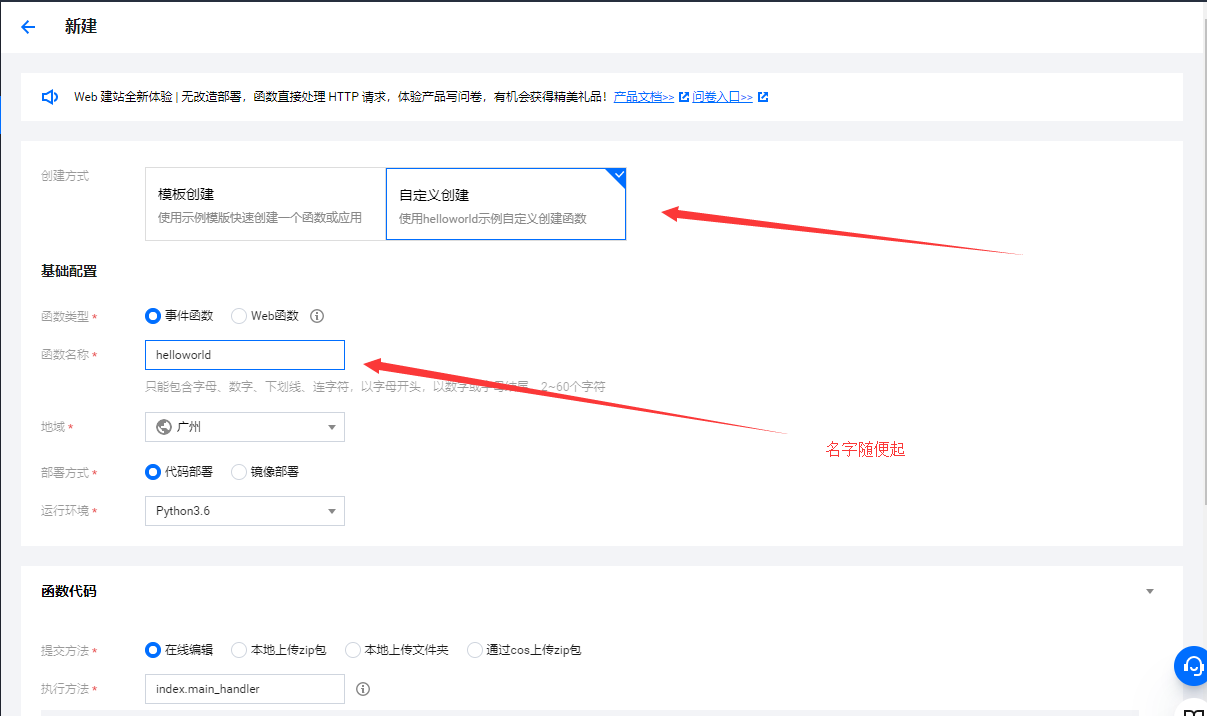
Select custom create - > set function name - > pull down to trigger configuration
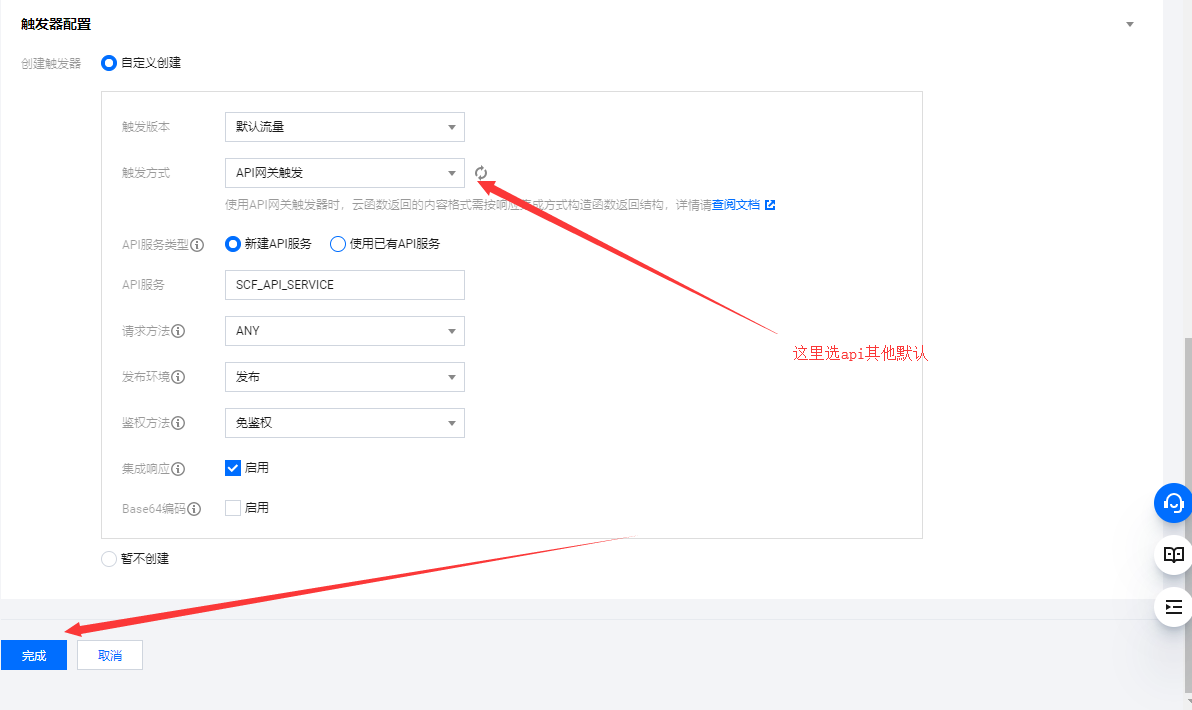
Select the triggering method as aip gateway triggering - > finish - > jump to cloud function
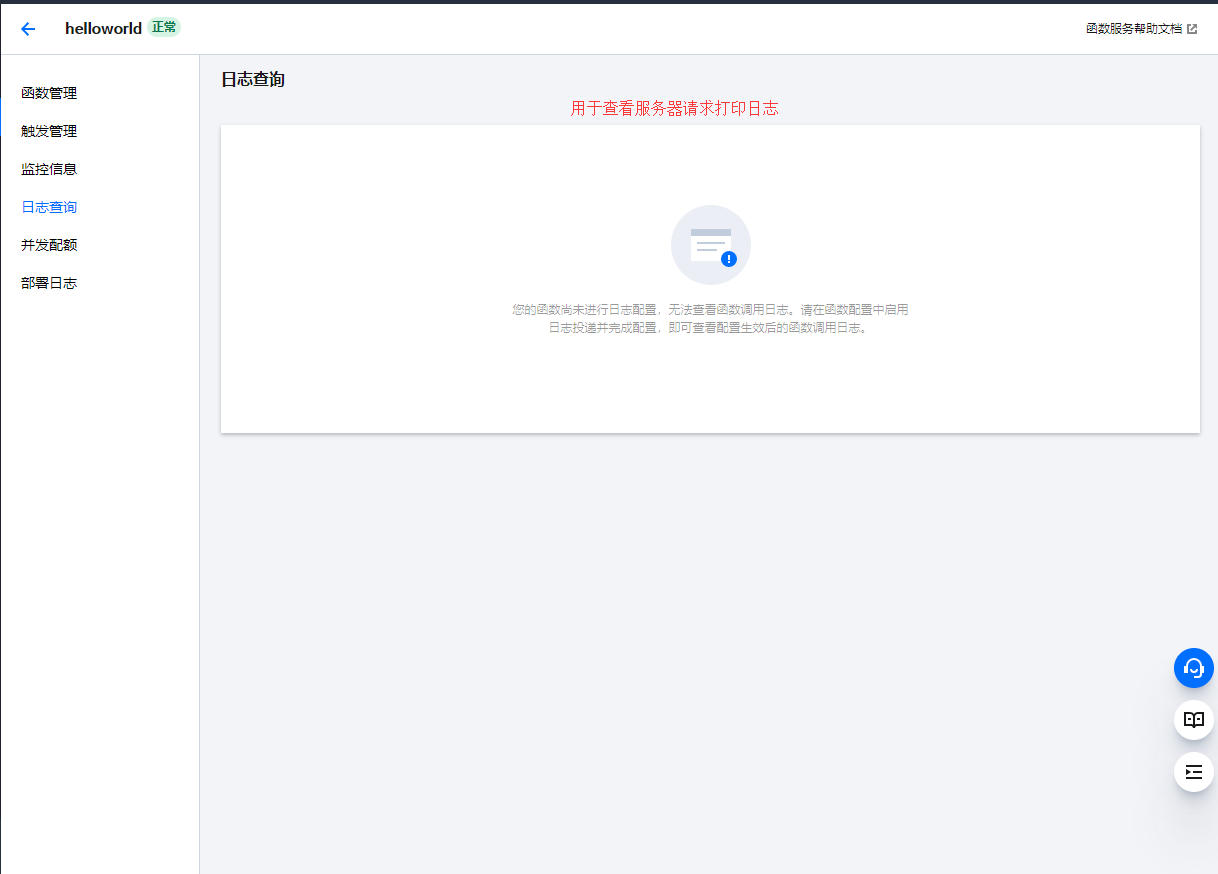
The log query is used to view the print requested by the server
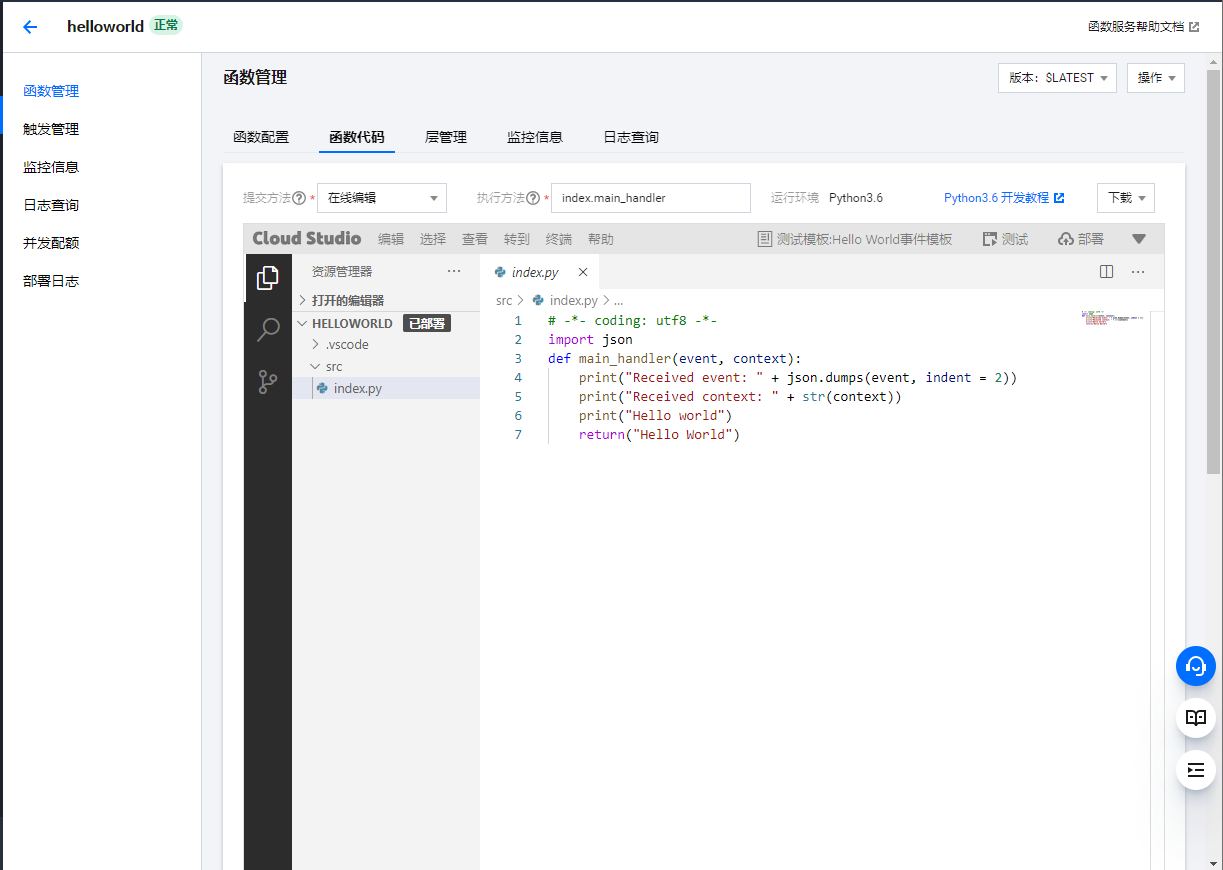
This is used to write our view function (you can take event as request and main_handler as the main function)

The trigger Management > access path is the server url of our WeChat official account.
Two, WeChat official account is implemented.
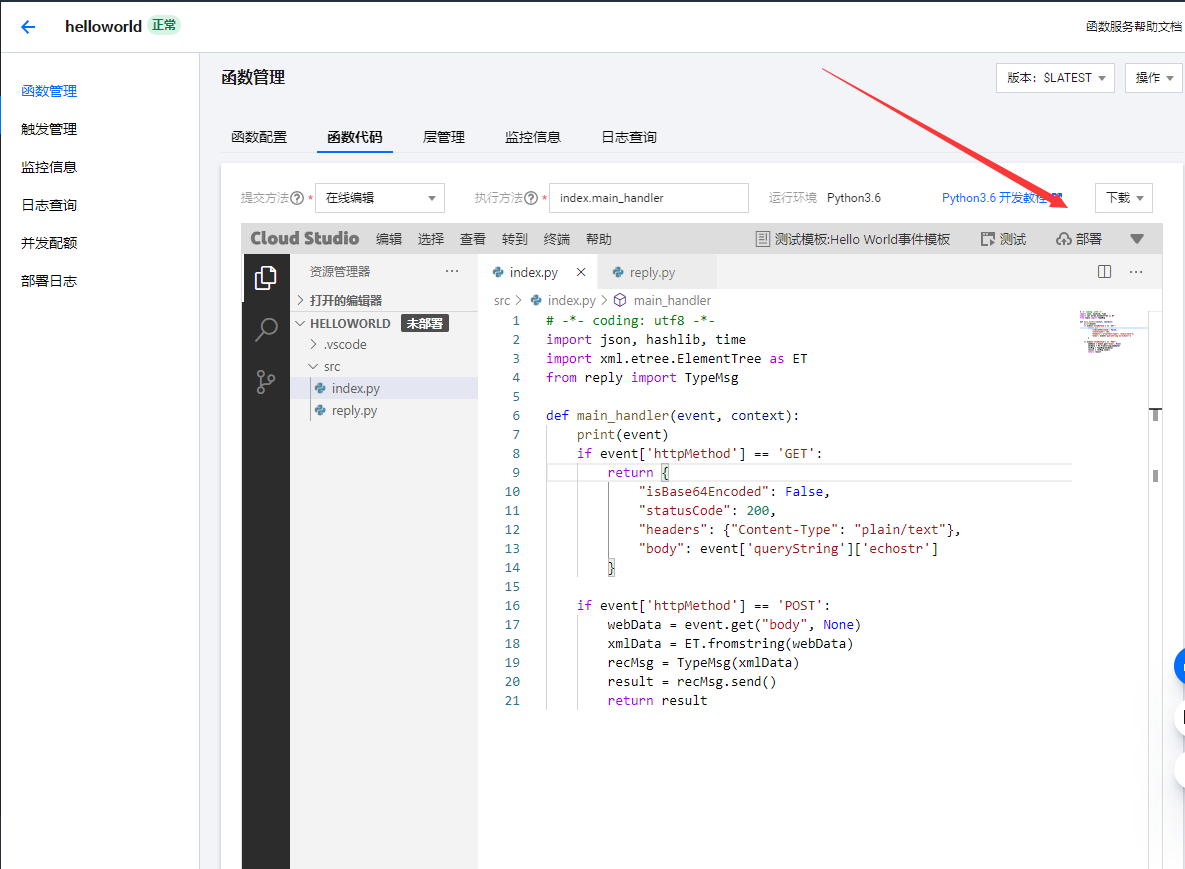
The code is as follows (index.py):
import json, hashlib, time
import xml.etree.ElementTree as ET
from reply import TypeMsg

def main_handler(event, context):
	print(event)
    if event['httpMethod'] == 'GET':
        return {
            "isBase64Encoded": False,
            "statusCode": 200,
            "headers": {"Content-Type": "plain/text"},
            "body": event['queryString']['echostr']
        }

    if event['httpMethod'] == 'POST':
        webData = event.get("body", None)
        xmlData = ET.fromstring(webData)
        recMsg = TypeMsg(xmlData)
        result = recMsg.send()
        return result
Create a reply.py to handle some WeChat official account return parameters (not too complicated in the main function).
The code is as follows (reply.py):
class TypeMsg(object):
    def __init__(self, xmlData):
        # Private object, external access prohibited
        self.__dict = dict()
        self.__dict['ToUserName'] = xmlData.find('ToUserName').text
        self.__dict['FromUserName'] = xmlData.find('FromUserName').text
        self.__dict['CreateTime'] = xmlData.find('CreateTime').text
        self.__dict['MsgType'] = xmlData.find('MsgType').text
        self.__dict['MsgId'] = xmlData.find('MsgId').text
        if self.__dict['MsgType'] == 'text':
            self.__dict['Content'] = xmlData.find('Content').text
        elif self.__dict['MsgType'] == 'image':
            self.__dict['PicUrl'] = xmlData.find('PicUrl').text
            self.__dict['MediaId'] = xmlData.find('MediaId').text
        print(self.__dict)
    def send(self):
        result = getattr(self, self.__dict['MsgType'])
        return result

    @property
    def text(self):
        XmlForm = """
                    <xml>
                        <ToUserName><![CDATA[{FromUserName}]]></ToUserName>
                        <FromUserName><![CDATA[{ToUserName}]]></FromUserName>
                        <CreateTime>{CreateTime}</CreateTime>
                        <MsgType><![CDATA[{MsgType}]]></MsgType>
                        <Content><![CDATA[{Content}]]></Content>
                        <MsgId>{MsgId}</MsgId>
                    </xml>
                    """
        return {
        "isBase64Encoded": False,
        "statusCode": 200,
        "headers": {"Content-Type": "application/xml"},
        "body": XmlForm.format(**self.__dict)
        }

    @property
    def image(self):
        XmlForm = """
                    <xml>
                        <ToUserName><![CDATA[{FromUserName}]]></ToUserName>
                        <FromUserName><![CDATA[{ToUserName}]]></FromUserName>
                        <CreateTime>{CreateTime}</CreateTime>
                        <MsgType><![CDATA[{MsgType}]]></MsgType>
                        <Image>
                            <MediaId><![CDATA[{MediaId}]]></MediaId>
                        </Image>
                    </xml>
                    """
        return {
        "isBase64Encoded": False,
        "statusCode": 200,
        "headers": {"Content-Type": "application/xml"},
        "body": XmlForm.format(**self.__dict)
        }
This class is mainly user type processing (all other similar ones, which are processed by pictures and messages), and can refer to the official account of WeChat public.
Finally, deploy
Three, configure WeChat official account server
The process is as follows:
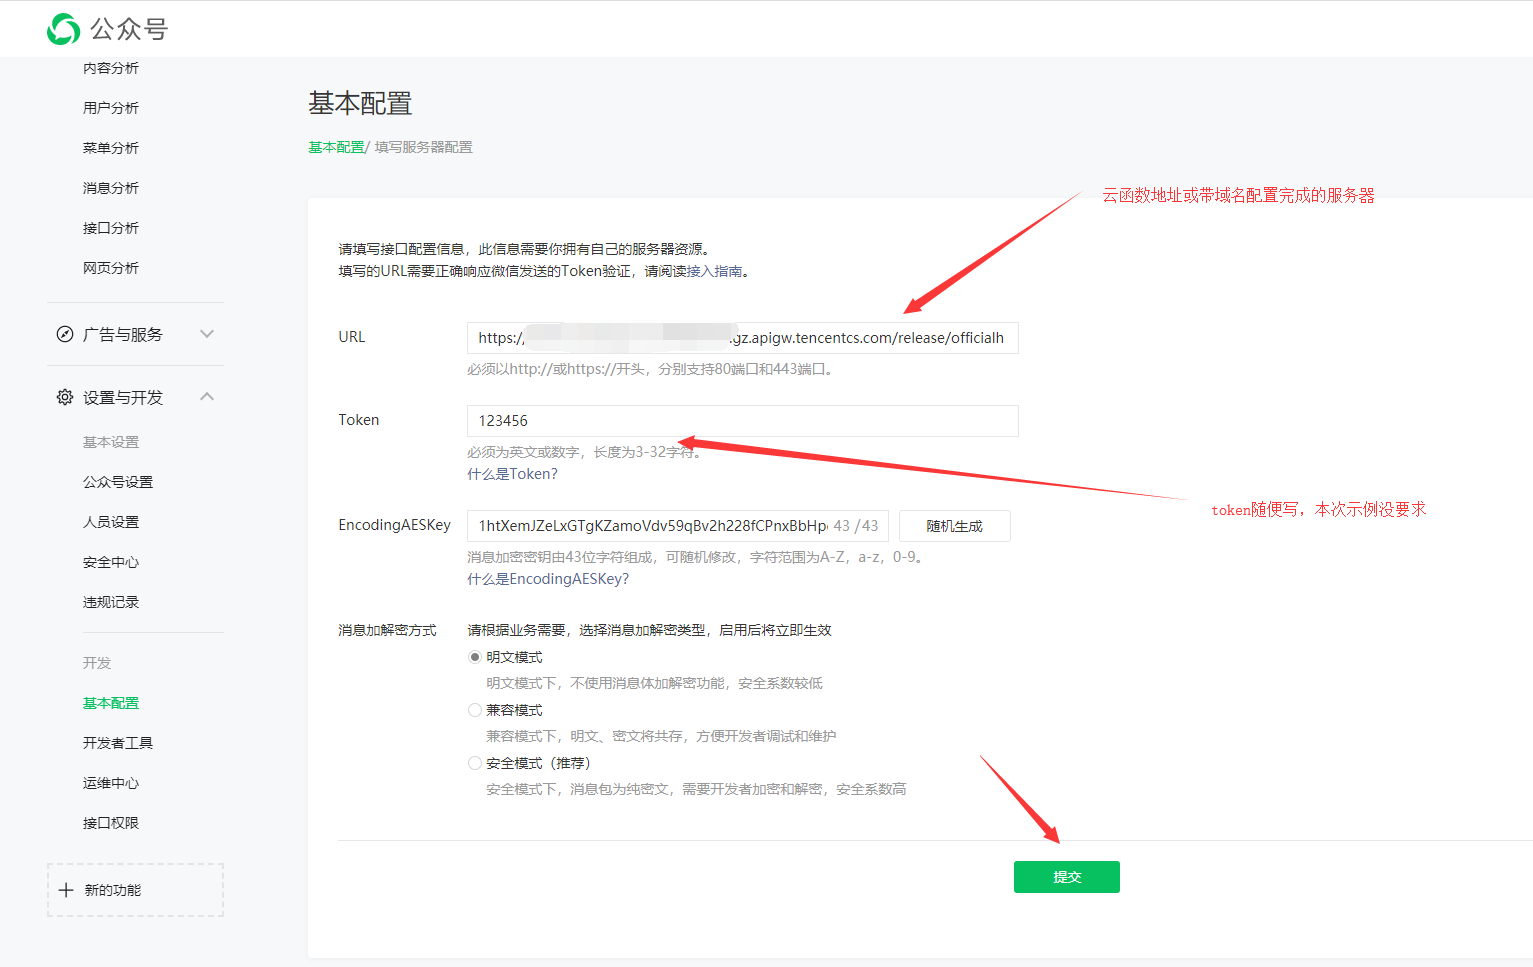
After submitting, we can return to cloud function - > log query. In the previous section, we printed the event parameter, and all the information can be seen in it. For example, the encryption parameter echostr of token (implemented through hashlib encryption. This example does not use verification token, which is used to judge whether it is operated by ourselves).
At this point, the configuration of WeChat official account has been successfully deployed, and the rest of the functions can be understood through official documents.
4, Display effect
In order to facilitate the demonstration of the way of logging in to wechat by computer and sending information by mobile phone.
The demonstration is as follows:
It can be seen that the animated picture is also based on text, and other processing needs to be done, and the expression can also be analyzed. There is no problem uploading the picture.