Python Big Job - Crawler + Visualization + Data Analysis + Database (Visualization)
I. Login Interface
Since the program will interact with the database to achieve song collection and other functions, you need to first design an interface for login registration.
The login interface will be the same size as the main interface and set to a fixed size for easy layout.
self.setFixedSize(960, 700)
self.setWindowTitle('Sign in')  # Set window name
self.setWindowIcon(QIcon('favicon.ico'))  # Set the window icon in the upper left corner
Next, set the window background with a palette control
palette = QPalette()
palette.setBrush(QPalette.Background, QBrush(QPixmap('1.jpg')))
self.setPalette(palette)
Next set up the interface controls
self.frame = QFrame(self)
self.frame.move(260, 110)  # coordinate
self.mainLayout = QVBoxLayout(self.frame)
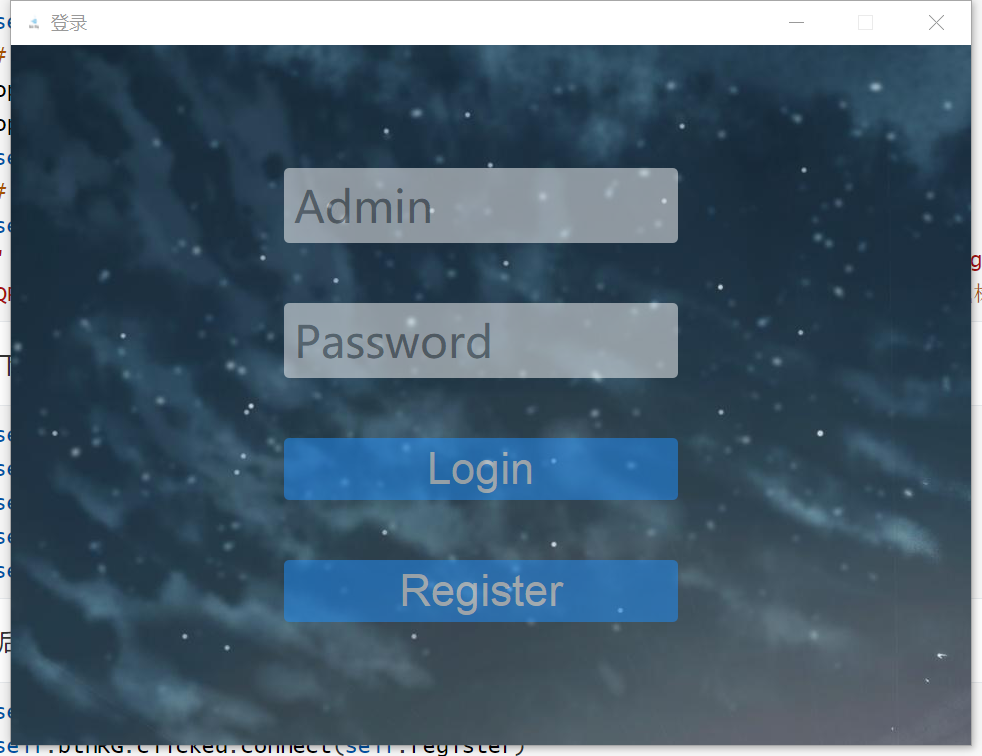
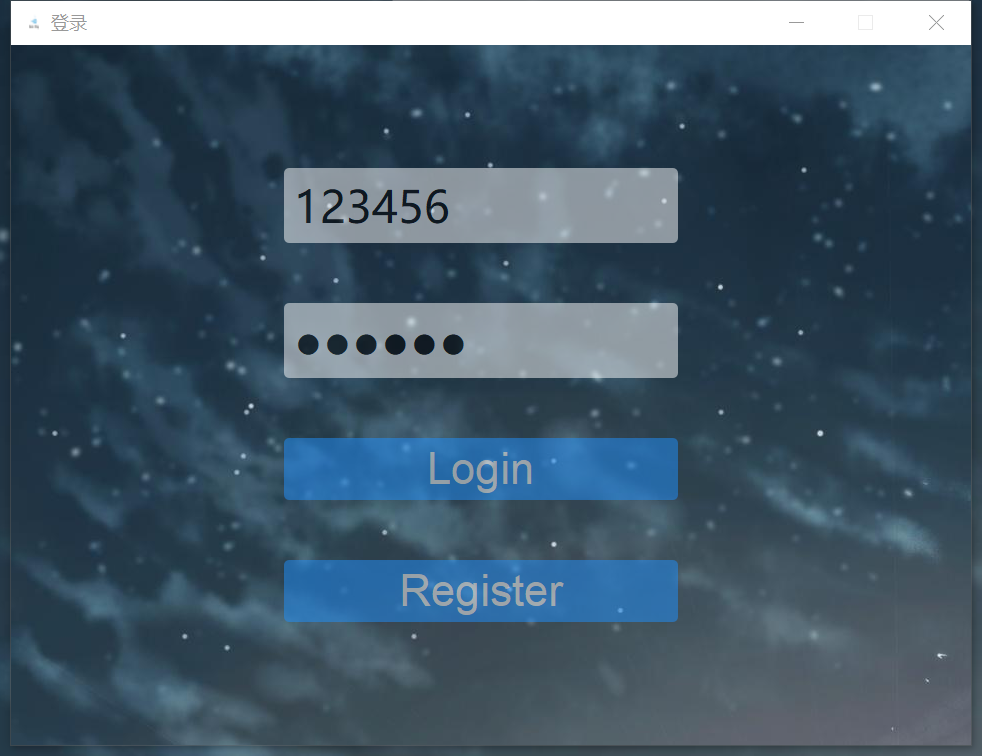
For simplicity and convenience, only two input boxes for account password and two buttons for login registration are set up, as follows:
self.nameEd1 = QLineEdit(self)  # Create Input Box
self.nameEd1.setPlaceholderText("Admin")  # Set default text
self.nameEd1.setFont(QFont('Microsoft YaHei', 22))  # Set font and size
# Set Transparency
op2 = QGraphicsOpacityEffect()
op2.setOpacity(0.5)
self.nameEd1.setGraphicsEffect(op2)
# Set Control Style
self.nameEd1.setStyleSheet('''QLineEdit{border-radius:5px; padding: 8px}''')
Similar to the password input box, just set its edit mode to Small Dot Fill
self.nameEd2.setEchoMode(QLineEdit.Password)
The login and registration button settings are exactly the same
self.btnLG = QPushButton('Login')  # Button Value Setting Login
# Set Transparency
op3 = QGraphicsOpacityEffect()
op3.setOpacity(0.5)
self.btnLG.setGraphicsEffect(op3)
# Set Control Style
self.btnLG.setStyleSheet(
'''QPushButton{background:#1E90FF;border-radius:5px;}QPushButton:hover{background:#4169E1;}\
QPushButton{font-family:'Arial';color:#FFFFFF; padding:6px}''')  # Hover is mouse hover style
Next, add the parts to the layout and set adjacent distances for them
self.mainLayout.addWidget(self.nameEd1)
self.mainLayout.addWidget(self.nameEd2)
self.mainLayout.addWidget(self.btnLG)
self.mainLayout.addWidget(self.btnRG)
self.mainLayout.setSpacing(60)
Finally, bind the mouse click event for them to complete the logon interface design.
self.btnLG.clicked.connect(self.login)
self.btnRG.clicked.connect(self.register)
The general results are as follows:
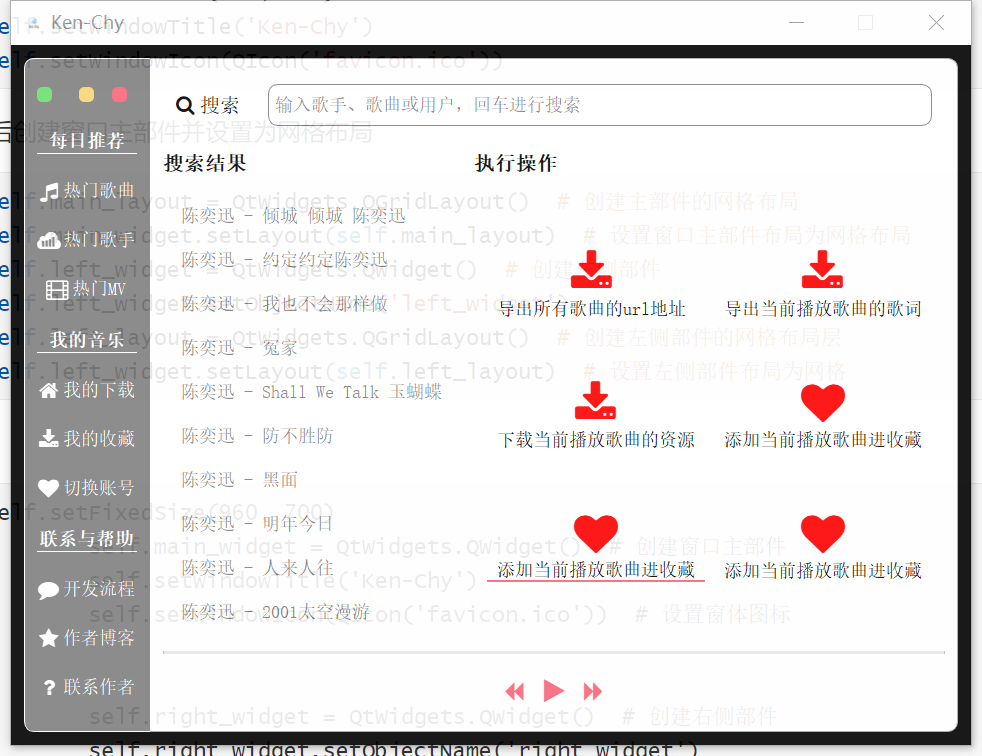
2. Main Interface
First, UI design to facilitate the interface layout settings, the interface design is roughly as follows
You can then program the GUI
Also first set the window size, name, icon, and partially set the window
self.setFixedSize(960, 700)
self.setWindowTitle('Ken-Chy')
self.setWindowIcon(QIcon('favicon.ico'))
self.setWindowOpacity(0.9)  # Set window transparency
self.setAttribute(QtCore.Qt.WA_TranslucentBackground)  # Set window background transparency
# self.setWindowFlags(QtCore.Qt.FramelessWindowHint) # hidden
Then we create the widgets and set the layout. First we can divide the interface into left and right parts and set the Name label for them. Then we add the left and right parts to the main part and set the position and size for them.
self.main_widget = QtWidgets.QWidget()  # Create the main widget of the window
self.main_layout = QtWidgets.QGridLayout()  # Create grid layout for main parts
self.main_widget.setLayout(self.main_layout)  # Set the widget layout to grid

self.left_widget = QtWidgets.QWidget()  # Create left part
self.left_widget.setObjectName('left_widget')
self.left_layout = QtWidgets.QGridLayout()  # Create a grid layout layer for the left part
self.left_widget.setLayout(self.left_layout)  # Set left part layout to grid

self.right_widget = QtWidgets.QWidget()  # Create Right Widget
self.right_widget.setObjectName('right_widget')
self.right_layout = QtWidgets.QGridLayout()
self.right_widget.setLayout(self.right_layout)  # Set right part layout to grid

self.setCentralWidget(self.main_widget)  # Set up the main widget of the window
self.main_layout.addWidget(self.left_widget, 0, 0, 12, 2)  # Left Widget in Row 0 Column, 8 Rows 3 Columns
self.main_layout.addWidget(self.right_widget, 0, 2, 12, 10)  # Right Widget in Row 0, Column 3, Row 8, Column 9
Looking at the left part, we can see that there are mainly three labels and nine buttons
Create three tags and set Name tags for them, then create nine buttons, set Name tags as well, and add these tags and buttons to the left layout
self.left_label_1 = QtWidgets.QPushButton("Daily Recommendation")
self.left_label_1.setObjectName('left_label')
self.left_label_2 = QtWidgets.QPushButton("My Music")
self.left_label_2.setObjectName('left_label')
self.left_label_3 = QtWidgets.QPushButton("Contact and Help")
self.left_label_3.setObjectName('left_label')

self.left_button_1 = QtWidgets.QPushButton(qtawesome.icon('fa.music', color='white'), "Top Songs")
self.left_button_1.setObjectName('left_button')
self.left_button_2 = QtWidgets.QPushButton(qtawesome.icon('fa.sellsy', color='white'), "Top singers")
self.left_button_2.setObjectName('left_button')
self.left_button_3 = QtWidgets.QPushButton(qtawesome.icon('fa.film', color='white'), "Popular MV")
self.left_button_3.setObjectName('left_button')
self.left_button_4 = QtWidgets.QPushButton(qtawesome.icon('fa.home', color='white'), "My Downloads")
self.left_button_4.setObjectName('left_button')
self.left_button_5 = QtWidgets.QPushButton(qtawesome.icon('fa.download', color='white'), "My Collection")
self.left_button_5.setObjectName('left_button')
self.left_button_6 = QtWidgets.QPushButton(qtawesome.icon('fa.heart', color='white'), "Switch Accounts")
self.left_button_6.setObjectName('left_button')
self.left_button_7 = QtWidgets.QPushButton(qtawesome.icon('fa.comment', color='white'), "Development process")
self.left_button_7.setObjectName('left_button')
self.left_button_8 = QtWidgets.QPushButton(qtawesome.icon('fa.star', color='white'), "Author Blog")
self.left_button_8.setObjectName('left_button')
self.left_button_9 = QtWidgets.QPushButton(qtawesome.icon('fa.question', color='white'), "Contact Author")
self.left_button_9.setObjectName('left_button')

self.left_layout.addWidget(self.left_label_1, 1, 0, 1, 3)
self.left_layout.addWidget(self.left_button_1, 2, 0, 1, 3)
self.left_layout.addWidget(self.left_button_2, 3, 0, 1, 3)
self.left_layout.addWidget(self.left_button_3, 4, 0, 1, 3)
self.left_layout.addWidget(self.left_label_2, 5, 0, 1, 3)
self.left_layout.addWidget(self.left_button_4, 6, 0, 1, 3)
self.left_layout.addWidget(self.left_button_5, 7, 0, 1, 3)
self.left_layout.addWidget(self.left_button_6, 8, 0, 1, 3)
self.left_layout.addWidget(self.left_label_3, 9, 0, 1, 3)
self.left_layout.addWidget(self.left_button_7, 10, 0, 1, 3)
self.left_layout.addWidget(self.left_button_8, 11, 0, 1, 3)
self.left_layout.addWidget(self.left_button_9, 12, 0, 1, 3)
After setting the left, let's look at the layout on the right
At the top is the search box, which is actually an input control
Let's first create a part for that location and set it to a grid layout
The input control and icon are then created and added to the search box layout
Finally, add the search box part to the right layout
self.right_bar_widget = QtWidgets.QWidget()  # Right Top Search Box Part
self.right_bar_layout = QtWidgets.QGridLayout()  # Top right search box grid layout
self.right_bar_widget.setLayout(self.right_bar_layout)

self.search_icon = QtWidgets.QLabel(chr(0xf002) + ' ' + 'search  ')
self.search_icon.setFont(qtawesome.font('fa', 20))
self.right_bar_widget_search_input = QtWidgets.QLineEdit()
self.right_bar_widget_search_input.setPlaceholderText("Enter a singer, song or user and return to search")

self.right_bar_layout.addWidget(self.search_icon, 0, 0, 1, 1)
self.right_bar_layout.addWidget(self.right_bar_widget_search_input, 0, 1, 1, 8)
self.right_layout.addWidget(self.right_bar_widget, 0, 0, 1, 9)
Next, on the left is a display of search results and on the right is the action options
Search results and action options are buttons because they can be clicked and played
So let's start by creating two labels, Search Results and Execute Action
Then create ten left buttons (search results) and six right buttons (perform actions)
You can do this by adding them to the layout
Search result buttons are created roughly as follows, and button text can be set by passing in a parameter string
self.search_result_button_1 = QtWidgets.QPushButton()
Execute the action button to create roughly the following
self.operator_button_1 = QtWidgets.QToolButton()
self.operator_button_1.setText("Export of all songs url address")
self.operator_button_1.setIcon(qtawesome.icon('fa.download', color='red'))  # Set button icon
self.operator_button_1.setIconSize(QtCore.QSize(50, 50))  # Set Button Size
self.operator_button_1.setToolButtonStyle(QtCore.Qt.ToolButtonTextUnderIcon)  # Set up buttons and text display
Finally, the bottom progress bar and the previous, next and play buttons
self.right_process_bar = QtWidgets.QProgressBar()  # Play Progress Widget
self.process_value = 0  # Set play value (0 is not yet played)
self.right_process_bar.setValue(self.process_value)  # Set the position of the progress bar
self.right_process_bar.setFixedHeight(3)  # Set Progress Bar Height
self.right_process_bar.setTextVisible(False)  # Do not display progress bar text

self.console_button_1 = QtWidgets.QPushButton(qtawesome.icon('fa.backward', color='#F76677'), "")
self.console_button_2 = QtWidgets.QPushButton(qtawesome.icon('fa.forward', color='#F76677'), "")
self.console_button_3 = QtWidgets.QPushButton(qtawesome.icon('fa.play', color='#F76677', font=18), "")
self.console_button_3.setIconSize(QtCore.QSize(30, 30))
Then add them to the layout as well
Next, set the spacing between the controls and style them with the Name tag, such as
self.main_layout.setSpacing(0)

self.left_widget.setStyleSheet("\
    QPushButton{border:none;color:white;}\
    QPushButton#left_label{\
        border:none;\
        border-bottom:1px solid white;\
        font-size:18px;\
        font-weight:700;\
        font-family: 'Helvetica Neue', Helvetica, Arial, sans-serif;\
    }\
    QPushButton#left_button:hover{border-left:4px solid red;font-weight:700;}\
    QWidget#left_widget{\
        background:gray;\
        border-top:1px solid white;\
        border-bottom:1px solid white;\
        border-left:1px solid white;\
        border-top-left-radius:10px;\
        border-bottom-left-radius:10px;\
    }")
Finally, bind the mouse events for them and you're done!
self.right_bar_widget_search_input.returnPressed.connect(
            lambda: self.search(self.right_bar_widget_search_input.text()))
self.search_result_button_1.clicked.connect(lambda: self.play_music(0))
self.search_result_button_2.clicked.connect(lambda: self.play_music(1))
self.search_result_button_3.clicked.connect(lambda: self.play_music(2))
self.search_result_button_4.clicked.connect(lambda: self.play_music(3))
self.search_result_button_5.clicked.connect(lambda: self.play_music(4))
self.search_result_button_6.clicked.connect(lambda: self.play_music(5))
self.search_result_button_7.clicked.connect(lambda: self.play_music(6))
self.search_result_button_8.clicked.connect(lambda: self.play_music(7))
self.search_result_button_9.clicked.connect(lambda: self.play_music(8))
self.search_result_button_10.clicked.connect(lambda: self.play_music(9))
self.console_button_1.clicked.connect(self.pre_music)
self.console_button_3.clicked.connect(lambda: self.play_music_by_button())
self.console_button_2.clicked.connect(self.next_music)