2.9.1 PO design mode
Before talking about Pytest, let's take a look at what is the PO (Page Object) design pattern.
Why reference PO design patterns? PO provides a mode of separating business process from page element operation, which makes the test code clearer.
PO (Page Object) Page Object model is a design pattern used to manage and maintain an object library of a set of web elements. In PO mode, each page of the application has a corresponding page class. Each page class maintains the element set of the web page and the methods to operate these elements.
2.9.2 installation and use of pytest
2.9.2.1 Pytest installation
We use the pip install command pip install -pytest.
Check the pytest installation version, and the command is pytest – version.

2.9.2.2 introduction to pytest
pytest is a unit test framework of Python. It is similar to the unit test framework of python, but it is simpler and more efficient than the unit test framework.
Advantages of pytest:
·The grammar is simple and easy to use
·Open source
·Convenient integration
·Support report framework - allure, etc
2.9.2.3 what modules does pytest execute?
All test module file names need to meet test_ Py format or_ test.py format.
In the Test module file, the Test class starts with Test and cannot have init method (Note: when defining a class, it needs to start with Test_, otherwise pytest will not run the class)
In a test module class, you can include one or more tests_ Function at the beginning.
At this time, when the pytest command is executed, it will automatically find the test functions that meet the above constraints from the current directory and subdirectories for execution.
2.9.2.4 execution mode of pytest
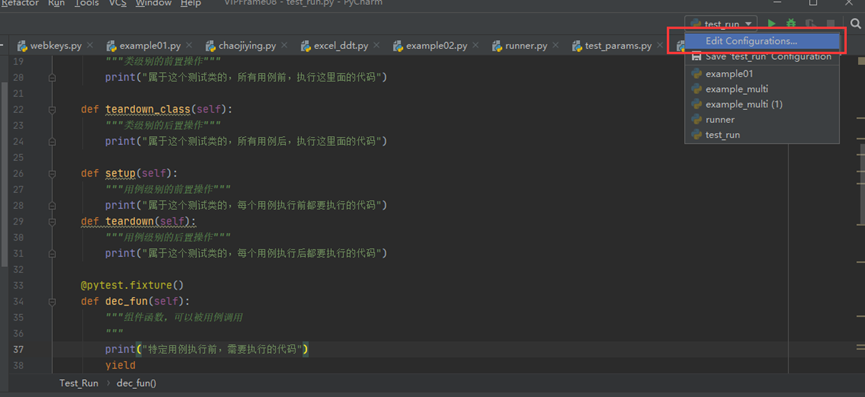
- pycharm
Select Edit configurations

Click the + sign and select pytest

Select the script path and click ok

Click Run:
- Main function mode
pytest.main(['parameter', 'script name'])
Example:
pytest.main(['-s','test_run.py'])
If there are multiple parameters:
pytest.main(['parameter',..., 'parameter', 'script name'])
Example:
pytest.main(['-s','-n','3','test_run.py']) - command line
pytest + parameter + file path / test file name
Example:
pytest -s ./pytest_examples/test_run.py - configuration file
Create the pytest.ini configuration file under the appropriate folder.
When pytest is executed, the configuration run of the configuration file is read
The contents of pytest.ini are as follows:
[pytest]
# Command line parameters
addopts =  -s
# Search file name
python_files = test_*.py
# Class name to search
python_classes = Test_*
# Function name to search
python_functions = test_*
2.9.2.5 execution sequence of pytest
- setup_class
In the test class, setup_class method is a class level pre operation, which belongs to this test class. Execute the code before all test cases. - teardown_class
In the test class, teardown_ The class method is a class level post operation. If it belongs to this test class, execute the code after all use cases - setup
In the test class, the setup method is a pre operation at the use case level. It belongs to the test class and the code to be executed before each use case is executed - teardown
In the test class, teardown method is a pre operation at the use case level. It belongs to the code to be executed after each use case is executed - @pytest.fixtrue()
In the test class, the method decorated with @ pytest. Fixrule () can be referenced by other test classes, and its priority is higher than setup. The yield keyword can be used in the method. The method after yield will be executed after the end of the use case, and its priority is lower than teardown
Example code:
import pytest

class Test_Run:
    """
    Test operation principle
    """

    def setup_class(self):
        """Class level pre operation"""
        print("For the test class, execute the code before all use cases")

    def teardown_class(self):
        """Class level post operations"""
        print("For all test cases belonging to this test class, execute the code")

    def setup(self):
        """Pre operation at use case level"""
        print("The code that belongs to this test class and must be executed before each use case is executed")

    def teardown(self):
        """Post operation at use case level"""
        print("The code belonging to this test class to be executed after each use case is executed")

    @pytest.fixture()
    def dec_fun(self):
        """Component functions that can be called by use cases"""
        print("Code to be executed before a specific use case is executed")
        yield
        print ( "Code to be executed after a specific use case is executed" )

    def test_run1(self):
        """
        :return:
        """
        print("Operation of case 1")

    def test_run2(self,dec_fun):
        """
        :return:
        """
        print("Operation of case 2")

    def test_run3(self):
        """
        :return:
        """
        print("Operation of case 3")

    def test_run4(self):
        """
        :return:
        """
        print("Operation of case 4")
Operation results:
For the test class, execute the code before all use cases
 The code that belongs to this test class and must be executed before each use case is executed
 Operation of case 1
 The code belonging to this test class to be executed after each use case is executed

Code (component function) to be executed before execution of a specific use case yield (previous code)
The code that belongs to this test class and must be executed before each use case is executed
 Operation of case 2
 The code belonging to this test class to be executed after each use case is executed
 Code (component function) to be executed after a specific use case is executed yield (code after)
The code that belongs to this test class and must be executed before each use case is executed
 Operation of case 3
.The code belonging to this test class to be executed after each use case is executed
 The code that belongs to this test class and must be executed before each use case is executed
 Operation of case 4
.The code belonging to this test class to be executed after each use case is executed
 For all test cases belonging to this test class, execute the code
2.9.2.6 Pytest Exit Code
• Exit code 0 all use cases have been executed and passed
• Exit code 1 all test cases have been executed, and there are Failed test cases
• Exit code 2 the user interrupted the execution of the test
• an internal error occurred during Exit code 3 test execution
• Exit code 4 pytest command line usage error
• Exit code 5 does not collect available test case files
2.9.2.7 Pytest parameterization
Parameterization refers to serializing multiple sets of parameter values of a function.
The parameterization method used in pytest is parameterize (arguments, argvalues)
explain:
arguments: parameter name
argvalues: parameter value, type must be list
When the parameter is one, the format is: [value]
When there are multiple parameters, the format is:
[(param_value1,param_value2),...,(param_valuen,param_valuen)]
use parametrize method:
@pytest.mark.parametrize(arguments,argvalues)
In the test method, use arguments[0] to call the first parameter. Similarly, use arguments[1] to call the second parameter.
Example code:
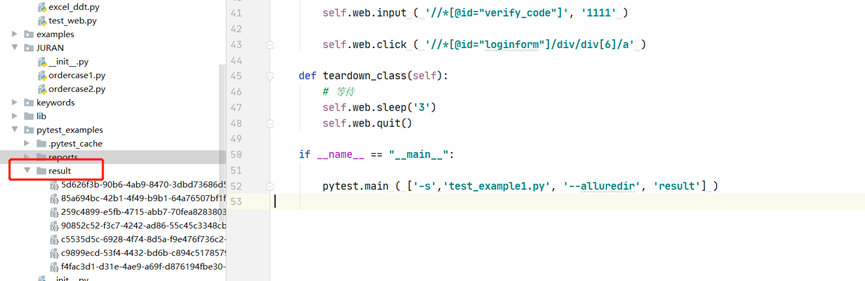
class Test_DS:
    """E-commerce website PO Design pattern"""

    def setup_class(self):
        """Create before execution Web object"""
        self.web = Web ()
        self.web.openbrowser ( 'gc' )


@pytest.mark.parametrize('loginparams',[('Password error','13800138006','12345611'),
                                        ('Account does not exist','13110138006', '123456'),
                                        ('Login succeeded', '13800138006', '123456')])


    def test_login_success(self,loginparams):
        # Login succeeded
         self.web.geturl ( 'Test website' )
        self.web.input ( '//*[@id="username"]', loginparams[1] )
        self.web.input ( '//*[@id="password"]', loginparams[2] )

        #self.web.get_verify ( '//*[@id="verify_code_img"]' )

        self.web.input ( '//*[@id="verify_code"]', '1111' )

        self.web.click ( '//*[@id="loginform"]/div/div[6]/a' )

    def teardown_class(self):
        # wait for
    self.web.sleep('3')
        self.web.quit()
Operation results:
2.9.2.8 Pytest assertion
pytest uses assert to assert.
Example:
class Test_Assert:
    """
    Assert
    """
    def test_run1(self):

        a=0
        print ( a)
        assert a

    def test_run2(self):

        assert 3==4
Operation results:

2.9.2.9 common parameters of pytest
Display print content:
When running the test script, in order to debug or print some content, we will add some print content to the code, but these contents will not be displayed when running pytest. If you bring - s, you can display it.
Operation mode:
pytest test_se.py -s
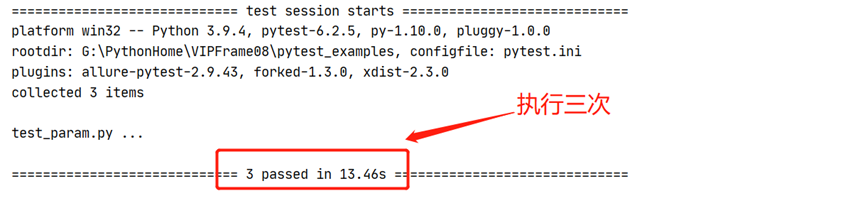
In addition, various running modes of pytest can be superimposed. For example, if you want to run four processes at the same time and want to print the content of print. You can use:
pytest test_se.py -s -n 4
Multi process running cases:
When there are a lot of cases, the running time will also become very long. If you want to shorten the running time of the script, you can run it with multiple processes.
To install pytest xdist:
pip install -U pytest-xdist
Operation mode:
pytest test_se.py -n NUM
Where NUM is the number of concurrent processes.
Failed case retry:
Install pytest rerunfailures:
pip install -U pytest-rerunfailures
Operation mode:
pytest test_se.py --reruns NUM
2.9.3 Pytest integration allure Report
2.9.3.1 original report of allure
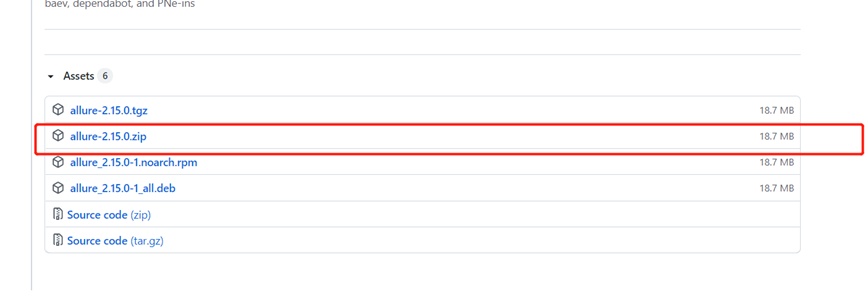
allure download address:
https://github.com/allure-framework/allure2/releases
Download this:
Configure environment variables after decompression:
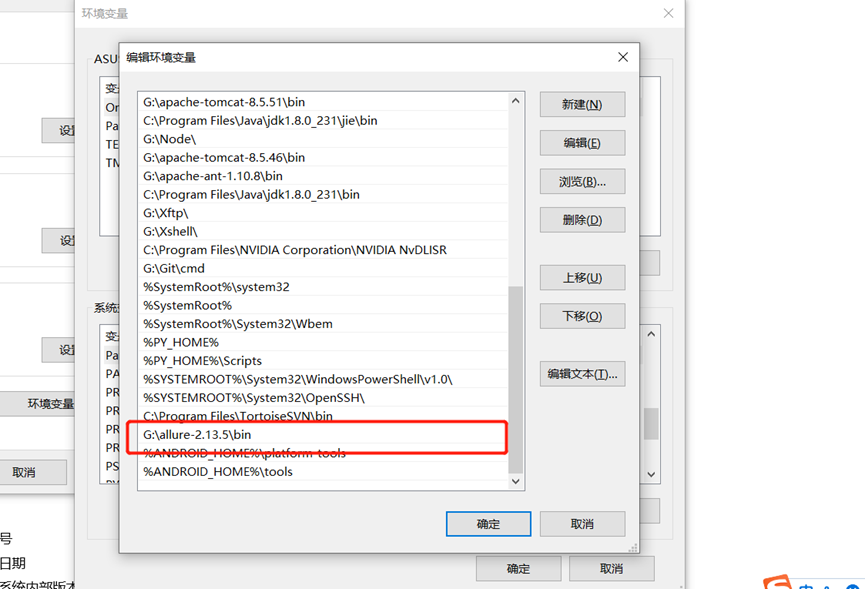
The installation of allure is completed. python needs to install the allure pytest library.
pip install allure-pytest
Add parameters when executing pytest:
pytest.main ( ['-s','test_param.py', '--alluredir', 'result'] )
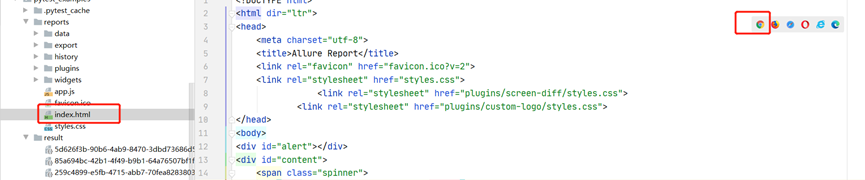
At this time, there will be a result file
In the folder (the file with result, here is pytest_example), execute the command line
`allure generate result -o reports`
We can let the code execute this command for us. The command is as follows:
os.system ( 'allure generate result -o reports --clean' )

The reports folder will be generated, and the index under the file will be opened_ HTML to get a clean test report

2.9.3.2 allure report DIY
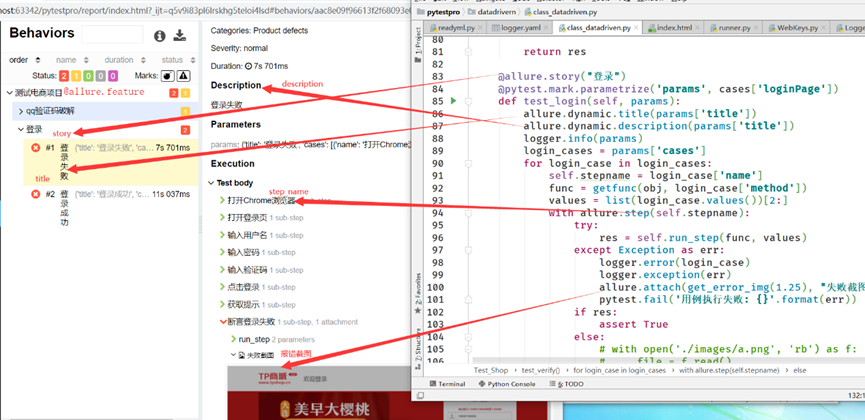
1. Annotation optimization
| usage method | Parameter value | Parameter description |
|---|---|---|
| @allure.epic() | epic description | Project description, followed by feature |
| @allure.feature() | Module name | Description of the function node, followed by story |
| @allure.story() | User story | User story, followed by title |
| @allure.title | Title of use case | Rename html report name |
| @allure.testcase() | Link address of test case | Corresponding to the case in the function test case system |
| @allure.issue() | defect | Corresponding to the link in the defect management system |
| @allure.description() | Use case description | Description of test cases |
| @allure.step() | Operation steps | Steps for test cases |
| @allure.severity() | Use case level | blocker,critical,normal,minor,trivial |
| @allure.link() | link | Define a link and display it in the test report |
| @allure.attachment() | enclosure | Add attachments to the report |
2. Set logo
a. Modify logo image
Open the allure folder:
G:\allure-2.15.0\plugins\custom-logo-plugin\static
custom-logo.svg in the static folder is the default logo. We want to put our logo image here.
Then open styles.css
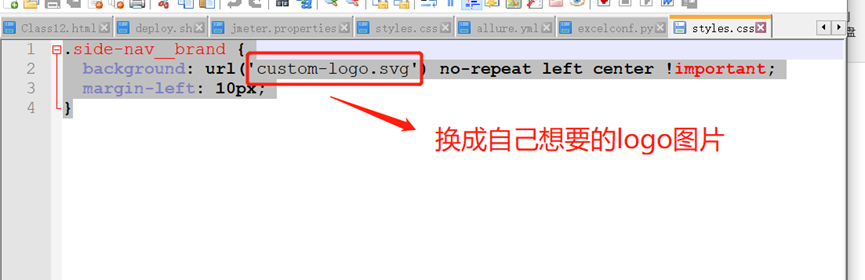
Here we need to adjust the style - find a front-end with good relationship!
b. Enable plug-ins
G:\allure-2.15.0\config \allure.yaml
Add a line at the end: - Custom Logo plugin
Just regenerate the report.