PXE
What is 1 pxe?
PXE(preboot execute environment, pre-boot execution environment) is Intel company The latest technology developed, working in Client/Server network mode, support Workstation The image is downloaded from the remote server through the network and the operating system is booted through the network. During the boot process, the terminal requests the server to assign the IP address for reuse. TFTP (trivial file transfer protocol) or MTFTP Multcast trivial file transfer protocol downloads a startup package to local memory for execution. The startup package completes the basic software settings of the terminal (client) and guides the terminal operating system pre-installed in the server. PXE can boot a variety of operating systems, such as: Windows95/98/2000/windows2003/windows2008/winXP/win7/win8,linux Series systems, etc.
2 pxe manifestation:
The most direct manifestation of PXE is that network environment lower Workstation Hard disk can be omitted, but it is not the concept of diskless station, because PC using this technology runs more than three times faster in network mode than PC with disks. Of course, the PC using PXE is not the traditional TERMINAL terminal, because the PC using PXE does not consume the C PU, RAM and other resources of the server, so the hardware requirements of the server are very low.
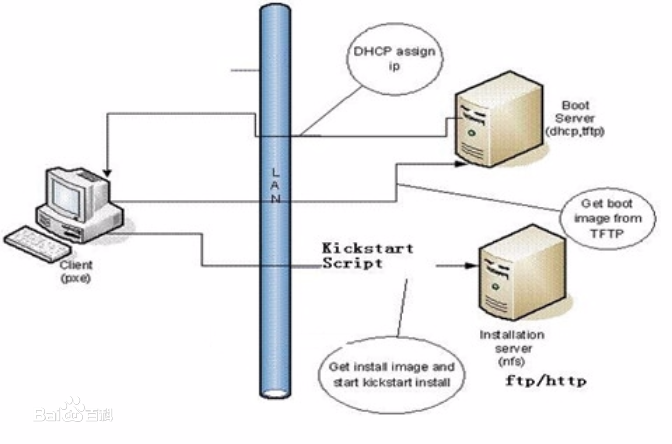
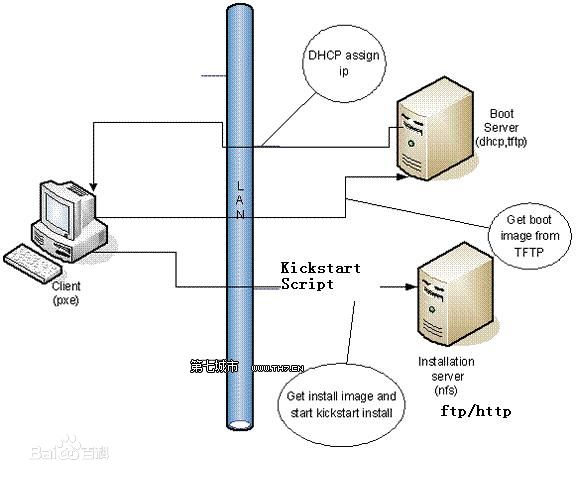
3 PXE Startup Principle
When the computer boots, BIOS Call the PXE Client into memory and execute it, then PXE Client Download files placed remotely to run locally over the network
4 Startup process
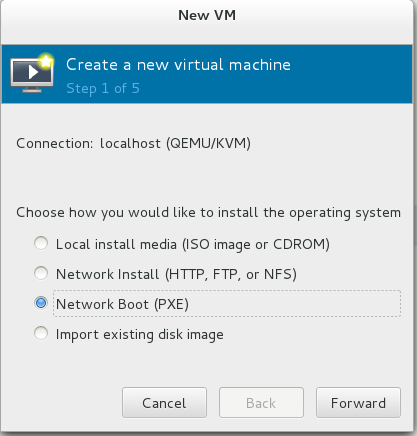
Let's use the PXE network bootstrapper to install a virtual machine.
1. Installation # Installation
yum install httpd dhcp tftp-server syslinux -y
httpd        ##Sharing installation resources
dhcp        ##Allocating ip and getting pxelinux.0 files from client hosts
pxelinux.0    ##Pre-install environment header files to specify programs to read subsequent files
tftp-server    ##Provide tftp protocol to allow client hosts to read the pre-installed environment
syslinux    ##Provide pxelinux.0 file
2. Start up service:
systemctl stop firewalld
systemctl disable firewalld
systemctl start httpd
systemctl enable httpd
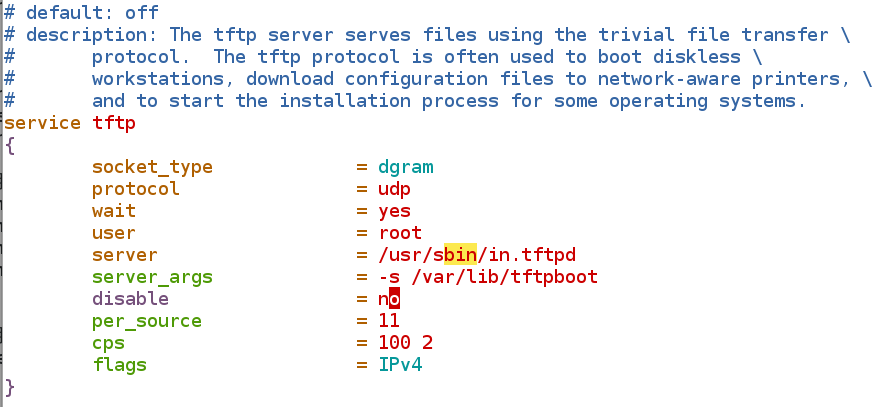
##Enabling tftp service
vim /etc/xinetd.d/tftp
14 disable= no
systemctl restart xinetd
chkconfig --list
xinetd based services:
chargen-dgram: off
chargen-stream: off
daytime-dgram: off
daytime-stream: off
discard-dgram: off
discard-stream: off
echo-dgram: off
echo-stream: off
tcpmux-server: off
tftp: on ##tftp service open
time-dgram: off
time-stream: off
2.1 # # Enable dhcp service
cp /usr/share/doc/dhcp-4.2.5/dhcpd.conf.example /etc/dhcp/dhcpd.conf
vim /etc/dhcp/dhcpd.conf
option domain-name "example.com";    ##Client Host Domain Name
option domain-name-servers 172.25.254.254; ##dns acquired by client hosts
default-lease-time 600;            ##Default lease term
max-lease-time 7200;            ##Maximum lease period
log-facility local7;            ##log level
subnet 172.25.254.0 netmask 255.255.255.0 {    ##Network segment, subnet mask
  range 172.25.254.60 172.25.254.70;    ##ip address pool
  option routers 172.25.254.250;    ##Gateway Obtained by Client Host
  filename "pxelinux.0";        ##Pre-installed environment header file obtained by client host
  next-server 172.25.254.100;        ##ip of the host where the header file is specified
}

systemctl start dhcpd
systemctl enable dhcpd
3. Setting Shared Files
##Making and Installing Source
mkdir  /var/www/html/rhel7.0
mkdir  /iso
mv /root/rhel-server-7.0-x86_64-dvd.iso  /iso/
mount /iso/rhel-server-7.0-x86_64-dvd.iso /var/www/html/rhel7.0/
vim /etc/rc.d/rc.local
mount /iso/rhel-server-7.0-x86_64-dvd.iso /var/www/html/rhel7.0/
chmod +x /etc/rc.d/rc.local
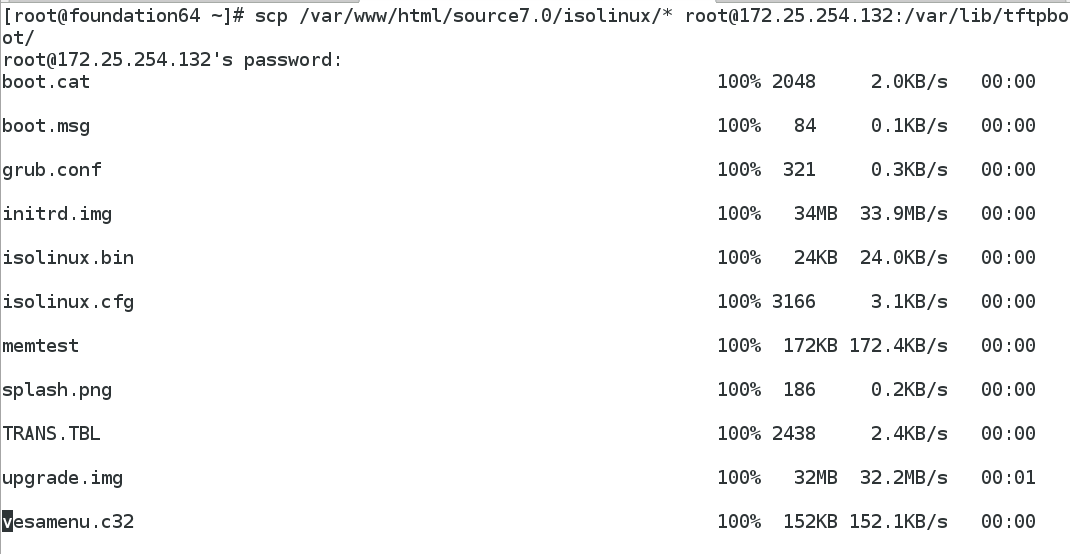
##Making Pre-Installation Environment

cp /var/www/html/rhel7.0/isolinux/*  /var/lib/tftpboot/
cp /usr/share/syslinux/pxelinux.0 /var/lib/tftpboot/
mkdir /var/lib/tftpboot/pxelinux.cfg
cp /var/lib/tftpboot/isolinux.cfg /var/lib/tftpboot/pxelinux.cfg/default
systemctl restart xinetd
##Setting up Automated Deployment
yum install system-conifig-kickstart
system-config-kickstart ---->/var/www/html/rhel7.0.cfg
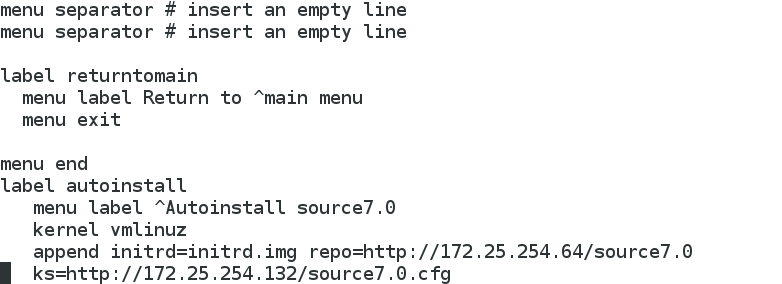
vim /var/lib/tftpboot/pxelinux.cfg/default
label autoinstall ##Option Tags
menu label ^Autoinstall RHEL7.0 ##Title
kernel vmlinuz ##Start Kernel Files
append initrd=initrd.img repo=http://172.25.254.100/rhel7.0 ks=http://172.25.254.100/rhel7.0.cfg
##Initialization Mirror ##Installation resources ##Automatic Installation Script PXE Network bootstrapper:
1 yum install httpd dhcp tftp-server syslinux -y
2 systemctl stop firewalld.service
3 systemctl disable firewalld.service
4 systemctl start httpd
5 systemctl enable httpd
6 vim /etc/xinetd.d/tftp
7 systemctl restart xinetd.service
8 chkconfig --list
Mirror operation: Pre-installation environment
1 vim /etc/rc.d/rc.local 2 chmod +x /etc/rc.d/rc.local 3 df 4 scp /var/www/html/source7.0/isolinux/* root@172.25.254.132:/var/lib/tftpboot/ 9 cp /usr/share/doc/dhcp-4.2.5/dhcpd.conf.example /etc/dhcp/dhcpd.conf 10 vim /etc/dhcp/dhcpd.conf 11 systemctl restart dhcpd 12 systemctl enable dhcpd 13 cp /usr/share/syslinux/pxelinux.0 /var/lib/tftpboot/ 14 mkdir /var/lib/tftpboot/pxelinux.cfg 15 cp /var/lib/tftpboot/isolinux.cfg /var/lib/tftpboot/pxelinux.cfg/default 16 systemctl restart xinetd Setting up Automated Deployment 17 yum install system-conifig-kickstart 18 vim /var/lib/tftpboot/pxelinux.cfg/default
Open dhcp service and deploy dhcp service

Make installation source:

vim /var/lib/tftpboot/pxelinux.cfg/default
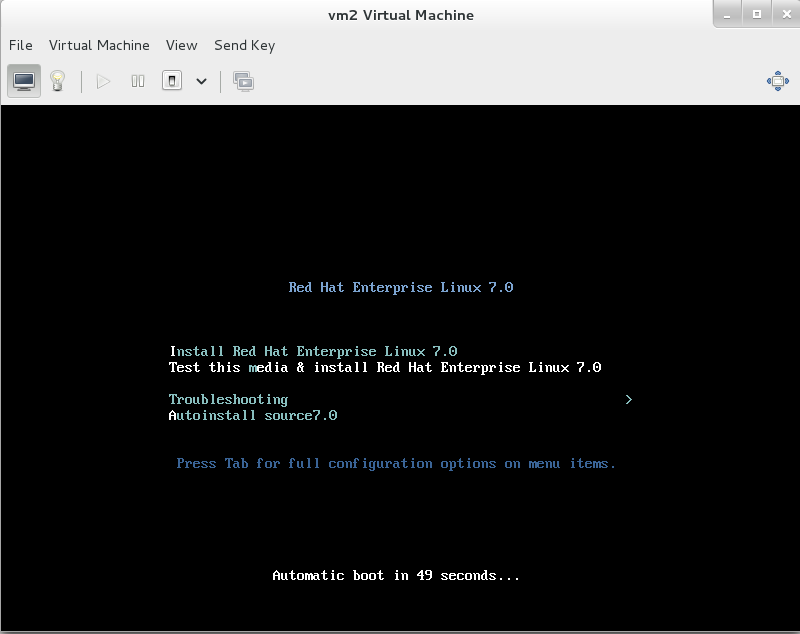
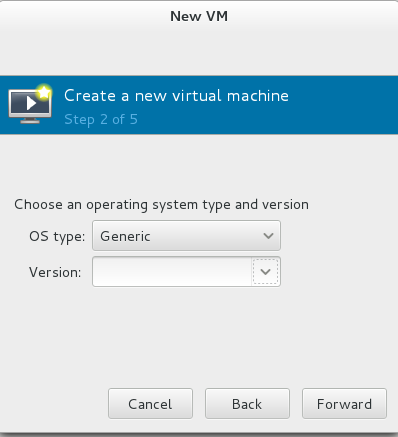
Install a virtual machine:
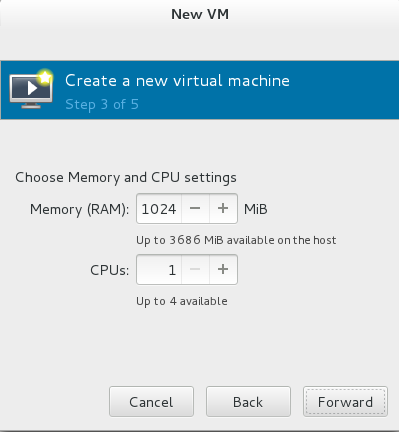 ,
,

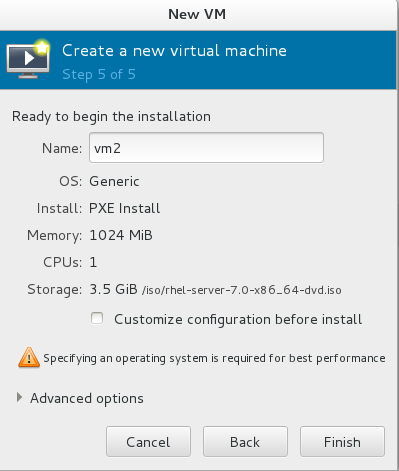
At this point, the virtual machine needs to get a dynamic ip from the dhcp server, then kickstart will tell him what files to access next, and then get the image from the installation source through the tftp protocol to complete the pxe installation of the virtual machine.