Preface
The new pneumonia epidemic that began to spread at the end of 2019 has affected people's hearts. As an individual, what we can do is to stay at home as little as possible.
Seeing that some friends ask design students to help them put on masks for their heads, as technicians, I think there must be more people with such demands. It's better to develop a simple program to realize this demand, which is also to help design sisters reduce workload.
So I spent some time writing a command-line tool called face mask, which can easily put on masks for the portraits in the picture, and the direction and size of the masks are suitable for the faces~

Use
Install face mask
Ensure Python version 3.6 and above
pip install face-mask
Using face mask
You can directly specify the image path to put on a mask for the portrait in the image, and a new image will be generated (with the suffix of - with mask in addition):
face-mask /path/to/face/picture
You can also use the default picture viewer to open a newly generated picture by specifying the -- show option:
face-mask /path/to/face/picture --show
Effect
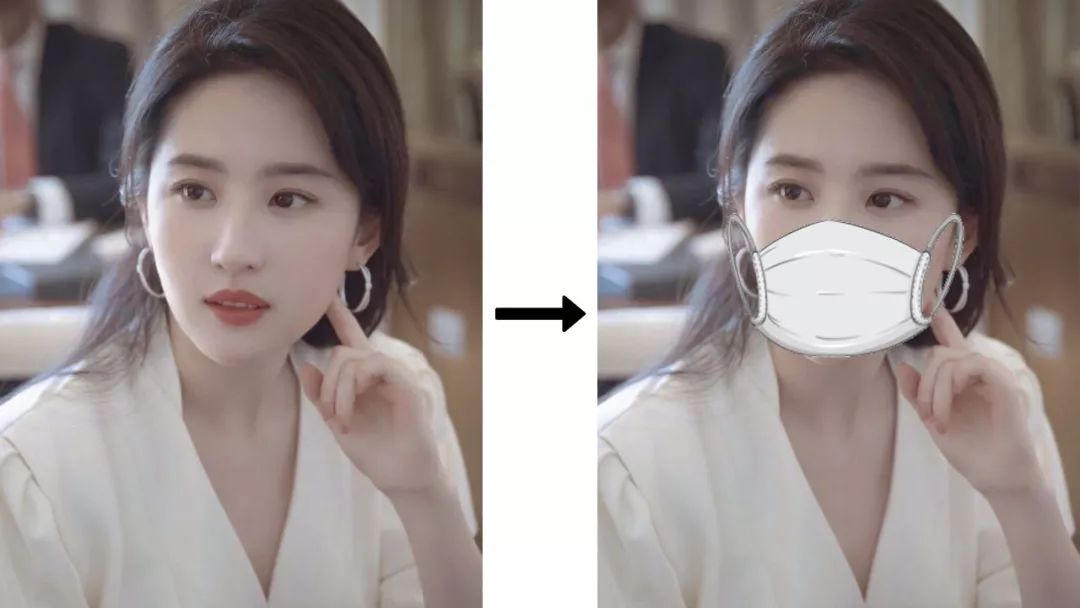
Put a mask on someone
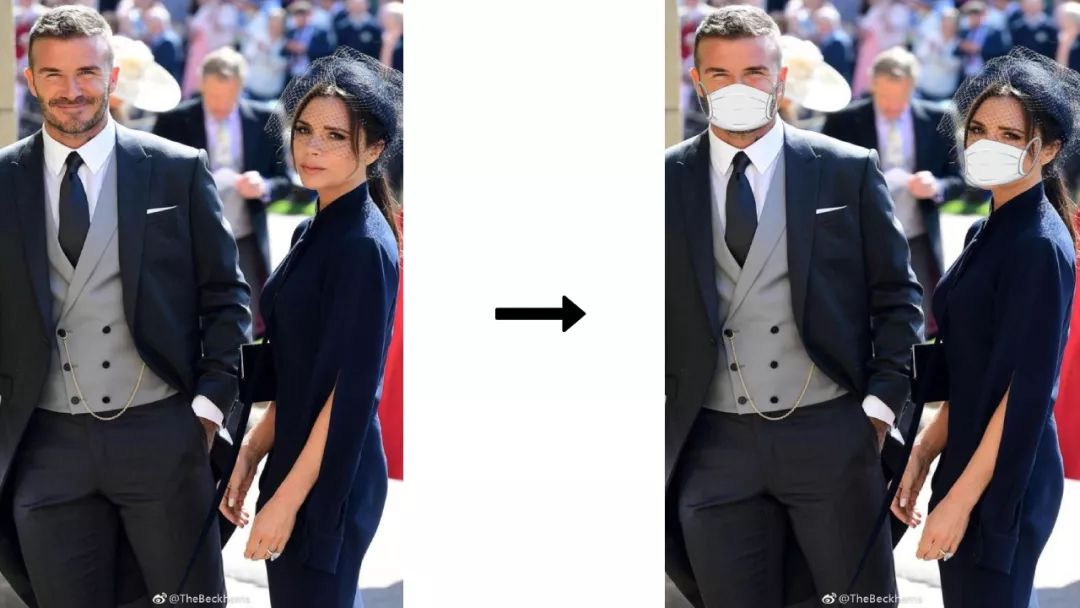
Put masks on more than one person
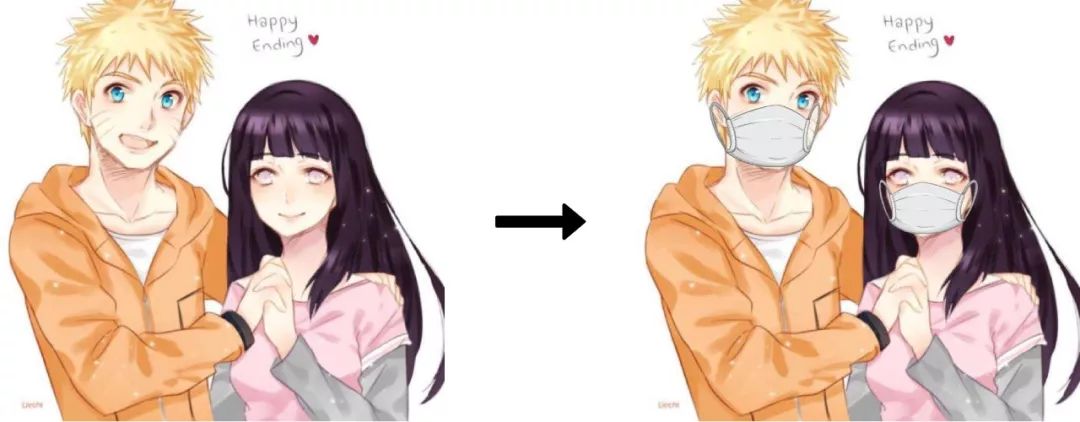
Put masks on cartoon characters
Realization
thinking
To achieve the above effect, what should we do? Think of it like this:
-
The first step is to recognize the nose (bridge) and the face outline (chin)
-
The left point, the bottom point and the right point of the face are determined by the face contour
-
Determine the height and centerline of the mask size from the nose and the bottom of the face
-
Divide the mask into two parts equally
-
Adjust the size of the left mask. The width is the distance from the left point of the face to the centerline
-
Adjust the size of the right mask. The width is the distance from the right point of the face to the centerline
-
Merge left and right masks into new masks
-
-
Rotate the new mask at the rotation angle of the centerline relative to the y axis
-
Put the new mask in place in the original picture
For face recognition, face recognition [2] library can be used for recognition.
With regard to image processing, the pilot [3] library can be used for processing.
Code
With ideas, implementation is a relatively easy thing. However, it may take some time to be familiar with the library and to calculate the transformation of pictures.
For detailed code, please read face mask [4]. Here are just the core steps.
Face recognition
import face_recognition

face_image_np = face_recognition.load_image_file('/path/to/face/picture')
face_landmarks = face_recognition.face_landmarks(face_image_np)
With the help of face recognition library, people can be easily identified. The final face landmarks is a list, in which each face landmarks represents a personal image data.
Face? Landmark is a dictionary in which the key represents the portrait feature and the value represents the list of points of the feature. For example:
-
The key nose [bridge] indicates the bridge of the nose
-
Key chin for cheek
We need to put masks on the corresponding head image according to each face \.
Get the feature points of nose and cheek
import numpy as np

nose_bridge = face_landmark['nose_bridge']
nose_point = nose_bridge[len(nose_bridge) * 1 // 4]
nose_v = np.array(nose_point)

chin = face_landmark['chin']
chin_len = len(chin)
chin_bottom_point = chin[chin_len // 2]
chin_bottom_v = np.array(chin_bottom_point)
chin_left_point = chin[chin_len // 8]
chin_right_point = chin[chin_len * 7 // 8]
Through the above code, we get:
-
A point representing the upper bridge of the nose
-
Show left point of face
-
Show right point of face
-
Represent the bottom point of the face
Split, scale, and merge masks
from PIL import Image

_face_img = Image.fromarray(face_image_np)
_mask_img = Image.open('/path/to/mask/picture')

# split mask and resize
width = _mask_img.width
height = _mask_img.height
width_ratio = 1.2
new_height = int(np.linalg.norm(nose_v - chin_bottom_v))

# left
mask_left_img = _mask_img.crop((0, 0, width // 2, height))
mask_left_width = get_distance_from_point_to_line(chin_left_point, nose_point, chin_bottom_point)
mask_left_width = int(mask_left_width * width_ratio)
mask_left_img = mask_left_img.resize((mask_left_width, new_height))

# right
mask_right_img = _mask_img.crop((width // 2, 0, width, height))
mask_right_width = get_distance_from_point_to_line(chin_right_point, nose_point, chin_bottom_point)
mask_right_width = int(mask_right_width * width_ratio)
mask_right_img = mask_right_img.resize((mask_right_width, new_height))

# merge mask
size = (mask_left_img.width + mask_right_img.width, new_height)
mask_img = Image.new('RGBA', size)
mask_img.paste(mask_left_img, (0, 0), mask_left_img)
mask_img.paste(mask_right_img, (mask_left_img.width, 0), mask_right_img)
The above codes are mainly as follows:
-
Divide the mask into two parts equally
-
Adjust the size of the left mask, the width is the distance from the left point of the face to the centerline * width factor 1.2
-
Adjust the size of the right mask, the width is the distance from the right point of the face to the centerline * width factor 1.2
-
Merge left and right masks into new masks
Get "distance" from "point" to "line is used to get the distance from a point to a line. The specific implementation can be seen in the source code.
Width ratio is the width coefficient used to properly enlarge the mask. The reason is that we calculate the width of the mask according to the width of the cheek, but the mask is on the ear, and the actual width should be wider.
Rotate the mask and put it in place
# rotate mask
angle = np.arctan2(chin_bottom_point[1] - nose_point[1], chin_bottom_point[0] - nose_point[0])
rotated_mask_img = mask_img.rotate(angle, expand=True)

# calculate mask location
center_x = (nose_point[0] + chin_bottom_point[0]) // 2
center_y = (nose_point[1] + chin_bottom_point[1]) // 2

offset = mask_img.width // 2 - mask_left_img.width
radian = angle * np.pi / 180
box_x = center_x + int(offset * np.cos(radian)) - rotated_mask_img.width // 2
box_y = center_y + int(offset * np.sin(radian)) - rotated_mask_img.height // 2

# add mask
_face_img.paste(mask_img, (box_x, box_y), mask_img)
The above codes are mainly as follows:
-
Rotate the new mask at the rotation angle of the centerline relative to the y axis
-
Calculate the coordinates that the mask should be placed
-
Put the new mask under the calculated coordinates of the original picture
Finally, the new image will be saved to the local path, and the code will not be displayed.
summary
With the help of the face recognition library, we can easily identify the human image, then calculate the size, direction and position of the exit mask according to the width of the cheek and the position of the bridge of the nose, and finally generate the picture of wearing the mask. The whole process is not complicated, but we need to be extra careful in coordinate calculation. In this way, we have created a short and powerful "automatic mask on" program!