Overview of this article
- I have a Lenovo notebook in 2015. The graphics card is GTX950M and ubuntu 16.04 LTS desktop version has been installed. In order to use its GPU to complete the training of deep learning 4J, I installed CUDA and cuDNN myself. Here, the whole process is recorded for future reference. The whole installation process is divided into the following steps:
- preparation
- Installing Nvidia drivers
- Install CUDA
- Install cuDNN
Statement of special issues
- According to the general steps, after installing the Nvidia graphics card driver, the corresponding CUDA version will be prompted. Next, install CUDA according to the prompted version. For example, what I prompt here is 11.2. Under normal circumstances, I should install CUDA version 11.2
- However, I chose version 9.1 for installation, because in the previous development, I found that after deep learning 4J used the 11.2 SDK, there would be a ClassNotFound error when starting the application. This problem has not been fixed so far (ashamed, Xinchen's level is so low...). Therefore, I still installed version 9.1 when Nvidia driver prompted version 11.2, Later, the deep learning 4J application was run in this environment, and everything was normal
- If you don't have problems like me, you can install CUDA according to the version specified by the driver. The specific operation steps will be described in detail later;
Preparation worker
- The next operations, except downloading from the web page, are all ssh Remote connection to the ubuntu machine. The ssh login account is an ordinary account, not root
- If there are already drivers, please delete them first:
sudo apt-get remove --purge nvidia*
- Disable the nouveau driver (very important), open the file / etc/modprobe.d/blacklist.conf with vi, add the following contents at the end, and then save and exit:
blacklist nouveau
blacklist lbm-nouveau
options nouveau modeset=0
alias nouveau off
alias lbm-nouveau off
echo options nouveau modeset=0 | sudo tee -a /etc/modprobe.d/nouveau-kms.conf
update-initramfs -u
- Execute reboot to restart the computer
- After restart, execute the following command, and there should be no output to prove that nouveau has been disabled:
lsmod|grep nouveau
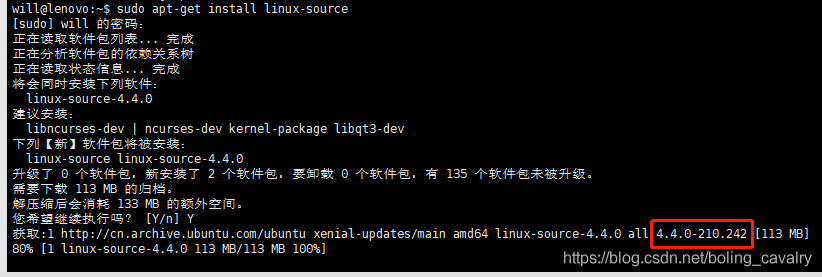
sudo apt-get install linux-source
- The information displayed during installation is as follows:
- According to the information in the red box above, the kernel version number is, so execute the following command:
sudo apt-get install linux-headers-4.4.0-210-generic
Download and install Nvidia drivers
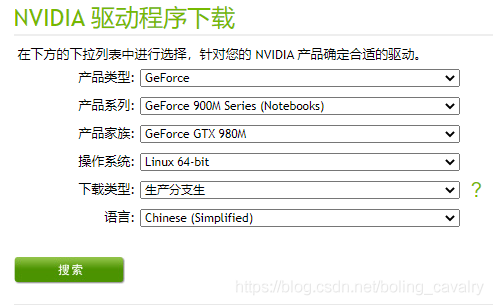
- Visit Nvidia website at https://www.nvidia.cn/Download/index.aspx?lang=cn , and then select the corresponding graphics card and operating system. My selection is shown in the figure below:
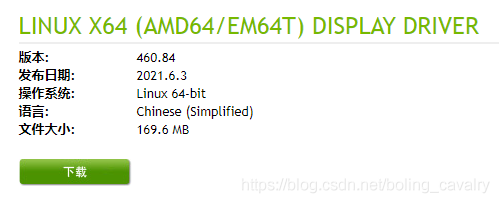
- Click the search button in the figure above to enter the page in the figure below and click download:
- The downloaded file name is NVIDIA-Linux-x86_64-460.84.run
- Close the graphic page:
sudo service lightdm stop
- Add executable permissions to the driver file:
sudo chmod a+x NVIDIA-Linux-x86_64-460.84.run
sudo ./NVIDIA-Linux-x86_64-460.84.run -no-x-check -no-nouveau-check -no-opengl-files
- In the following figure, select the red box:
- If you encounter the following figure, enter directly:
- To restore a drawing page:
sudo service lightdm start
- Execute the command NVIDIA SMI. If the driver installation is successful, the following contents will be displayed:
will@lenovo:~/temp/202106/20$ nvidia-smi
Sun Jun 20 09:02:11 2021
+-----------------------------------------------------------------------------+
| NVIDIA-SMI 460.84       Driver Version: 460.84       CUDA Version: 11.2     |
|-------------------------------+----------------------+----------------------+
| GPU  Name        Persistence-M| Bus-Id        Disp.A | Volatile Uncorr. ECC |
| Fan  Temp  Perf  Pwr:Usage/Cap|         Memory-Usage | GPU-Util  Compute M. |
|                               |                      |               MIG M. |
|===============================+======================+======================|
|   0  GeForce GTX 950M    Off  | 00000000:01:00.0 Off |                  N/A |
| N/A   41C    P0    N/A /  N/A |      0MiB /  4046MiB |      1%      Default |
|                               |                      |                  N/A |
+-------------------------------+----------------------+----------------------+

+-----------------------------------------------------------------------------+
| Processes:                                                                  |
|  GPU   GI   CI        PID   Type   Process name                  GPU Memory |
|        ID   ID                                                   Usage      |
|=============================================================================|
|  No running processes found                                                 |
+-----------------------------------------------------------------------------+
- As can be seen from the above, CUDA Version: 11.2 means that the CUDA version corresponding to the driver should be 11.2. As mentioned earlier, I have encountered a problem, so I will install version 9.1 next, but you can choose to install 11.2
Install CUDA
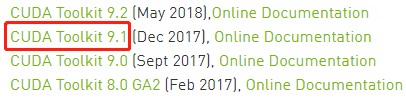
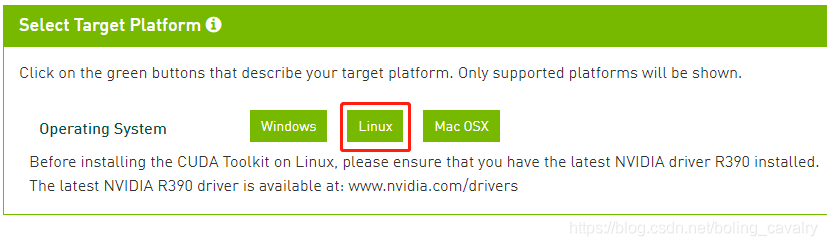
- Browser access https://developer.nvidia.com/cuda-toolkit-archive , click the link in the red box:
- Download the Linux version as shown below:
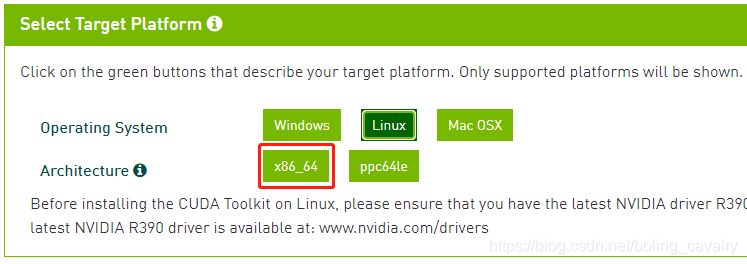
- Continue selecting x86_64:
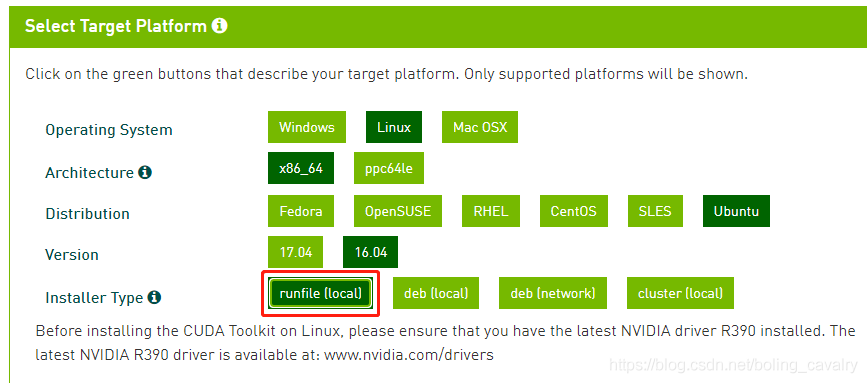
- Select the specific Linux version and its version number:
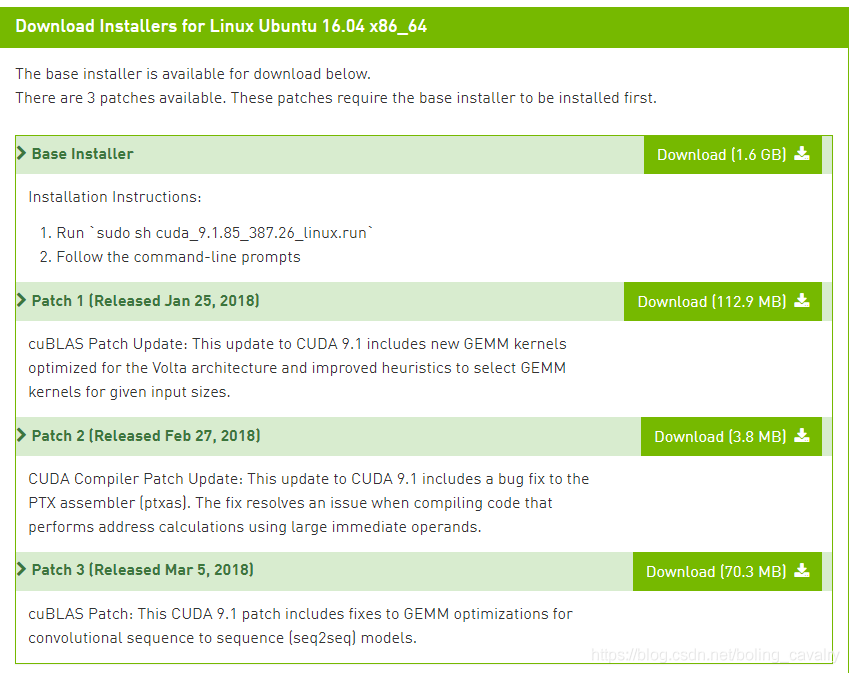
- There are many things to download, one installer and three patches:
- The download addresses of the above four files are sorted as follows:
https://developer.download.nvidia.cn/compute/cuda/9.1/secure/Prod/local_installers/cuda_9.1.85_387.26_linux.run?P0Ntu_6NLtuuEMm6fJRk1W5vl4KM7oaT1oFW870zKJ-zDw2ckKntFLOE6klRJfw2CmTa8z3Q390_6urlgc6LqjoqlIFW9gvfvDCusnINYplLaw1u8lRY8R4oVNtpNzaXU4BQcHjvdb6c6rjq20dktCcRd4640woXt1yHmD95v1Du7wdBBXq2eOY

https://developer.download.nvidia.cn/compute/cuda/9.1/secure/Prod/patches/1/cuda_9.1.85.1_linux.run?yeXf_7wIGlHAUw--E_YVLQZRgXv0x2i043woJVY-ydXU5Kyhc-eYQf5JmL-4mvYmlvPYCEc5RhT2sDWscX20CJbdOwpkt30kWb9vx8E4oIlajDQ3MVPvXdiKKsIOBUx-h0q0N0jSkNn80VMhW-nk8jwvRY_e6MuFzqWBaPk

https://developer.download.nvidia.cn/compute/cuda/9.1/secure/Prod/patches/2/cuda_9.1.85.2_linux.run?5jGZxNigaOJkaaPbMagjhSW7ebQvYGyYoqe2vBxZ1eV8qp2BzXJLxIPgAo11UgWhORirQkdJGq5b8eFh4aShBVUTmuPaasvRiMCKDZw5yjjIobGQrCEyU-LFO59AbrRER57Mxa0T1Sc97fC80IOZq8Ox2repjn7A3oYVgd8

https://developer.download.nvidia.cn/compute/cuda/9.1/secure/Prod/patches/3/cuda_9.1.85.3_linux.run?CxWimJTC-XROYihig-UZmH62odbJInf1fmxTZ_bsW1nQ0Zz5cL5r8qLmlMR_1j2rVhk3j8Z5lS6dpArt8frjGHH2MeVn5TefMoclam8udm-RSMMmqHXYE66hHN2D0drVEdtCwe8ZrEIYb2rpucaz9svCFE8Z319mge4Ju94
- After downloading, execute the command chmod a+x *.run to add executable permissions for the above four files
- Install CUDA:
sudo sh cuda_9.1.85_387.26_linux.run
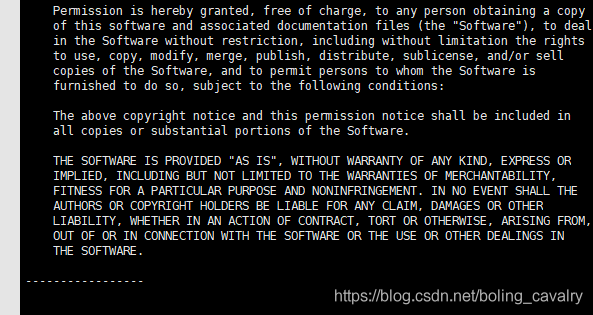
- When encountering a license, just like using vi tool, enter ":" and then enter "q" to skip the license reading and perform the real installation operation:
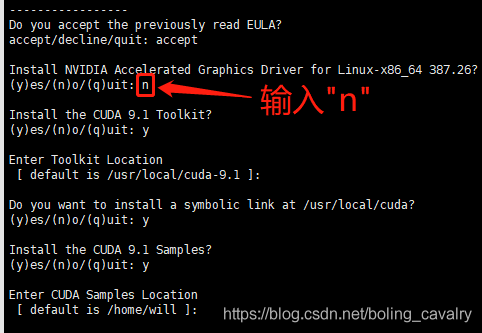
- Next is a series of questions. The answer to each question is shown in the figure below. Please note that the questions in the red box must be selected n:
- After installation, output the following:
Installing the CUDA Toolkit in /usr/local/cuda-9.1 ...
Missing recommended library: libGLU.so
Missing recommended library: libX11.so
Missing recommended library: libXi.so
Missing recommended library: libXmu.so
Missing recommended library: libGL.so

Installing the CUDA Samples in /home/will ...
Copying samples to /home/will/NVIDIA_CUDA-9.1_Samples now...
Finished copying samples.

===========
= Summary =
===========

Driver:   Not Selected
Toolkit:  Installed in /usr/local/cuda-9.1
Samples:  Installed in /home/will, but missing recommended libraries

Please make sure that
 -   PATH includes /usr/local/cuda-9.1/bin
 -   LD_LIBRARY_PATH includes /usr/local/cuda-9.1/lib64, or, add /usr/local/cuda-9.1/lib64 to /etc/ld.so.conf and run ldconfig as root

To uninstall the CUDA Toolkit, run the uninstall script in /usr/local/cuda-9.1/bin

Please see CUDA_Installation_Guide_Linux.pdf in /usr/local/cuda-9.1/doc/pdf for detailed information on setting up CUDA.

***WARNING: Incomplete installation! This installation did not install the CUDA Driver. A driver of version at least 384.00 is required for CUDA 9.1 functionality to work.
To install the driver using this installer, run the following command, replacing <CudaInstaller> with the name of this run file:
    sudo <CudaInstaller>.run -silent -driver

Logfile is /tmp/cuda_install_13425.log
- Open the file ~ /. bashrc and add the following two lines at the end (if LD_LIBRARY_PATH already exists, please refer to the writing method of PATH and change it to add):
export PATH=/usr/local/cuda-9.1/bin:$PATH
export LD_LIBRARY_PATH=/usr/local/cuda-9.1/lib64
- Execute the command source ~/.bashrc to make the configuration effective
- Execute the command su - switch to the root account and execute the following command (do not use sudo, but switch to the root account):
sudo echo "/usr/local/cuda-9.1/lib64" >> /etc/ld.so.conf
- Execute the following command as root:
ldconfig
- Execute the command exit to exit the root identity. Now it is the identity of an ordinary account again
- Execute the command nvcc -V to check the CUDA version. Note that the parameter V is capitalized:
will@lenovo:~$ nvcc -V
nvcc: NVIDIA (R) Cuda compiler driver
Copyright (c) 2005-2017 NVIDIA Corporation
Built on Fri_Nov__3_21:07:56_CDT_2017
Cuda compilation tools, release 9.1, V9.1.85
sudo sh cuda_9.1.85.1_linux.run
- Install the second patch:
sudo sh cuda_9.1.85_387.26_linux.run
sudo sh cuda_9.1.85_387.26_linux.run
Install cuDNN
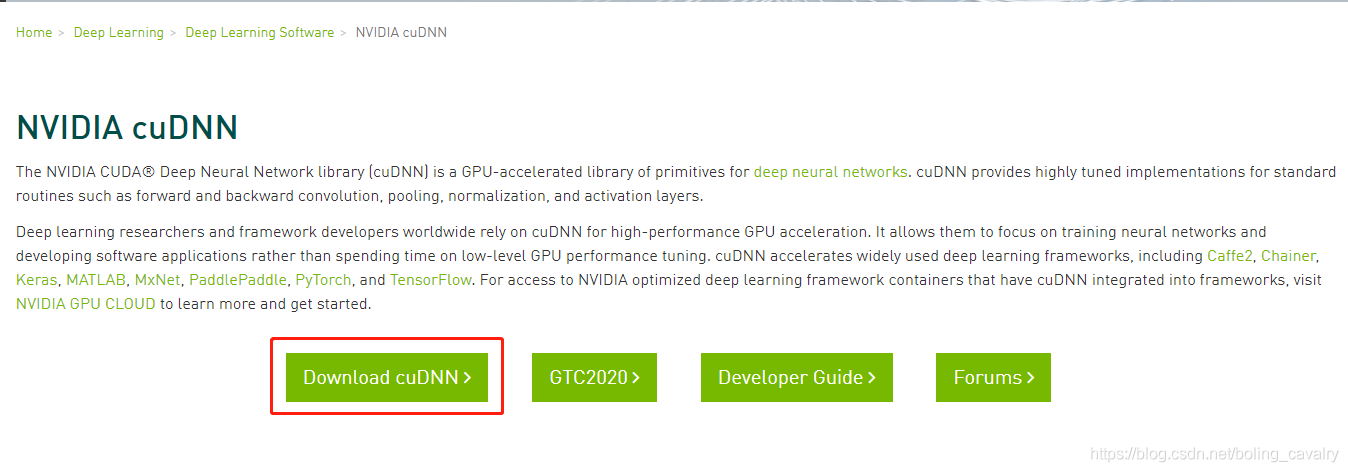
- Browser access https://developer.nvidia.com/zh-cn/cudnn :
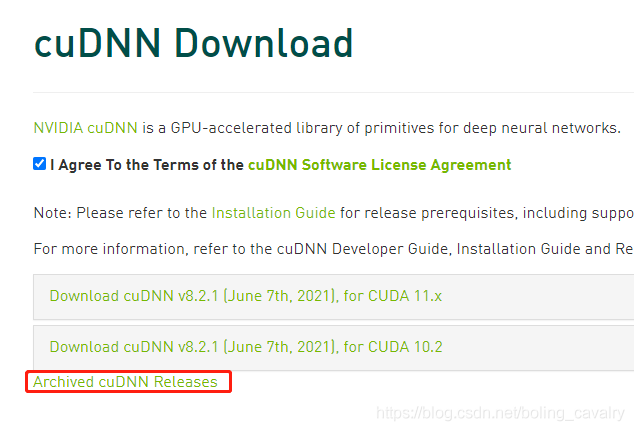
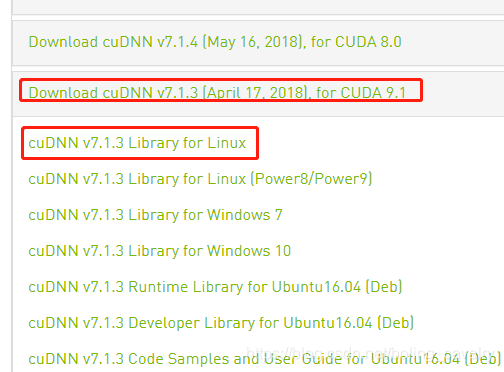
- Log in as prompted. If you don't have an account, please register one. After logging in, enter the download page. You need to click the red box in the figure below to see the old version:
- Select the version that matches CUDA:
- After downloading, unzip to get the cuda folder, and then execute the following command:
sudo cp cuda/include/cudnn.h /usr/local/cuda/include/
sudo cp cuda/lib64/libcudnn* /usr/local/cuda/lib64/
sudo chmod a+r /usr/local/cuda/include/cudnn.h
sudo chmod a+r /usr/local/cuda/lib64/libcudnn*
- Execute the command cat /usr/local/cuda/include/cudnn.h | grep CUDNN_MAJOR -A 2, if the installation is successful, there will be the following outputs:
#define CUDNN_MAJOR 7
#define CUDNN_MINOR 1
#define CUDNN_PATCHLEVEL 3
--
#define CUDNN_VERSION    (CUDNN_MAJOR * 1000 + CUDNN_MINOR * 100 + CUDNN_PATCHLEVEL)

#include "driver_types.h"
- So far, the installation of CUDA(9.1) and cuDNN for Ubuntu 16 has been completed. I hope I can give you some reference.