objective
In the last article Electron 01: getting started The basic usage of Electron is introduced in. If you just show the front-end page and don't need to use the file system, hardware devices and other functions of the operating system, just understand the content of that article. However, if you need to use the above resources, you need to further understand some mechanisms and contents of Electron. This article will explain the relevant content, and the example demonstration in the article will be based on the previous article.
Process model
Each Electron application has a main entry file, and its process is called the Main Process. The forms created in the Main Process have their own running process, which is called the Renderer Process. Each Electron's application has one and only one Main Process, but there can be multiple rendering processes. Simply understand that the Main Process is equivalent to the browser, and the rendering process is equivalent to a web page opened on the browser.
The main work of the main process is to control the application life cycle and manage windows, menus, trays, etc. in addition, the main process runs in the Node.js environment, so it can use various Node.js modules and call various resources in the operating system.
The rendering process is mainly used to display the web page and run the front-end code. Here, only the syntax rules of the front-end can be used, and the syntax and module of Node.js cannot be used.
The syntax and module of Node.js can be directly used in the earlier version of Electron rendering process. In the current version, it cannot be directly used for security reasons (although it can be unlocked through configuration), but there is still a requirement to use some functions of Node.js in the rendering process, so Electron now provides the function of preload.
Preload calls a JS script, which will run before the web page is loaded. It can not only use the function of Node.js, but also access the window object on the web page (it cannot be accessed directly by default, but through the contextBridge module). Therefore, you can pass the functions of Node.js to the window object here, so that the rendering process can use these functions.
Interprocess communication
As can be seen from the above content, by default, the rendering process can only use the syntax rules of the front end, so it can only communicate with the main process equivalent to the background through http or websocket. This method is not convenient, so Electron also provides some other methods to deal with this problem. In Electron, two modules, ipcMain and ipcRenderer, are used to handle interprocess communication. These two modules are based on Node.js. Therefore, according to the above contents, there will be some points for attention, mainly how to use them.
Unsafe way
In the previous chapter, it was mentioned that the syntax and module of Node.js can be directly used in the early version of Electron rendering process. For security reasons, it cannot be directly used in the current version, but it can be unlocked through configuration. Therefore, we can configure it, and then we can directly use the syntax and modules of Node.js in the rendering process, such as the ipc module for inter process communication. This is the easiest way to use.
The following is a simple example. Rewrite the main.js and index.html files respectively:
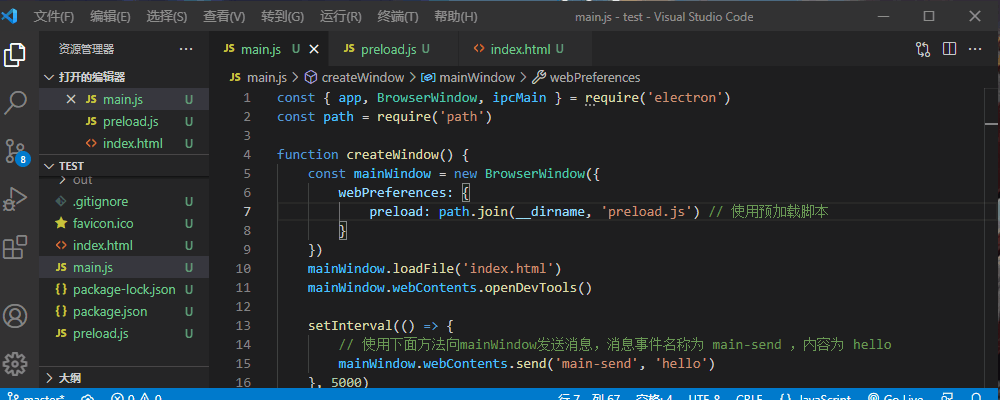
const { app, BrowserWindow, ipcMain } = require('electron')
const path = require('path')

function createWindow() {
    const mainWindow = new BrowserWindow({
        webPreferences: {
            nodeIntegration: true, // Enable node environment
            contextIsolation: false // Disable context isolation
        }
    })
    mainWindow.loadFile('index.html')
    mainWindow.webContents.openDevTools()

    setInterval(() => {
        // Use the following method to send a message to mainWindow. The message event name is main send and the content is hello
        mainWindow.webContents.send('main-send', 'hello')
    }, 5000)
}

// Listen for the renderer send event using the ipcMain.on method
ipcMain.on('renderer-send', (event, arg) => {
    console.log(arg)
    // Use the following method to respond to the object that generates the event. When responding, the event name is main reply and the content is pong
    event.reply('main-reply', 'pong')
})

app.whenReady().then(() => {
    createWindow()
    app.on('activate', function () {
        if (BrowserWindow.getAllWindows().length === 0) createWindow()
    })
})

app.on('window-all-closed', function () {
    if (process.platform !== 'darwin') app.quit()
})
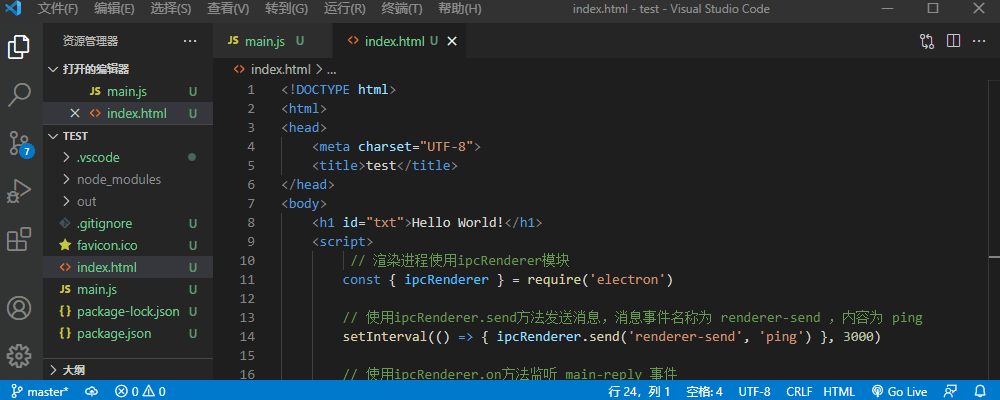
<!DOCTYPE html>
<html>
<head>
    <meta charset="UTF-8">
    <title>test</title>
</head>
<body>
    <h1 id="txt">Hello World!</h1>
    <script>
         // The rendering process uses the ipcRenderer module
        const { ipcRenderer } = require('electron')

        // Use the ipcRenderer.send method to send a message. The message event name is renderer send and the content is ping
        setInterval(() => { ipcRenderer.send('renderer-send', 'ping') }, 3000)

        // Listen for the main reply event using the ipcRenderer.on method
        ipcRenderer.on('main-reply', (event, arg) => { console.log(arg) })

        // Listen for the main send event using the ipcRenderer.on method
        ipcRenderer.on('main-send', (event, arg) => { console.log(arg) })
    </script>
</body>
</html>
The above is a simple communication demonstration. You can directly use the syntax and module of Node.js in the rendering process by setting nodeIntegration: true and contextIsolation: false.
ipcMain and ipcRenderer modules are used for the main process and rendering process respectively. When delivering a message, the message will have an event name. The two modules use their own on() methods to listen for message events. Only ipcRenderer can actively send messages to ipcMain. ipcMain can only return messages after listening to events from ipcRenderer.
The main thread can use the webContents.send() method of the BrowserWindow object to actively send a message to the object rendering process, which also uses ipcRenderer.on() to listen for this message.
In the above demonstration, the messages sent by ipcRenderer and returned by ipcMain are asynchronous methods. They also have synchronous methods. You can refer to the official API document of Electron.
Preload mode
The above method is not recommended by Electron now. It is recommended to transfer some contents of Node.js to the rendering process by preloading. The following is a simple example. Now add a preload.js file as follows:
const { contextBridge, ipcRenderer } = require('electron')

// Use the contextBridge.exposeInMainWorld() method to
// Function, String, Number, Array, Boolean, object, etc
// The window object passed to the rendering process
contextBridge.exposeInMainWorld('myAPI', ()=>{
        setInterval(() => { ipcRenderer.send('renderer-send', 'ping') }, 3000)
        ipcRenderer.on('main-reply', (event, arg) => { console.log(arg) })
        ipcRenderer.on('main-send', (event, arg) => { console.log(arg) })
})
Rewrite the main.js and index.html files respectively:
// In main.js, you only need to rewrite the following content
    const mainWindow = new BrowserWindow({
        webPreferences: {
            preload: path.join(__dirname, 'preload.js') // Using preloaded scripts
        }
    })
<!-- index.html Just rewrite the following -->
    <script>
        window.myAPI()
    </script>
The above is a simple way to use preloading. You can see that there is not much difference from the perspective of use. It is just that the contextBridge.exposeInMainWorld() method is used to pass the content of Node.js to the window object.
Node module usage
Node has many modules that can be used. Some of these modules can be used directly in Electron, but many cannot be used directly in Electron. They need to be compiled by Electron rebuild tool. Install and compile them in the following way:
- Installation tools
npm install --save-dev electron-rebuild - Use the tool to compile all modules
./node_modules/.bin/electron-rebuild
Compile in Windows as follows:
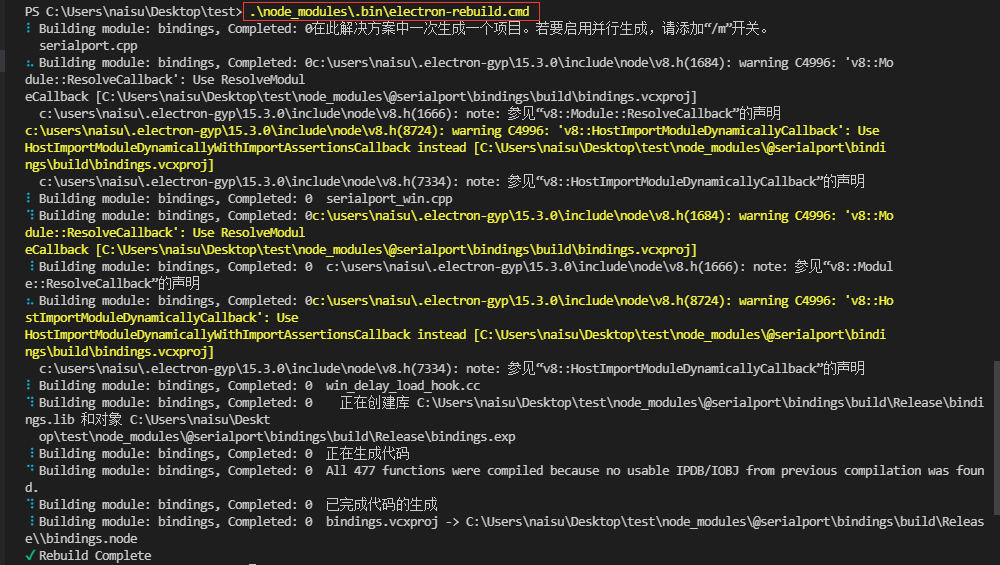
.\node_modules\.bin\electron-rebuild.cmd
Of course, the compilation and use of various modules of Node, especially third-party modules, are very complex. You can also refer to more contents Getting started with Node.js 02: package manager npm The module compilation section of this article.
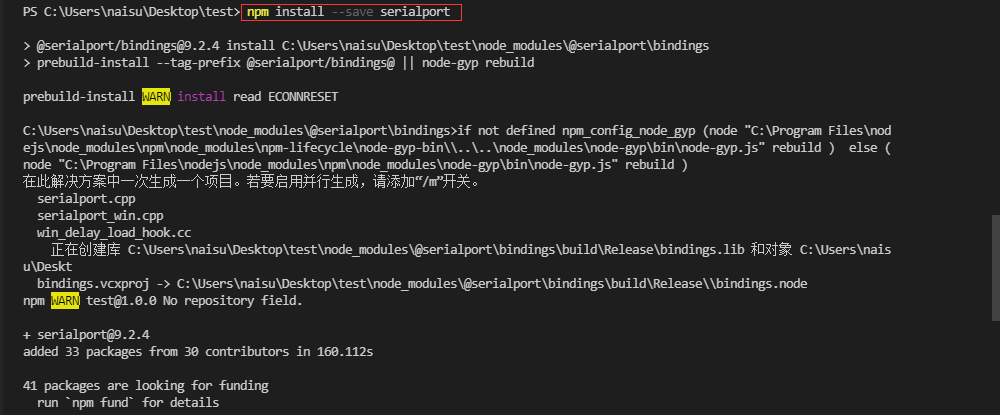
For example, using the serial port module SerialPort in Node.js is troublesome, and node gyp compilation is required. In Electron, you also need to use Electron rebuild to compile, such as the following process:
summary
The introduction of Electron is basically based on understanding the previous article and this article. The following contents are often just the use of some modules provided by Electron, which can be consulted Official documents To understand: