preface
The operation of Oracle database will inevitably encounter various errors, such as bad blocks in the data table. At this time, the data of your table can not be accessed. What good way can you recover it?
What, haven't you met?
Then I hope you will meet in the near future. Ha ha, make a joke ~ play and make trouble. Experience must be old!
1, Introduction
Today I'll tell you how to deal with the bad block of the data table!
Physical corruption of Oracle data blocks can generally be divided into two cases:
- With backup, restore through RMAN
- No backup, via DBMS_REPAIR repair
1,RMAN
In the case of backup, this is an ideal situation. We can recover damaged blocks directly through the RMAN BLOCK MEDIA RECOVERY function.
Here, I do not recommend recovering the entire database or database files to repair these small damaged data blocks, which is a bit of a waste of time.
Refer to official documents: Block Media Recovery with RMAN
2,DBMS_REPAIR
What if there is no backup? (PS: backup is more than everything!)
We can use the DBMS that comes with Oracle_ Repair package to achieve repair.
???? Note: use DBMS_ The repair package is not a complete recovery, but marks the bad block and does not access it. This part of the marked data will be lost, which is inevitable.
Refer to MOS documentation: DBMS_REPAIR SCRIPT (Doc ID 556733.1)
2, Actual combat environment preparation
1. Environment installation
Refer to my one click installation script: Oracle database one click installation has never been so simple
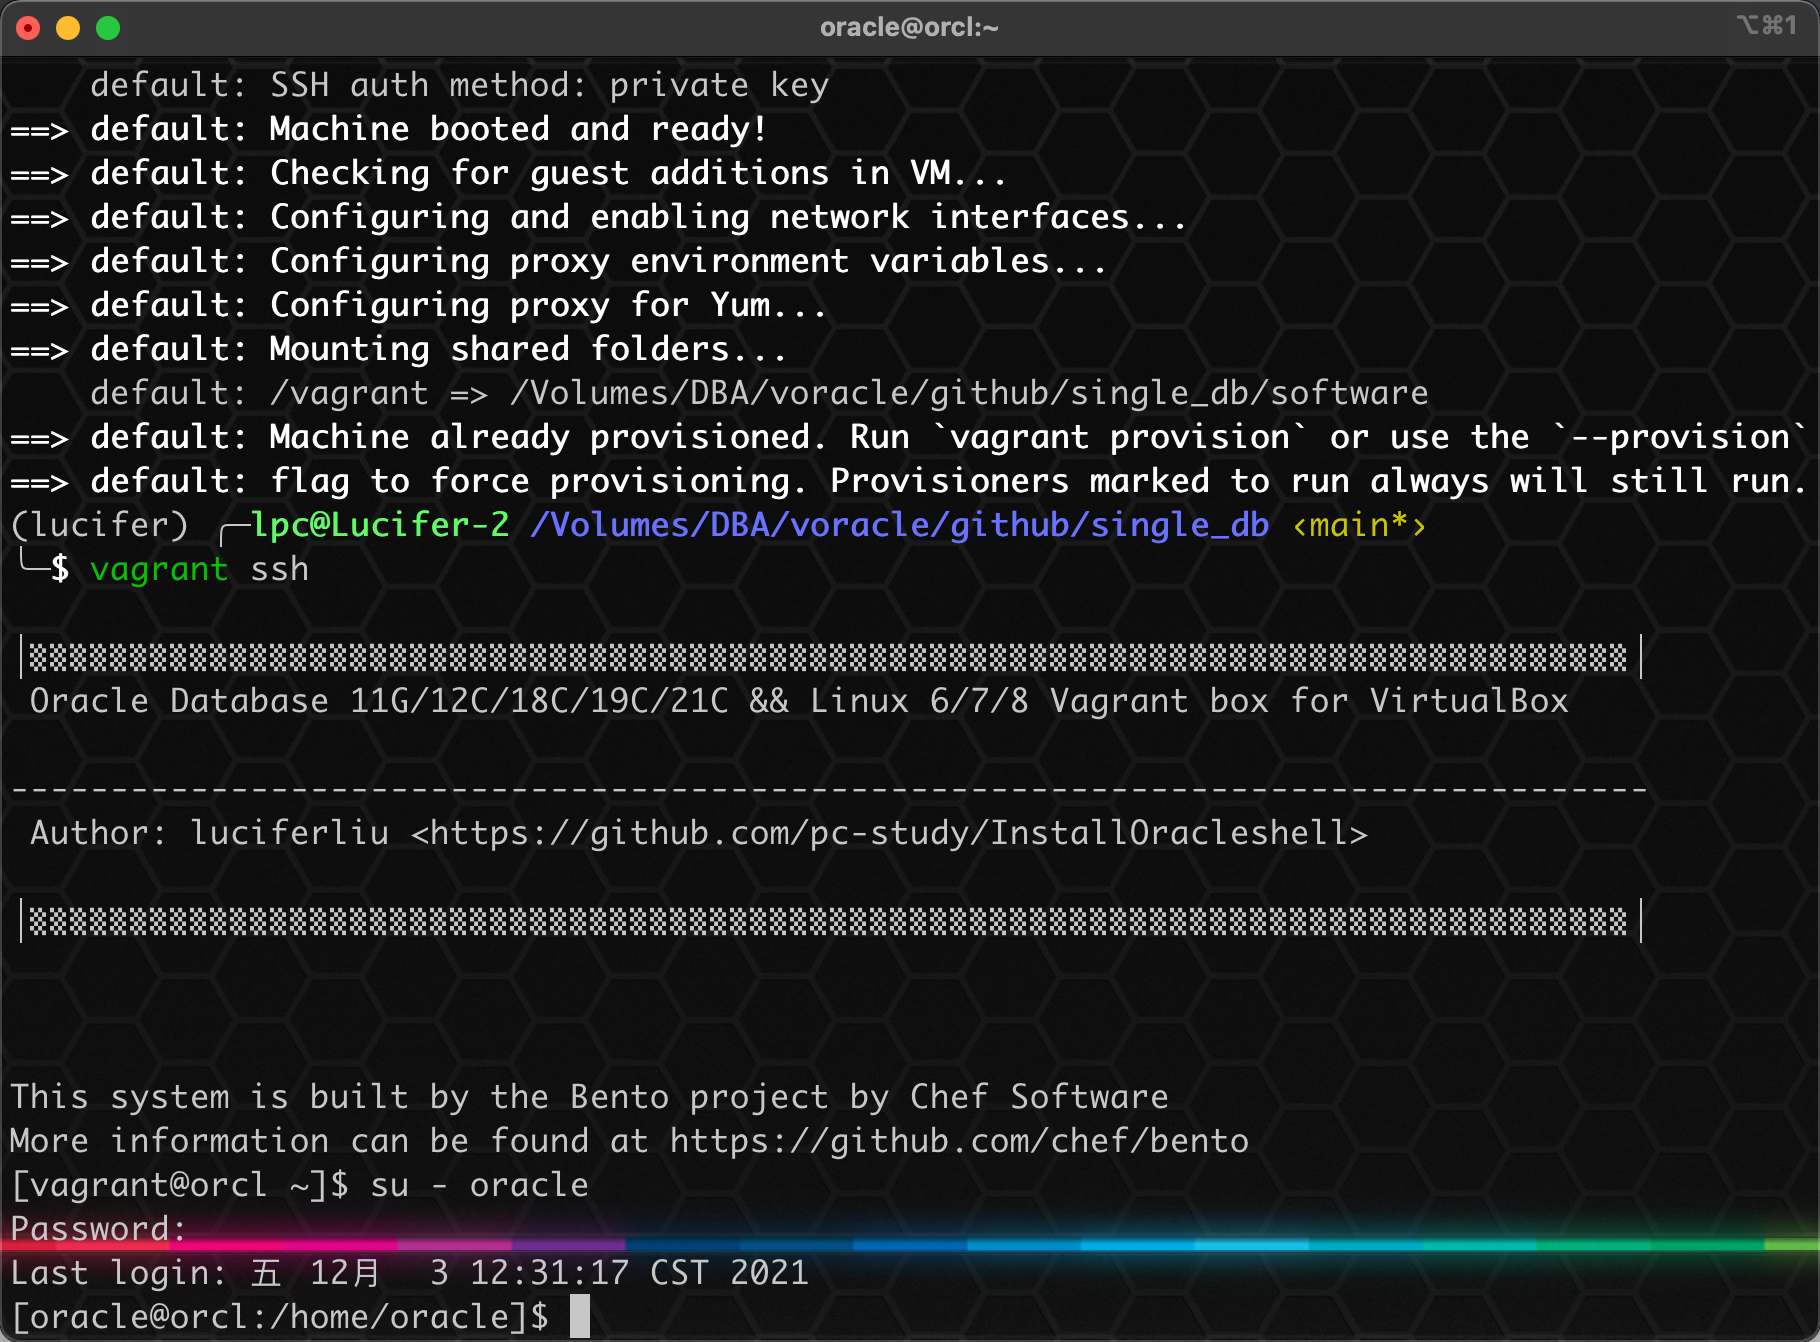
cd /Volumes/DBA/voracle/github/single_db
vagrant up
vagrant ssh
2. Test data preparation
Create tablespace:
create tablespace eason datafile '/oradata/orcl/eason.dbf' size 1g autoextend on;

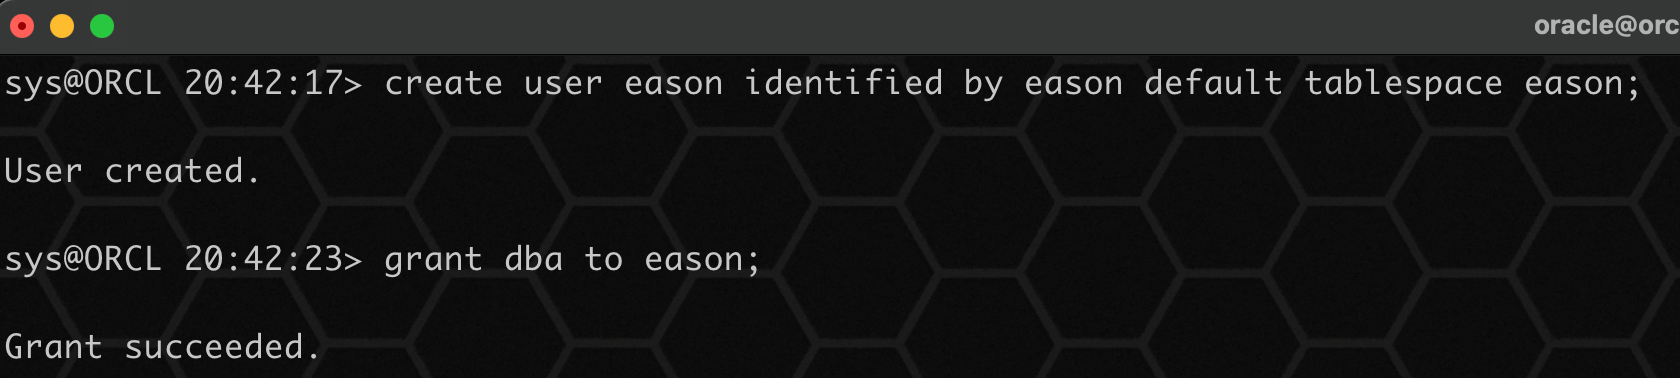
Create user:
create user eason identified by eason default tablespace eason;
grant dba to eason;
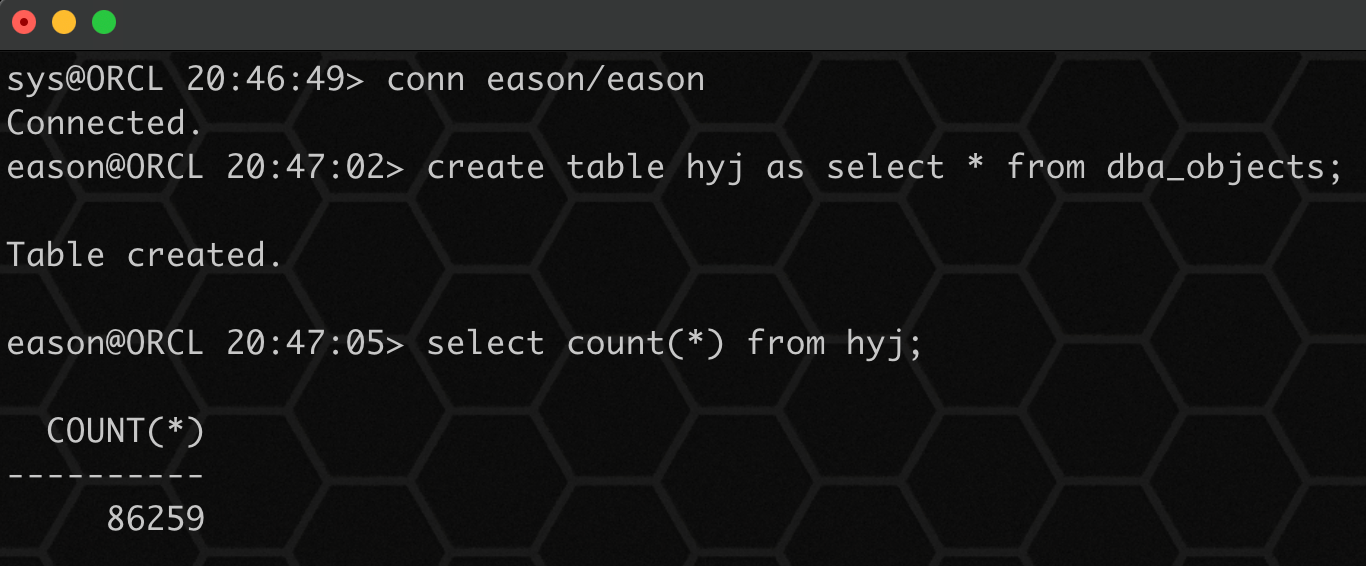
To create a test table:
create table hyj as select * from dba_objects;
Create table index:
create index i_hyj on hyj(object_id);

3. View table related information
To view relevant information on a table segment:
select segment_name , header_file , header_block,blocks from dba_segments where segment_name ='HYJ';

Find out the data block containing row records:
select distinct dbms_rowid.rowid_block_number(rowid) from eason.hyj order by 1;

DBMS_ROWID.ROWID_BLOCK_NUMBER(ROWID)
------------------------------------
                                1411
                                1412
                                1413
								...
								...
								...
                                2665
                                2666
                                2667

1232 rows selected.
select * from dba_extents where segment_name='HYJ';
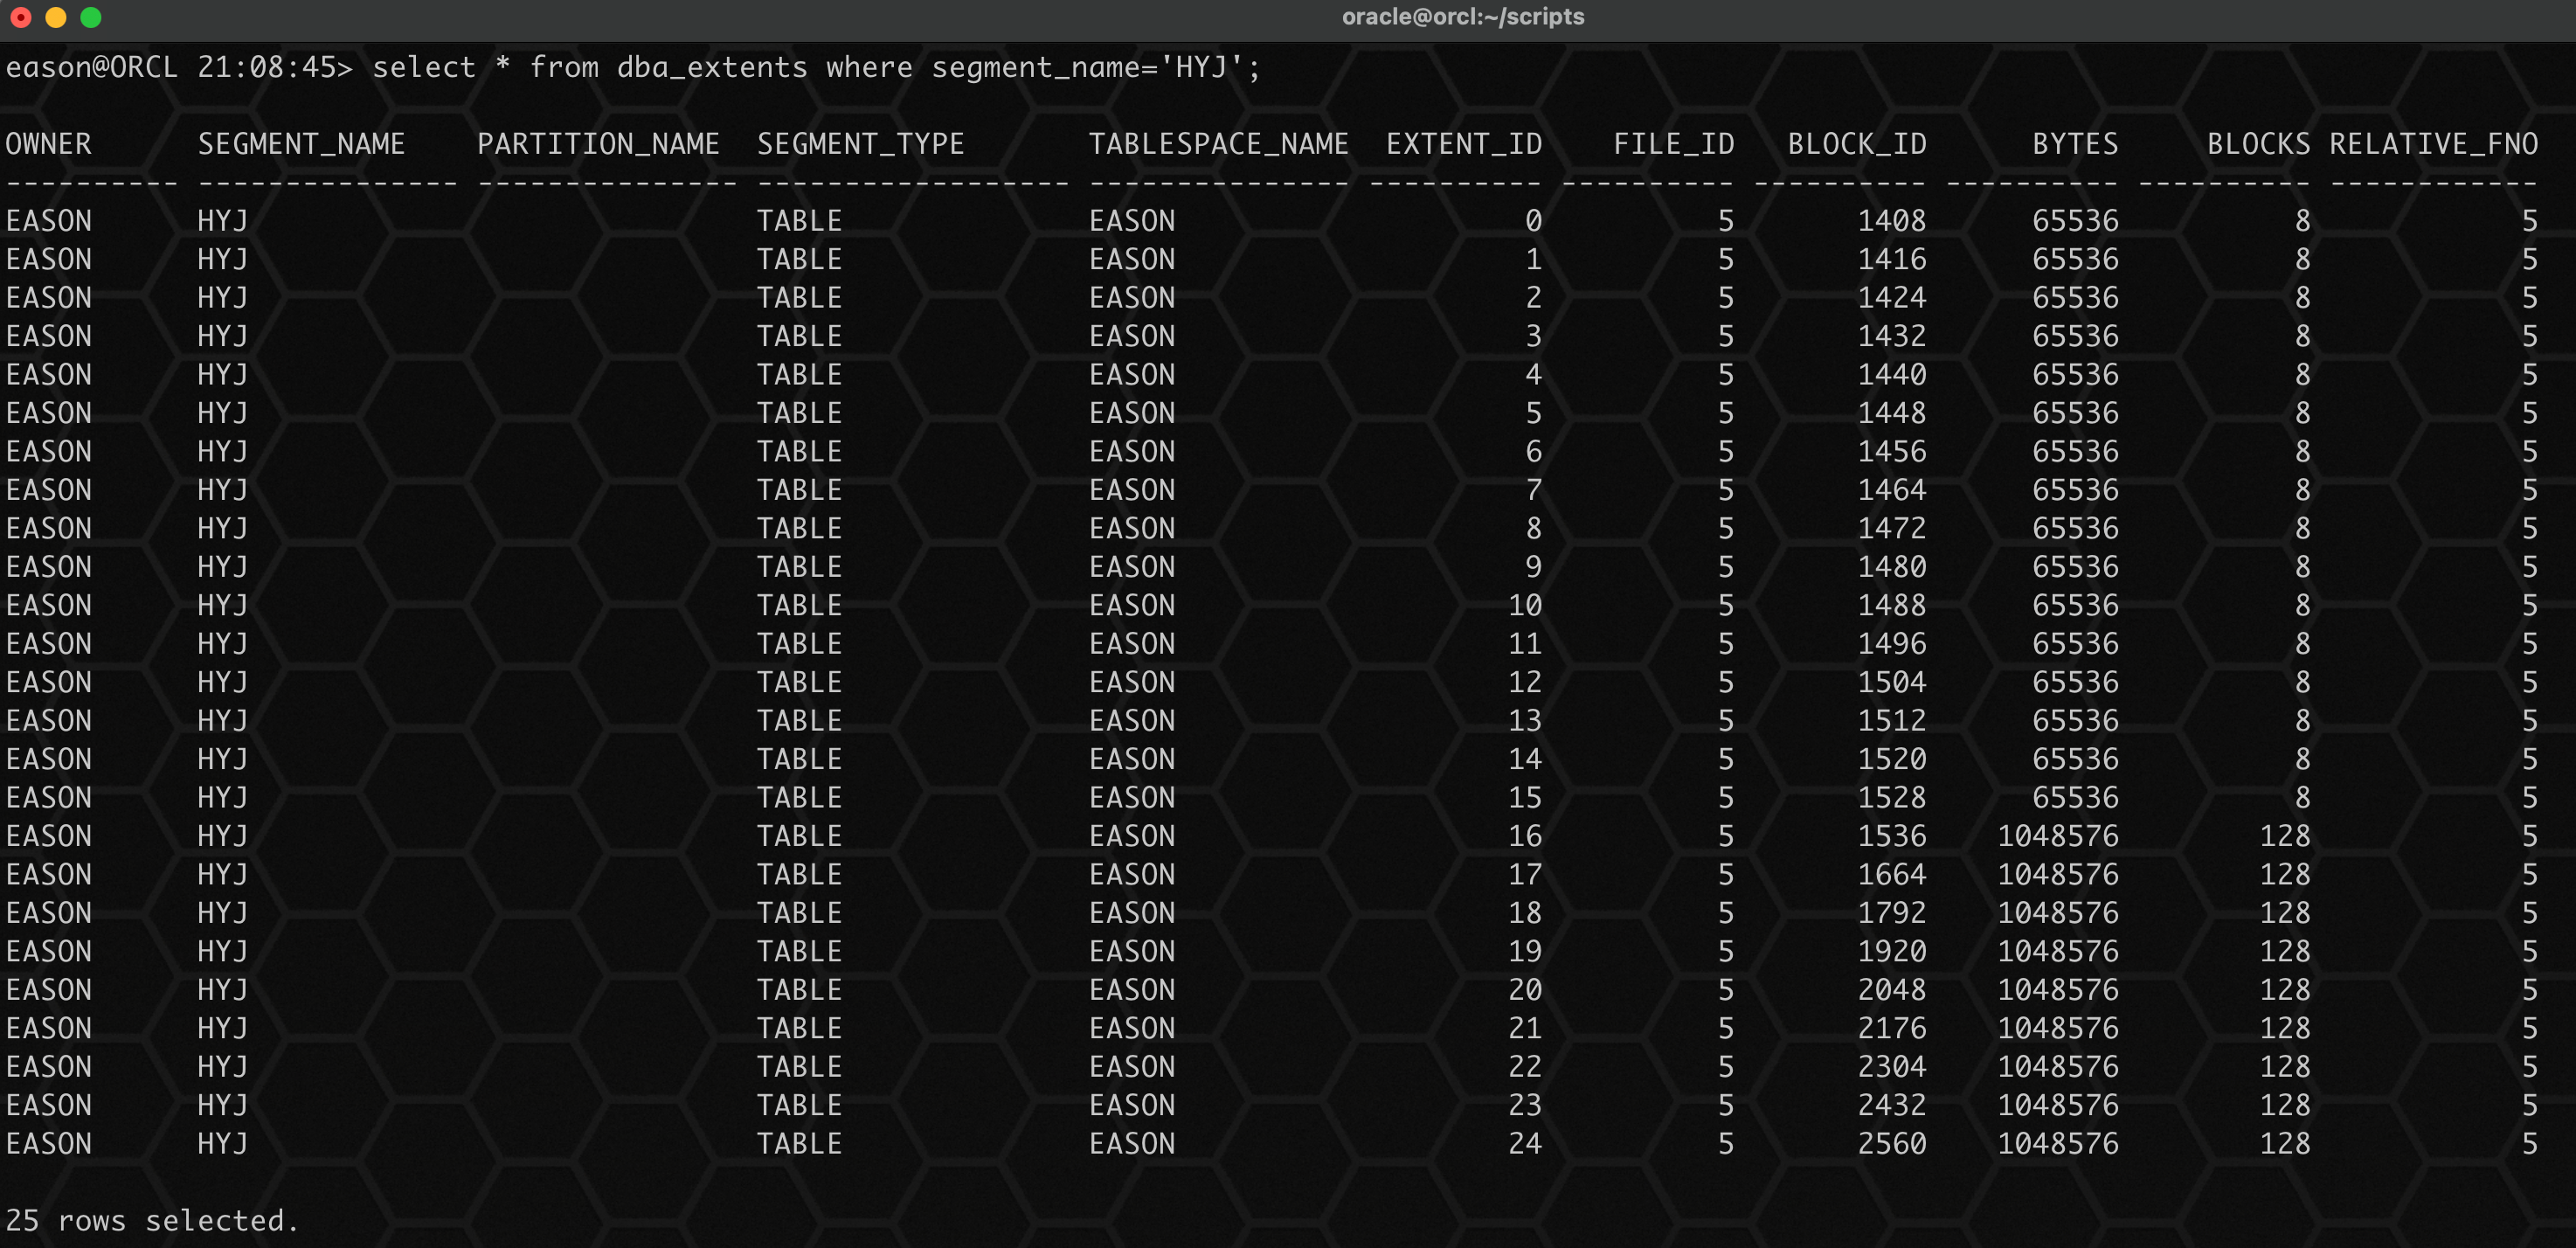
Note: see header here_ Block and block_ The IDs are inconsistent. In fact, the first block in the first area of a segment is the FIRST LEVEL BITMAP BLOCK, and the SECOND LEVEL BITMAP BLOCK. These two blocks are used to manage free block s. The third block is PAGETABLE SEGMENT HEADER, which is the header in the segment_ BLOCK.
4. RMAN backup
First, let's do a full backup to demonstrate that RMAN fixes bad blocks!
run {
allocate channel c1 device type disk;
allocate channel c2 device type disk;
crosscheck backup;
crosscheck archivelog all;
sql"alter system switch logfile";
delete noprompt expired backup;
delete noprompt obsolete device type disk;
backup database include current controlfile format '/backup/backlv_%d_%T_%t_%s_%p';
backup archivelog all DELETE INPUT;
release channel c1;
release channel c2;
}
5. Analog bad block
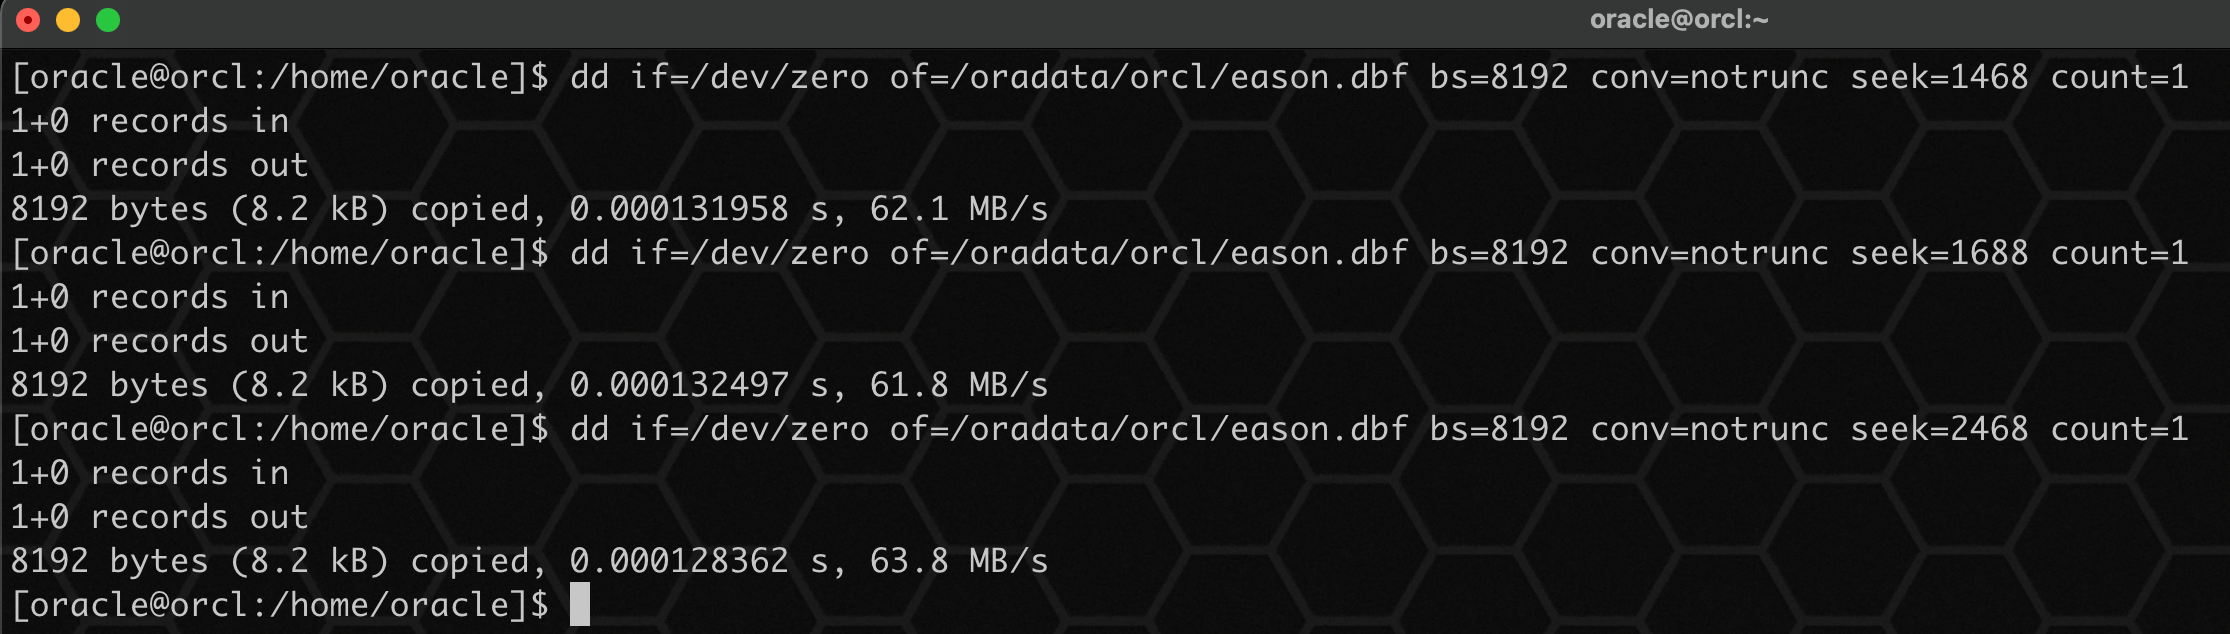
Destroy the contents of 1468, 1688 and 2468 data blocks:
dd if=/dev/zero of=/oradata/orcl/eason.dbf bs=8192 conv=notrunc seek=1468 count=1
dd if=/dev/zero of=/oradata/orcl/eason.dbf bs=8192 conv=notrunc seek=1688 count=1
dd if=/dev/zero of=/oradata/orcl/eason.dbf bs=8192 conv=notrunc seek=2468 count=1
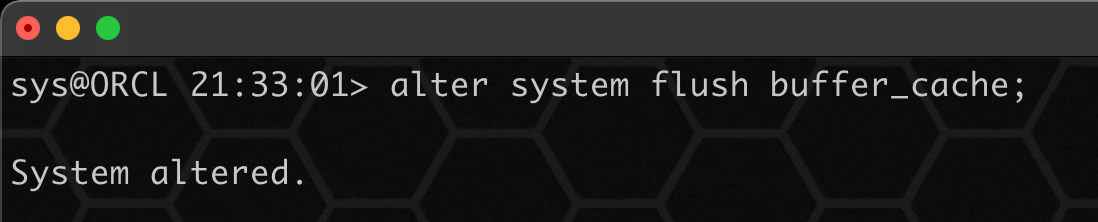
Clear the contents of buffer cache:
alter system flush buffer_cache;
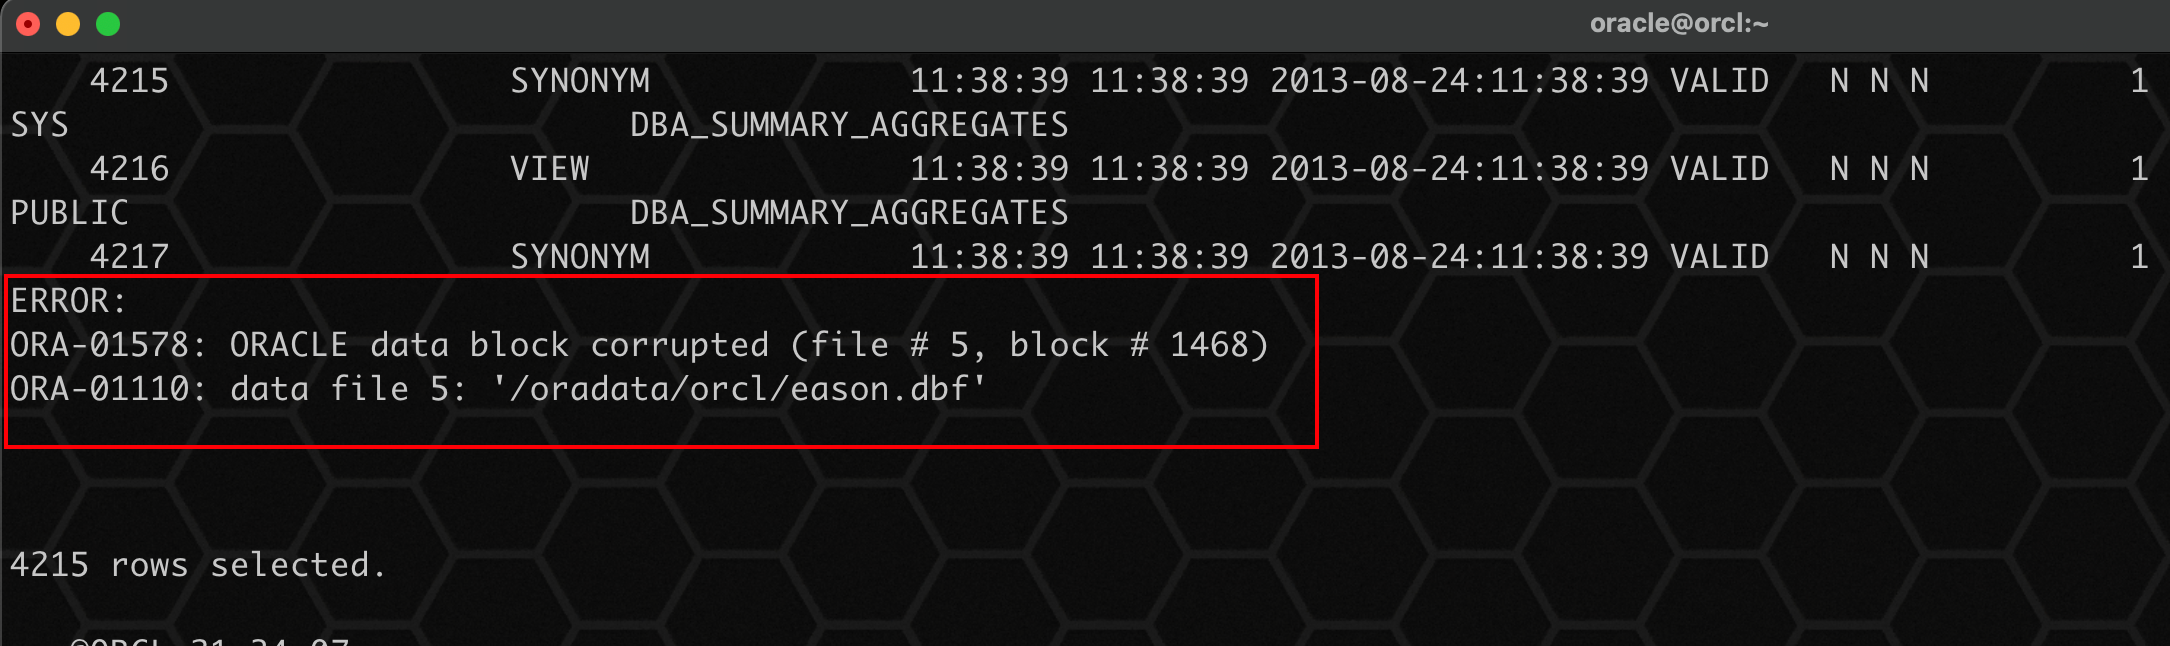
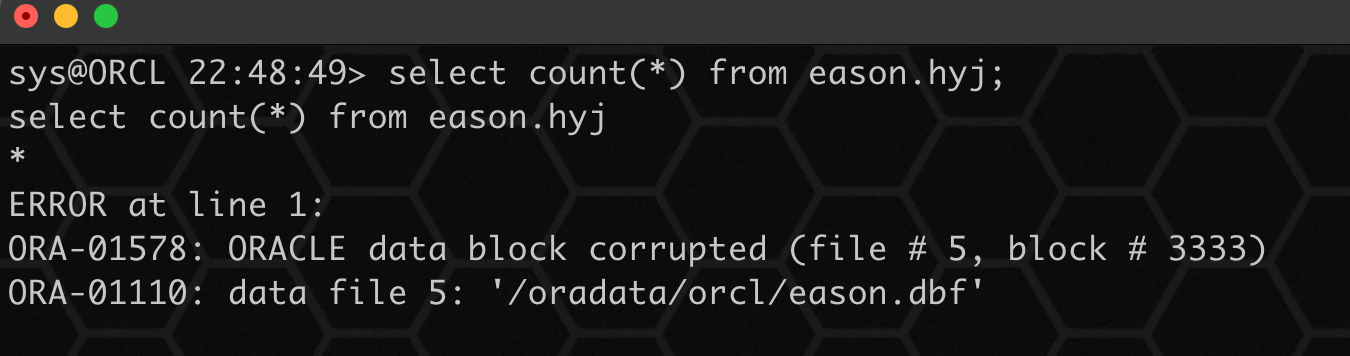
Query the table hyj again. At this time, the query has reported an error and found a bad block:
select * from eason.hyj;
Of course, you can also use bbed for bad block simulation!
6. Bad block check
Here are several ways to find bad blocks:
1. Use the DBV to check the bad blocks of the current file:
dbv file=/oradata/orcl/eason.dbf blocksize=8192;
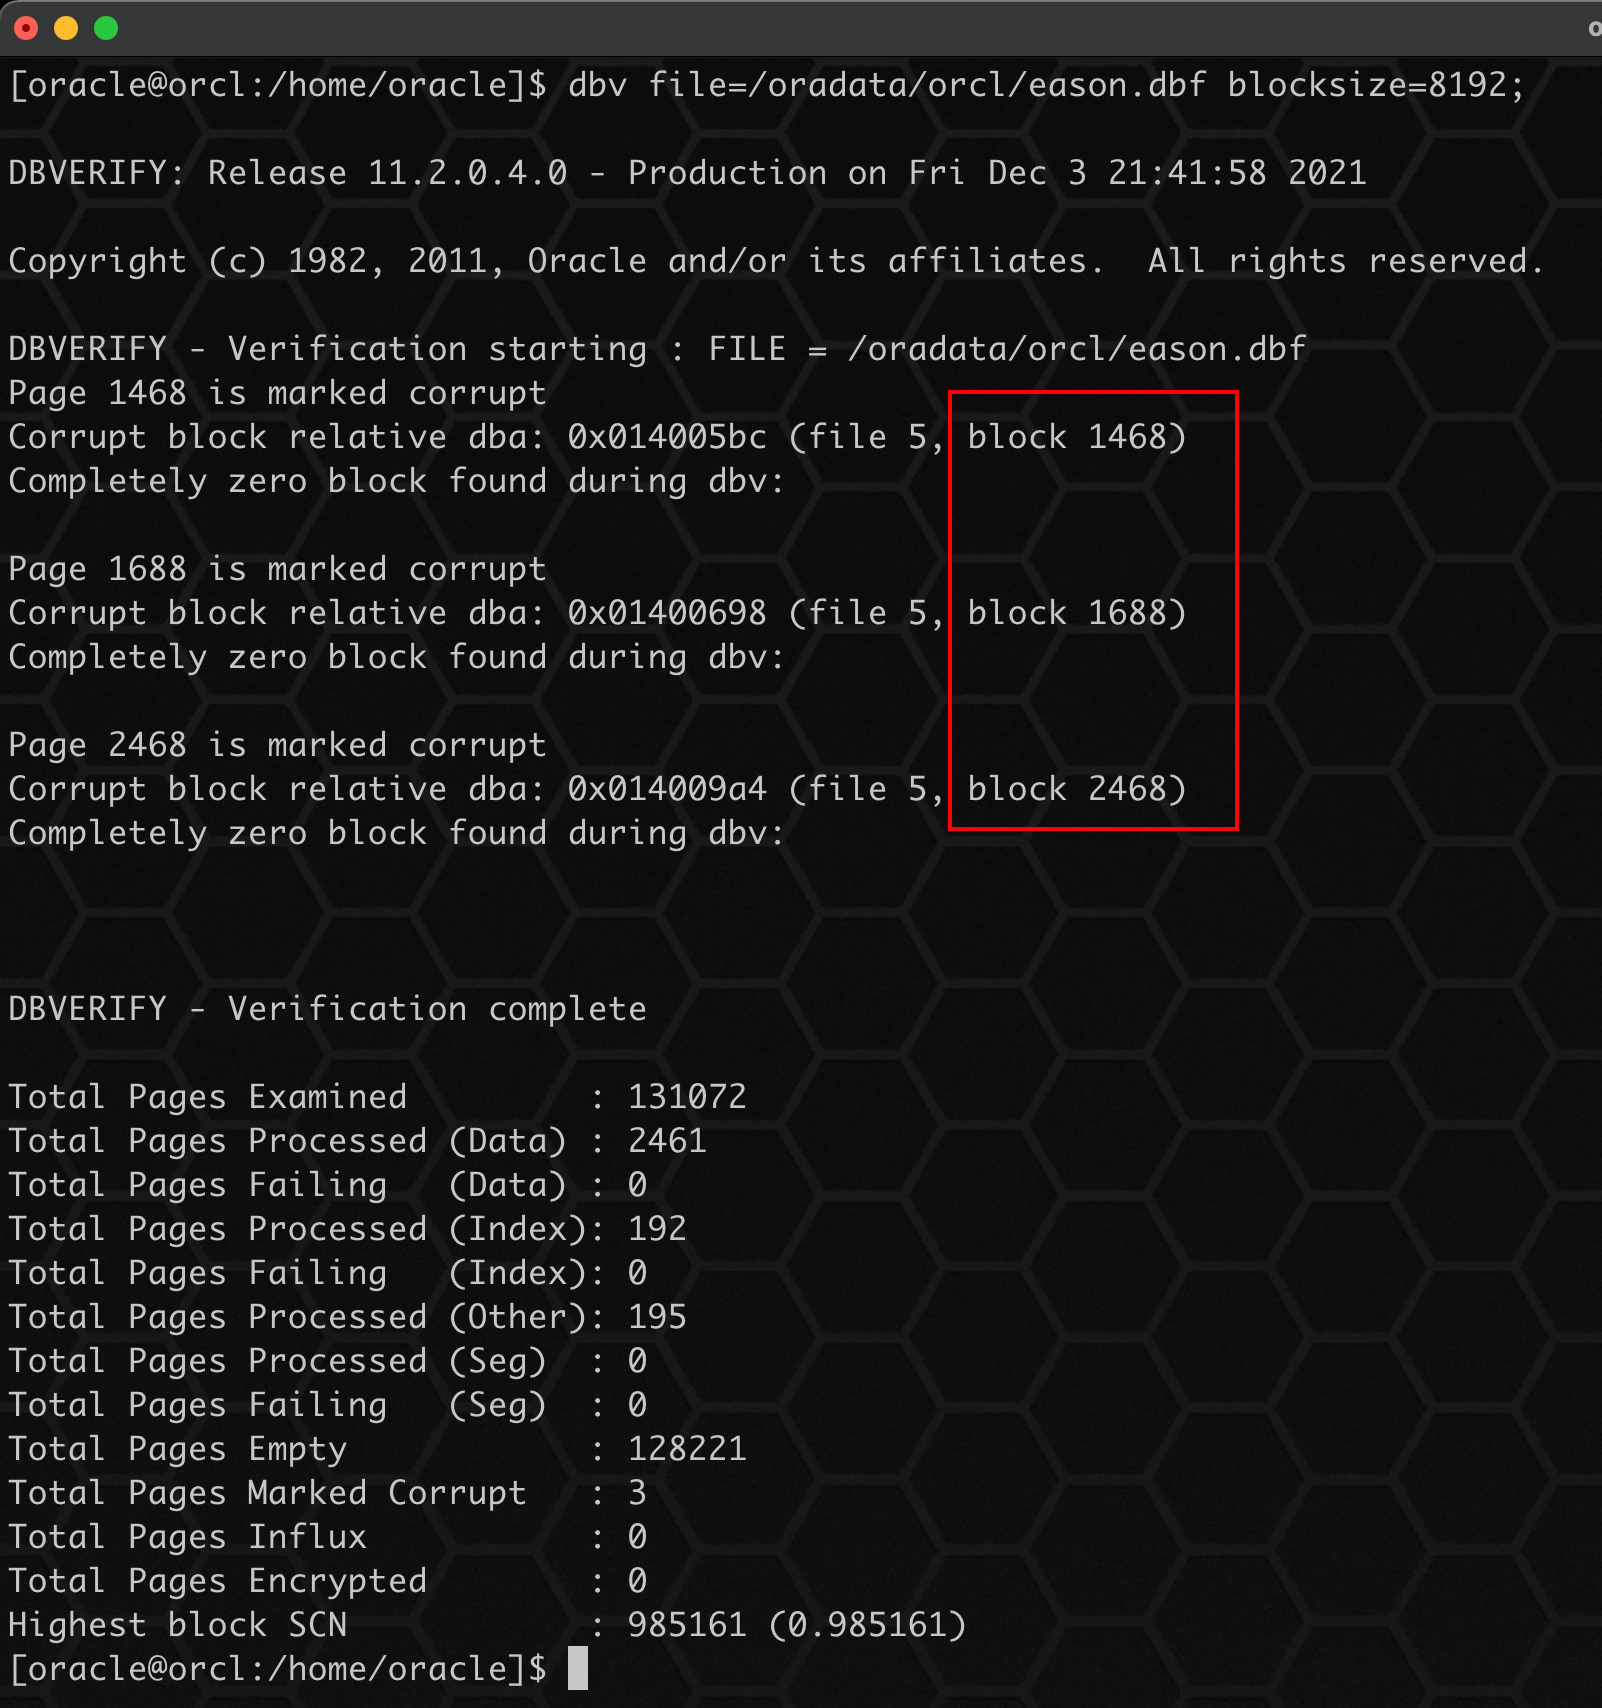
Using the DBV check, bad blocks are also found!
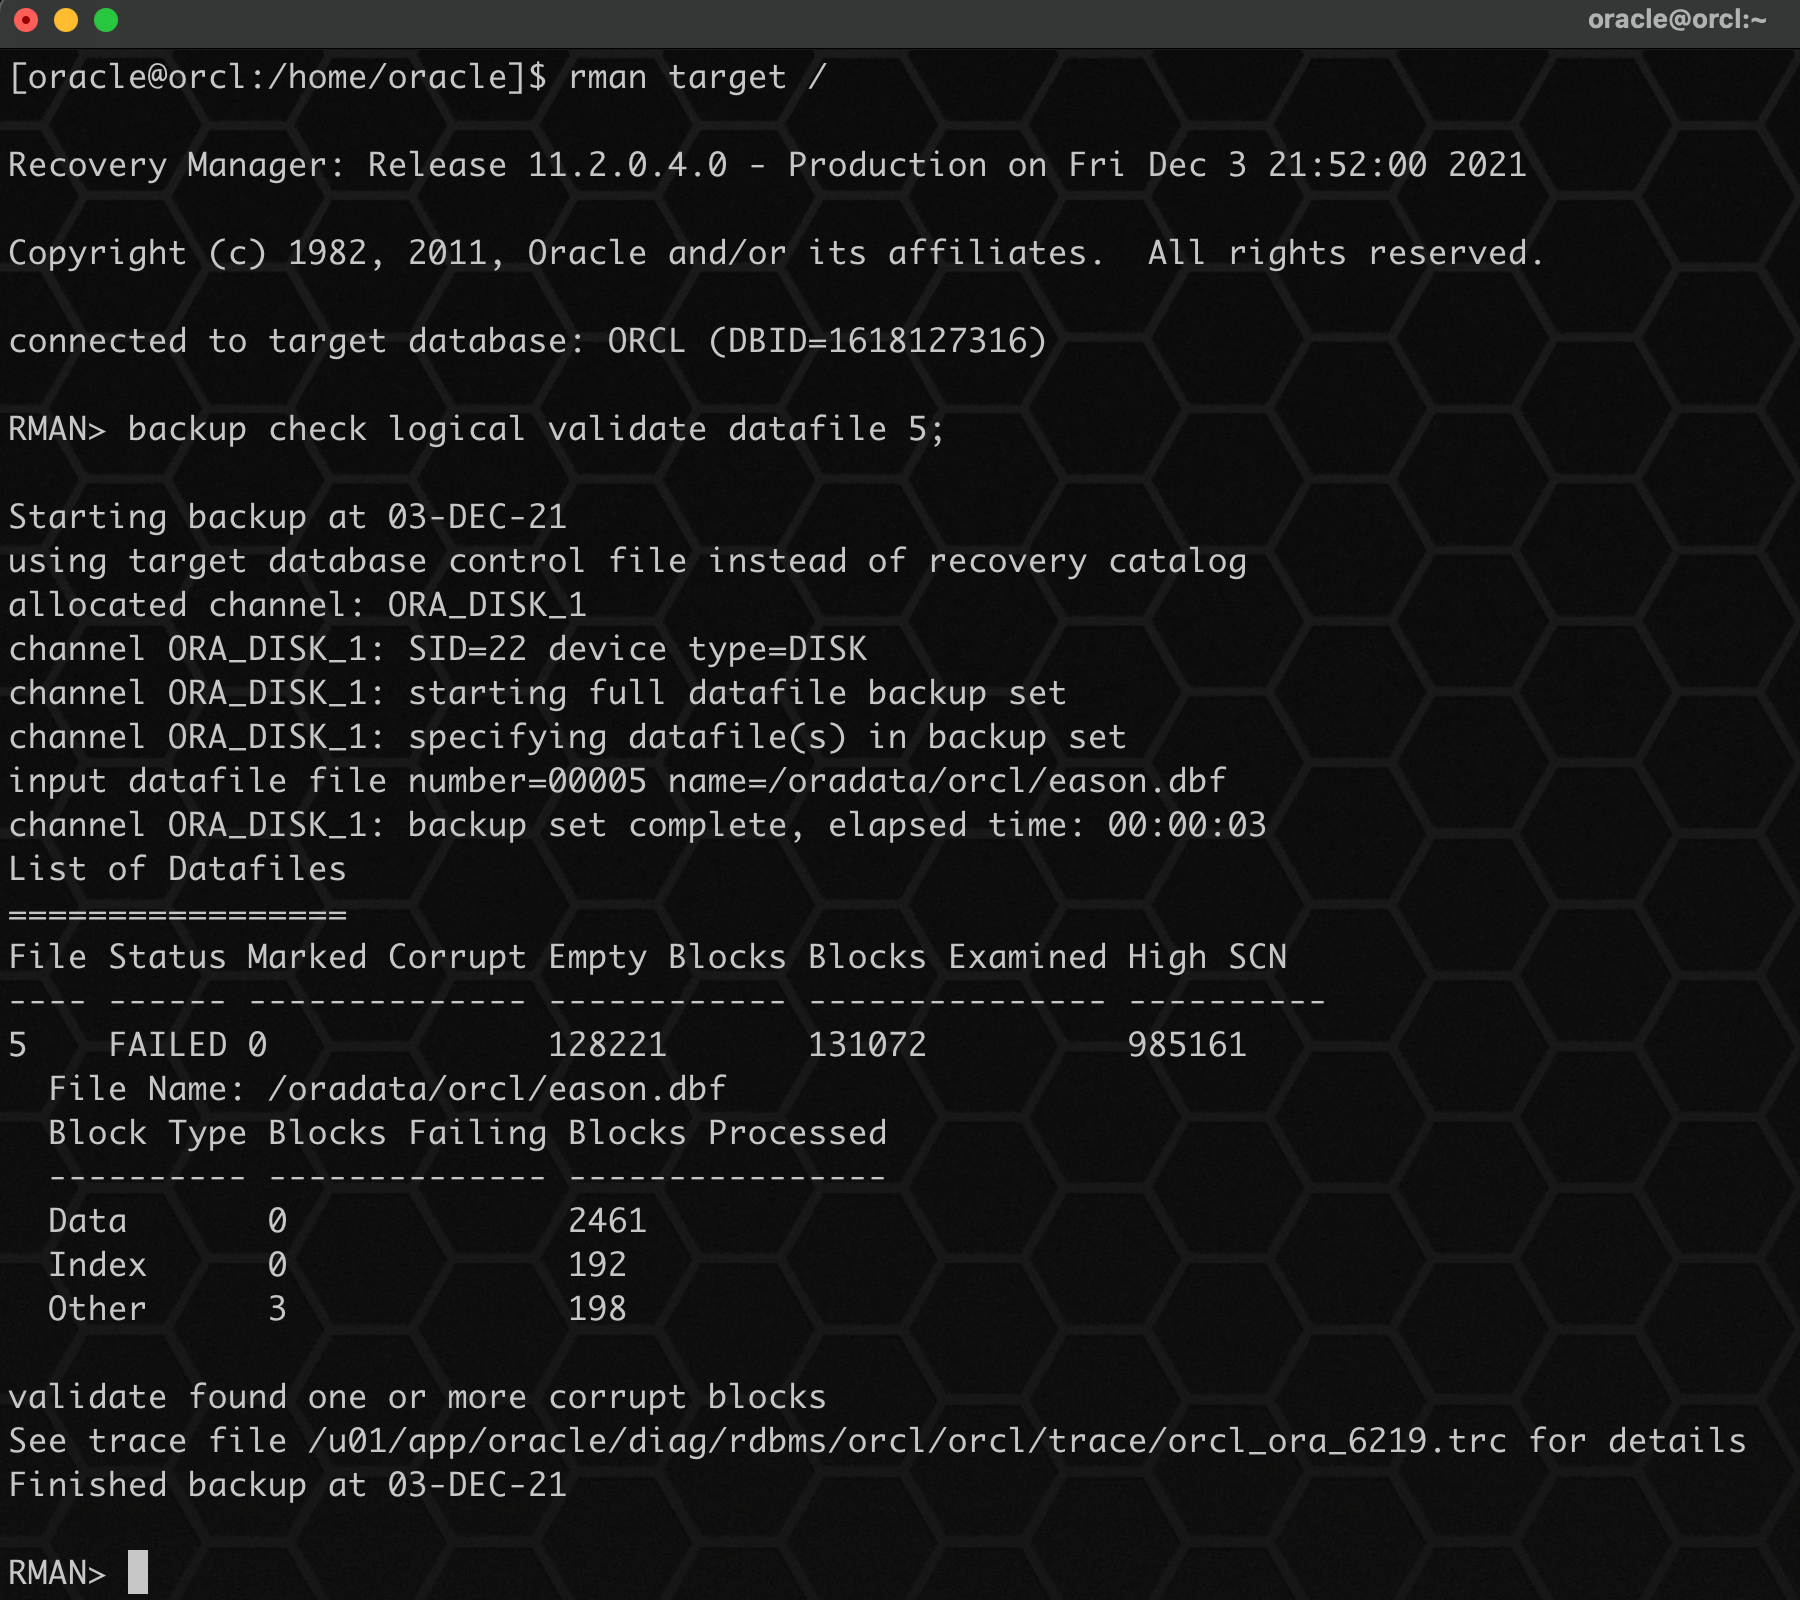
2. Use rman to check for bad blocks in the database:
## Check the corresponding data file
backup check logical validate datafile 5;
## Check current database
backup validate check logical database;
Combined with V $database_ BLOCK_ The corruption view is more convenient to view:
select * from V$DATABASE_BLOCK_CORRUPTION;
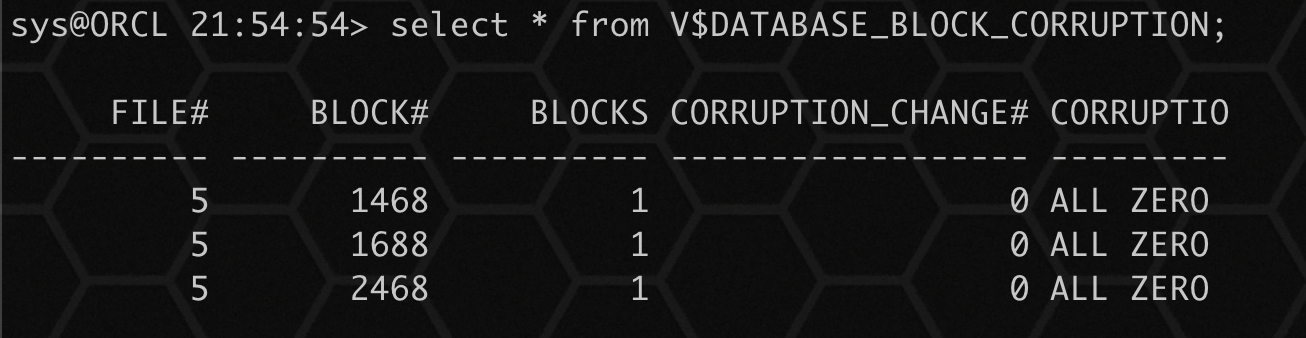
After checking with RMAN, bad blocks are also found!
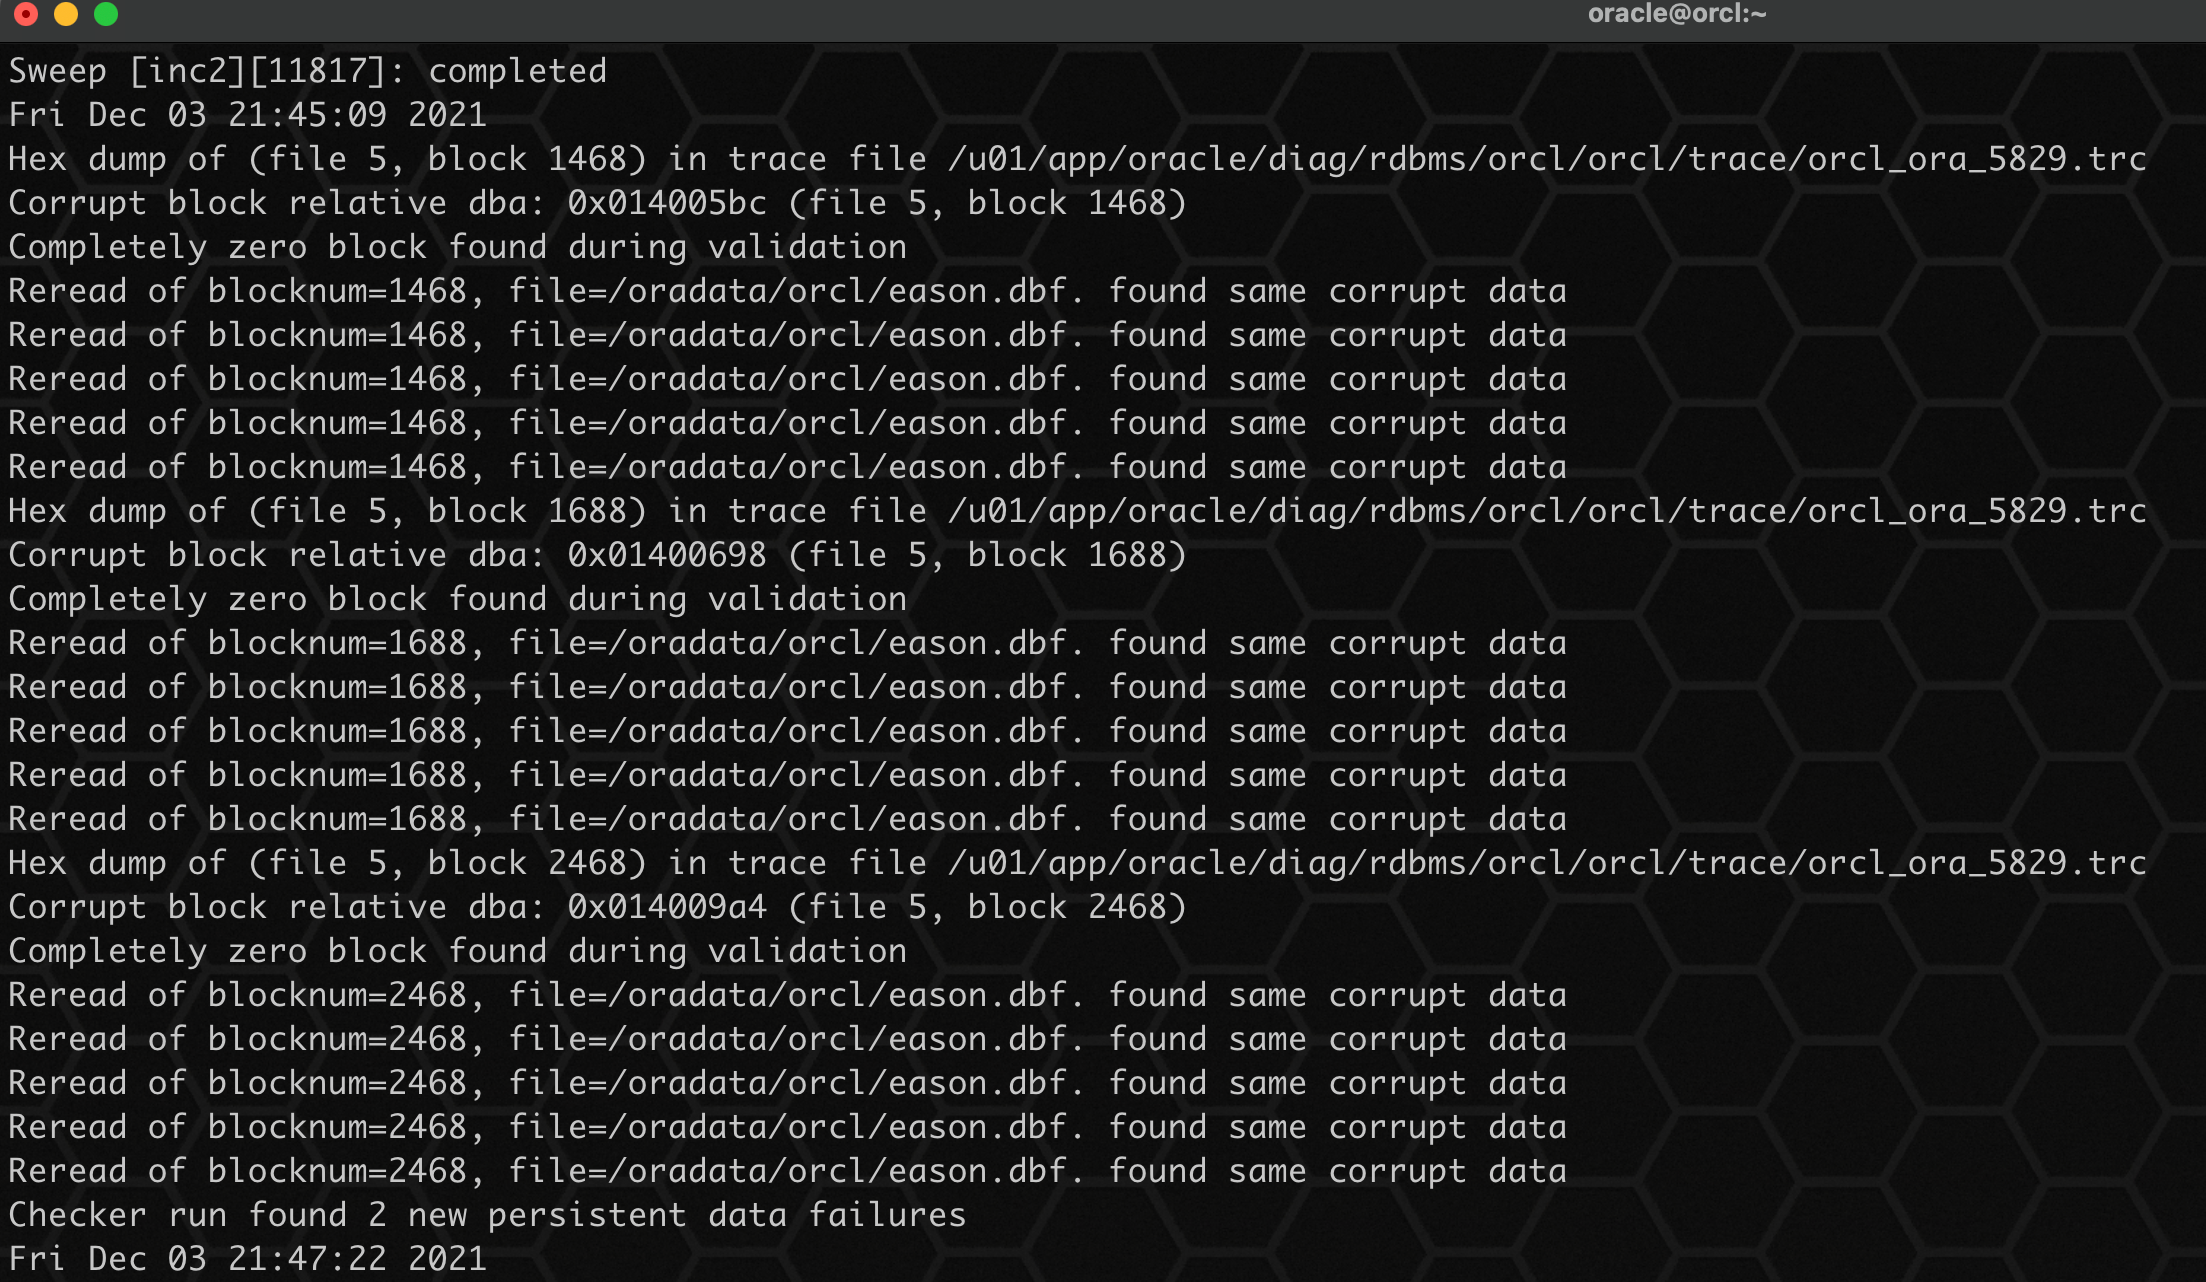
3. You can also find the error through the alarm log of the database:
4. Find the corresponding bad table through the snapshot of error information, and fill in the data file ID 5 and bad block ID 1468 in turn:
SELECT tablespace_name, segment_type, owner, segment_name
FROM dba_extents
        WHERE file_id = &fileid
and &blockid between block_id AND block_id + blocks - 1;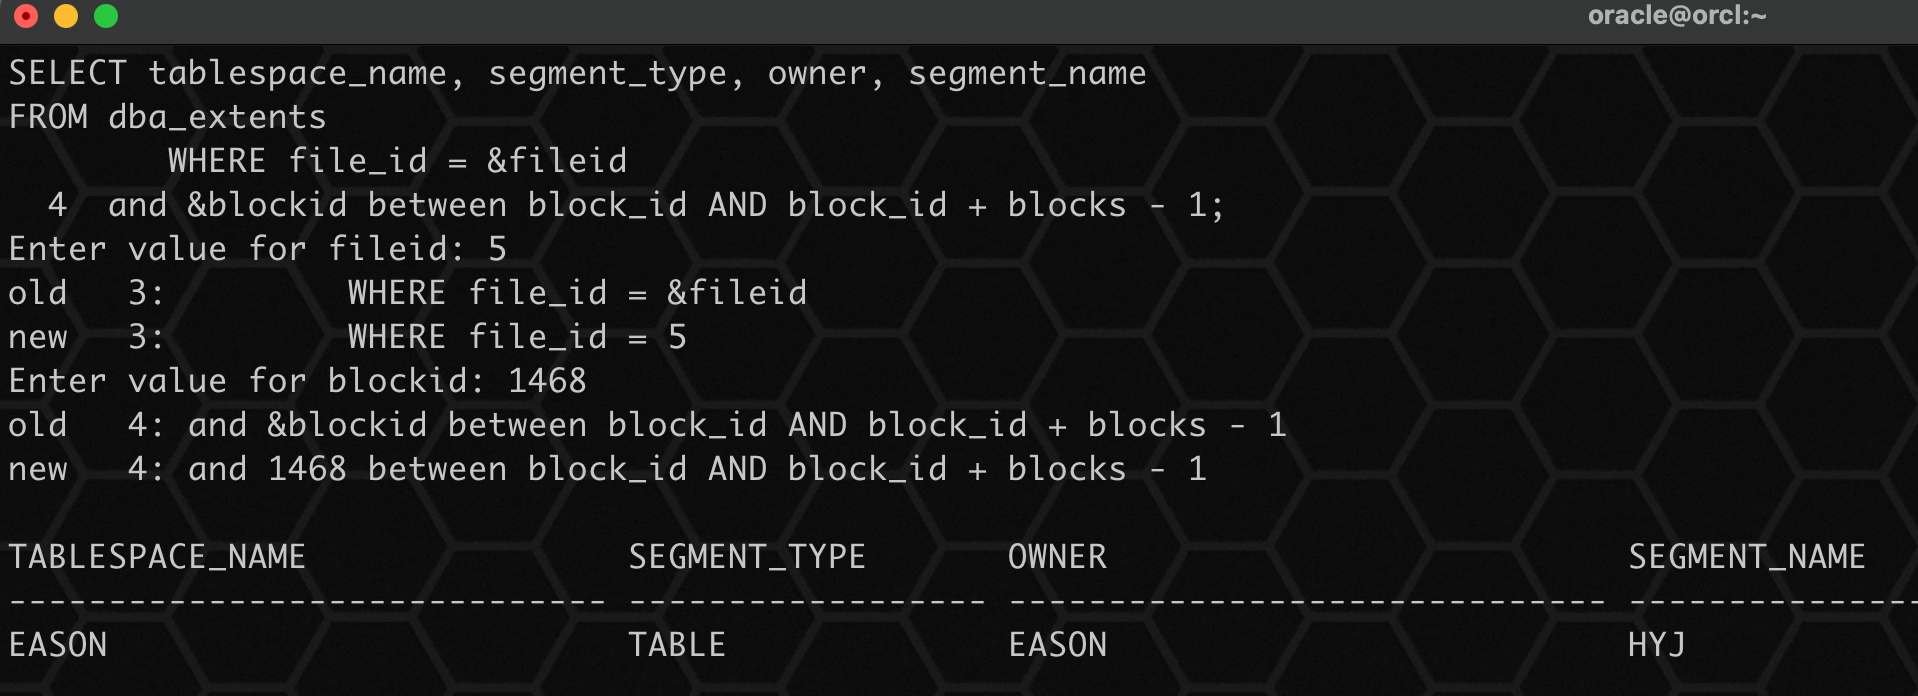
The experimental environment is ready. Let's start the actual combat!
3, Actual combat demonstration
Today, I intend to use the above two ways to demonstrate!
1. RMAN repair
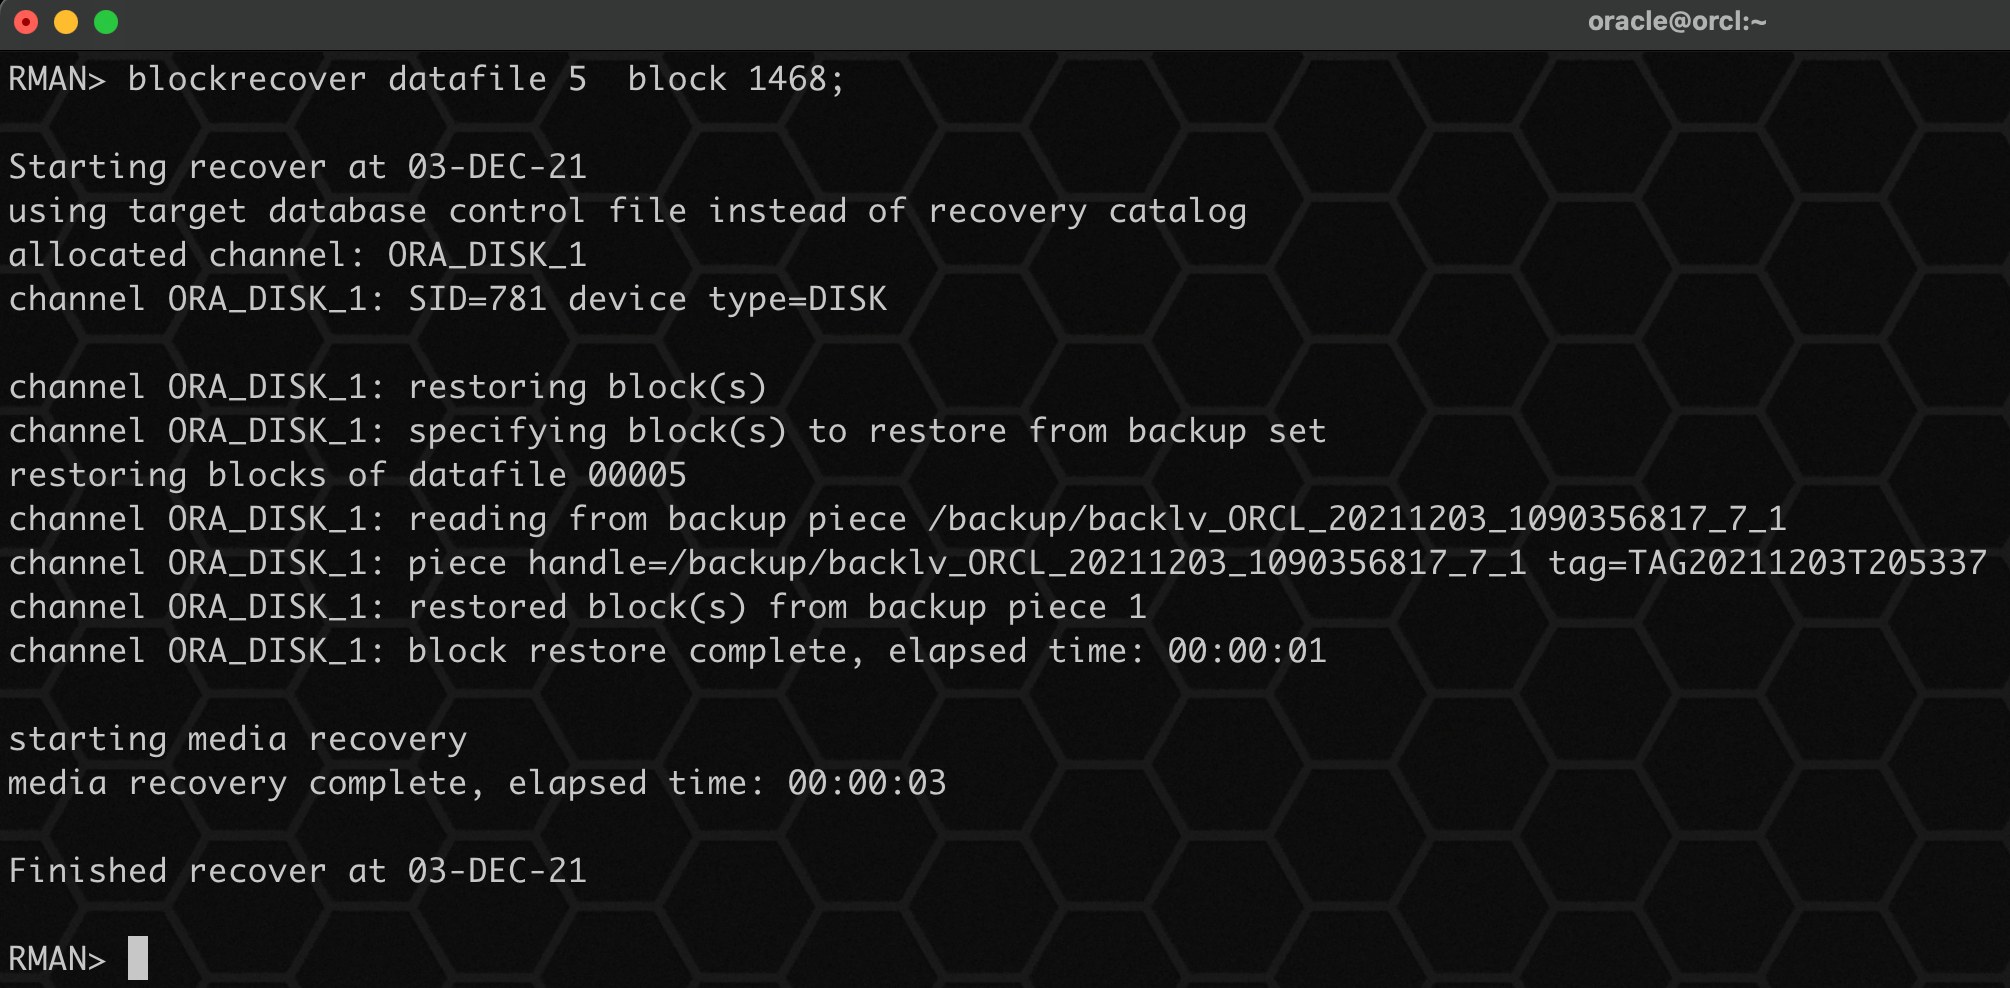
Since we have backed up before, we can directly use backup to recover bad blocks:
blockrecover datafile 5 block 1468;
blockrecover datafile 5 block 1688,2468;
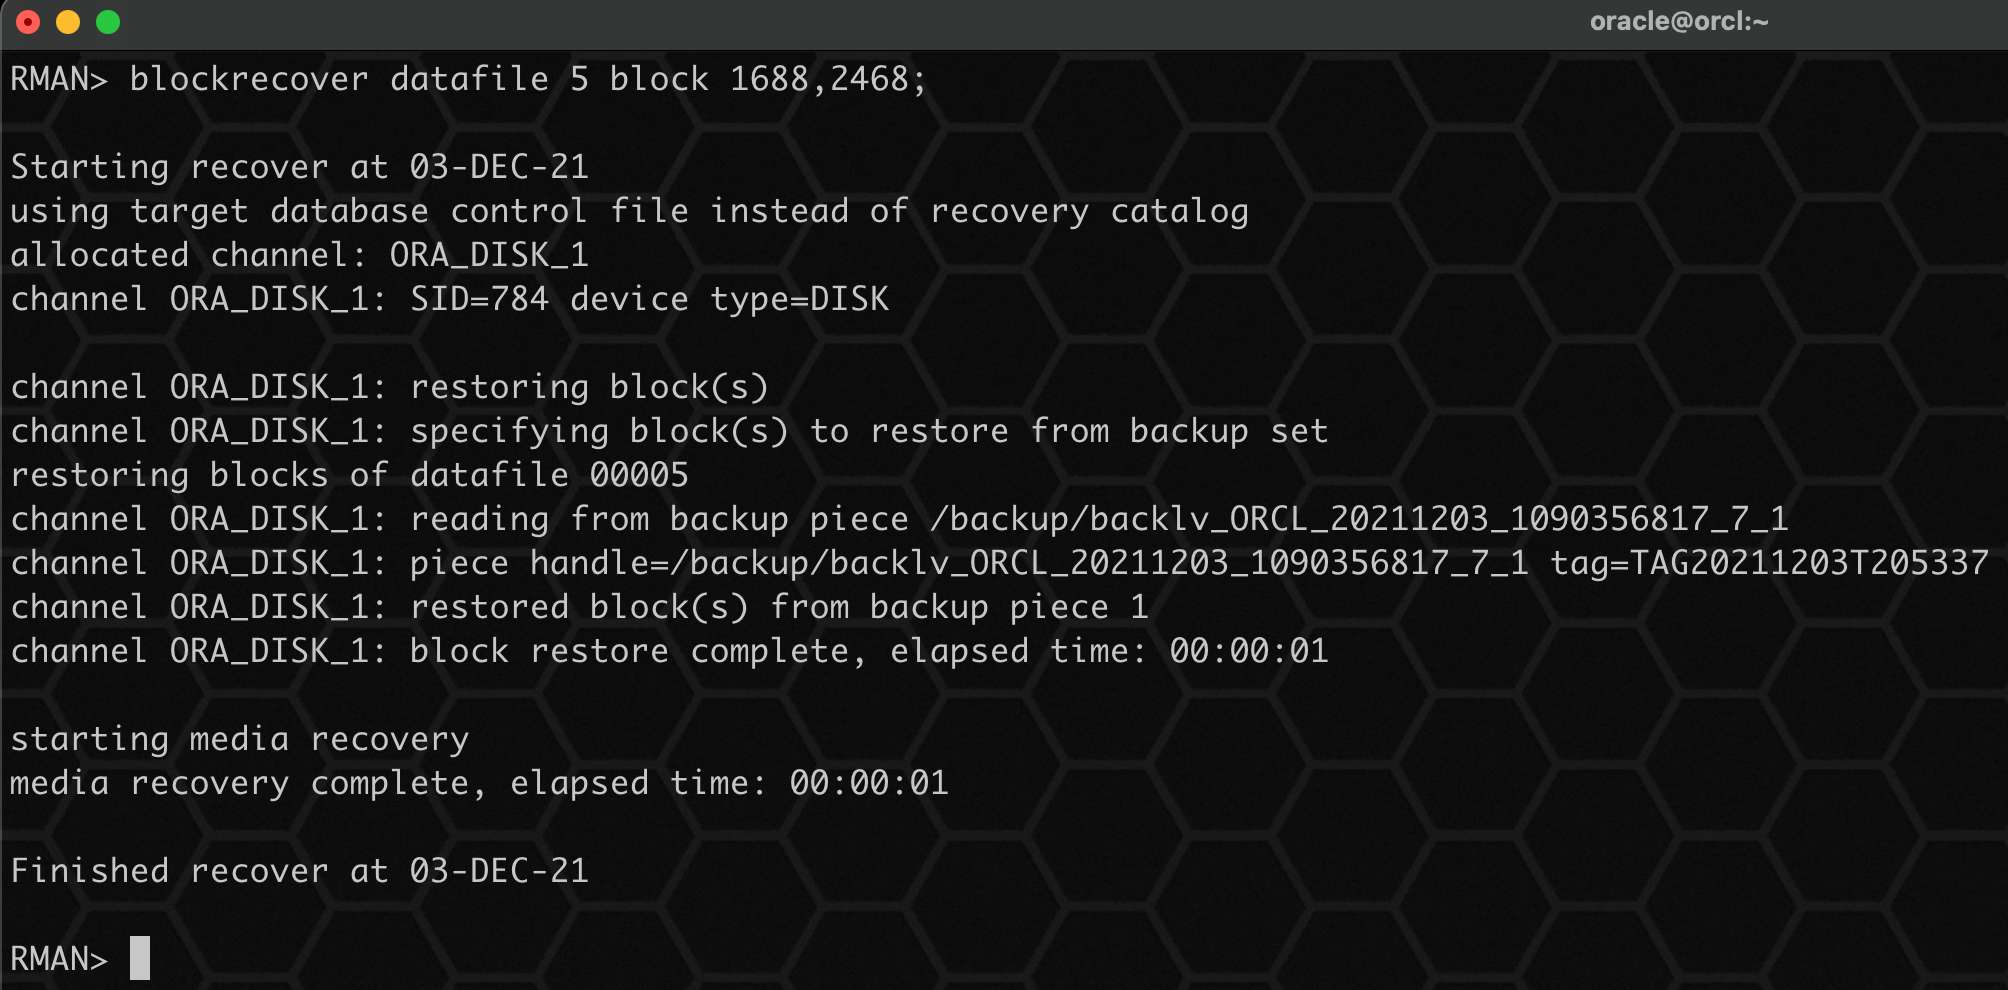
Using the same method, repair the bad blocks 16882468 in turn. After the repair is successful, the query has returned to normal!
Check the bad block condition again:
backup validate check logical database;
select * from V$DATABASE_BLOCK_CORRUPTION;

The bad blocks have been recovered and the data has not been lost!
2,DBMS_REPAIR repair
First, still use dd to simulate bad blocks first:
dd if=/dev/zero of=/oradata/orcl/eason.dbf bs=8192 conv=notrunc seek=3333 count=1
dd if=/dev/zero of=/oradata/orcl/eason.dbf bs=8192 conv=notrunc seek=3368 count=1
dd if=/dev/zero of=/oradata/orcl/eason.dbf bs=8192 conv=notrunc seek=4000 count=1
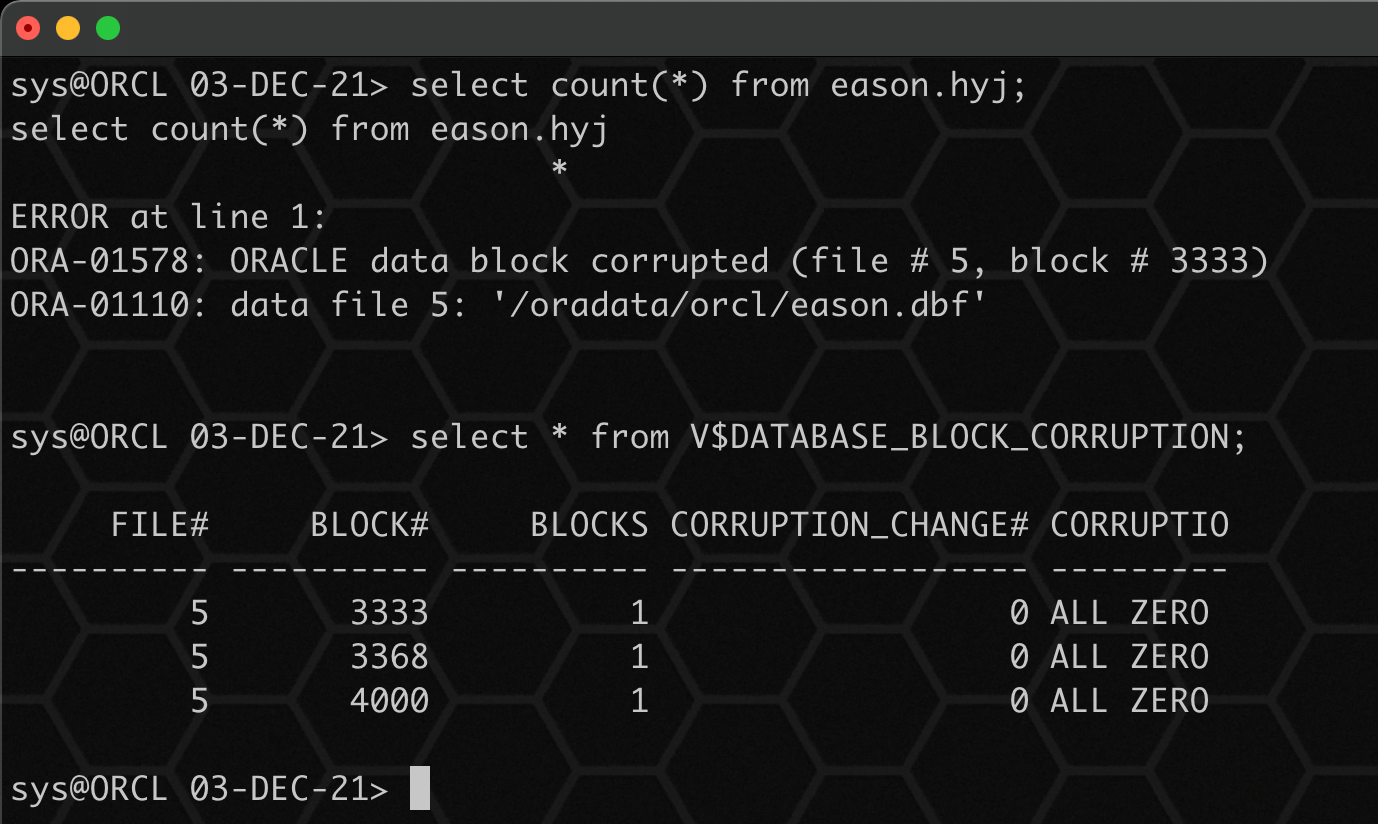
On the premise of no backup, we can't repair the bad block losslessly, and we need to lose the data corresponding to the bad block.
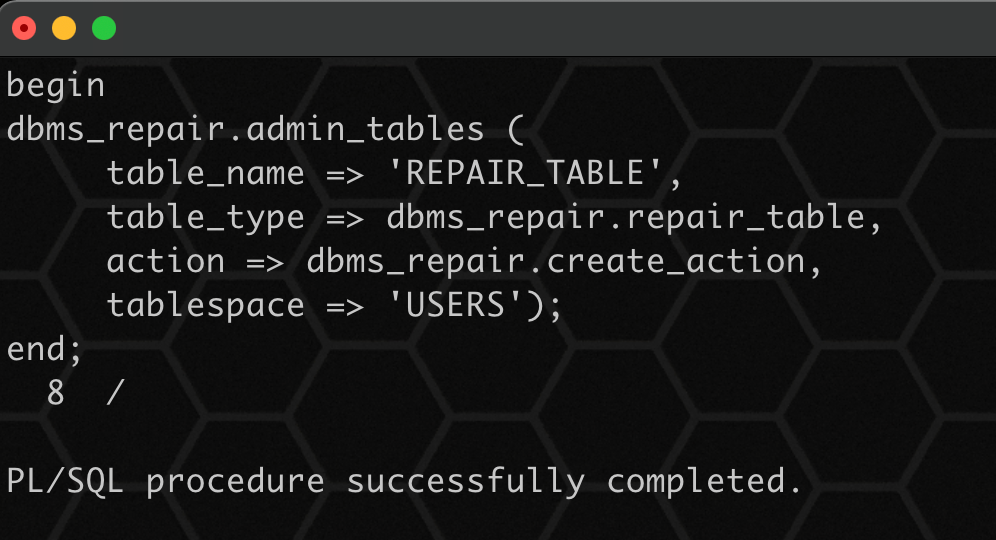
1. Create a repair table to record the tables to be repaired:
begin
dbms_repair.admin_tables (
     table_name => 'REPAIR_TABLE',
     table_type => dbms_repair.repair_table,
     action => dbms_repair.create_action,
     tablespace => 'USERS');
end;
/
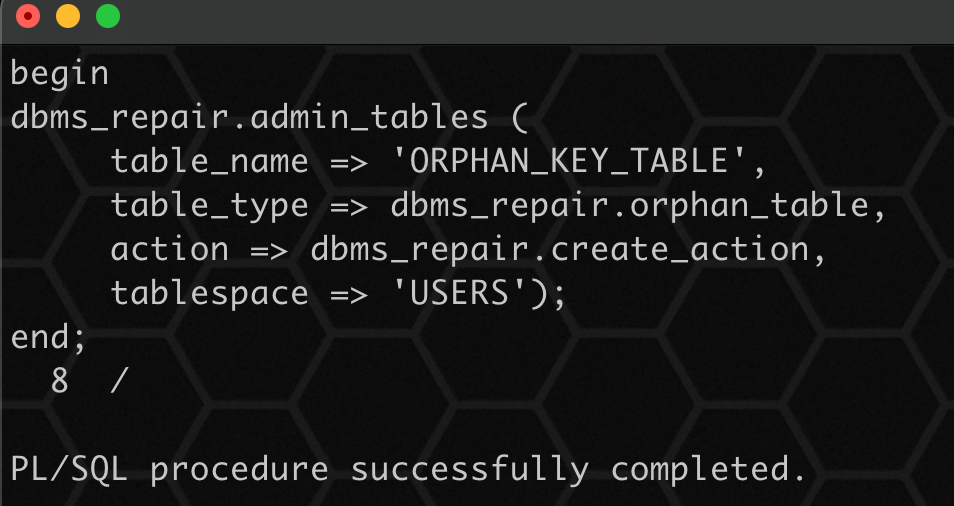
2. Create an Orphan Key table to record the orphaned indexes after the table block is damaged, that is, the indexes pointing to the bad block:
begin
dbms_repair.admin_tables (
     table_name => 'ORPHAN_KEY_TABLE',
     table_type => dbms_repair.orphan_table,
     action => dbms_repair.create_action,
     tablespace => 'USERS');
end;
/
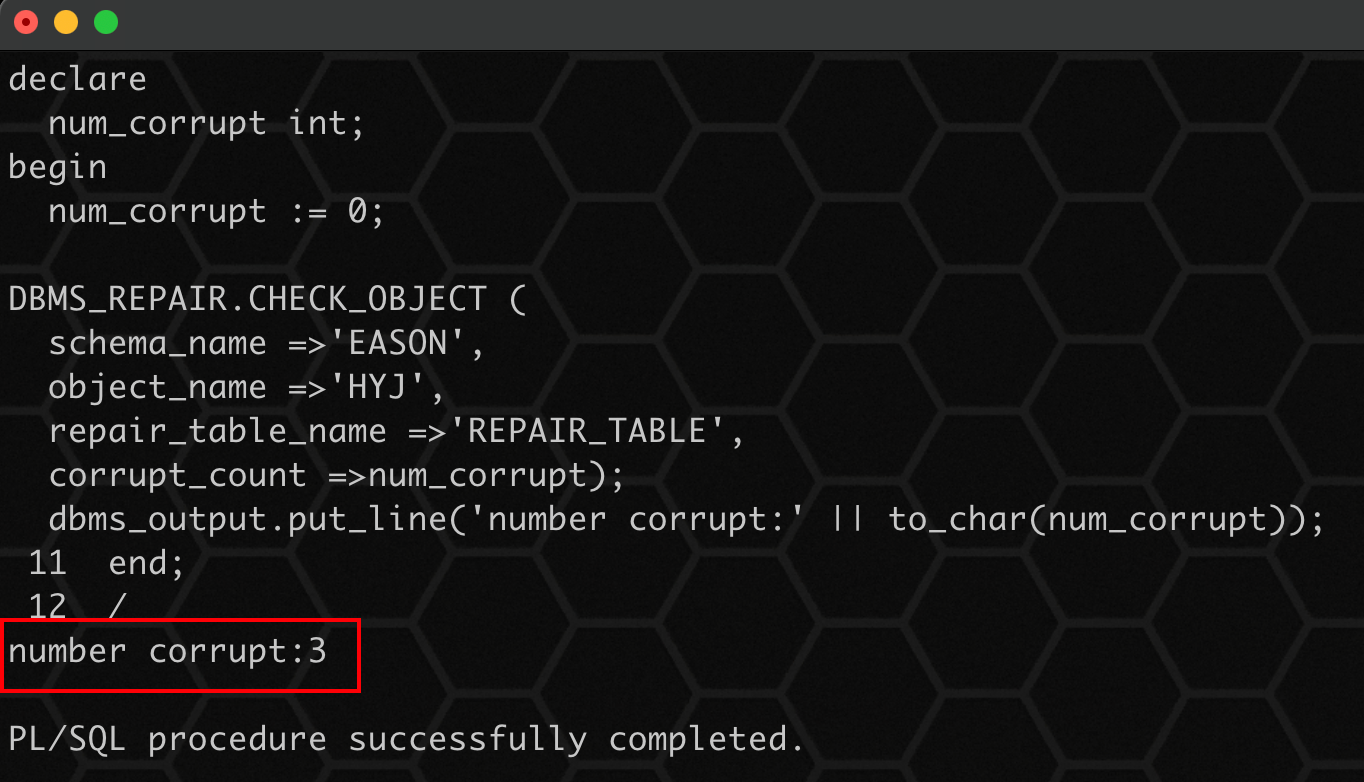
3. Check the bad block, detect the damage on the object, and return the number of damaged blocks as 3:
declare
  num_corrupt int;
begin
  num_corrupt := 0;
DBMS_REPAIR.CHECK_OBJECT (
  schema_name =>'EASON',
  object_name =>'HYJ',
  repair_table_name =>'REPAIR_TABLE',
  corrupt_count =>num_corrupt);
  dbms_output.put_line('number corrupt:' || to_char(num_corrupt));
end;
/
4. To view damaged block information:
select object_name, block_id, corrupt_type, marked_corrupt, repair_description from repair_table;

Note: here marked_corrupt is marked as TRUE. It should be that the system is executing check_ Fix is automatically completed in the process of object_ CORRUPT_ BLOCKS. If it is marked as FALSE, fix needs to be run again_ CORRUPT_ Blocks to complete the marking of bad blocks.
5. Repair the damaged data blocks. These damaged data blocks are checked after execution_ Generated after object:
declare
  cc number;
begin
  dbms_repair.fix_corrupt_blocks(schema_name => 'EASON',
  object_name => 'HYJ',
  fix_count => cc);
  dbms_output.put_line('Number of blocks fixed: ' || to_char(cc));
end;
/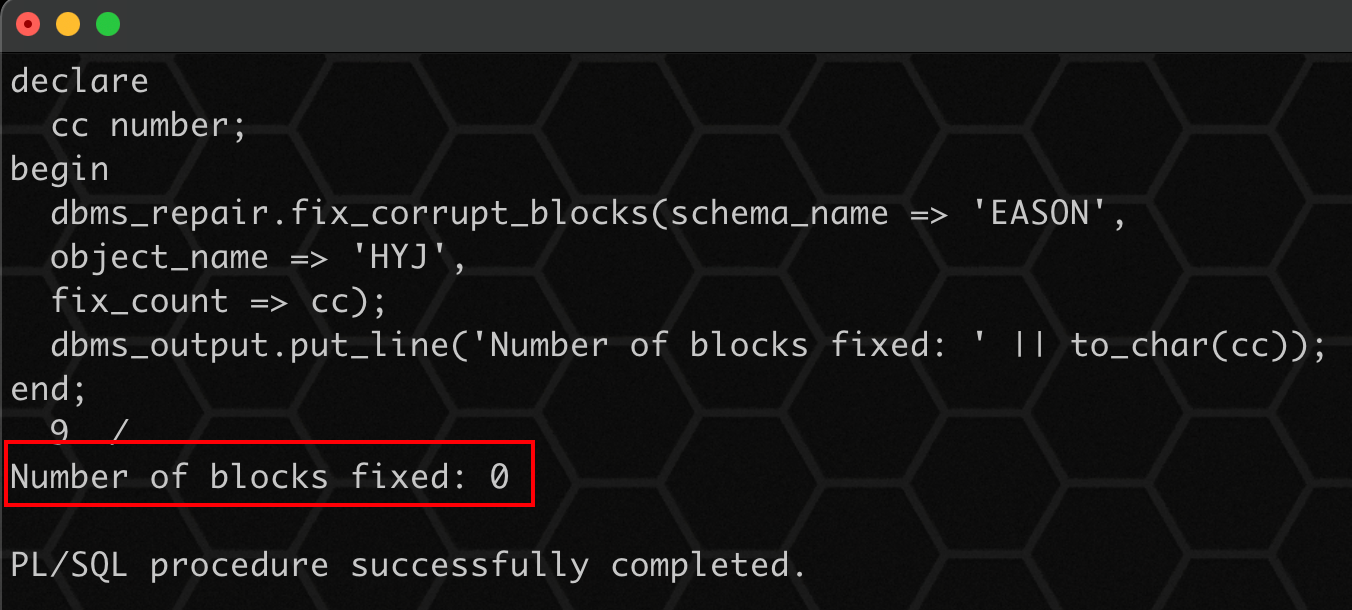
0 bad blocks are marked, indicating CHECK_OBJECT finished marking.
6. Using dump_ ORPHAN_ The keys procedure populates orphan with index key values that point to bad blocks_ KEY_ TABLE:
declare
   cc number;
begin
  dbms_repair.dump_orphan_keys
  (
     schema_name => 'EASON',
     object_name => 'I_HYJ',
     object_type => dbms_repair.index_object,
     repair_table_name => 'REPAIR_TABLE',
     orphan_table_name=> 'ORPHAN_KEY_TABLE',
     key_count => cc
  );
  dbms_output.put_line('Number of orphan keys: ' || to_char(cc));
end;
/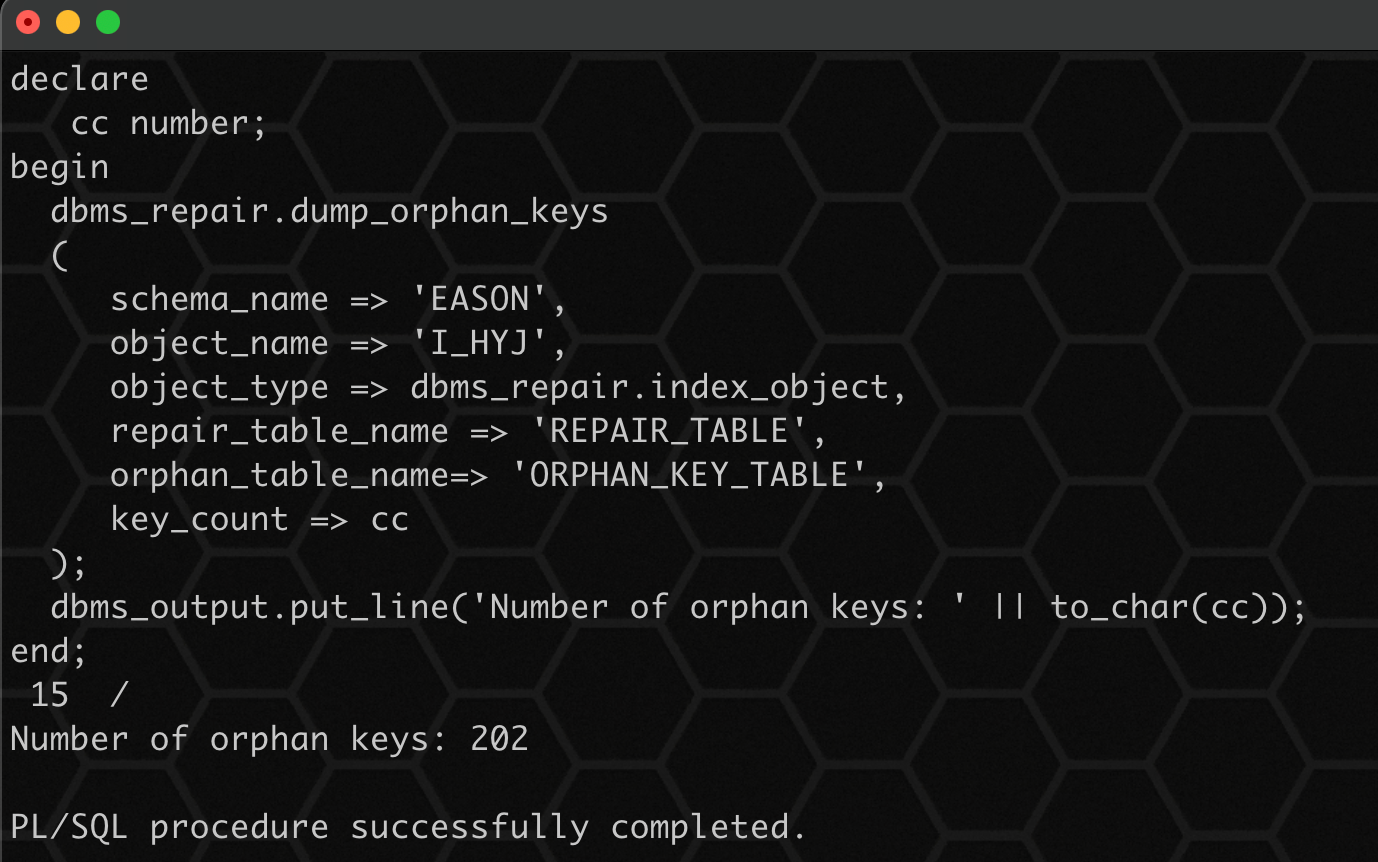
It indicates that 202 records are damaged or lost!
Note: you must pay attention to the object here_ Name is the index name, not table_name, here dump is the corrupted index information. If the table has multiple indexes, dump needs to be performed for each index_ ORPHAN_ Keys operation.
7. Verify whether the object can be queried. The following results still show that it cannot be queried:
select count(*) from eason.hyj;
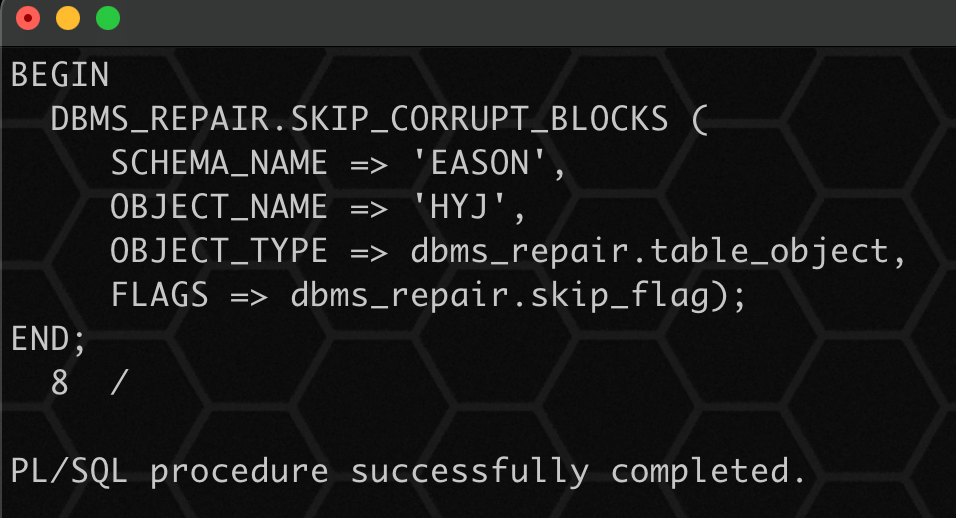
8. Skip bad blocks:
BEGIN
  DBMS_REPAIR.SKIP_CORRUPT_BLOCKS (
     SCHEMA_NAME => 'EASON',
     OBJECT_NAME => 'HYJ',
     OBJECT_TYPE => dbms_repair.table_object,
     FLAGS => dbms_repair.skip_flag);
END;
/
Note: 202 records are lost. The rowid of the lost record can be in orphan_ KEY_ Found in table.
9. Re index:
alter index eason.I_HYJ rebuild;

10. Verification results

So far, the data in the table can be accessed smoothly!
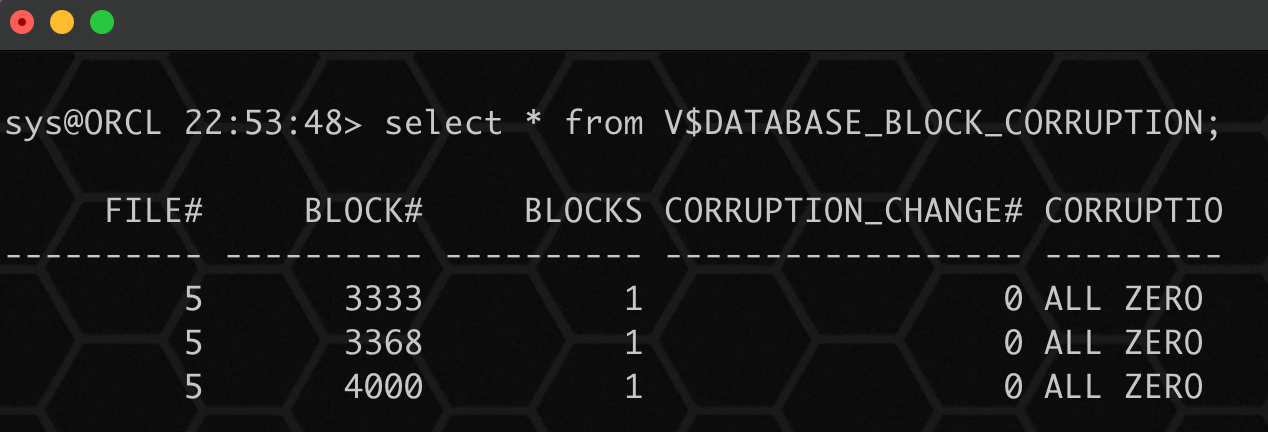
Since the bad block does not disappear, but is marked to skip, you can still view the bad block:
select * from V$DATABASE_BLOCK_CORRUPTION;
In this way, you can retrieve part of the data or the indexed value, but when you use dbv to check the data file in the table space, the damaged data block will still be displayed.
At this time, you need to export all the data of the table, rebuild the table or table space, and then import the retrieved data into the database. It is recommended to use the command expdp/impdp to completely eliminate the bad blocks detected by dbv.
Write at the end
Backup is more important than everything, and it is also the last line of defense, so please make a backup! eight hundred and eighty-six