preface:
Last time, I introduced the installation of RabbitMQ under windows and the addition of AMQP extension of PHP. Here, the code of local test is put into the service, so that is to install it again on Linux. But there is no need to use it directly. It is mainly about the use of control console after RabbitMQ is installed and how to call its interface in PHP to realize the production and consumption of messages.
Step:
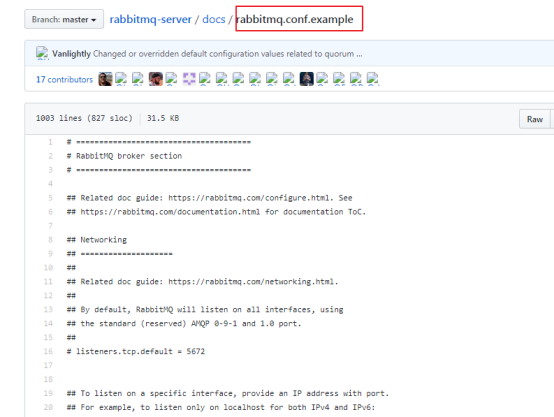
1. After Linux installs rabbitMQ, there is no configuration file. You need to go to GitHub( https://github.com/rabbitMQ/rabbitmq-server/tree/master/docs )Admiral rabbitmq.conf.example Copy, download and change to rabbitmq.conf .
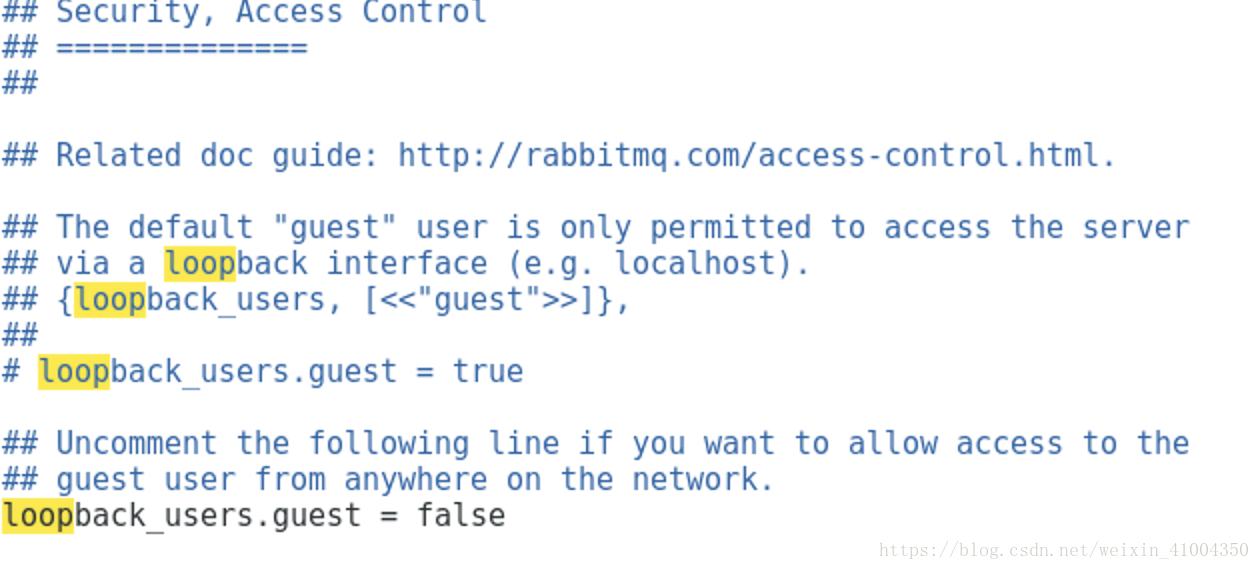
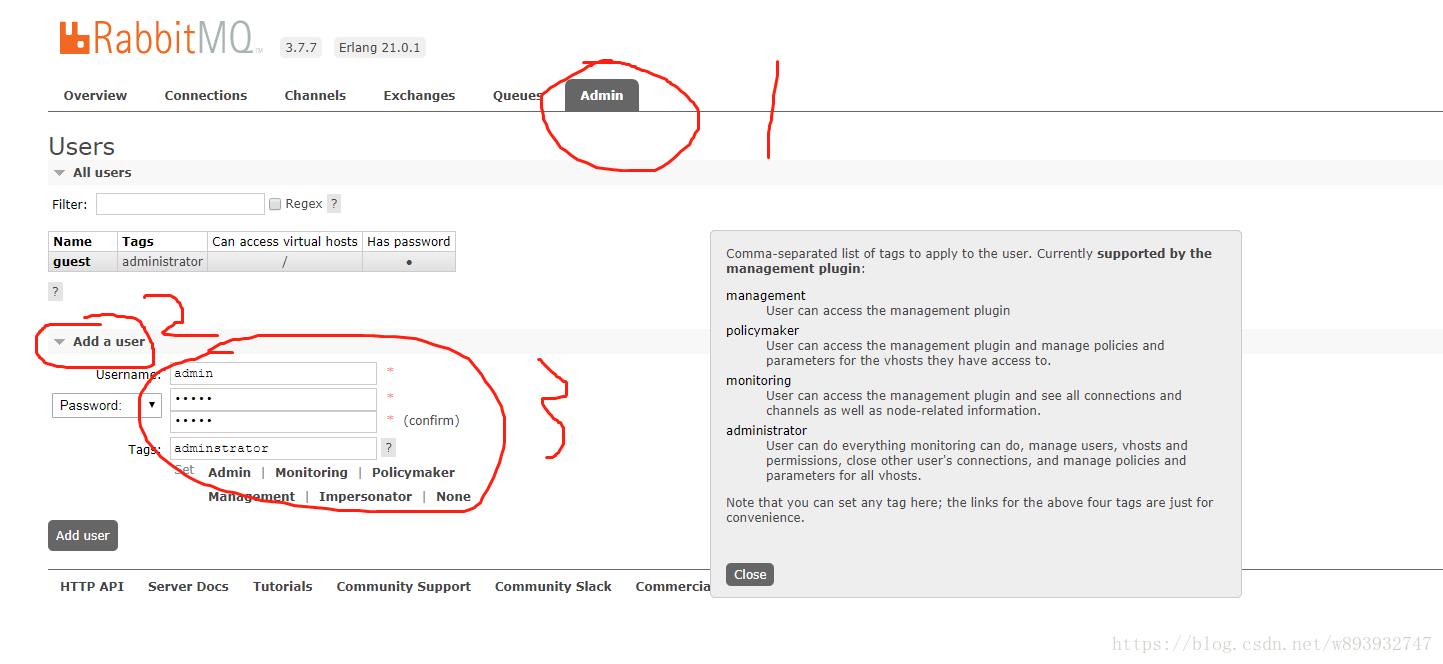
2. You can modify the default Vhost and the administrator's default account password. The most important thing is to open the administrator to all IP S to log in (only local can log in by default). The modification method is as follows.
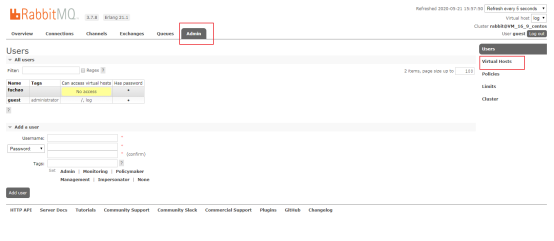
3. After entering the control console, first create vhost, click admin, and click Virtual Hosts in the sidebar.

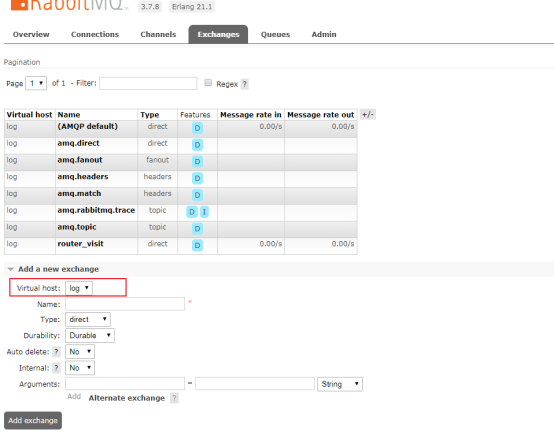
4. To add Exchanges, first select the corresponding Vhost
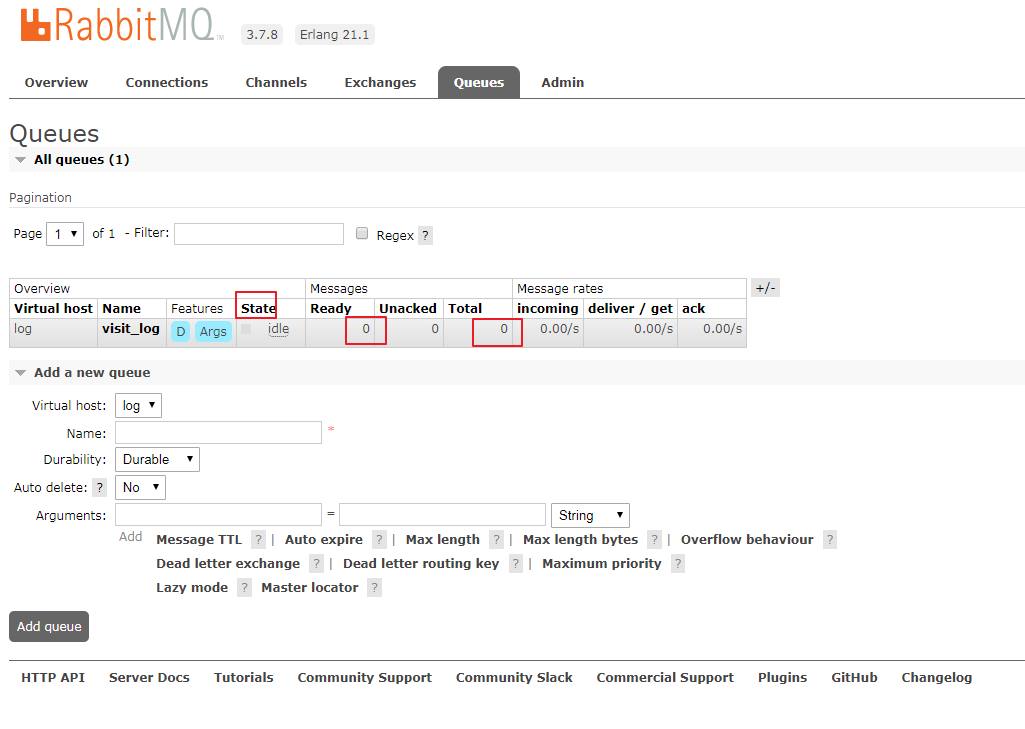
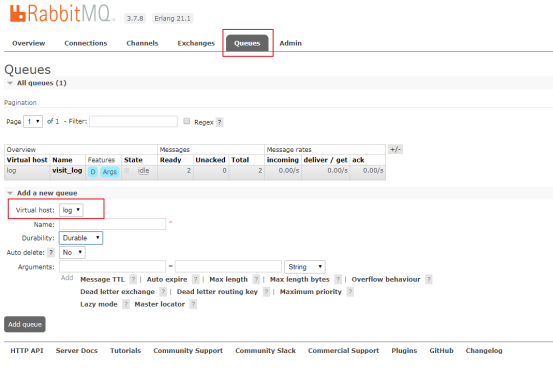
5. Add a queue, select Queues, and select the corresponding Vhost
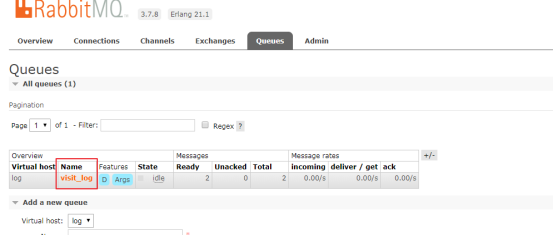
6. After adding the queue, select one of the added names to enter.
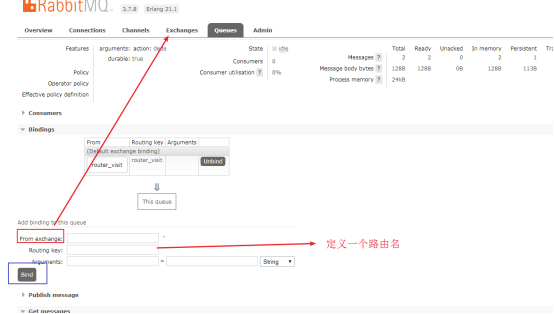
7. For one of the exchanges before binding, enter the name of the exchange and customize a route Key.
8. After success, messages can be generated to the virtual machine through PHP code, and then routed to the queue through the switch.
<?php


namespace rabbitmq;


class Amq
{
    /**
     * @var object Object instance
     */
    protected static $instance;

    protected $exchange='router_visit';  // Switch (need to be bound in the queue)
    protected $queue ='visit_log';       // queue
    protected $route ='router_visit';    // Route key (need to be bound in the queue)
    protected $consumer_tag='consumer';
    protected $config = [
        'host' => '146.53.206.264',
        'port' => 5672,
        'login' => 'guest',		//guest
        'password' => 'guest',	//Na18gR@9tf
        'vhost' => 'log',
        'amqp_debug' => true
    ];
    protected $exchange_index = 0;
    protected $exchange_type = [
        'direct',
        'fanout',
        'topic',
        'headers'
    ];

    /**
     * @note instantiation
     * @author: beiqiaosu
     * @since: 2019/11/13 16:10
     */
    public static function getInstance()
    {
        if (!(self::$instance instanceof self)) {
            self::$instance = new self();
        }
        return self::$instance;
    }


    /**
     * @Notes: Message production
     */
    public function publisher($message,$config=[]) {
        //Use the new configuration if there is one
        $this->config ['vhost'] = $config['vhost']?? $this->config ['vhost'];
        $this->exchange = $config['exchange']?? $this->exchange;
        $this->queue = $config['queue']?? $this->queue;

        $this->consumer_tag = $config['consumer_tag']?? $this->consumer_tag;
        $this->route = $config['route']?? $this->route;
        $this->exchange_index = $config['exchange_index']?? $this->exchange_index;

        $cnn = new \AMQPConnection($this->config);
        if (!$cnn->connect()) {
            echo "Cannot connect to the broker";
            exit();
        }

        $channel = new \AMQPChannel($cnn);
        $ex = new \AMQPExchange($channel);
        $ex->setName($this->exchange);

        $ex->setType(AMQP_EX_TYPE_DIRECT); //direct type

        $ex->setFlags(AMQP_DURABLE); //Persistence
        $ex->declareExchange();
        return "Send Message:".$ex->publish($message, $this->route, AMQP_NOPARAM, array('delivery_mode' => 2))."\n";
    }


    /**
     * @note consumption
     * @author: tata
     * @since: 2019/11/13 16:10
     */
    public function consumer() {

        $exchange='router_visit';       //Switch
        $queue ='visit_log';         //queue
        $route ='router_visit';        //route

        //Connection broker
        $cnn = new \AMQPConnection($this->config);
        if (!$cnn->connect()) {
            echo "Cannot connect to the broker";
            exit();
        }
        $channel = new \AMQPChannel($cnn);
        $ex = new \AMQPExchange($channel);
        //Set switch name
        $ex->setName($exchange);
        //Set switch type
        //AMQP_EX_TYPE_DIRECT: direct switch
        //AMQP_EX_TYPE_FANOUT: sector switch
        //AMQP_EX_TYPE_HEADERS: header switch
        //AMQP_EX_TYPE_TOPIC: topic switch
        $ex->setType(AMQP_EX_TYPE_DIRECT);
        //Set switch persistence
        $ex->setFlags(AMQP_DURABLE);
        //Claim switch
        $ex->declareExchange();
        //Create a message queue
        $q = new \AMQPQueue($channel);
        //Set queue name
        $q->setName($queue);
        //Set queue persistence
        $q->setFlags(AMQP_DURABLE);
        //Claim message queue
        //$q->declareQueue();
        //Switch and queue are bound through $route
        $q->bind($exchange, $route);

        $ret = $q->consume(function($envelope, $queue) {

            // Take the message subject and convert it to an array
//            $origin_data = json_decode($envelope->getBody(),true);
//            dump($envelope->getBody());die;

            /**Business on message subject**/
            $res = true;
            /**Business on message subject**/

            // After business processing, send the message to MQ to consume it
            if ($res) $queue->ack($envelope->getDeliveryTag()); //Send ACK response manually
        });

        dump($ret);die;

        $cnn->disconnect();
    }

}
9. For each execution of production or consumption code, you can see in the statistics or chart in the Queue to test whether the code is successful.