cause
Recently, the project began to be reconstructed, which may use the situation that the master-slave plus read-write separation. I wanted to build a local one first to try the effect. As a result, baidu found a lot of them, but few of them went to the pit. Most of them were copying other people's content. The key is that there will be errors in the actual application. The browser has opened nearly 20 tabs, and several of them have been tried The problem can't be used at all. If you waste time and don't talk about it, it will make you feel embarrassed. So do it yourself.
1, Preparation
1. First, check and clean the mysql related files in the system
# Check whether Mysql files exist in the system find / -name mysql # Delete the file or folder where mysql exists rm -rf /usr/lib64/mysql/ # Check whether there are mysql related dependencies rpm -qa|grep mysql # Uninstall mysql dependency rpm -e mysql-.....
2. Download the corresponding version of mysql installation file
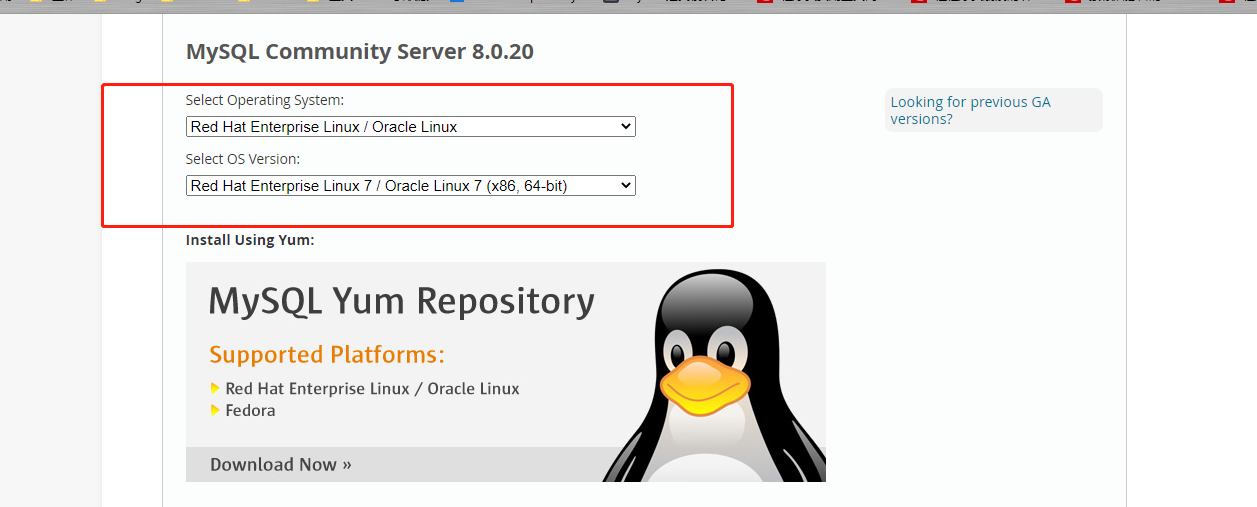
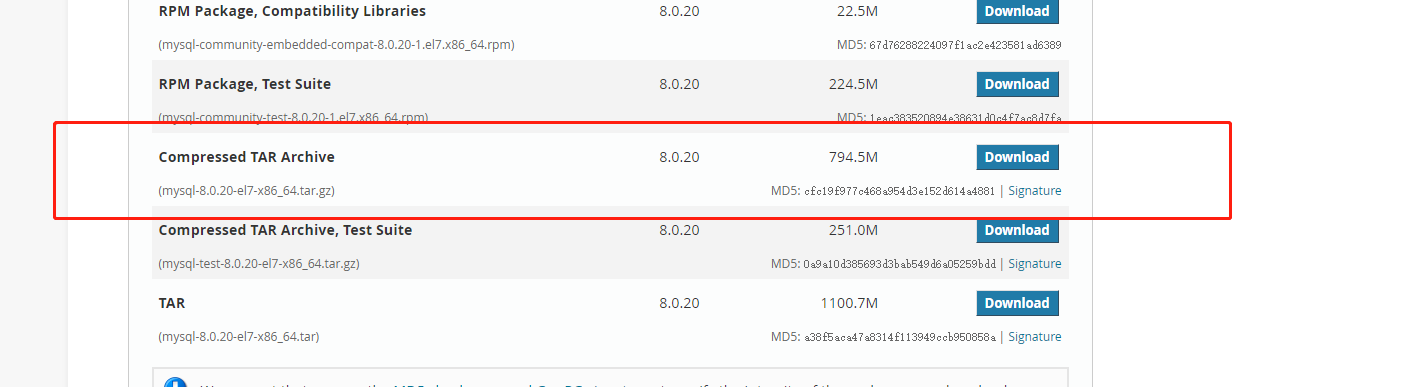
Because I use CentOS 7 64 bit, I choose the operating system as shown in the figure below on MySQL official website, and then choose tar package to download.
Here's why I want to use tar package for installation, instead of using a normal installation on the Internet and another rpm installation method. Because if the first uses yum for normal installation and the second uses local installation, then I can't specify the installation path and put the two mysql together for systematic management, so I use tar package for installation here Install multiple instances in the same directory for easy management and configuration.
# Create a MySQL user before downloading. Why create a MySQL user? Because the extracted MySQL file does not have any group, and in order to avoid MySQL not being able to read some files during configuration and startup, it is recommended to use MySQL users to run mysql adduser mysql # Set password passwd mysql # Next, enter the password twice # Switch users su mysql # Download Mysql tar package wget https://dev.mysql.com/get/Downloads/MySQL-8.0/mysql-8.0.20-el7-x86_64.tar.gz # Extract the file and rename the folder to mysql_01 tar xf mysql-8.0.20-el7-x86_64.tar.gz ./mysql_01 # Copy a copy of mysql_01 and rename it mysql_02 cp -r ./mysql_01 ./mysql_02/ # Switch to root user, change the array of two mysql to mysql user, and then switch back to mysql user exit chown -R mysql:mysql /home/mysql/mysql_01/ /home/mysql/mysql_02/ su mysql
2, Modify configuration
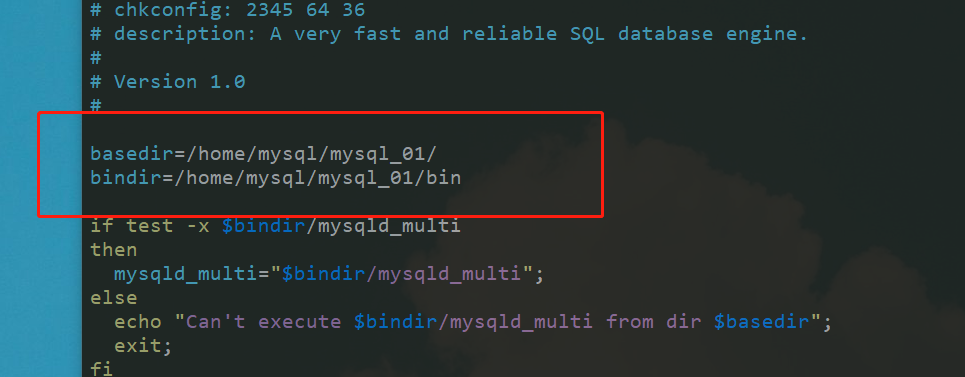
The next step is to configure mysql. In fact, the configuration of the two MySQL is the same, but the path is different. Here I will only show mysql_01, mysql_02 replace the corresponding path with your own.
1. Custom configuration my.cnf
# Switch to mysql_01 path down cd ./mysql_01 # create profile my.cnf,Direct use vim Edit and save. among###Expressed as required,#Represented as optional vim my.cnf ----------Here are the contents of the document------------- [mysqld] ### Port number port=10085 ### Installation directory basedir=/home/mysql/mysql_01/ ### Data storage path datadir=/home/mysql/mysql_01/data/ ### Session file directory socket=/home/mysql/mysql_01/mysql.sock # Maximum number of connection failures allowed max_connect_errors=10 # Character set coding of server character-set-server=utf8 # Default storage engine default-storage-engine=INNODB # Default user user=mysql # Turn on slow query slow_query_log=on # Slow query log file directory slow_query_log_file=/home/mysql/mysql_01/slow-query.log
[client]
The port number used by the connection server
port=10085
Session file
socket=/home/mysql/mysql_01/mysql.sock
(default character set encoding)
default-character-set=utf8
------ end of file content--------------------
In the above configuration, you can see that there is a data folder in the datadir item, and MySQL_ No under 01, so you need to create data folder
mkdir data
2. Modify the default configuration
Next, you need to modify the default configuration information of mysql
 # Modify the default configuration information in the file
 vim ./support-files/mysql.server
 # Change all the configuration of basedir and datadir in the file to the current path, as shown below
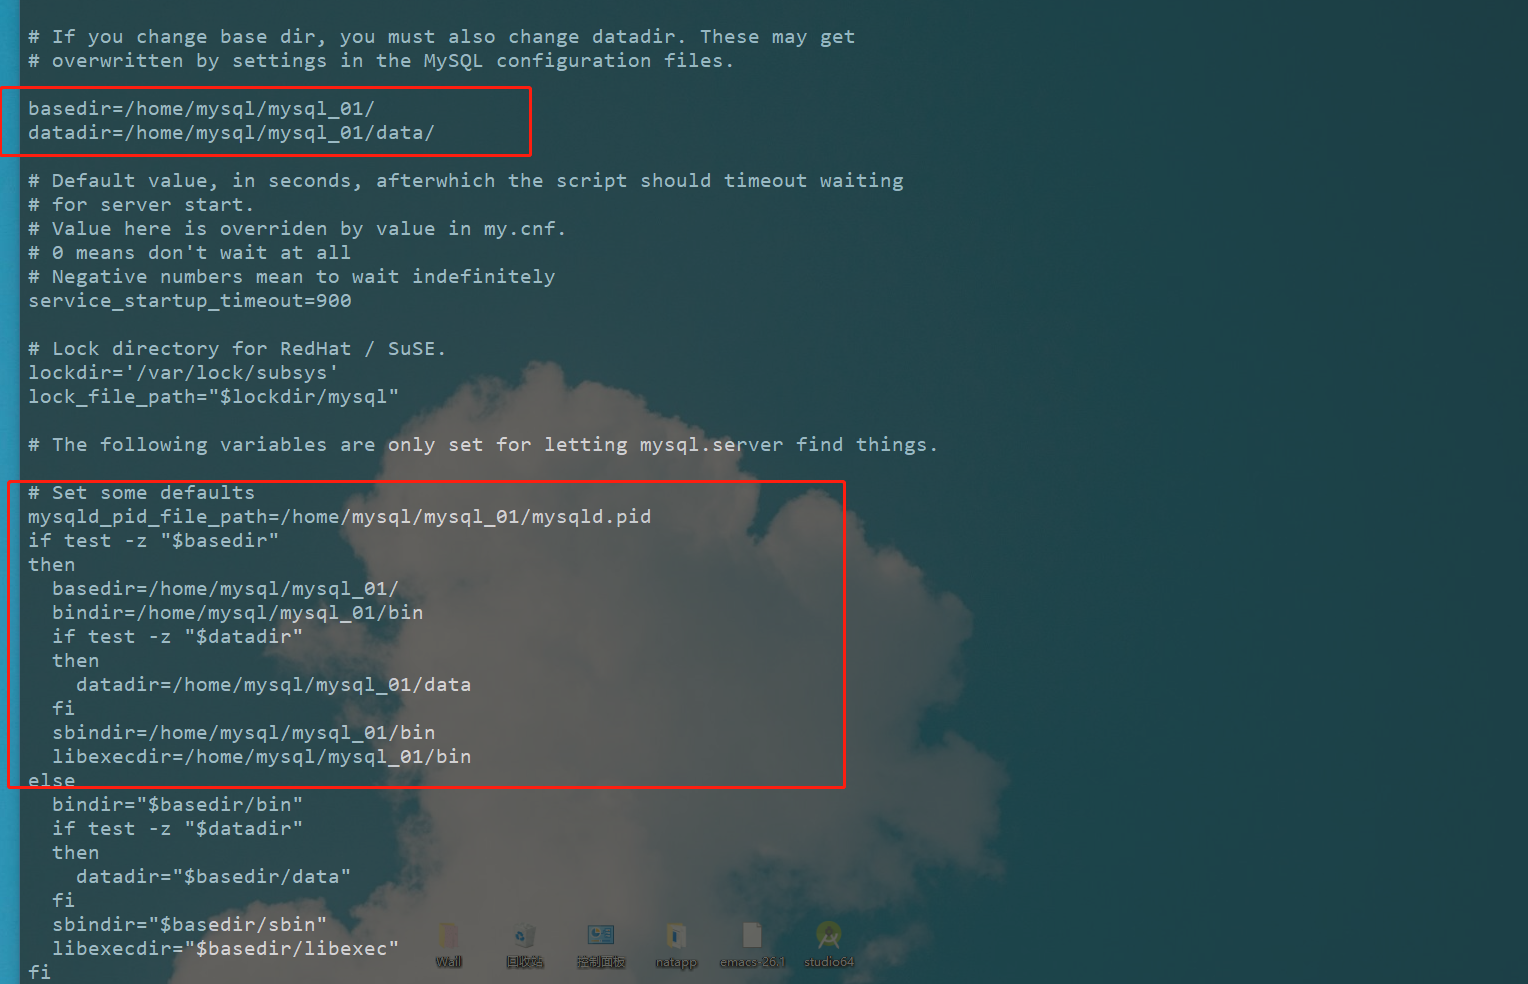
And modify the MySQL configuration file path loaded in the file to the one just created my.cnf File, as shown in the figure below. After modification, save and exit.
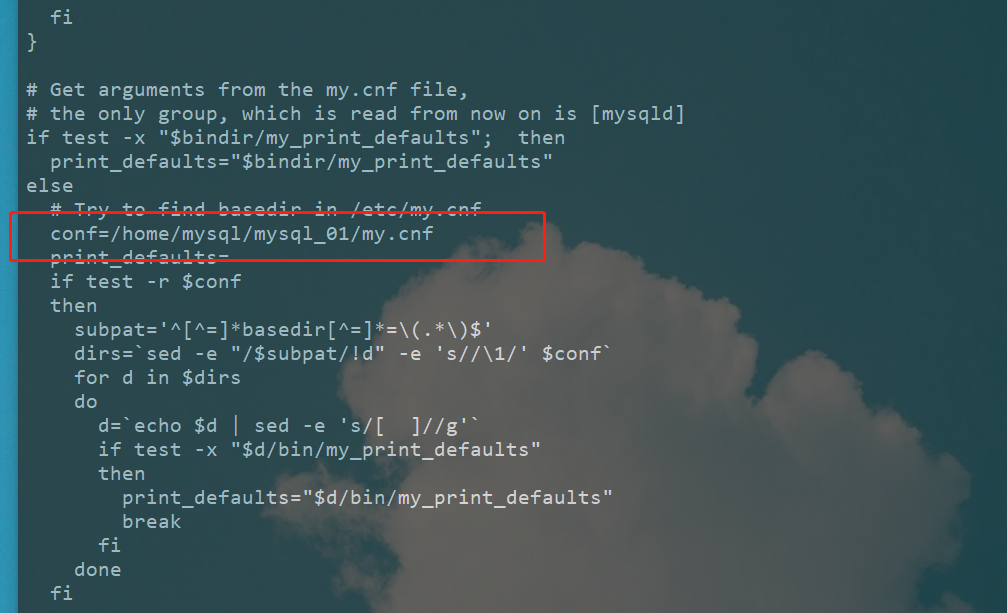
You also need to modify another file under support files
# modify support-files Under folder mysqld_multi.server file vim ./support-files/mysqld_multi.server #Or modify the two properties of basedir and datadir, as shown in the following figure
3, Initialize installation and start service
1. Initialize installation
# Switch to MySQL_ Root of 01 cd /home/mysql/mysql_01/ # Initialize installation --defaults-file Represents the configuration file for the specified initialization --console Indicates that the initialization information is printed on the console ./bin/mysqld --defaults-file=/home/mysql/mysql_01/my.cnf --initialize --console --user=mysql # After successful initialization, the initialization password will be printed out in the console. The approximate format is as follows root@localhost: fa356fgss,
2. Start service
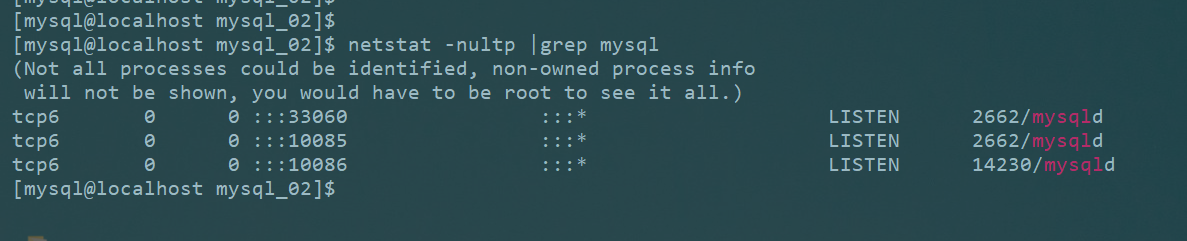
# Background start current mysql_01 Of mysql Service, you still need to specify the configuration file, because in the configuration file we set a socket Parameter. Only when you start according to this configuration file, will you follow the socket Configure the path to generate, otherwise it will be automatically generated in the/tmp/mysql.sock,If mysql_02 If it is generated in this way, an overlay will be formed. When connecting, only one service can be connected, or even an error will be reported. ./bin/mysqld_safe --defaults-file=./my.cnf & # Use the command to check whether the mysql service is started, as shown in the following figure netstat -nultp|grep 10085

4, Connecting to database and changing password
# You can see from the above that MySQL service has been started, so you can connect to MySQL ./bin/mysql --socket=./mysql.sock -uroot -p # Enter initial password # Change the login password of MySQL. Here I change it to root. Note the ending semicolon at the end alter user root@localhost identified by "root";

After the same configuration, start mysql_02, the effect is as follows
That's MySQL_01, the same MySQL_02 is consistent with this. You only need to change the corresponding directory to your own file path. After multiple instances are installed, you can perform master-slave replication, read-write separation and other related configurations.
[reprint please indicate https://www.cnblogs.com/fqgump/p/12957145.html]