1 Introduction to easyexcel
EasyExcel is an open source project of Alibaba open source, which is a simple and memory saving read-write Excel based on Java. Support reading and writing 100M excel while saving memory as much as possible.
GitHub address: https://github.com/alibaba/easyexcel
Official documents: https://www.yuque.com/easyexcel/doc/easyexcel
2 use of easyexcel
2.1 writing to Excel
Write the data of an entity class to Excel table.
POM import dependency:
<dependency>
    <groupId>com.alibaba</groupId>
    <artifactId>easyexcel</artifactId>
    <version>3.0.3</version>
</dependency>
Entity class:
@Data
public class User {
	private String name;
	private String gender;
	private Integer age;
	private String phone;
	private String address;
}
Design test data:
public static List<User> getDate() {
    List<User> list = new ArrayList<>();
    User u1 = new User("Zhang San", "male", 23, "18888888888", "Shenzhen City");
    User u2 = new User("Li Si", "male", 20, "16666666666", "Beijing");
    User u3 = new User("Wang Wu", "female", 18, "19999999999", "Shanghai");
    User u4 = new User("Zhao Liu", "female", 34, "15555555555", "Guangzhou City");
    list.add(u1);
    list.add(u2);
    list.add(u3);
    list.add(u4);
    return list;
}
Write code:
public static void write(){
	String fileName = "F:\\test\\test.xlsx";
	EasyExcel.write(fileName, User.class)
		.sheet("Template")
		.doWrite(getDate());
}
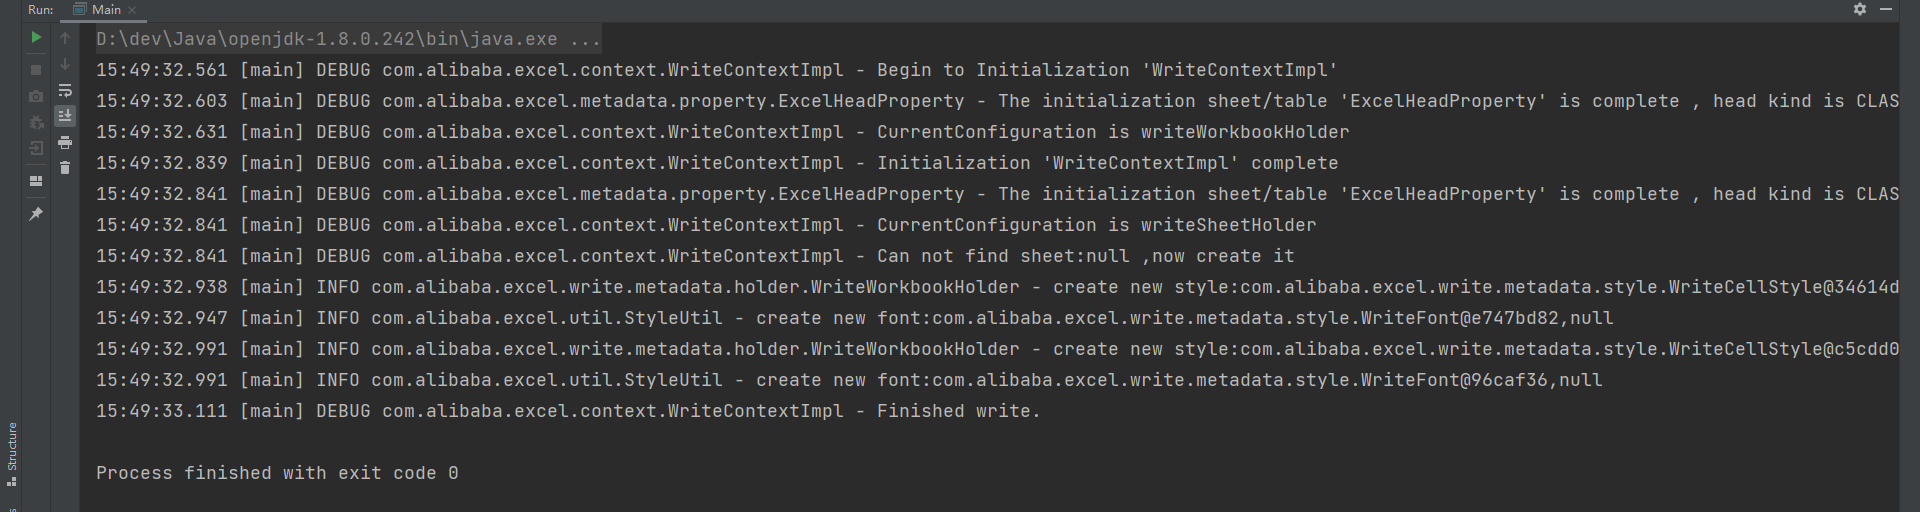
Finally, the write() method is called through the main class. The following running results indicate that the write is successful
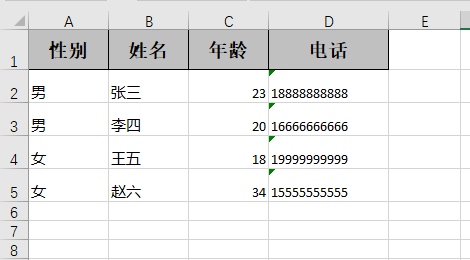
Open the Excel file generated after writing, and the visible data is successfully written to the Excel file.

2.1.1 code analysis
The data can be written into Excel file through simple code. The key point is to write part of the code:
First, declare a file path to save the generated file. The file does not need to exist. The file will be automatically generated when writing.
String fileName = "F:\\test\\test.xlsx";
Then there is the key writing part. When writing, call the write method directly through EasyExcel. The write method needs to pass in two parameters, the first is the file path, and the second is to specify which class to write, that is, the entity class corresponding to the data in the excel file needs to be written, and then use the sheet method to specify the sheet name of Excel, Then use the doWrite method to specify the specific data that needs to be written. In this example, we call the getData method in the doWrite method to get the test data we designed.
EasyExcel.write(fileName, User.class)
		.sheet("Template")
		.doWrite(getDate());
2.1.2 format setting
It can be seen from the written excel file that the header in the file is the property name in our entity class, but the property name will not be exported directly in actual development, so it is necessary to specify the corresponding Chinese name for the property name. In EasyExcel, the @ ExcelProperty annotation can be used to specify the name written into Excel:
@ExcelProperty("full name")
private String name;
In @ ExcelProperty, in addition to specifying the header name, you can also specify the column in the whole table. By default, it is arranged in the order of attributes in Excel. You can specify the column in the index property, starting from 0.
@ExcelProperty(value = "Gender", index = 0)
private String gender;
You can also see that the telephone number column in the written Excel file does not fully display the telephone, so we can specify the width of a column through the @ ColumnWidth annotation.
@ExcelProperty("Telephone")
@ColumnWidth(15)
private String phone;
You can also use @ ColumnWidth on the entity class, which means that all columns in the table are set to the specified width. On the entity class, you can also use @ ContentRowHeight to specify the row height and @ HeadRowHeight to specify the header height.
@Data
@ContentRowHeight(25)
@HeadRowHeight(30)
@ColumnWidth(10)
public class User {
	@ExcelProperty("full name")
	private String name;
	@ExcelProperty(value = "Gender", index = 0)
	private String gender;
	@ExcelProperty("Age")
	private Integer age;
	@ExcelProperty("Telephone")
	@ColumnWidth(15)
	private String phone;
	@ExcelIgnore
	private String address;
}
It is different to write after specifying the above table format.
2.1.3 color and font settings
In Easy, you can set the fill color and font of the table through annotations, which are used on entity classes.
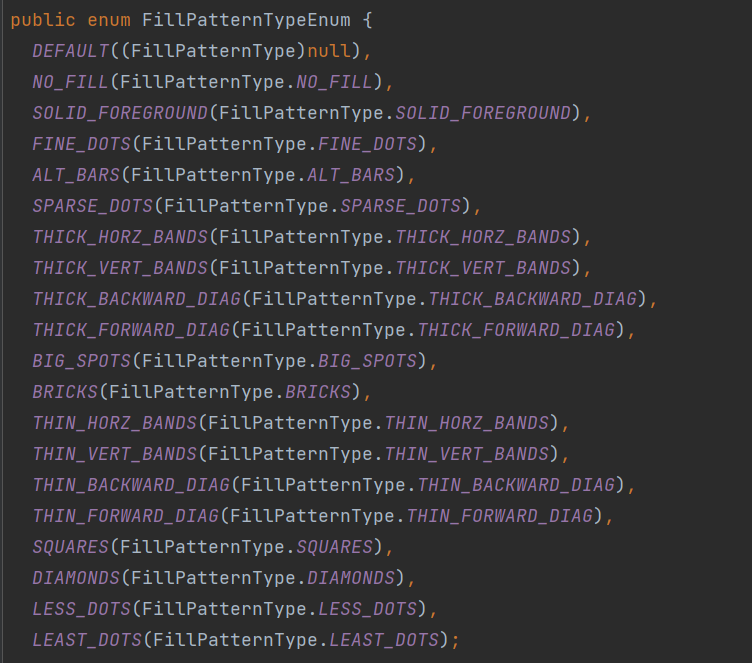
@HeadStyle(fillPatternType = FillPatternTypeEnum.SOLID_FOREGROUND, fillForegroundColor = 10)
@HeadFontStyle(fontHeightInPoints = 20)
@ContentStyle(fillPatternType = FillPatternTypeEnum.LESS_DOTS, fillForegroundColor = 17)
@ContentFontStyle(fontHeightInPoints = 20)
HeadStyle and ContentStyle are used to set header filling and content filling respectively. fillPatternType is defined as the filling type. The filling type is obtained by using the enumeration class FillPatternTypeEnum. Different filling categories are defined in the enumeration class. The filling type can be roughly determined by name.
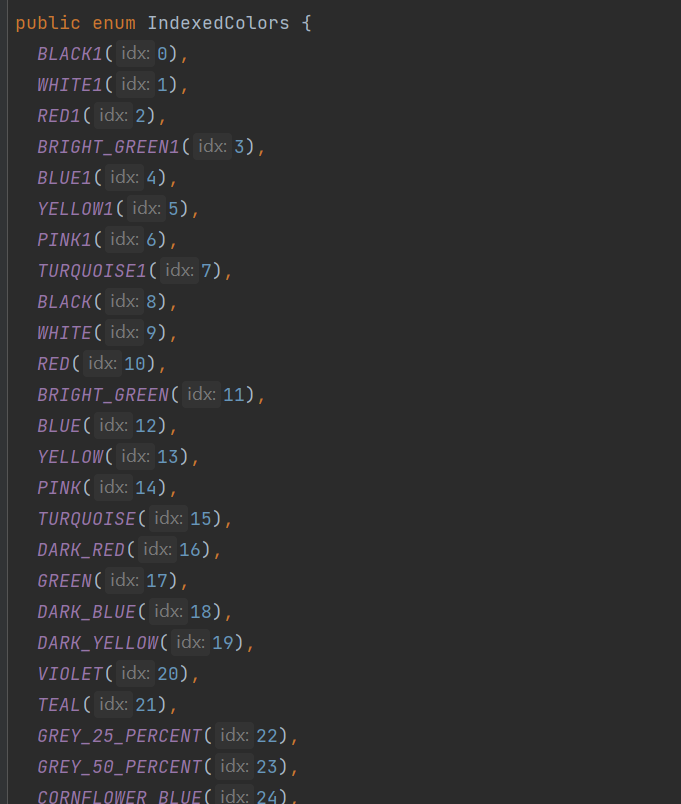
fillForegroundColor specifies the fill color. The color passes in an integer value. The integer value can be obtained through the IndexedColors class. Similarly, the specific color can be known by name.
After specifying the color and font, run the program again to generate the Excel file as follows:
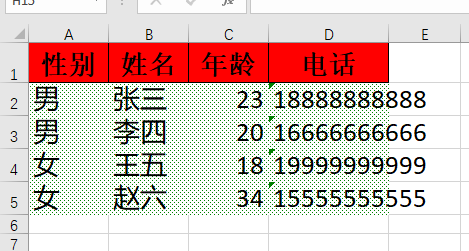
The abnormal display of the phone number column here is because we have specified the font size, but the column width of the phone column is only 15, so the phone number overflows the cell.
2.1.4 common notes
@ExcelProperty: Specifies the name and column after the property is written to the file
@ColumnWidth: Specifies the column width
@ContentRowHeight: Specifies the row height
@HeadRowHeight: Specifies the height of the header
@ExcelIgnore: ignores an attribute
@HeadStyle: sets the header fill color, fillPatternType property specifies the fill type, and fillforeroundcolor property specifies the fill color.
@HeadFontStyle: Specifies the header font size, which is specified through the fonthightinpoints property.
@ContentStyle: Specifies the fill color of the content area, the same as @ HeadStyle
@ContentFontStyle: Specifies the font size of the content area, the same as @ HeadFontStyle
2.2 reading Excel
Reading Excel files is more troublesome than writing Excel files. Here, we read the files previously written to the local file, and restore the User entity class to the original.
@Data
public class User {
    @ExcelProperty("full name")
	private String name;
    @ExcelProperty("Gender")
	private String gender;
    @ExcelProperty("Age")
	private Integer age;
    @ExcelProperty("Telephone")
	private String phone;
    @ExcelProperty("address")
	private String address;
}
To read Excel, you first need to define a listener:
public class UserExcelListener extends AnalysisEventListener<User> {

	// This method is called every time a piece of data is read
	@Override
	public void invoke(User user, AnalysisContext analysisContext) {
		System.out.println("Read a piece of data:" + JSON.toJSONString(user) );
	}

	// After reading Excel, the callback uses this method
	@Override
	public void doAfterAllAnalysed(AnalysisContext analysisContext) {
		System.out.println("File read complete");
	}
}
Read code:
public static void read(){
    String fileName = "F:\\test\\test1.xlsx";
	EasyExcel.read(fileName, User.class, new UserExcelListener())
		.sheet("Template")
		.doRead();
}
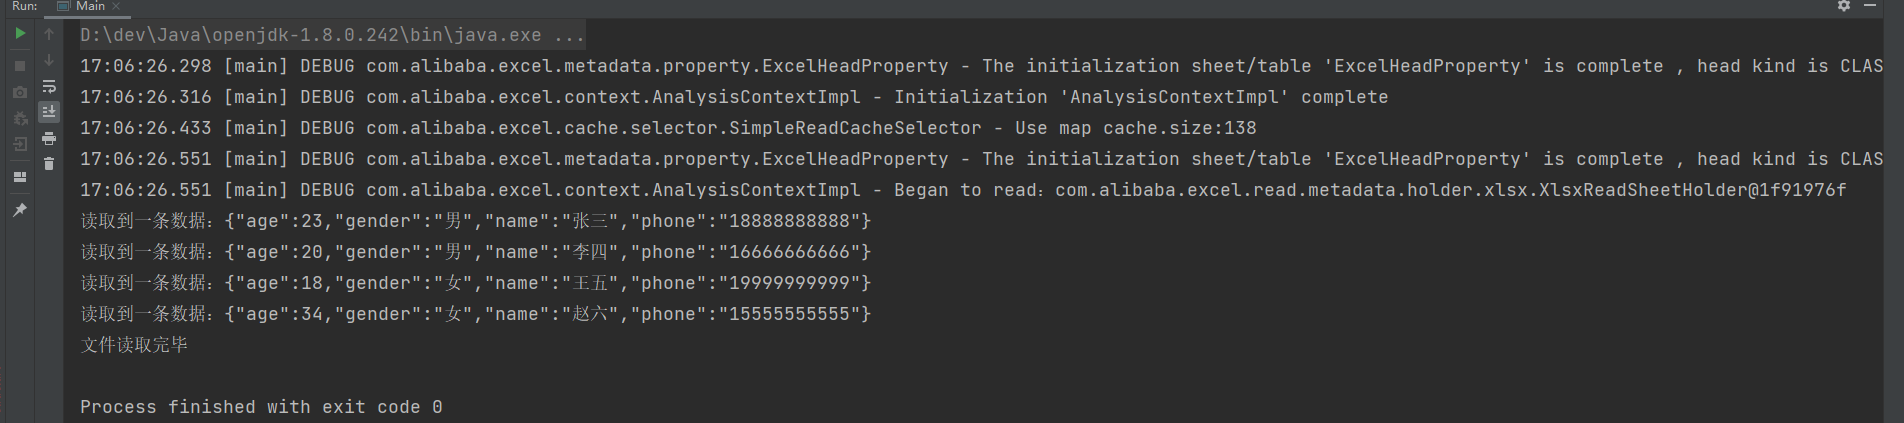
The test class calls the read method, and the running results are as follows:
2.2.1 code analysis
The custom listener needs to inherit the AnalysisEventListener class, and then override the invoke and doAfterAllAnalysed methods. When reading an Excel file, it will read one line at a time, call the invoke method every time it reads one line, and call the doAfterAllAnalysed method after reading the entire Excel file.
The specific read code and write code structures have roughly the same meaning, except that one more listening parameter needs to be passed in when reading the file.
Special note: Custom listeners cannot be managed by spring, so you should use the new keyword every time you read Excel instead of @ Autowired annotation injection. Similarly, if you need to use spring managed classes in the listener, you can pass them through the listener's construction method. For example, you need to use the Dao layer in the listener to save the read data to the database, You can use the following methods:
public class UserExcelListener extends AnalysisEventListener<User> {
	private UserDao userDao;
    public UserExcelListener(UserDao userDao) {
        this.userDao = userDao;
    }
}
2.2.2 @ExcelProperty
You can also use @ ExcelProperty when reading Excel. In this case, you can also specify the name and index by using this annotation. Specifying the name means that you want to read the data with the same name as that in the table. For example, all the above entity classes use this method. If the name is repeated, only one field will read the data, Specifying index means reading the data of the specified column.
@ExcelProperty(index = 3)
private String name;
The @ ExcelProperty(index = 3) here means that the name property forces you to read the contents of the fourth column. The data read out is that the phone number will be assigned to name. This is not recommended. In an entity class, it is better to match all names or all indexes, and the flexibility of name matching is higher.
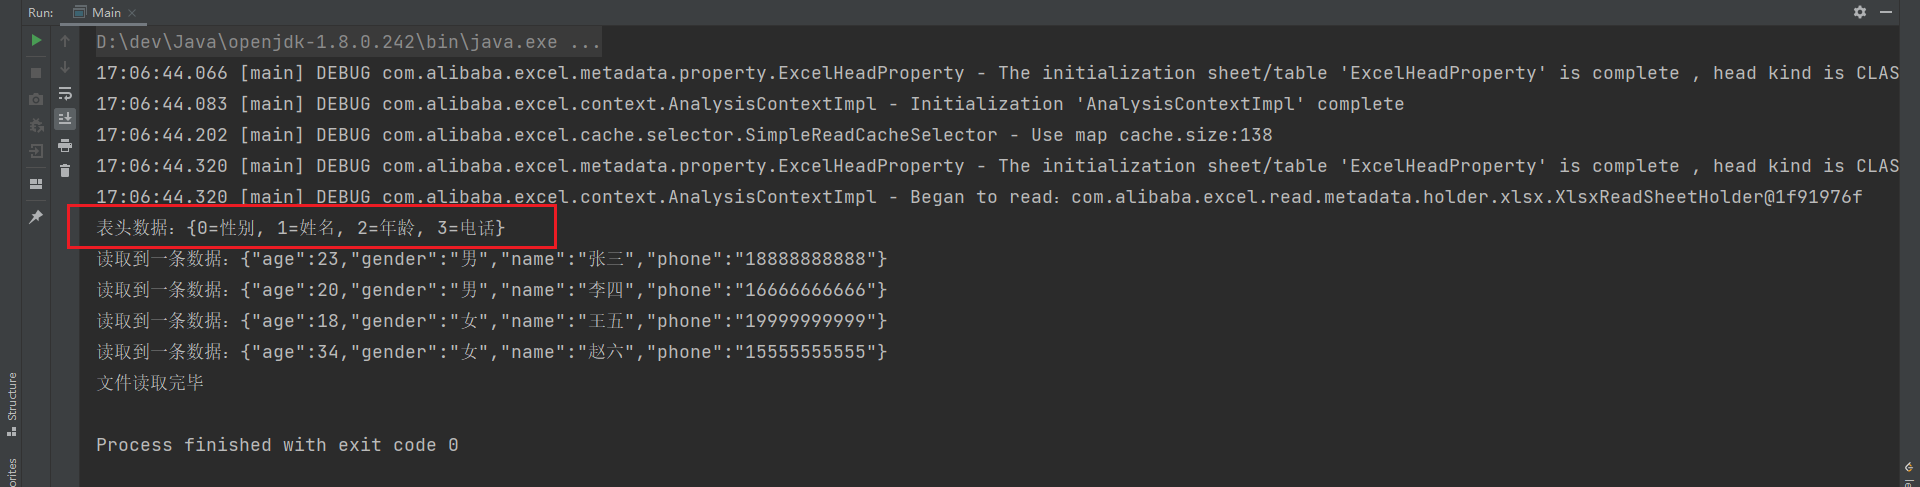
2.2.3 reading the header
If you need to read the header, you need to implement the invokeHeadMap method when customizing the listener. When customizing the listener, the invoke and doafterallanalyzed methods must be implemented, but the invokeHeadMap is not enforced.
@Override
public void invokeHeadMap(Map<Integer, String> headMap, AnalysisContext context) {
	System.out.println("Header data:" + headMap);
}