Recently, in learning OpenGL, I wrote some of the learning process here, hoping to share with you the discussion. Welcome to my personal website Orient Discuss learning together. This is mine. GitHub If you like it, may I give you a compliment? A kind of
texture
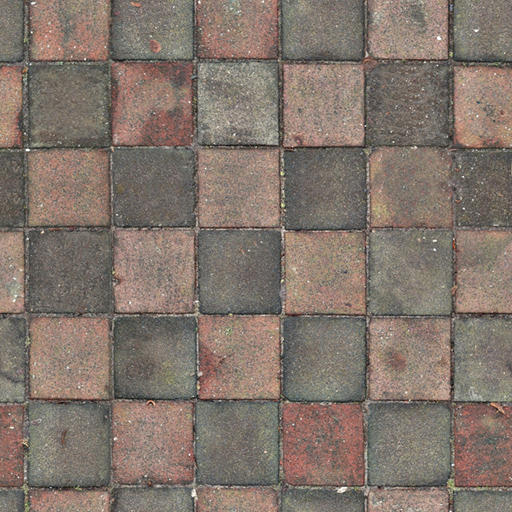
In this code, I used the following texture image:
Texture coordinates:
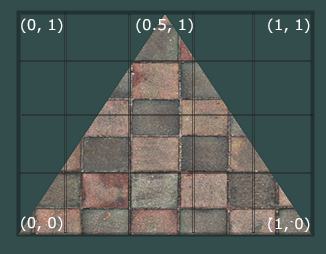
As can be seen from the image above, the texture coordinate distant point starts at the bottom left of the image. The corresponding texture coordinates for drawing rectangle/triangle are as follows:
//float vertices[] = {
//    // positions        // colors            // texture coords
//     0.5f,  0.5f, 0.0f,  1.0f, 0.0f, 0.0f,  1.0f, 1.0f ,// top right
//     0.5f, -0.5f, 0.0f,  0.0f, 1.0f, 0.0f,  1.0f, 0.0f,// bottom right
//    -0.5f, -0.5f, 0.0f,  0.0f, 0.0f, 1.0f,  0.0f, 0.0f,// bottom left
//    -0.5f,  0.5f, 0.0f,   1.0f, 1.0f, 0.0f,  0.0f, 1.0f// top left
//};
//unsigned int indices[] = {  // note that we start from 0!
//    0, 1, 3,  // first Triangle
//    1, 2, 3   // second Triangle
//};
float vertices[] = {    // Code needed to render triangles
    -0.5f, -0.5f, 0.0f,  0.0f, 0.0f, 1.0f,  0.0f, 0.0f,        // Code needed to render triangles
     0.5f, -0.5f, 0.0f,  0.0f, 1.0f, 0.0f,  1.0f, 0.0f,        // Code needed to render triangles
     0.0f,  0.5f, 0.0f,  1.0f, 0.0f, 0.0f,  0.5f, 1.0f        // Code needed to render triangles
};        // Code needed to render triangles
Rectangle drawing is achieved by drawing two triangles. We can draw a rectangle only by giving four vertex attributes and an index array.
Next bind VAO,VBO,EBO:
unsigned int VBO, VAO, EBO;
glGenVertexArrays(1, &VAO);
glGenBuffers(1, &VBO);
//GlGenBuffers (1, & EBO); // Code needed to render rectangles
// bind the Vertex Array Object first, then bind and set vertex buffer(s), and then configure vertex attributes(s).
glBindVertexArray(VAO);

glBindBuffer(GL_ARRAY_BUFFER, VBO);
glBufferData(GL_ARRAY_BUFFER, sizeof(vertices), vertices, GL_STATIC_DRAW);

//GlBind Buffer (GL_ELEMENT_ARRAY_BUFFER, EBO); //Code needed to render rectangles
//GlBuffer Data (GL_ELEMENT_ARRAY_BUFFER, sizeof (indices), indices, GL_STATIC_DRAW); //Code needed to render rectangles
Analytical vertex data:
// This is the vertex coordinate property of the drawing
glVertexAttribPointer(0, 3, GL_FLOAT, GL_FALSE, 8 * sizeof(float), (void*)0);
glEnableVertexAttribArray(0);

// This is the vertex color attribute of the drawing
glVertexAttribPointer(1, 3, GL_FLOAT, GL_FALSE, 8 * sizeof(float), (void*)(3 * sizeof(float)));
glEnableVertexAttribArray(1);

// This is the texture coordinate corresponding to the vertex.
glVertexAttribPointer(2, 2, GL_FLOAT, GL_FALSE, 8 * sizeof(float), (void*)(6 * sizeof(float)));
glEnableVertexAttribArray(2);
Texture settings
First create a texture ID and bind it
unsigned int texture;
glGenTextures(1, &texture);
glBindTexture(GL_TEXTURE_2D, texture);
Set up surround and filter mode
// set the texture wrapping parameters
glTexParameteri(GL_TEXTURE_2D, GL_TEXTURE_WRAP_S, GL_REPEAT);
glTexParameteri(GL_TEXTURE_2D, GL_TEXTURE_WRAP_T, GL_REPEAT);
// set texture filtering parameters
glTexParameteri(GL_TEXTURE_2D, GL_TEXTURE_MIN_FILTER, GL_LINEAR);
glTexParameteri(GL_TEXTURE_2D, GL_TEXTURE_MAG_FILTER, GL_LINEAR);
Generate and load textures
int width, height, nrChannels;
char *texturePath = "../src/wall.jpg";        // Fill in your picture path here
unsigned char *data = stbi_load(texturePath, &width, &height, &nrChannels, 0);        // The stbi_load function first accepts the location of an image file as input. Next, it needs three int s as its second, third and fourth parameters. stb_image.h will fill these three variables with the width, height of the image and the number of color channels. The width and height of the image we will use to generate the texture later.
It's used here. stb_image.h
Before using stb_image.h, you need to create a stb_image.cpp file and add the following:
By defining STB_IMAGE_IMPLEMENTATION, the preprocessor modifies the header file to contain only the relevant function definition source code. When used, you only need to include the stb_image.h file in the program.
#define STB_IMAGE_IMPLEMENTATION
#include "stb_image.h"
Next, use the previously loaded images to generate textures:
if (data)
{
    glTexImage2D(GL_TEXTURE_2D, 0, GL_RGB, width, height, 0, GL_RGB, GL_UNSIGNED_BYTE, data);
    glGenerateMipmap(GL_TEXTURE_2D);
}
else
{
    std::cout << "Failed to load texture" << std::endl;
}
// Release image memory
stbi_image_free(data);
When glTexImage 2D is called, the currently bound texture object is appended with a texture image. At present, however, only the texture image of the base-level is loaded. If we want to use the multi-level fading texture, we must set all the different images manually (increasing the second parameter continuously). Or, call glGenerate Mipmap directly after the texture is generated. This automatically generates all required multilevel fading textures for the currently bound texture.
Finally, apply texture
while (!glfwWindowShouldClose(window))
    {
        // input
        // -----
        processInput(window);

        // render
        // ------
        glClearColor(0.2f, 0.3f, 0.3f, 1.0f);
        glClear(GL_COLOR_BUFFER_BIT);

        ourShader.use();
        glBindVertexArray(VAO); // seeing as we only have a single VAO there's no need to bind it every time, but we'll do so to keep things a bit more organized
                                //glDrawArrays(GL_TRIANGLES, 0, 6);
        //glDrawElements(GL_TRIANGLES, 6, GL_UNSIGNED_INT, 0);
        // glBindVertexArray(0); // no need to unbind it every time

        glDrawArrays(GL_TRIANGLES, 0, 3);    // Code needed to render triangles

        //glDrawElements(GL_TRIANGLES, 6, GL_UNSIGNED_INT, 0); //Code needed to render rectangles

        // glfw: swap buffers and poll IO events (keys pressed/released, mouse moved etc.)
        // -------------------------------------------------------------------------------
        glfwSwapBuffers(window);
        glfwPollEvents();
    }

    // optional: de-allocate all resources once they've outlived their purpose:
    // ------------------------------------------------------------------------
    glDeleteVertexArrays(1, &VAO);
    glDeleteBuffers(1, &VBO);
    glDeleteBuffers(1, &EBO);

    // glfw: terminate, clearing all previously allocated GLFW resources.
    // ------------------------------------------------------------------
    glfwTerminate();
    return 0;
}
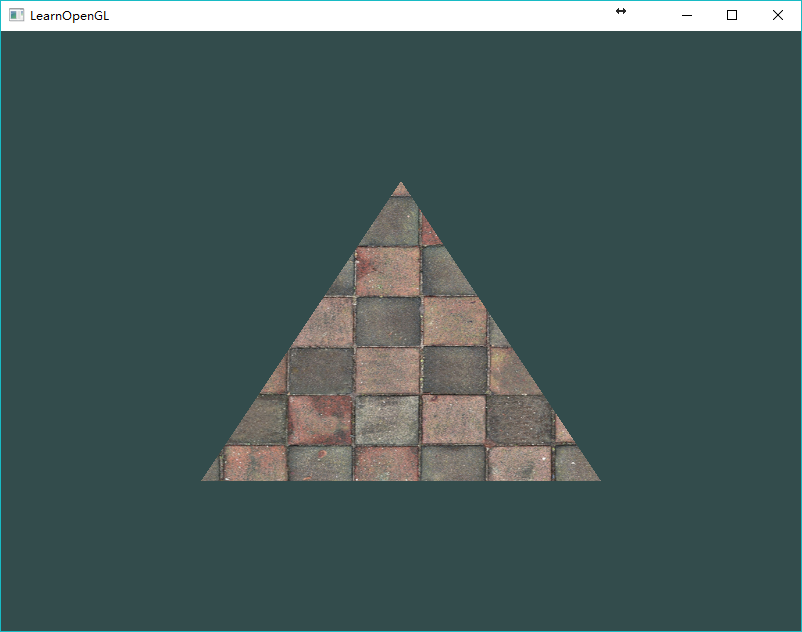
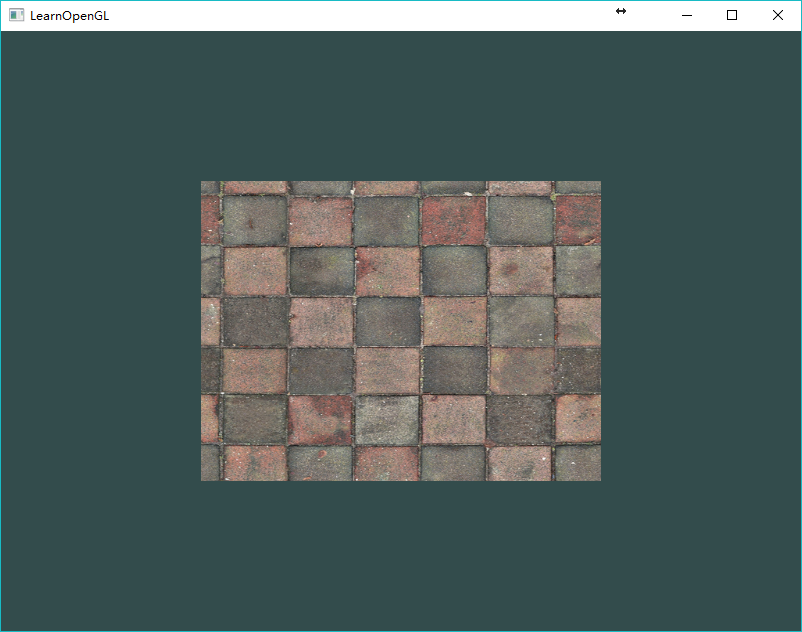
You can be at Here Find the source code, and finally render the triangle and rectangle (just need to interchange the code of the triangle and rectangle in the comment). The effect is as follows: