OpenFaaS actual combat series article link
- deploy
- Introduction to functions
- Java functions
- Template operation (template)
- Big talk watchdog
- Of watchdog (born for performance)
- java11 template parsing
- Self made template (maven+jdk8)
- Final, self-made template (springboot+maven+jdk8)
Overview of this article
- As the end of the series of OpenFaaS actual combat, we have done enough in theory and practice in the first eight articles. Finally, let's make a practical template to put an end to the whole series;
- OpenFaaS practice 8: self made templates (maven+jdk8) A Java template is made in: the JDK version is 8, the compilation and construction tool is maven, and the function is to provide web services by writing Handler.java. This template is not practical. In the actual development, Java programmers like to use the springboot framework. Therefore, our task today is to make a self-defined template, including jdk8, Maven and springboot;
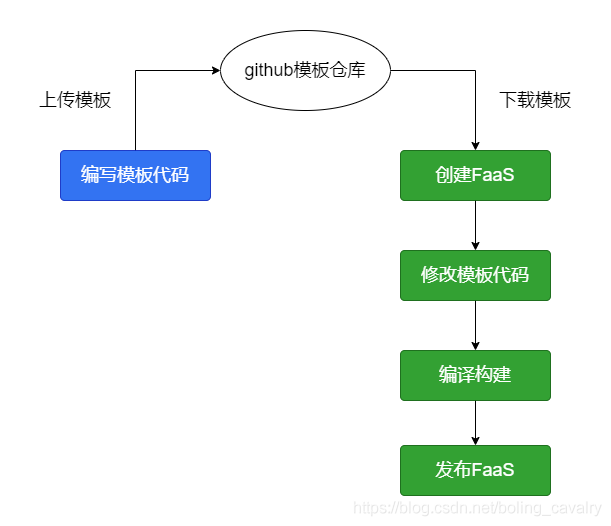
- The specific practical contents are shown in the figure below. First complete the blue part on the left, complete the template, and then execute the green part on the right to develop a function to verify that the template meets the expectations:
- Well, less routine, more sincerity, No gossip and start operation directly;
Create a java project
- When making a template, the most important thing is to provide complete template code. Let's make it next;
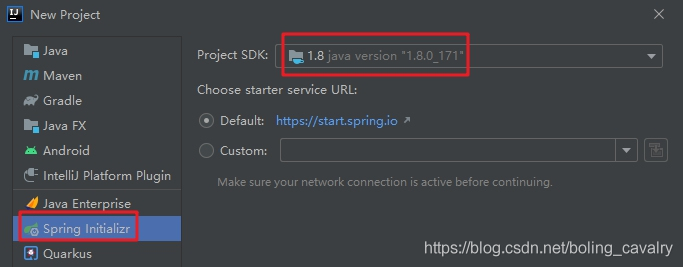
- I use IDEA to build a springboot project called jdk8maven springboot, using JDK8:
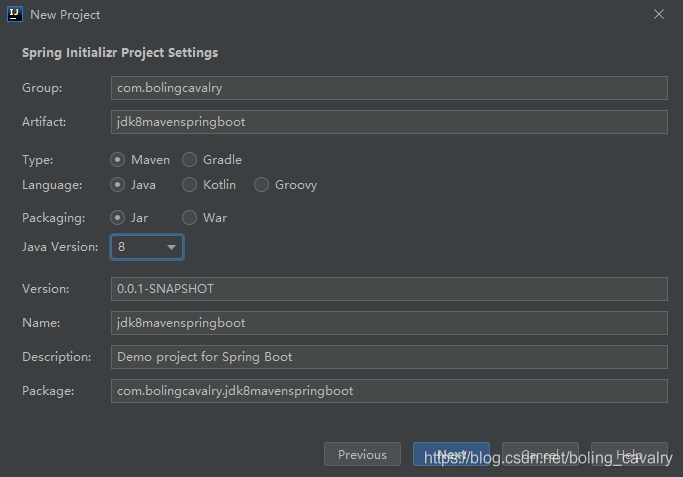
- The basic settings of the project are as follows:
- The pom.xml content of the project is as follows. It should be noted that the spring boot Maven plugin adds a configuration parameter configuration.layers.enabled, which is used when creating the image. The jar file can extract the content required for the image:
<?xml version="1.0" encoding="UTF-8"?>
<project xmlns="http://maven.apache.org/POM/4.0.0" xmlns:xsi="http://www.w3.org/2001/XMLSchema-instance"
         xsi:schemaLocation="http://maven.apache.org/POM/4.0.0 https://maven.apache.org/xsd/maven-4.0.0.xsd">
    <modelVersion>4.0.0</modelVersion>
    <parent>
        <groupId>org.springframework.boot</groupId>
        <artifactId>spring-boot-starter-parent</artifactId>
        <version>2.4.3</version>
        <relativePath/> <!-- lookup parent from repository -->
    </parent>
    <groupId>com.bolingcavalry</groupId>
    <artifactId>jdk8mavenspringboot</artifactId>
    <version>0.0.1-SNAPSHOT</version>
    <name>jdk8mavenspringboot</name>
    <description>Demo project for Spring Boot</description>
    <properties>
        <java.version>1.8</java.version>
    </properties>
    <dependencies>
        <dependency>
            <groupId>org.springframework.boot</groupId>
            <artifactId>spring-boot-starter-web</artifactId>
        </dependency>

        <dependency>
            <groupId>org.springframework.boot</groupId>
            <artifactId>spring-boot-starter-test</artifactId>
            <scope>test</scope>
        </dependency>
    </dependencies>

    <build>
        <plugins>
            <plugin>
                <groupId>org.springframework.boot</groupId>
                <artifactId>spring-boot-maven-plugin</artifactId>
                <configuration>
                    <layers>
                        <enabled>true</enabled>
                    </layers>
                </configuration>
            </plugin>
        </plugins>
    </build>
</project>
- Add a controller as a symbolic demo code:
package com.bolingcavalry.jdk8mavenspringboot.controller;

import org.springframework.web.bind.annotation.RequestMapping;
import org.springframework.web.bind.annotation.RequestMethod;
import org.springframework.web.bind.annotation.RestController;
import java.util.Date;

@RestController
public class Hello {

    @RequestMapping(value = "/hello", method = RequestMethod.GET)
    public String hello() {
        return "Hello world, " + new Date();
    }
}
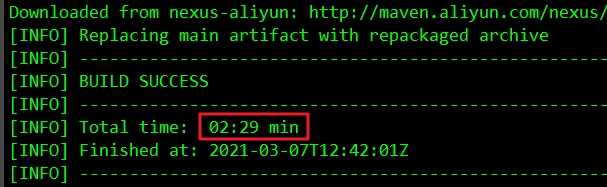
- In the directory where pom.xml is located, create a new folder m2 and add maven's configuration file settings.xml, which is used when making images during FaaS development (java projects will be compiled and built when making images). It is strongly recommended to configure your maven private server or alicloud image in it, which will make the image much faster. I have configured alicloud image here, It still takes more than two minutes (as shown in the figure below), so if you have nexus3 private server, you must give priority to it:
- Modify the configuration file src/main/resources/application.properties and add a line of port configuration, which is the port forwarded by fwatchdog:
server.port=8082
- So far, the coding work has been completed. It can be seen that this is an ordinary springboot project. The next thing to consider is how to create a Docker image, that is, how to write a Dockerfile;
Develop Dockerfile
- In the previous actual combat, we have experienced that the code compilation and construction will be made into an image when developing FaaS, so the corresponding Dockerfile should also be prepared. The following is the complete Dockerfile content:
# maven image is used as the basic image to compile and build java projects
FROM maven:3.6.3-openjdk-8 as builder

WORKDIR /home/app

# Copy the entire project to the / home/app directory
COPY . /home/app/

# Enter the directory where pom.xml is located, execute the build command, and specify m2/settings.xml file as the configuration file,
# Please configure the private server in settings.xml, otherwise the construction speed is very slow
RUN cd function && mvn clean package -U -DskipTests --settings ./m2/settings.xml

# After the previous build is compiled with maven, the build results are copied to the specified location for extracting files
RUN cp /home/app/function/target/*.jar ./application.jar
# Extract the split build results from application.jar through the tool spring boot jarmode layertools
RUN java -Djarmode=layertools -jar application.jar extract

# There is a binary file watchdog in of watchdog, which is used when making an image
FROM openfaas/of-watchdog:0.7.6 as watchdog

# The openjdk image is the running environment of the container
FROM openjdk:8-jre-slim as ship

# For security reasons, do not refer to the root account and group when running the container in the production environment
RUN addgroup --system app \
    && adduser --system --ingroup app app

# Copy the binary fwatchdog from the of watchdog image, which is the starting process of the container
COPY --from=watchdog /fwatchdog /usr/bin/fwatchdog

# Give executable permission
RUN chmod +x /usr/bin/fwatchdog

WORKDIR /home/app

# The file obtained after the successful execution of the previous extraction command is used to start the application in the image
COPY --from=builder /home/app/dependencies/ ./
COPY --from=builder /home/app/spring-boot-loader/ ./
COPY --from=builder /home/app/snapshot-dependencies/ ./
COPY --from=builder /home/app/application/ ./

# Specify the running account of the container
user app

# Specifies the working directory of the container
WORKDIR /home/app/

# fwatchdog is the forwarding address after receiving the web request. The java process listens on this port
ENV upstream_url="http://127.0.0.1:8082"

# The operating mode is http
ENV mode="http"

# Pull up the command of the business process. Here is to start the java process
ENV fprocess="java org.springframework.boot.loader.JarLauncher"

# The exposed port of the container, that is, the port on which the fwatchdog process listens
EXPOSE 8080

# health examination
HEALTHCHECK --interval=5s CMD [ -e /tmp/.lock ] || exit 1

# The container starts the command. Here, execute the binary file fwatchdog
CMD ["fwatchdog"]
Template configuration
- Now that the materials have been prepared, sort them out and submit them to github, and they can be used as OpenFaaS templates;
- Create a new folder named simplespringboot;
- Create a new file template.yml in the simplespringboot directory, as follows:
language: simplespringboot
welcome_message: |
  You have created a function using the java8 and maven and springboot template
- Copy the previous Dockerfile file to the simplespringboot directory;
- For the springboot project we created earlier, the outermost folder is called jdk8mavenspringboot. Please rename this folder function, and then copy the entire folder to the simplespringboot directory;
- These contents should be in the simplespringboot directory at the moment:
[root@hedy 003]# tree simplespringboot
simplespringboot
├── Dockerfile
├── function
│   ├── HELP.md
│   ├── jdk8mavenspringboot.iml
│   ├── m2
│   │   └── settings.xml
│   ├── mvnw
│   ├── mvnw.cmd
│   ├── pom.xml
│   └── src
│       ├── main
│       │   ├── java
│       │   │   └── com
│       │   │       └── bolingcavalry
│       │   │           └── jdk8mavenspringboot
│       │   │               ├── controller
│       │   │               │   └── Hello.java
│       │   │               └── Jdk8mavenspringbootApplication.java
│       │   └── resources
│       │       ├── application.properties
│       │       ├── static
│       │       └── templates
│       └── test
│           └── java
│               └── com
│                   └── bolingcavalry
│                       └── jdk8mavenspringboot
│                           └── Jdk8mavenspringbootApplicationTests.java
└── template.yml

17 directories, 12 files
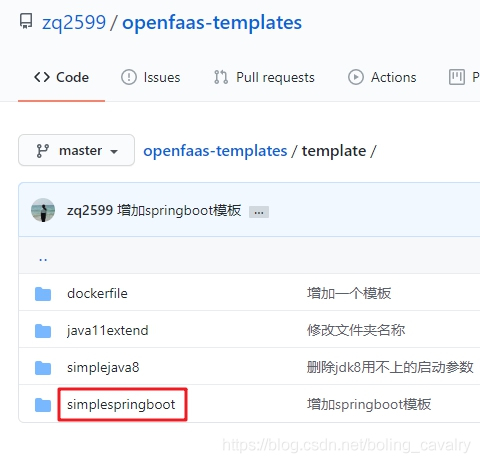
- Upload all these contents to GitHub. My path here is https://github.com/zq2599/openfaas-templates/tree/master/template , there are already four templates. The new ones are shown in the red box below:
- At this point, the template is completed. Next, verify whether the template is available;
Validation template
- The next thing to do is the green part on the right of the figure below:
- Log in to a computer equipped with OpenFaaS client, find a clean directory and execute the following command to download all templates on github:
faas template pull https://github.com/zq2599/openfaas-templates
- The console responds as follows, prompting that four templates have been downloaded, which is in line with expectations:
[root@hedy 07]# faas template pull https://github.com/zq2599/openfaas-templates
Fetch templates from repository: https://github.com/zq2599/openfaas-templates at
2021/03/07 20:30:24 Attempting to expand templates from https://github.com/zq2599/openfaas-templates
2021/03/07 20:30:29 Fetched 4 template(s) : [dockerfile java11extend simplejava8 simplespringboot] from https://github.com/zq2599/openfaas-templates
- Use faas new --list to view the list as follows:
[root@hedy 07]# faas new --list
Languages available as templates:
- dockerfile
- java11extend
- simplejava8
- simplespringboot
- As like as two peas in the template/simplespringboot directory,
[root@hedy 07]# tree template/simplespringboot/
template/simplespringboot/
├── Dockerfile
├── function
│   ├── m2
│   │   └── settings.xml
│   ├── mvnw
│   ├── mvnw.cmd
│   ├── pom.xml
│   └── src
│       ├── main
│       │   ├── java
│       │   │   └── com
│       │   │       └── bolingcavalry
│       │   │           └── jdk8mavenspringboot
│       │   │               ├── controller
│       │   │               │   └── Hello.java
│       │   │               └── Jdk8mavenspringbootApplication.java
│       │   └── resources
│       │       └── application.properties
│       └── test
│           └── java
│               └── com
│                   └── bolingcavalry
│                       └── jdk8mavenspringboot
│                           └── Jdk8mavenspringbootApplicationTests.java
└── template.yml

15 directories, 10 files
- With a template, you can create a function. Execute the following command to create a function named FAAS simplespringbootdemo:
faas-cli new faas-simplespringbootdemo --lang simplespringboot -p bolingcavalry
- The console prompts as follows. At this time, a new folder FAAS simplespringbootdemo is added in the current directory, which is the code directory of the new function:
[root@hedy 07]# faas-cli new faas-simplespringbootdemo --lang simplespringboot -p bolingcavalry
Folder: faas-simplespringbootdemo created.
  ___                   _____           ____
 / _ \ _ __   ___ _ __ |  ___|_ _  __ _/ ___|
| | | | '_ \ / _ \ '_ \| |_ / _` |/ _` \___ \
| |_| | |_) |  __/ | | |  _| (_| | (_| |___) |
 \___/| .__/ \___|_| |_|_|  \__,_|\__,_|____/
      |_|


Function created in folder: faas-simplespringbootdemo
Stack file written: faas-simplespringbootdemo.yml

Notes:
You have created a function using the java8 and maven and springboot template
- The contents of the FAAS simplespringbootdemo folder are as follows. Now it's ready. Use IDE tools such as IDEA to import it in the form of maven project, and then modify the project according to business requirements:
[root@hedy 07]# tree faas-simplespringbootdemo
faas-simplespringbootdemo
├── m2
│   └── settings.xml
├── mvnw
├── mvnw.cmd
├── pom.xml
└── src
    ├── main
    │   ├── java
    │   │   └── com
    │   │       └── bolingcavalry
    │   │           └── jdk8mavenspringboot
    │   │               ├── controller
    │   │               │   └── Hello.java
    │   │               └── Jdk8mavenspringbootApplication.java
    │   └── resources
    │       └── application.properties
    └── test
        └── java
            └── com
                └── bolingcavalry
                    └── jdk8mavenspringboot
                        └── Jdk8mavenspringbootApplicationTests.java

14 directories, 8 files
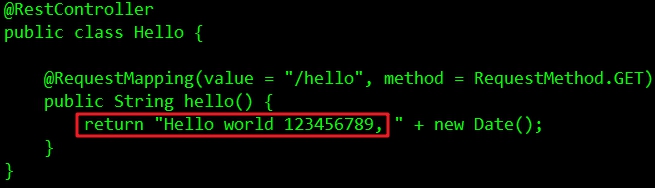
- Now you can develop the business. For testing, the returned content of the Hello.java interface is modified, as shown in the red box below:
- Start compiling the build and execute the following command:
faas-cli build -f ./faas-simplespringbootdemo.yml
- After the construction is completed, push the image to the image warehouse so that Kubernetes can download the image. I use hub.docker.com here because my ID is bolingcavalry. The push can be successful by executing the following commands (log in by executing the docker login command first):
docker push bolingcavalry/faas-simplespringbootdemo:latest
- Execute the following command to deploy the function to OpenFaaS:
faas-cli deploy -f faas-simplespringbootdemo.yml
- The console response is as follows. It can be seen that the deployment has started and the endpoint is given:
[root@hedy 07]# faas-cli deploy -f faas-simplespringbootdemo.yml
Deploying: faas-simplespringbootdemo.
WARNING! You are not using an encrypted connection to the gateway, consider using HTTPS.

Deployed. 202 Accepted.
URL: http://192.168.50.75:31112/function/faas-simplespringbootdemo.openfaas-fn
- Test with curl command on the console:
[root@hedy 07]# curl http://192.168.50.75:31112/function/faas-simplespringbootdemo.openfaas-fn/hello
Hello world 123456789, Sun Mar 07 13:17:06 UTC 2021
- So far, the verification template is completed and meets the expectations
clear
- The command to delete the function is as follows, which is still the directory of faas-simplespringbootdemo.yml:
faas-cli remove -f faas-simplespringbootdemo.yml
- So far, we have gone through the self-made springboot+maven+jdk8 template from development to verification, and our OpenFaaS practical series has come to a successful conclusion. I hope this series can bring some references to your Serverless Road, which will be my honor;