Installation of mysql and Workbench on mac is very fast, mainly because it tramples a lot of holes when importing csv data.
mysql start
Click MySql in system preferences to enter the interface to start mysql. Enter mysql-u root-p in terminal and enter password to login mysql.
Before importing data, please ensure that the imported data is csv format, mainly my original data is csv format, no attempt to import data in xlsx format. You can see on other pages that the data you have to import must be in csv format. Import data, the most important thing is to clarify the format of all data and determine the type of the column in the database. For example, there are characters in user_id. If the type of user_id is set to INT, when import data encounters the value of the column as a string, Incorrect integer value: problem will arise.
There are two main ways to import data:
The first one is to import directly in Workbench, without creating tables before importing.
The second is to import in terminal. This method imports faster, but builds tables before importing data.
1. ERROR 1290 (HY000) appears when importing data into mysql: The MySQL server is running with the -- secure-file-priv option so that it cannot execute this statement;
Solution: You can use show variables like'% secure%'; commands to view the value of secure-file-priv. If value is null, it is forbidden; if value is folder directory, only files under that directory are allowed; if value is empty, directory is not restricted. But the current version of mysql does not have my.cnf file under / etc / so it can be found on this website. https://www.cnblogs.com/liangjiahao713/p/8097942.html Copy the content of the file and save it as my.cnf file, then add secure-file-priv =''in.
cd /etc
sudo vim my.cnf
If you don't use sudo, there will be problems that can't be saved!
# Example MySQL config file for medium systems.
  #
  # This is for a system with little memory (32M - 64M) where MySQL plays
  # an important part, or systems up to 128M where MySQL is used together with
  # other programs (such as a web server)
  #
  # MySQL programs look for option files in a set of
  # locations which depend on the deployment platform.
  # You can copy this option file to one of those
  # locations. For information about these locations, see:
  # http://dev.mysql.com/doc/mysql/en/option-files.html
  #
  # In this file, you can use all long options that a program supports.
  # If you want to know which options a program supports, run the program
  # with the "--help" option.
  # The following options will be passed to all MySQL clients
  [client]
  default-character-set=utf8
  #password   = your_password
  port        = 3306
  socket      = /tmp/mysql.sock
  # Here follows entries for some specific programs
  # The MySQL server
  [mysqld]
  character-set-server=utf8
  init_connect='SET NAMES utf8
  port        = 3306
  socket      = /tmp/mysql.sock
  skip-external-locking
  key_buffer_size = 16M
  max_allowed_packet = 1M
  table_open_cache = 64
  sort_buffer_size = 512K
  net_buffer_length = 8K
  read_buffer_size = 256K
  read_rnd_buffer_size = 512K
  myisam_sort_buffer_size = 8M
  character-set-server=utf8
  init_connect='SET NAMES utf8'
# Don't listen on a TCP/IP port at all. This can be a security enhancement,
# if all processes that need to connect to mysqld run on the same host.
# All interaction with mysqld must be made via Unix sockets or named pipes.
# Note that using this option without enabling named pipes on Windows
# (via the "enable-named-pipe" option) will render mysqld useless!
#
#skip-networking

  # Replication Master Server (default)
  # binary logging is required for replication
  log-bin=mysql-bin

    # binary logging format - mixed recommended
    binlog_format=mixed

      # required unique id between 1 and 2^32 - 1
      # defaults to 1 if master-host is not set
      # but will not function as a master if omitted
      server-id   = 1

    # Replication Slave (comment out master section to use this)
    #
    # To configure this host as a replication slave, you can choose between
    # two methods :
    #
    # 1) Use the CHANGE MASTER TO command (fully described in our manual) -
    #    the syntax is:
    #
    #    CHANGE MASTER TO MASTER_HOST=<host>, MASTER_PORT=<port>,
    #    MASTER_USER=<user>, MASTER_PASSWORD=<password> ;
    #
    #    where you replace <host>, <user>, <password> by quoted strings and
    #    <port> by the master's port number (3306 by default).
    #
    #    Example:
    #
    #    CHANGE MASTER TO MASTER_HOST='125.564.12.1', MASTER_PORT=3306,
    #    MASTER_USER='joe', MASTER_PASSWORD='secret';
    #
    # OR
    #
    # 2) Set the variables below. However, in case you choose this method, then
    #    start replication for the first time (even unsuccessfully, for example
    #    if you mistyped the password in master-password and the slave fails to
    #    connect), the slave will create a master.info file, and any later
    #    change in this file to the variables' values below will be ignored and
    #    overridden by the content of the master.info file, unless you shutdown
    #    the slave server, delete master.info and restart the slaver server.
    #    For that reason, you may want to leave the lines below untouched
    #    (commented) and instead use CHANGE MASTER TO (see above)
    #
    # required unique id between 2 and 2^32 - 1
    # (and different from the master)
    # defaults to 2 if master-host is set
    # but will not function as a slave if omitted
    #server-id       = 2
    #
    # The replication master for this slave - required
    #master-host     =   <hostname>
    #
    # The username the slave will use for authentication when connecting
    # to the master - required
    #master-user     =   <username>
    #
    # The password the slave will authenticate with when connecting to
    # the master - required
    #master-password =   <password>
    #
    # The port the master is listening on.
    # optional - defaults to 3306
    #master-port     =  <port>
    #
    # binary logging - not required for slaves, but recommended
    #log-bin=mysql-bin

      # Uncomment the following if you are using InnoDB tables
      #innodb_data_home_dir = /usr/local/mysql/data
      #innodb_data_file_path = ibdata1:10M:autoextend
      #innodb_log_group_home_dir = /usr/local/mysql/data
      # You can set .._buffer_pool_size up to 50 - 80 %
      # of RAM but beware of setting memory usage too high
      #innodb_buffer_pool_size = 16M
      #innodb_additional_mem_pool_size = 2M
      # Set .._log_file_size to 25 % of buffer pool size
      #innodb_log_file_size = 5M
      #innodb_log_buffer_size = 8M
      #innodb_flush_log_at_trx_commit = 1
      #innodb_lock_wait_timeout = 50

        [mysqldump]
        quick
        max_allowed_packet = 16M

          [mysql]
          no-auto-rehash
          # Remove the next comment character if you are not familiar with SQL
          #safe-updates
          default-character-set=utf8

        [myisamchk]
        key_buffer_size = 20M
        sort_buffer_size = 20M
        read_buffer = 2M
        write_buffer = 2M

          [mysqlhotcopy]
          interactive-timeout
2. If data is imported at this time
ERROR 13 (HY000): Error in Can't get stat of'/Users/zhangxin/Desktop/pool_oto/ccf_online_stage 1_train.csv'(OS errno 13-Permission denied)
Solution: use show variables like'% tmpdir%'; view the temporary directory that mysql defaults to use and transfer files to the temporary directory; another way is to change load data infile to load data local infile (to be verified) http://www.360doc.com/content/15/1231/20/1073512_524491459.shtml
3. Incorrect integer value:'null'for column appeared when mysql imported data.
Solution: NaN value is converted to null value by python, and then imported into database
Finally, the successful use of a section of code import success!!!!!!
python code:
import pandas as pd
data = pd.read_csv('/var/tmp/pool_oto/ccf_online_stage1_train.csv')
df = data.where(data.notnull(),'')# Converts NaN to a null value''
DF ['Date'] = DF ['Date']. apply (lambda x: int (x) if x!=''else x)] # because time is changed to floating point, converting time to integer
df['Date_received'] = df['Date_received'].apply(lambda x: int(x) if x != '' else x)
df.to_csv('/var/tmp/pool_oto/ccf_online_stage1_train2.csv',index = False)
sql code:
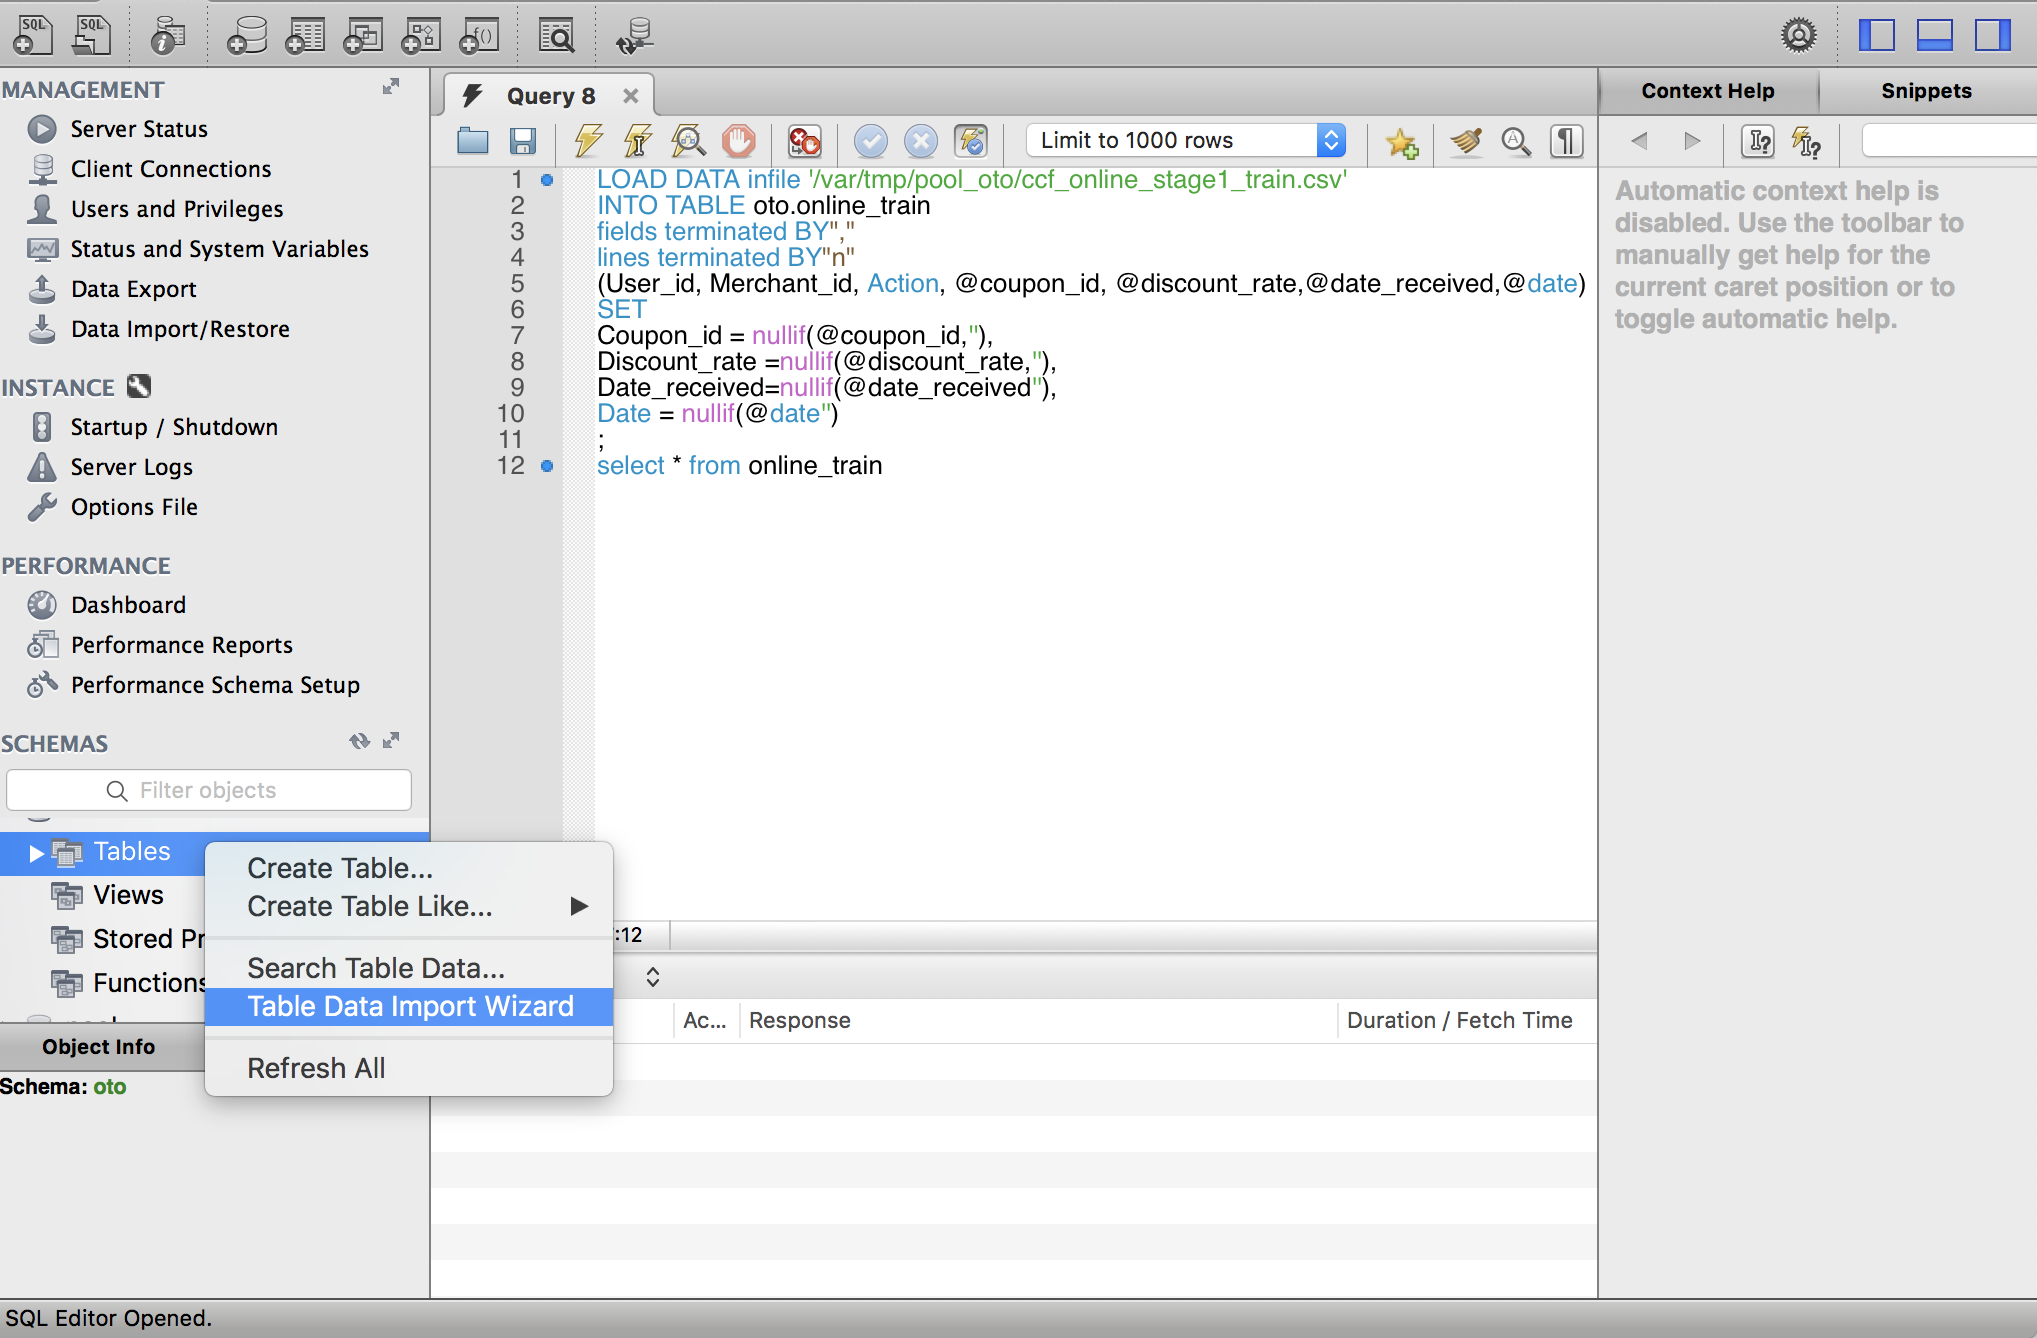
LOAD DATA INFILE '/var/tmp/pool_oto/ccf_online_stage1_train2.csv'
INTO TABLE oto.online_train
FIELDS TERMINATED BY ','
ignore 1 lines /* ignores the first line because the first action column name causes an Incorrect integer value: error when imported because user_id is a string */
/* User variable @ is used here to allow data to be stored in the database in the form we want */
(@User_id,@Merchant_id,@Action, @Coupon_id,@Discount_rate, @Date_received,@Date)
SET
User_id = IF(@User_id= '', NULL,@User_id),
Merchant_id= IF(@Merchant_id= '', NULL,@Merchant_id),
Action= IF(@Action= '', NULL,@Action),
Coupon_id = IF(@Coupon_id= '', NULL,@Coupon_id),
Discount_rate= IF(@Discount_rate= '', NULL,@Discount_rate),
Date_received= IF(@Date_received= '', NULL,@Date_received),
Date= IF(@Date= '', NULL,@Date)
;