Have you ever thought about porting a Django project from windows to Linux? Linux performance is well known. As a server running Django, it's very suitable. Today, let's share how to run a Django project in the Linux environment of an online cloud machine.
Client Access Server Process
 1. First, the client requests service resources.
2.nginx, as a direct external service interface, receives http requests from clients and unpacks them.
3. If it is a static file request, it will return the requested resource according to the static file directory configured by nginx. Otherwise, it will find the resource according to the static directory set by django configuration file.
4. If it is a dynamic request, nginx passes the request to uwsgi through the configuration file.
5.uwsgi processes the received packets and forwards them to wsgi. WSGI calls a file or function of django project according to the request. after processing, django gives the return value to wsgi. WSGI packages the return value and forwards it to uwsgi.
6.uwsgi receives and forwards it to nginx, which eventually returns the return value to the client (such as browser).
Add a little knowledge:
1.wsgi is a low-level interface between web server and web program
2.uwsgi is a WEB interface based on uwsgi protocol, wsgi protocol and Http protocol. In short, the web accesses django files through uwsgi
I. Environmental preparation
- One Linux Server
- Nginx package
- MySQL package
- Django project
II. Environmental deployment
1. Install python on Linux and install python version according to your project needs
1.1 Installation-related dependencies
yum install zlib-devel bzip2-devel openssl-devel ncurses-devel sqlite-devel readline-devel tk-devel
1.2 Compile and Install
cd /usr/local/
tar xf Python-3.5.1.tgz
cd Python-3.5.1/
./configure --enable-optimizations
cd Python-3.5.1/
make && make install
1.3 Modify Python files
mv /usr/bin/python /usr/bin/python2.7.5
ln -s /usr/local/bin/python3.5 /usr/bin/python
python -V   #The output here is your compiled version of OK.
Python 3.5.1
1.4 Modify the yum configuration file because the python file is modified and Yum is not available
vim /usr/bin/yum
#Modify!/usr/bin/python 2.7.5 to the previously moved Python file
Others can be modified according to the above because of the installation error of Yum.
2. Installation module
2.1 install uwsgi Modular
pip3 install uwsgi
2.2 install pymysql Modular
pip3 install pymysql
2.3 install django
pip3 install django==2.0
3. Modify the django configuration file
3.1 The init file in the project is written to the following code, if it is not filled, it will not connect to the database.
import pymysql
pymysql.install_as_MySQLdb()
3.2 Modify the set.py configuration file
DEBUG = False    #You need to change it to False, otherwise the program will be displayed on the WEB page.
ALLOWED_HOSTS = ['IP']      #Here set which IP access you allow
DATABASES = {
    'default': {
        'ENGINE': 'django.db.backends.mysql',  #This is the driver for connecting to the database.
        'NAME': 'xxxxx',                      #Your project database name
        'USER': 'xxxxx',                       #Connecting database users
        'PASSWORD': xxxxxxxxx',      #Database password
        'HOST': "xxxxxxxx",                 #Host
        'PORT': '3306',                         #port
    }
}
TIME_ZONE = 'Asia/Shanghai'               #Amendment to China Region
USE_TZ = False                                      #Close
STATIC_ROOT= "/data/autoops/static"    #Set it to your static directory
4. Compile and install niginx
5. Binary installation of mysql
6. Upload the django project code to the Linux server and place it in the specified directory according to your needs.
7. Write uwsgi file, my file is in / data/autoops/script/uwsgi.ini (emphasis)
[uwsgi]
# Project catalogue
chdir=/data/autoops/
# application of the specified project
module=autoops.wsgi:application
# Number of processes
workers=8
pidfile=/data/autoops/script/uwsgi.pid
# Specify IP Port
#http=192.168.10.155:8003    ##You can use the socket file without enabling it. If it's just a test, you need to enable it.
# Specify static file directories
static-map=/static=/data/autoops/static
# Launch the username and user group of uwsgi
uid=root
gid=root
# Enabling the main process
master=true
# Automatically remove unix Socket and pid files when service stops
vacuum=true
# Serialize accepted content, if possible
thunder-lock=true
# Enabling Threads
enable-threads=true
# Setting self-interrupt time
harakiri=30
# Setting Buffer
post-buffering=4096
# Setting up Log Directory
daemonize=/data/autoops/script/uwsgi.log
# Specify the file path for sock
socket=/data/autoops/script/uwsgi.sock
die-on-term=true
8.uwsgi command
uwsgi --reload uwsgi.pid  restart
uwsgi --stop uwsgi.pid Close
uwsgi --ini uwsgi.ini start-up
9. Before startup, it should be noted that if your setting s DEBUG is closed, Python management. py collect static needs to be executed in the Django project. The function is to collect all static resources involved in the Django project and put statistics into STATIC_ROOT management access. If you do not execute, you will find that the Django project cannot. Load CSS style, JS script.
See below.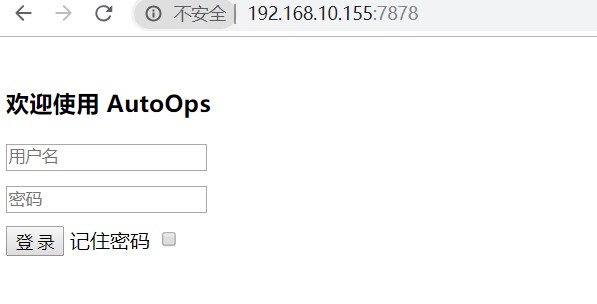
10. Initialize the ORM of the django project
   1. Python management. py makemigrations record the changes in models.py and record them under the migrations folder
   2. Python management. py migrate translates changes into SQL statements for database execution
11. Configure the Nginx file and check the syntax startup
worker_processes  1;
events {
    worker_connections  1024;
}
http {
    include       mime.types;
    default_type  application/octet-stream;
    sendfile        on;
    keepalive_timeout  65;
    server {
        listen       Your port number;
        server_name  Public Network IP;
        location / {
                include uwsgi_params;
                uwsgi_connect_timeout 30;
                uwsgi_pass unix:/data/autoops/script/uwsgi.sock;    #Location of your uwsgi.sock file
        }
    }
}
12. Start uwsgi and nginx
[root@xxxxxxxxx08:56:29/data/autoops]# uwsgi --ini script/uwsgi.ini
[uWSGI] getting INI configuration from script/uwsgi.ini
[uwsgi-static] added mapping for /static => /data/autoops/static
3. Testing access to nginx
Summary: It's not difficult to deploy. We need to pay attention to it. Some parts of the article are not detailed. We can think about it and share it next time.