Adaptation of Android 7.0
Recently, in the process of software maintenance and updating, I learned some adaptions about Android 7.0. Here I would like to share with you. As far as I know, we need to adapt Notification, photography, and image clipping.
I. Notification
_I won't elaborate on the features of Android 7.0 Notification additions here, because some of the articles about this kind of introduction have already been published by Daniel. I'm mainly talking about the pit I stepped into using Notification in the application update function. It can be said that the application update function is essential for every online App, because the requirements or functions of App are constantly changing and improving.
_I encountered the following situation: below Android 7.0, the following code is to display the notification bar after the successful download of the new version of App, Click to jump to the page where App is installed.
    NotificationManager manager = (NotificationManager) context.getSystemService(Context.NOTIFICATION_SERVICE);

    // Create an intention to open the App Installation Interface
    Intent installIntent = new Intent();
    installIntent.addFlags(Intent.FLAG_ACTIVITY_NEW_TASK);
    installIntent.setAction(Intent.ACTION_VIEW);
    installIntent.setDataAndType(Uri.fromFile(file),
                "application/vnd.android.package-archive");


    // Create a Notification and set related properties
    NotificationCompat.Builder builder = new NotificationCompat.Builder(context);
    builder.setAutoCancel(false)//Notification settings will not be automatically displayed
            .setShowWhen(true)//Display time
            .setSmallIcon(notificationIconResId)//Set small icons for notifications
            .setContentTitle("Title of Notice")
            .setContentText("Download completed,Click Installation");//Setting the content of the notification

    //Create Pending Intent for intentional action after clicking on the notification bar
    PendingIntent pendingIntent = getActivity(context, 0, installIntent, PendingIntent.FLAG_UPDATE_CURRENT);
    builder.setContentIntent(pendingIntent);

    Notification notification = builder.build();
    notification.defaults = Notification.DEFAULT_SOUND;// Set to default sound
    notification.flags = isCanClear ? Notification.FLAG_ONLY_ALERT_ONCE : Notification.FLAG_ONLY_ALERT_ONCE | Notification.FLAG_NO_CLEAR;
    manager.notify(0, notification);// Display notification
The above code, under Android 7.0, can achieve the function of click notification bar to block jumping to install the App interface, but Android 7.0 or above, the click event will be a problem, the click notification bar will not respond, the notification bar will not display, but there will be error-level log output, FileUriExposedException, such an exception, because Andorid 7.0 "Private Directory Restricted Access", "Strict Mode" API Policy". Since Android 7.0, Uri using the real path directly will be considered unsafe, throwing an exception like FileUriExposedException. FileProvider is needed to selectively share encapsulated Uri to the outside world. Therefore, the above code needs to be modified.
         ......

     if (Build.VERSION.SDK_INT >= Build.VERSION_CODES.N) {
        //Is the interpretation version above 7.0?
        Uri apkUri =
                    FileProvider.getUriForFile(context,
                    "com.chaychan.demo" + ".fileprovider",
                    file);
        //Add this sentence to indicate that the file represented by the Uri is temporarily authorized for the target application
        installIntent.addFlags(Intent.FLAG_GRANT_READ_URI_PERMISSION);
        installIntent.setDataAndType(apkUri, "application/vnd.android.package-archive");
    } else {
        installIntent.setDataAndType(Uri.fromFile(file),
                "application/vnd.android.package-archive");
    }
         ......
The above code adds to the judgment of the system version. If Andorid is 7.0 or above, then the Uri.fromFile() method is no longer used to obtain the Uri of the file, but the getUriForFile() method is used by FileProvider (the class provided by support. v4). At the same time, add one more line of code installIntent.addFlags(Intent.FLAG_GRANT_READ_URI_PERMISSION);
Since FileProvider is one of the four components inherited from ContentProvider, it needs to be configured in Android Manifest. XML as follows:
    <!--Version updates fileProvider For compatibility 7.0 Installation of Notification Bar-->
    <provider
        android:name="android.support.v4.content.FileProvider"
        android:authorities="${applicationId}.fileprovider"
        android:exported="false"
        android:grantUriPermissions="true">
        <!--metadata-->
        <meta-data
            android:name="android.support.FILE_PROVIDER_PATHS"
            android:resource="@xml/file_provider_paths"/>
    </provider>
authorities in configuration usually add package names according to the rules of rivers and lakes, ${application Id} is to get the package name of the current project, provided that the defaultConfig {closure has the application Id attribute.
 defaultConfig {
    applicationId "com.chaychan.demo"

}
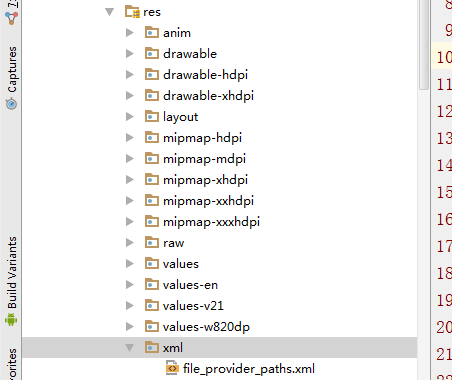
_The resource in the tag fills in the configuration file of the configuration file provider, creates the file_provider_paths.xml file under the new XML file under the res resource directory, and creates the file_provider_paths.xml file under the folder. This XML file name does not have to be the same as the file name in the list file, as long as it is consistent with the file name configured in the list file.
The contents of file_provider_paths.xml are as follows
<?xml version="1.0" encoding="utf-8"?>
<resources>
    <paths>
        <external-path path="" name="myFile"></external-path>
    </paths>
</resources>
The path="" in the above code is of special significance. It codes the root directory, that is to say, you can share any file in the root directory and its subdirectory with other applications. If you set the path to path="pictures", it represents the pictures directory under the root directory (eg:/storage/emulated/0/picture). S) If you share files outside the scope of the pictures directory with other applications, it's not possible.
After completing the above code modification and FileProvider configuration, you can be compatible with Android 7.0 or above. Click the notification bar to jump to the interface of installing App. So far, the compatibility of Notification in Android 7.0 is complete.
Photograph
_Under Andorid 7.0, the following code can realize the function of jumping to the photo interface, and the photo will be called back in the onActivityResult() method in Activity that opens the photo interface.
// Specify the storage path for photos taken after calling the camera
File imgFile = new File(imgPath);
Uri imgUri = null;
imgUri = Uri.fromFile(imgFile);
Intent intent = new Intent(MediaStore.ACTION_IMAGE_CAPTURE);
intent.putExtra(MediaStore.EXTRA_OUTPUT,imgUri);
startActivityForResult(intent, takePhotoRequestCode);
However, in Android 7.0 or above, when the above code calls the photo function, it will lead to the application of Crash, which will report FileUriExposedException exception. It is necessary to modify the above code. Judge the system version using App, and modify the code as follows:
// Specify the storage path for photos taken after calling the camera
File imgFile = new File(imgPath);
Uri imgUri = null;
if (Build.VERSION.SDK_INT >= 24){
    //If it is 7.0 or above, use getUriForFile() to get the Uri of the file
    imgUri = FileProvider.getUriForFile(this, "com.chaychan.demo" + ".fileprovider",imgFile);
}else {
    imgUri = Uri.fromFile(imgFile);
}

Intent intent = new Intent(MediaStore.ACTION_IMAGE_CAPTURE);
intent.putExtra(MediaStore.EXTRA_OUTPUT,imgUri);
startActivityForResult(intent, REQ_TAKE_PHOTO);
After the modification is completed, the camera function can be invoked on Android 7.0 or more mobile phone callbacks. After the photo is taken, in the onActivity Result () callback, imgFile is the file object that saves the picture after the photo is taken, and can be processed accordingly, such as cutting the picture.
III. Cutting of Pictures
Under Android 7.0, the following code can call the image clipping function of the mobile phone:
/**
 * Initiate a request for clipping pictures
 * @param activity context
 * @param srcFile File of the original file
 * @param output File of Output File
 * @param requestCode Request code
 */
public static void startPhotoZoom(Activity activity, File srcFile, File output,int requestCode) {

    Intent intent = new Intent("com.android.camera.action.CROP");
    intent.setDataAndType(Uri.fromFile(srcFile), "image/*");
    // crop for true is set in the open intent to set the display view to be clipped
    intent.putExtra("crop", "true");

    // aspectX aspectY is the ratio of width to height
    intent.putExtra("aspectX", 1);
    intent.putExtra("aspectY", 1);

    // outputX,outputY is the width of the clipped image
    intent.putExtra("outputX", 800);
    intent.putExtra("outputY", 480);

    intent.putExtra("return-data", false);// true: no uri, false: URI
    intent.putExtra(MediaStore.EXTRA_OUTPUT, Uri.fromFile(output));
    intent.putExtra("outputFormat", Bitmap.CompressFormat.JPEG.toString());

    activity.startActivityForResult(intent, requestCode);
}
However, the above code needs to be modified in Android 7.0 or above, as follows:
/**
 * Initiate a request for clipping pictures
 * @param activity context
 * @param srcFile File of the original file
 * @param output File of Output File
 * @param requestCode Request code
 */
public static void startPhotoZoom(Activity activity, File srcFile, File output,int requestCode) {

    ......

    //Mainly modify this line of code, instead of using the Uri.fromFile() method to get the Uri of the file
    intent.setDataAndType(getImageContentUri(activity,srcFile), "image/*");

    ......
}
_getImageContentUri() method is as follows:
/**Android 7.0 clips to get uri based on file path*/
public static Uri getImageContentUri(Context context, File imageFile) {
    String filePath = imageFile.getAbsolutePath();
    Cursor cursor = context.getContentResolver().query(
            MediaStore.Images.Media.EXTERNAL_CONTENT_URI,
            new String[] { MediaStore.Images.Media._ID },
            MediaStore.Images.Media.DATA + "=? ",
            new String[] { filePath }, null);

    if (cursor != null && cursor.moveToFirst()) {
        int id = cursor.getInt(cursor
                .getColumnIndex(MediaStore.MediaColumns._ID));
        Uri baseUri = Uri.parse("content://media/external/images/media");
        return Uri.withAppendedPath(baseUri, "" + id);
    } else {
        if (imageFile.exists()) {
            ContentValues values = new ContentValues();
            values.put(MediaStore.Images.Media.DATA, filePath);
            return context.getContentResolver().insert(
                    MediaStore.Images.Media.EXTERNAL_CONTENT_URI, values);
        } else {
            return null;
        }
    }
}
Owing to encapsulating the method of initiating the clipping request, in onActivityResult(), if you need to clip the picture after the photo is taken, you can do this:
public void onActivityResult(int requestCode, int resultCode, Intent data) {
    switch (resultCode) {
        case RESULT_OK://Invoking Picture Selection Processing Successfully
            String zoomImgPath = "";
            Bitmap bm = null;
            File temFile = null;
            File srcFile = null;
            File outPutFile = null;
            switch (requestCode) {
                case REQ_TAKE_PHOTO:// Callback here after taking photos
                    srcFile = new File(imgPath);
                    outPutFile = new File(outputPath);
                    outputUri = Uri.fromFile(outPutFile);
                    FileUtils.startPhotoZoom(this, srcFile, outPutFile, REQ_ZOOM);// Initiate tailoring requests
                    break;

                case REQ_ZOOM://Cut-back callback
                    if (data != null) {
                        if (outputUri != null) {
                            bm = ImageTools.decodeUriAsBitmap(this,outputUri);

                            String scaleImgPath = FileUtils.saveBitmapByQuality(bm, 80);//Copy and compress to your own directory and compress

                            //bm can be used to display in the corresponding ImageView, scaleImgPath is the path of clipped and compressed pictures, which can be used for uploading operations.
                            ...... //Implementing your own business logic

                        }
                    } else {
                        UIUtils.showToast("An error occurred in selecting an image. The image may have been moved or deleted.");
                    }
                    break;
            }
    }
}
The decodeUriAsBitmap() method of ImageTools is to convert Uri into Bitmap objects. The specific code is as follows:
public static Bitmap decodeUriAsBitmap(Context context,Uri uri) {
    Bitmap bitmap = null;
    try {
        // First, an instance of ContentResolver is obtained through the getContentResolver method.
        // Call the openInputStream(Uri) method to get the uri-associated data stream
        // Resolve the data stream obtained in the previous step into bitmap
        bitmap = BitmapFactory.decodeStream(context.getContentResolver().openInputStream(uri));
    } catch (FileNotFoundException e) {
        e.printStackTrace();
        return null;
    }
    return bitmap;
}
FileUtils.saveBitmapByQuality() method is to compress the image. The first parameter is the Bitmap object of the image. The second parameter is the preservation rate of the compression. For example, the above parameter is 80, that is, 80% of the original after compression, and 20% of the original compression. The specific code is as follows:
/**
 * Compression of bm by mass
 * @param bm
 * @param quality Compression Preservation Rate
 * @return
 */
public static String saveBitmapByQuality(Bitmap bm,int quality) {
    String croppath="";
    try {
        File f = new File(FileUtils.generateImgePath());
        //Get the camera picture and save it locally.
        croppath=f.getPath();
        if (f.exists()) {
            f.delete();
        }
        FileOutputStream out = new FileOutputStream(f);
        bm.compress(Bitmap.CompressFormat.JPEG,quality, out);
        out.flush();
        out.close();
    } catch (FileNotFoundException e) {
        e.printStackTrace();
    } catch (IOException e) {
        e.printStackTrace();
    }
    return croppath;
}
_The above code can achieve and compatible with Android 7.0 or above system of photography + clipping pictures. Here, by the way, write and paste the function of calling album. After all, when uploading pictures in actual development, users usually choose to take pictures or get them from the album.
Intent intent = new Intent(Intent.ACTION_PICK, null);
intent.setDataAndType(MediaStore.Images.Media.EXTERNAL_CONTENT_URI,
        "image/*");
startActivityForResult(intent, REQ_ALBUM);
_If you need to clip the picture after selecting the album picture, you can clip the request in the onActivityResult() callback, just like the photo code above. Here is a disposal of onActivityResult:
public void onActivityResult(int requestCode, int resultCode, Intent data) {
    switch (resultCode) {
        case RESULT_OK://Invoking Picture Selection Processing Successfully
            String zoomImgPath = "";
            Bitmap bm = null;
            File temFile = null;
            File srcFile = null;
            File outPutFile = null;
            switch (requestCode) {
                case REQ_TAKE_PHOTO:// Callback here after taking photos
                    srcFile = new File(imgPath);
                    outPutFile = new File(outputPath);
                    outputUri = Uri.fromFile(outPutFile);
                    FileUtils.startPhotoZoom(this, srcFile, outPutFile, REQ_ZOOM);// Initiate tailoring requests
                    break;

                 case REQ_ALBUM:// Select the pictures in the album
                    if (data != null) {
                        Uri sourceUri = data.getData();
                        String[] proj = {MediaStore.Images.Media.DATA};

                        // It's like the encapsulation interface of Android multimedia database. Look at Android documents in detail.
                        Cursor cursor = managedQuery(sourceUri, proj, null, null, null);

                        // As I understand it personally, this is to get the index value of the picture selected by the user.
                        int column_index = cursor.getColumnIndexOrThrow(MediaStore.Images.Media.DATA);
                        // It's important to move the cursor to the beginning. It's easy to cross the boundary if you're not careful.
                        cursor.moveToFirst();
                        // Finally, the image path is obtained according to the index value.
                        String imgPath = cursor.getString(column_index);

                        srcFile = new File(imgPath);
                        outPutFile = new File(FileUtils.generateImgePath());
                        outputUri = Uri.fromFile(outPutFile);
                        FileUtils.startPhotoZoom(this, srcFile, outPutFile, REQ_ZOOM);// Initiate tailoring requests
                    }
                    break;


                case REQ_ZOOM://Cut-back callback
                    if (data != null) {
                        if (outputUri != null) {
                            bm = ImageTools.decodeUriAsBitmap(this,outputUri);

                            String scaleImgPath = FileUtils.saveBitmapByQuality(bm, 80);//Copy and compress to your own directory and compress

                            //bm can be used to display in the corresponding ImageView, scaleImgPath is the path of clipped and compressed pictures, which can be used for uploading operations.
                            ...... //Implementing your own business logic

                        }
                    } else {
                        UIUtils.showToast("An error occurred in selecting an image. The image may have been moved or deleted.");
                    }
                    break;
            }
    }
}
Well, at this point, my first blog was finally completed, and it took nearly four hours, because this is a technical blog with strict writing requirements, so it is not as easy as writing. However, I try to make the article easy to understand, hoping to help more people. Although I have written a lot of notes before, I have never written a blog. If there are some places that are not good enough, I would like to ask Daniel to make comments, exchange and learn from each other.
The reason why I germinated the idea of blogging is that when I inquired about problems in the development process, I saw Guo Lin's blog accidentally. So I read his blog one by one and gradually understood him. I admired him very much. Yesterday I asked him if blogging was helpful to improve my ability. He also recommended me. Write a blog, so today I wrote my first blog. I hope I can keep it going. After all, I have always been very keen on Android development.