DataX3 is still very convenient to use. Here are some official things
GitHub address of DataX3 https://github.com/alibaba/DataX , which contains the introduction of DataX3 and download link.
How to use DataX3 https://github.com/alibaba/DataX/wiki/Quick-Start
Configuration parameters of various reader s and writer s https://github.com/alibaba/DataX/wiki/DataX-all-data-channels
Basic use
Check whether Python is available on the system. Linux system usually comes with Python. It is officially recommended to use Python 2 
Download DataX directly, http://datax-opensource.oss-cn-hangzhou.aliyuncs.com/datax.tar.gz
After downloading, unzip to a local directory, modify the permission to 755, enter the bin directory, and run the sample synchronization job:
$ tar zxvf datax.tar.gz
$ sudo chmod -R 755 datax
$ cd  datax/bin
$ python datax.py ../job/job.json
Sample operation results, which can be used normally 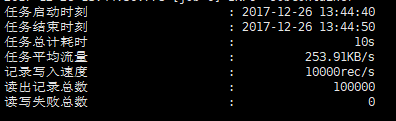
Then create your own profile
Data sources currently supported by DataX DataX all data channels
Take mysqlreader and mysqlwriter as examples to view the configuration template
$ cd  datax/bin
$  python datax.py -r mysqlreader -w mysqlwriter

DataX (DATAX-OPENSOURCE-3.0), From Alibaba !
Copyright (C) 2010-2017, Alibaba Group. All Rights Reserved.


Please refer to the mysqlreader document:
     https://github.com/alibaba/DataX/blob/master/mysqlreader/doc/mysqlreader.md

Please refer to the mysqlwriter document:
     https://github.com/alibaba/DataX/blob/master/mysqlwriter/doc/mysqlwriter.md

Please save the following configuration as a json file and  use
     python {DATAX_HOME}/bin/datax.py {JSON_FILE_NAME}.json
to run the job.

{
    "job": {
        "content": [
            {
                "reader": {
                    "name": "mysqlreader",
                    "parameter": {
                        "column": [],
                        "connection": [
                            {
                                "jdbcUrl": [],
                                "table": []
                            }
                        ],
                        "password": "",
                        "username": "",
                        "where": ""
                    }
                },
                "writer": {
                    "name": "mysqlwriter",
                    "parameter": {
                        "column": [],
                        "connection": [
                            {
                                "jdbcUrl": "",
                                "table": []
                            }
                        ],
                        "password": "",
                        "preSql": [],
                        "session": [],
                        "username": "",
                        "writeMode": ""
                    }
                }
            }
        ],
        "setting": {
            "speed": {
                "channel": ""
            }
        }
    }
}
Create your own json configuration file with the above template
Name it mysql2mysql.json and put it in the job directory
$ vim datax/job/mysql2mysql.json
{
    "job": {
        "content": [
            {
                "reader": {
                    "name": "mysqlreader",
                    "parameter": {
                        "column": ["id","name","location","age"],
                        "connection": [
                            {
                                "jdbcUrl": ["jdbc:mysql://192.168.1.130:3306/people?useUnicode=true&characterEncoding=UTF-8"],
                                "table": ["test"]
                            }
                        ],
                        "password": "123456",
                        "username": "root",
                        "where": "test.id <= 50000"
                    }
                },
                "writer": {
                    "name": "mysqlwriter",
                    "parameter": {
                        "column": ["id","name","location","age"],
                        "connection": [
                            {
                                "jdbcUrl": "jdbc:mysql://192.168.1.131:3306/people?useUnicode=true&characterEncoding=UTF-8",
                                "table": ["test"]
                            }
                        ],
                        "password": "123456",
                        "preSql": [],
                        "session": [],
                        "username": "root",
                        "writeMode": "insert"
                    }
                }
            }
        ],
        "setting": {
            "speed": {
                "channel": "100"
            }
        }
    }
}
The detailed explanation of each parameter can be found in the data source DataX all data channels View, including other data sources is similar.
Then create the script in the dataX directory and start dataX
#!/bin/bash
python ./bin/datax.py ./job/mysql2mysql.json > ./log/mysql2mysql.log &
You can check the operation at datax/log/mysql2mysql.log. Don't paste the results here.
DataX3 is still very convenient to use, and the speed is OK. In the same network, 100 concurrent data of 50 million (15G size) is about 80 minutes