[TOC]
1. Error page
1.1 official documents:
You can customize the error page by editing the layouts/error.vue file
Warning: Although this file is in the layouts folder, it should be treated as a page
This layout file does not need to contain < nuxt / > tags. You can think of this layout file as a component for displaying application errors (404500, etc.).
Take an example of personalized error page layouts/error.vue:
<template>
  <div class="container">
    <h1 v-if="error.statusCode === 404">Page does not exist</h1>
    <h1 v-else>Application error exception</h1>
    <nuxt-link to="/">Home page</nuxt-link>
  </div>
</template>

<script>
export default {
  props: ['error'],
  layout: 'blog' // You can specify a custom layout for the error page
}
</script>

1.2 practical operation (example exercise)
1.2.1 create error page
layouts/error.vue
<template>
  <div class="container">
    <h1 v-if="error.statusCode === 404">Page does not exist</h1>
    <h1 v-else>Application error exception</h1>
    <nuxt-link to="/">Home page</nuxt-link>
  </div>
</template>

<script>
export default {
  props: ['error'],
  layout: 'layout' // You can specify a custom layout for the error page
}
</script>
Use v-if to determine the error type. This error needs to be declared in script. If the program cannot find the error.statusCode without declaration
1.3, test

2. Meta label
2.1 official documents:
Default Meta label
Nuxt.js allows you to define all the default meta tags required by the application in nuxt.config.js. You can configure them in the head field:
Note: Nuxt.js uses hid instead of vmid to identify the element key
An example of using custom viewport and Google fonts:
head: {
  meta: [
    { charset: 'utf-8' },
    { name: 'viewport', content: 'width=device-width, initial-scale=1' }
  ],
  link: [
    { rel: 'stylesheet', href: 'https://fonts.googleapis.com/css?family=Roboto' }
  ]
}
Personalize Meta tags for specific pages
Note: in order to avoid the phenomenon that the meta tag in the child component cannot correctly cover the same tag in the parent component, it is recommended to use the hid key to assign a unique identification number to the meta tag
The meta of the page is very important for the setting of SEO. For example, you need to make a news page now. In order to include the news in the search engine, each page needs to have different title and meta settings for the news. Just use the head method to set the header information of the current page. We will now set the New-1 page as a personalized meta and title.
2.2 practical operation (practice example)
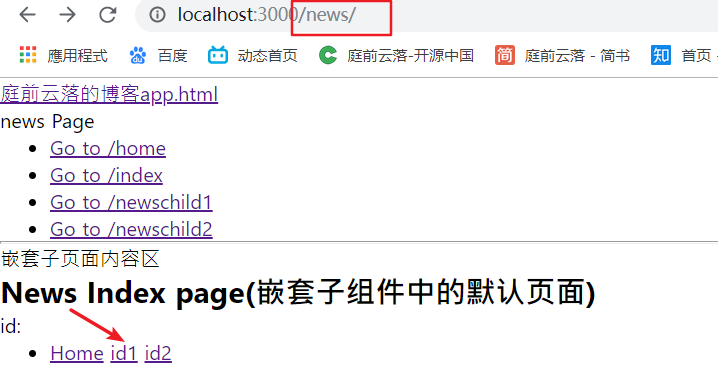
2.2.1 modify / pages/news/index.vue
<template>
  <div>
    <h2>News Index page(Default page in nested subcomponent)</h2>
    <p>id:{{$route.params.Id}}</p>
    <ul>
      <li>
        <nuxt-link to="/">Home</nuxt-link>
        <nuxt-link to="{name:'news-id',params:{id:123,title:'sqks'}}">id1</nuxt-link>
        <nuxt-link to="/news/aaa">id2</nuxt-link>
      </li>
    </ul>
  </div>
</template>

<script>
export default {};
</script>

<style>
</style>
2.2.2 modify / pages/news/_id.vue, and change the meta and title according to the passed value
<template>
  <div>
    <h2>ids:[{{$route.params.id}}]</h2>
    <ul>
      <li>
        <router-link to="/">Home</router-link>
      </li>
    </ul>
  </div>
</template>

<script>
export default {
  validate({ params }) {
    return /^\d+$/.test(params.id);
  },
   data(){
    return{
      title:this.$route.params.title,
    }
  },
//Set head information independently
  head(){
      return{
        title:this.title,
        meta:[
          {hid:'description',name:'news',content:'tingqianyunluo'}
        ]
      }
    }
};
</script>

<style>
</style>
2.3, test

