Article directory
Create nuxt.js project
Install Vue cli
npm install -g vue-cli --registry=https://registry.npm.taobao.org
Execute under project directory
vue init nuxt/starter <project-name> # After waiting for a while, you need to add project name, description, and Author.
cd <project-name>
npm install # Wait for installation dependency
npm run dev # Development mode start
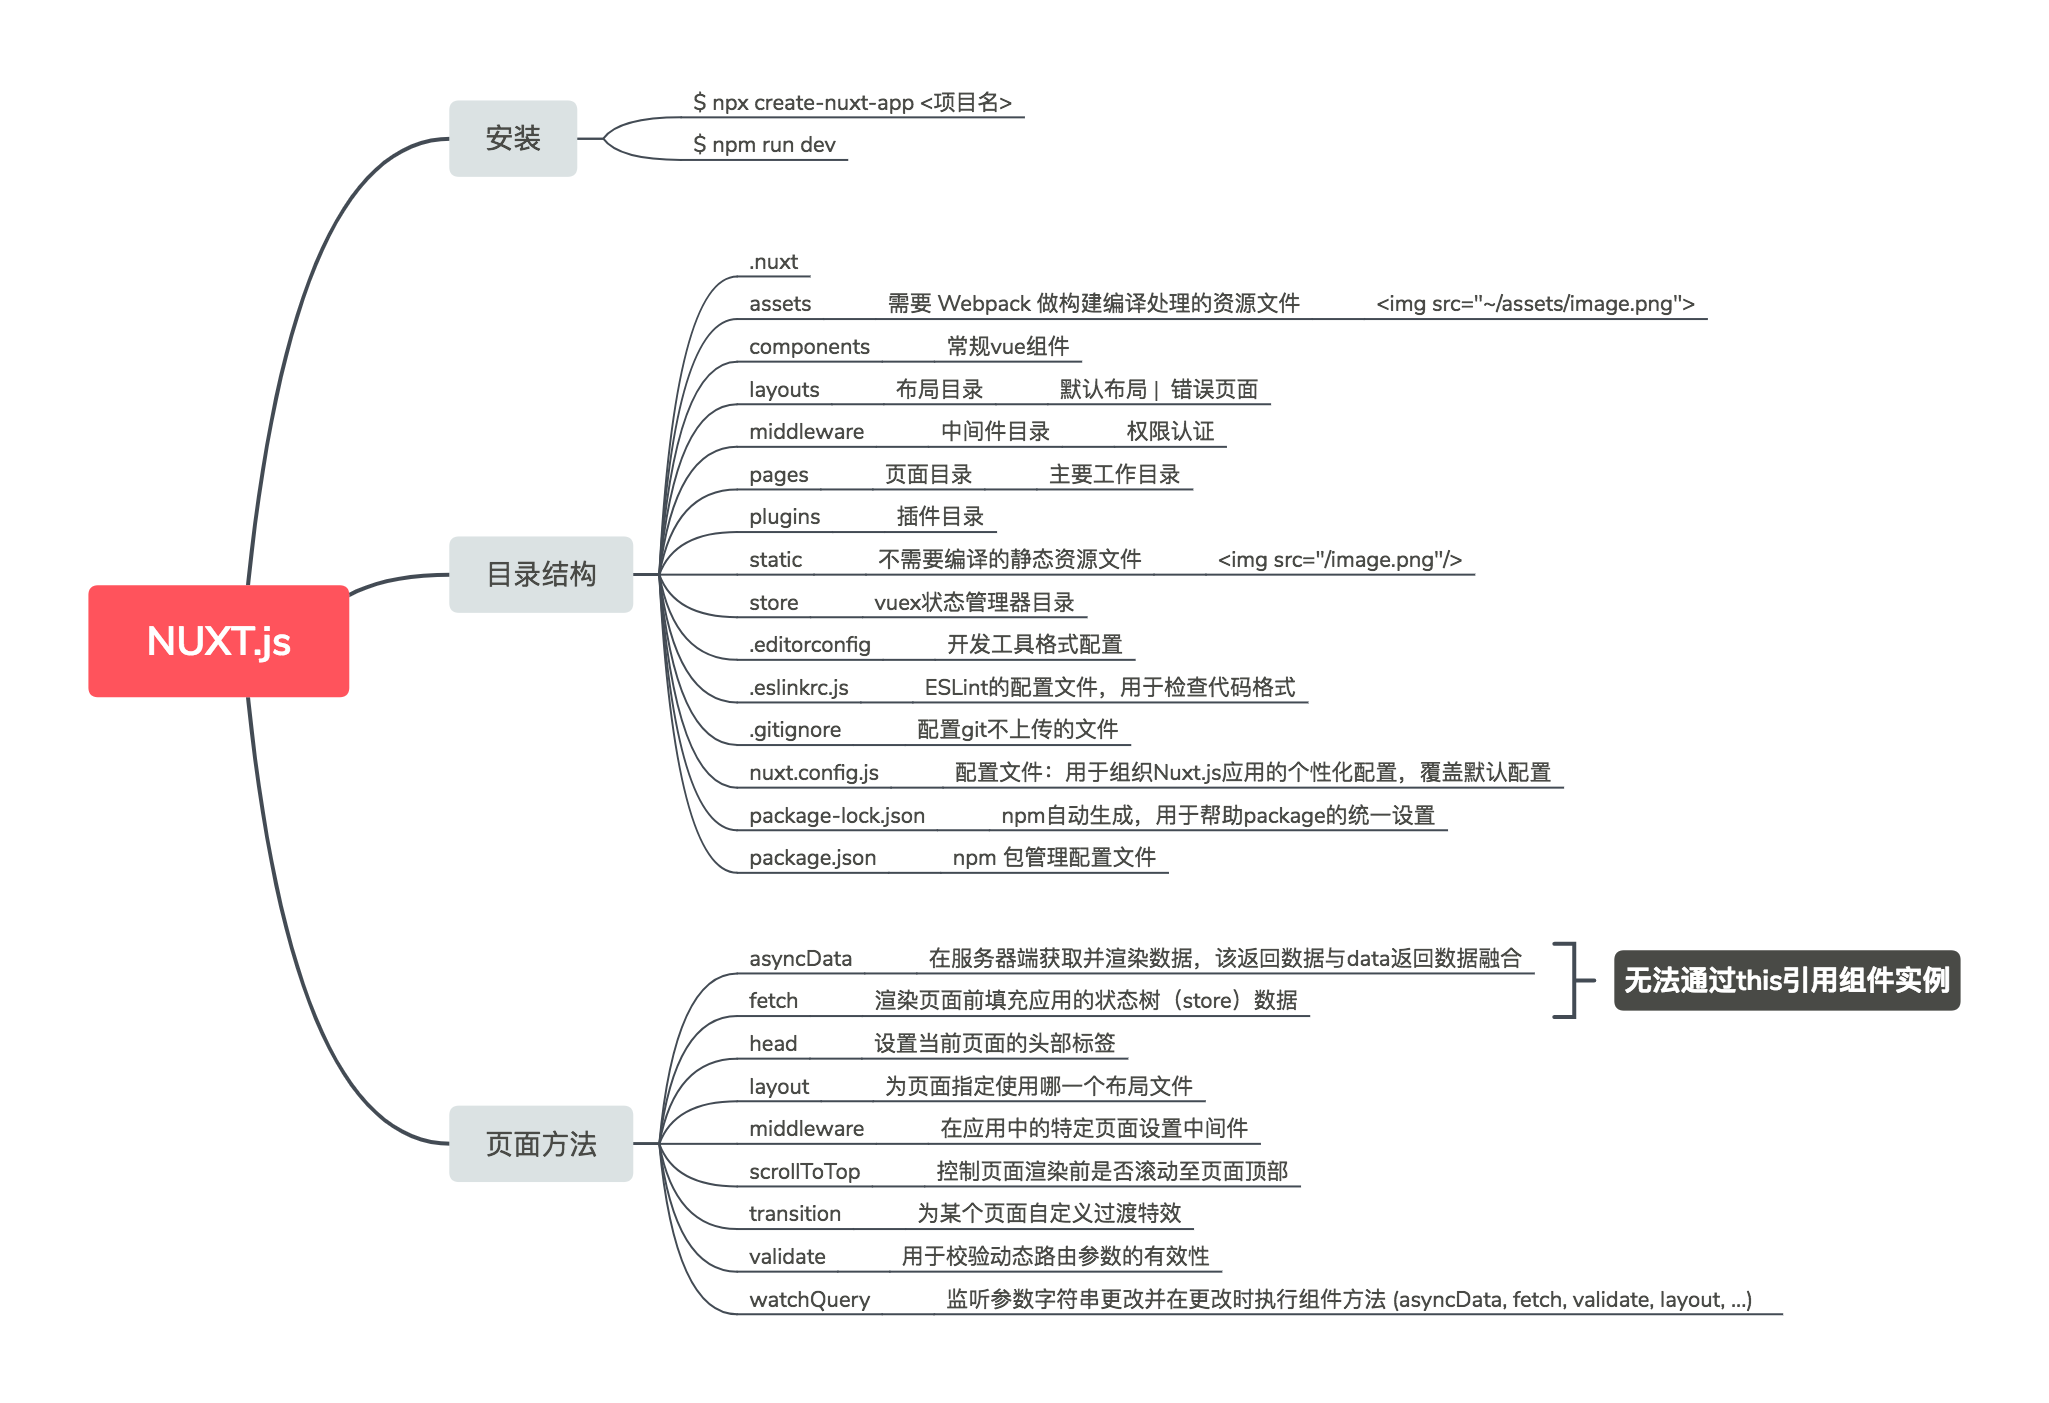
nuxt.js directory structure
|-- .nuxt                            // Nuxt automatic generation, temporary file for editing, build
|-- assets                           // Use to organize uncompiled static resources into LESS, SASS or JavaScript
|-- components                       // It is used for Vue components written by oneself, such as scroll component, calendar component and paging component.
|-- layouts                          // The layout directory is used to organize the layout components of the application and cannot be changed.
|-- middleware                       // Used to store Middleware
|-- pages                            // Used to store written pages, our main work area
|-- plugins                          // Where to store JavaScript plug-ins
|-- static                           // Used to store static resource files, such as pictures
|-- store                            // Vuex status management for organization applications.
|-- .editorconfig                    // Development tool format configuration
|-- .eslintrc.js                     // Configuration file for ESLint to check code format
|-- .gitignore                       // Configure files git does not upload
|-- nuxt.config.json                 // Personalized configuration used to organize Nuxt.js application, overriding the default configuration
|-- package-lock.json                // The npm is generated automatically to help set the uniformity of package, and yarn has the same operation.
|-- package-lock.json                // The npm is generated automatically to help set the uniformity of package, and yarn has the same operation.
|-- package.json                     // npm package management profile

Integrate element UI and Axios
package.js
"dependencies": {
    "axios": "^0.19.0",		//Add version as appropriate
    "element-ui": "^2.10.1",	//Add version as appropriate
    "nuxt": "^2.0.0"
  },
And then under Terminal
npm install #Installation dependency
In the plugins folder, create axios.js and element-ui.js, respectively.
import axios from 'axios'

// Set baseURL
axios.defaults.baseURL = 'http://127.0.0.1:8080'

// Create axios object, expose
export default axios.create()
import Vue from 'vue'
import ElementUI from 'element-ui'
import 'element-ui/lib/theme-chalk/index.css'

Vue.use(ElementUI)
//All of the above are imported, or can be imported as required.
// import { Button, Input } from 'element-ui'
//
// Vue.use(Button)
// Vue.use(Input)
Configure in nuxt.config.js
build: {
    /*
    ** Run ESLint on save
    */
    vendor:['element-ui','axios'],//Compile only once
    ...
  },
  plugins:[
    {src:'~/plugins/element-ui'},//Add configuration for element UI
  ]
In the interface where you need to import axios, you need to import
import axios from "~/plugins/axios";
Note: there are other ways to introduce axios
Add: push local projects to Gitee
Create a new warehouse on gitee and obtain the address, for example https://gitee.com/heheyixiao/standerd-nuxt.git
Right click the project directory and click Git Bash Here
If it is the first time to use, you can configure the name first.
$ git config--global user.name "Your Name" #Set your submitted name
$ git config --global user.email"email@example.com" #Set up your email
It can be directly configured
$ git init #Initialize. At this time, there will be a hidden folder of. git in your project.
$ git status #The directory you want to upload will appear
At this time, please note that the project does not upload the. Nuxt file by default, and upload the. idea folder (if you use an IDE such as webstorm). Generally, we ignore to upload the. idea folder, and upload the. Nuxt folder.
Open. gitignore
# dependencies
node_modules

# logs
npm-debug.log

# Nuxt build
.nuxt

# Nuxt generate
dist
Can be changed to
# dependencies. You can download them with npm.
node_modules

# Logs logs do not need to be uploaded
npm-debug.log

# Nuxt build allows. nuxt to upload, so. nuxt comments can be deleted directly.
# .nuxt

# Nuxt generate compiled problem files do not need to be uploaded
dist
# Ignore files for. idea
.idea
Then continue to enter commands in bash
$ git status #It can be compared with the previous one.
$ git remote add origin https://gitee.com/heheyixiao/standerd-nuxt.git #Associate local warehouse with remote warehouse
$ git add . #Add all changed files in the directory. Note that there is a space after add, followed by "."
$ git commit -m 'Submission of projects'
$ git push -u origin master
If you can't submit it directly, you may be prompted to pull the project first. You can use the command
$ git pull --rebase origin master
Then you can see your own project, gitee.