Nuxt.js(4) ajax operation for programmers
1, Integrate axiox
- When building a project, if you select the axios component, nuxt.js will automatically integrate with axios.
- Integration effect:
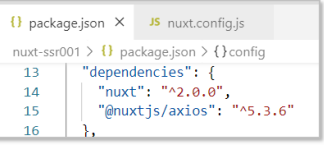
- 1) package.json has axios version
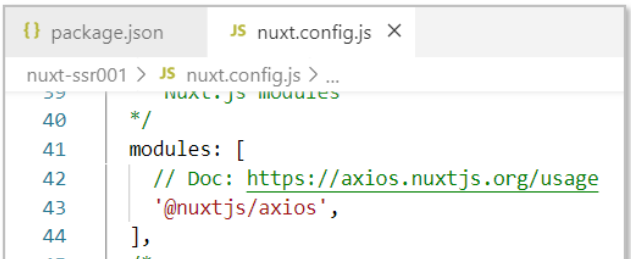
- 2) nuxt.config.js add axios as a module
- Common configuration, modify nuxt.config.js to configure the baseURL (change according to your background configuration path)
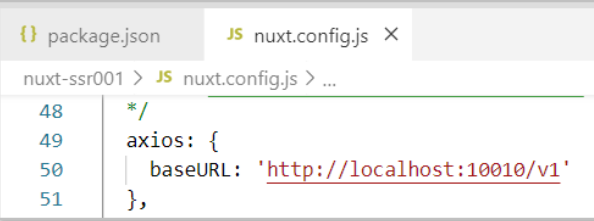
  axios: {
    baseURL:'http://localhost:10010/api '/ / configure the gateway address
  },
2, Normal ajax (nuxt and axios integration)
this.$axios can get the axios instance and send ajax |
|---|
For example:
<template>
  <div>
    //Normal ajax (nuxt integrates axios) < br / >
    <!-- Provide button, click button, send ajax Query the result and display it under the button -->
    <input type="button" @click="findAllFn" value="Click to send">
    {{pageInfo}}
  </div>
</template>

<script>
export default {
  methods: {
    async findAllFn() {
      //Send ajax
      let { data } = await this.$axios.get('/userservice/user/list')
      //Save data
      this.pageInfo = data.data
    }
  },
  data() {
    return {
      pageInfo: ''
    }
  },
}
</script>

<style>

</style>
3, Sending asynchronous data using asyncData
1. use asyncData-- one request
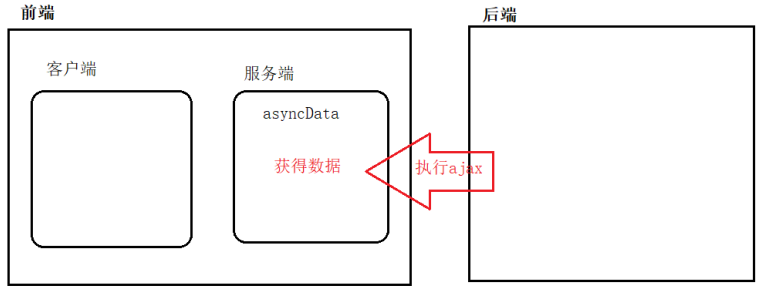
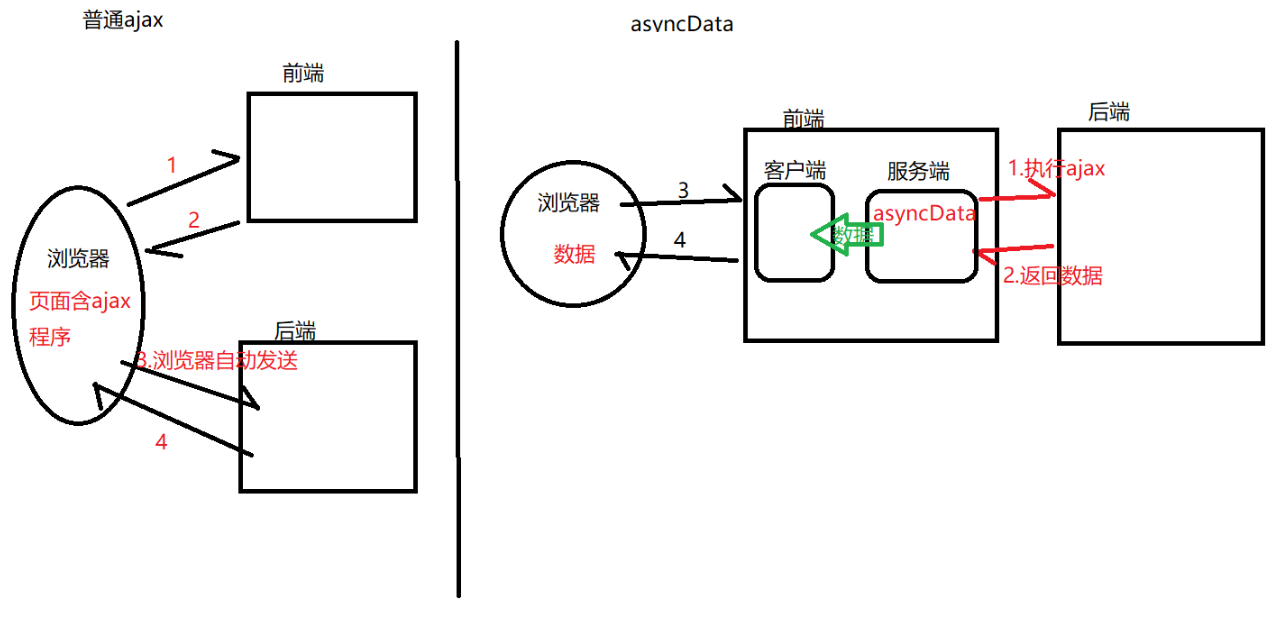
ajax in asyncData will be executed in the "front-end server", and the browser will see that it is the data, not the ajax program.
|
|---|
-
asyncData syntax 1: use context object
- For example:
 <template>
	{{Name}}
</template>
<script>
export default {
    //asyncData cannot use this (current component)
    //Provide the first parameter context to represent the context (all functions of nuxt)
    asyncData( context ) {
        //Send ajax
        let data = context.$axios.get('','')
        // Combine data and return
        return {
            //Name: Data
        }
    }
}
</script>
• asyncData syntax 2: deconstruct the context object, context. $Axios -- > {$Axios}
 <script>
export default {
    async asyncData( {$axios} ) {
        //Send ajax
        let { data } = await $axios.get('Route')
        //encapsulation
        return {
            //Variables: querying data
        }
    }
}
</script>

•Example
<template>
  <div>
    {{pageInfo}}
  </div>
</template>

<script>
export default {
  async asyncData( context ) {
      //Send ajax
      let { data } = await context.$axios.get('/userservice/user/list')
      //Composite data
      return {
        pageInfo: data.data
      }
  },
}
</script>

<style>

</style>
Comparison between ajax and asyncData
2. Using asyncData -- multiple requests
- Multiple requests require Promise ($axios.get() to return Promise object)
<script>
//Rarely use response objects directly
export default {
    async asyncData( {$axios} ) {
        //Send multiple requests
        let [response 1, response 2] = await Promise.all([request 1, request 2])
        //Return data
        return {
            Variable 1: response 1,
            Variable 2: response 2
        }
    }
}
</script>
//Deconstruct the response object response 1 -- > {data} //Both "response 1" and "response 2" can deconstruct data with duplicate variable names. It is recommended to use the alias {data: alias} export default { async asyncData( {$axios} ) { //Send multiple requests let [ { data: d1 }, {data:d2} ] = await Promise.all([Request 1, Request 2]) //Return data return { //Variable 1: d1.data, //Variable 2: d2.data } } } </script>
- Instance 1: Promise.all sends 1 request
<template>
  <div>
      {{pageInfo}}
  </div>
</template>

<script>
export default {
  async asyncData({ $axios }) {
    //Send ajax
    let [ {data} ] = await Promise.all([ $axios.get('/userservice/user/list') ])
    //Return
    return {
      pageInfo : data.data
    }
  },
}
</script>

<style>

</style>
- Example 2: Promise.all sends 2 requests
<template>
  <div>
      {{pageInfo}}
      {{list}}
  </div>
</template>

<script>
export default {
  async asyncData({ $axios }) {
    //Send ajax
    let [ {data : d1 }, {data : d2} ] = await Promise.all([ $axios.get('/userservice/user/list'), $axios.get('/userservice/user/list2') ])
    //Return
    return {
      pageInfo : d1.data,
      list : d2.data
    }
  },
}
</script>

<style>

</style>
3, fetch send ajax
- The fetch method is used to fill the application's state tree data before rendering the page. Similar to the asyncData method, it does not set the component's data.
- Comparison map

Of course, to send ajax using fetch, you need to learn to integrate vuex (state tree)
- In nuxt, only the core content of vuex is written.
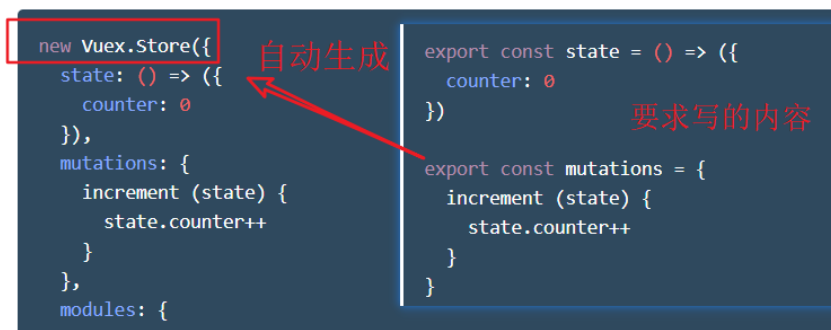
- Compiling content
 //state area, equivalent to defining variables
export const state = () => ({

})

//Regions for modifying data
export const mutations = {
  Method name (state, value){

  }
}


– pay attention to the implementation of the state area
 //state area, equivalent to defining variables
export const state = ()=> {
  return {

  }
}
//Ellipsis
export const state = () => ({

})
For example:
- 1) Create ~ / store/index.js and write the following
 //state area, equivalent to defining variables
export const state = () => ({
  pageInfo: ''
})

//Regions for modifying data
export const mutations = {
  setData( state , value) {
    state.pageInfo = value
  }
}
- 2) Complete the fetch operation
<template>
  <div>
      {{ this.$store.state.pageInfo }}
  </div>
</template>

<script>
export default {
  async fetch( {$axios, store } ) {
    //Send ajax
    let { data } = await $axios.get('/userservice/user/list')
    console.info( data )
    //Save query results to vuex
    store.commit('setData', data.data )
  }
}
</script>

<style>

</style>
At the same time, we need to pay attention to the following small knowledge points:
localStorage and sessionStorage cannot be used here. An error will appear
- Both localStorage and sessionStorage are browser side objects, which are not available on the front-end server. If the above two variables are used in created(), the program will throw an exception (the object is not declared)

Conclusion;
In nuxt.js, migrate the code previously stored in created() to mounted()
<template>

</template>

<script>
export default {
  /*
  //created()The function is called on both the client and the server. localStorage can only be used on the client
  created() {
    localStorage.setItem('name','Test data ')
  },
  */
  mounted() {
    localStorage.setItem('name','test data')
  },
}
</script>
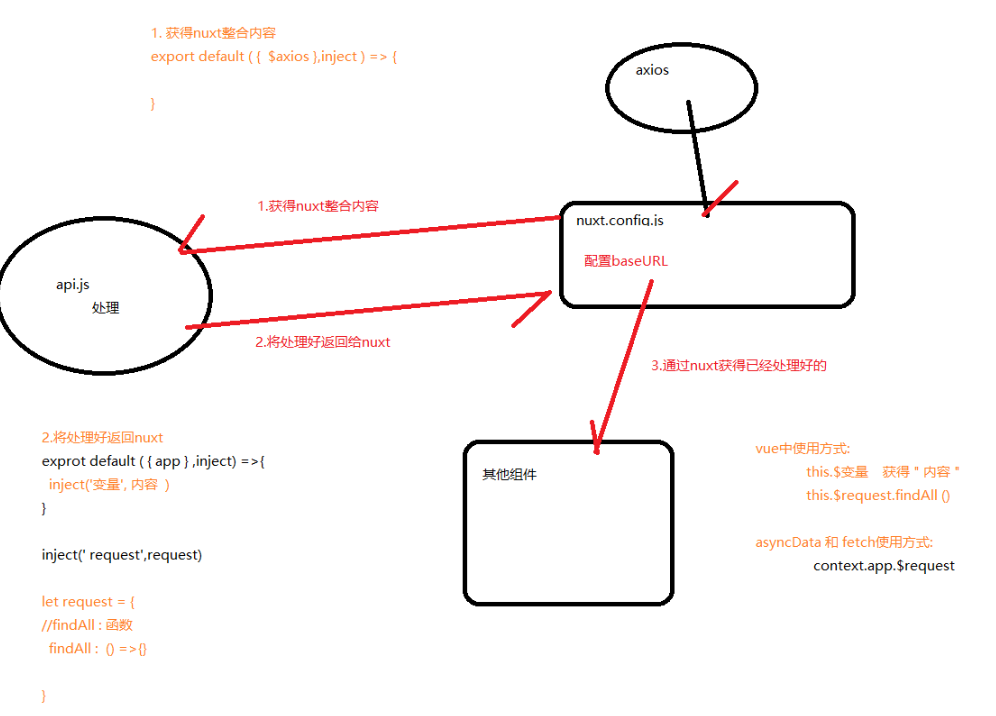
4, Customize axios
- Purpose of customizing axios: write an api.js file for unified maintenance of request path
- Step 1: modify nuxt.config.js and write axios baseURL

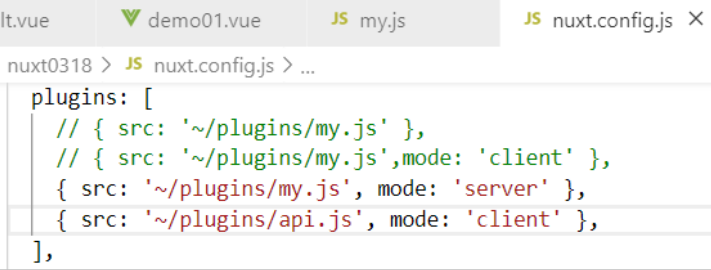
- Step 2: create ~ / plugins/api.js file and configure it in nuxt.config.js file (only available to clients)
   plugins: [
    // { src: '~/plugins/my.js' },
    // { src: '~/plugins/my.js',mode: 'client' },
    { src: '~/plugins/my.js', mode: 'server' },
    { src: '~/plugins/api.js', mode: 'client' },
  ],
- Step 3: modify api.js and copy fixed content
 //Custom function
const request = {
  test : (params) => {
    return axios.get('/web-service/test',{
      params
    })
  },
}

var axios = null
export default ({ $axios }, inject) => {

  //3) Save built-in axios
  axios = $axios

  //4) Hand over custom function to nuxt
  // Usage 1: in vue, this.$request.xxx()
  // Usage 2: in asyncData of nuxt, content.app.$request.xxx()

  inject('request', request)
}
- Step 4: send ajax in other components
-
 <template>
  <div>

  </div>
</template>

<script>
export default {
  //Page loaded successfully
  async mounted() {
    //Send ajax
    let { data } = await this.$request.findAll()

    console.info( data )
  },
}
</script>

<style>

</style>
- Step 5: modify api.js to write specific functions
//Custom function
const request = {
  test : (params) => {
    return axios.get('/web-service/test',{
      params
    })
  },
  //Method name: function
  findAll : () => {
    return axios.get('/userservice/user/list')
  }
}
Custom axios: Principle Analysis
After learning this, you can almost come and go freely in Nuxt.js
Can operate to write some pages, quickly try it!
Please give yourself a compliment!
Make a little progress every day`~~~~~
