Many systems come with mail servers, such as the most common office system. Generally, mail servers are built on Linux devices, but anti-virus software rarely supports Linux platform. Even if it supports, the operation is often troublesome or needs a graphical interface, and people will not install a graphical interface on mail servers. So we might as well change our thinking and install anti-virus software to provide virus detection services on several Windows devices in the LAN. The mail server sends the files that need to be detected to the Windows antivirus server for scanning, gets a scanning result and stores them in the library. Windows servers and mail servers do not share storage, which reduces efficiency but improves security and confidentiality. And the email attachments will not be scanned every day. Real-time scanning can be done when emailing. For small-scale mail servers, it is very convenient to build a very low cost, that is, the cost of buying a server. If the virtualization platform can directly hit the zero-cost deployment of anti-virus servers.
Tested a lot of anti-virus software both at home and abroad, including fee-based and free. Here's to pay a big tribute to Kaspersky, the command-line drug detection tool set up for fee-paying service in most major antivirus factories, which has been provided in his free version. This command line antivirus tool is the core of the mail server. Kaspersky is a conscientious enterprise.
First, download the latest free version on Kaspersky's official website. Of course, you need to download the paid version better. https://www.kaspersky.com.cn/free-antivirus
The version I downloaded is kfa18.0.0.405 abzh-hans_12797.exe

Installed like this, is the ordinary home version, but now we want to use it as a server level.

The important thing is that Kaspersky installs the command line antivirus program in the directory. His location is C: Program Files (x86) Kaspersky Lab Kaspersky Free 18.0.0 avp.com. Almost all Windows computers can only be installed in this location.
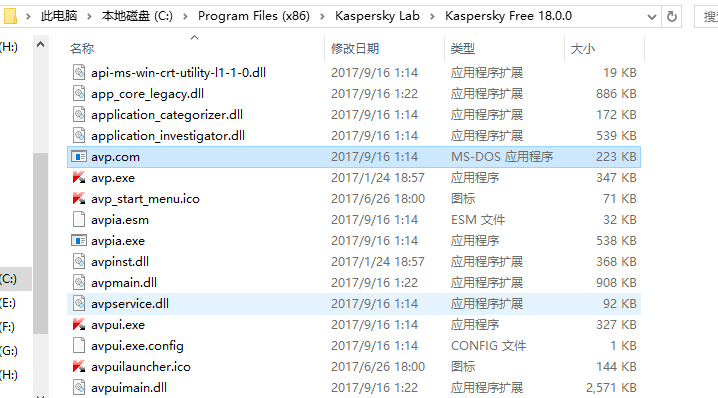
Then we use the command line to try out the killing function. Note that if your Kaspersky program is not running on your computer, then executing avp.com will open the Kaspersky protection service and graphical interface.
avp.com SCAN file or folder path

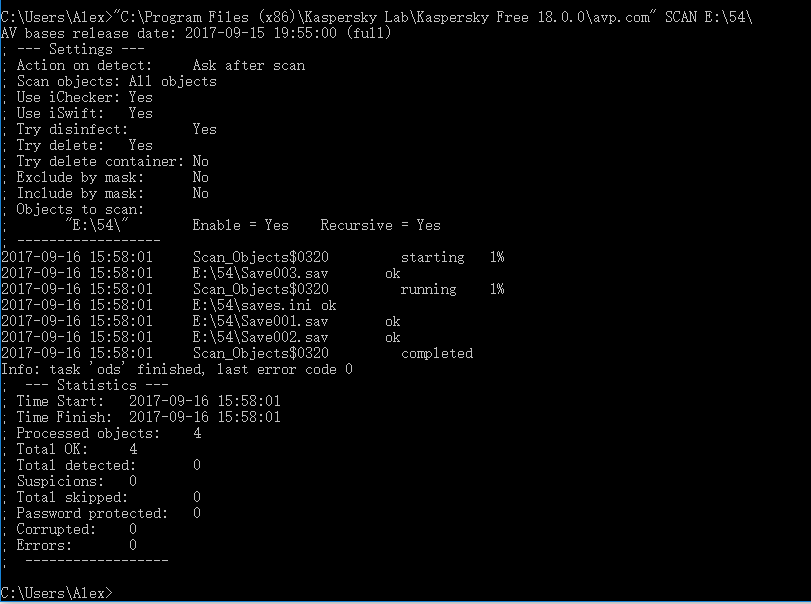
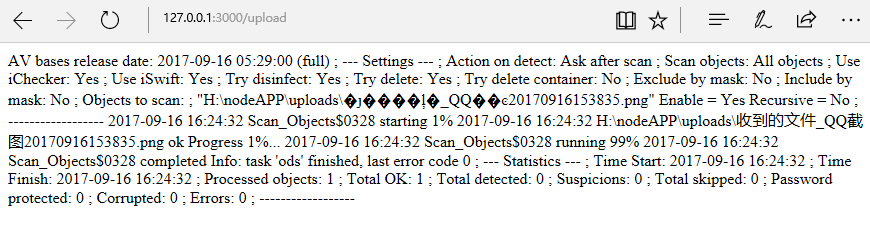
It can be seen that Kaspersky prints out a list of specific files scanned, including which file to scan, whether the file is ok, and at the bottom there is a total number of scanned files, the total number of security files and the number of virus files found. When reading a message, we can check whether the total number of virus files is 0 or not. If not, we can look up to find which file has not passed the detection.
Note: Although some files are only single files, Kaspersky will split them into pieces to scan, typically zip, rar and other compressed files, exe installation packages, Word Excel and other office files. The following figure only scans an excel text. But he scanned four pieces and estimated that each sheet in the workbook would be counted as a file. Many times word documents can scan more than 30 files
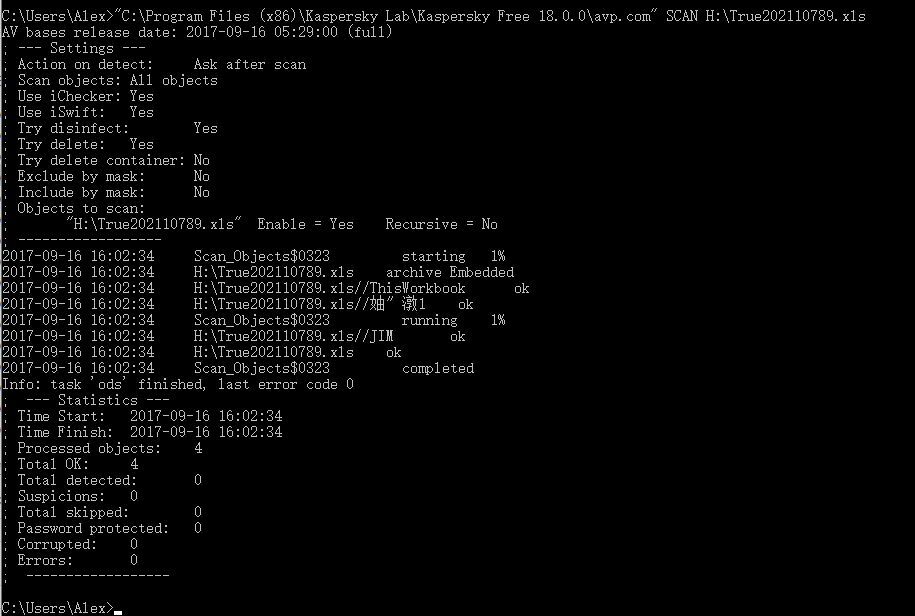
It's normal for Chinese to be scrambled, which will not affect the scanning results.
Now that we have such a good command-line tool, we need to find a middleware to provide an accessible interface for other servers to upload the files to be checked for poisoning, and then send the message back after scanning, so that other servers can parse and retrieve the message for themselves. The message format is the example shown in the screenshot above, which is generally as follows.
AV bases release date: 2017-09-15 19:55:00 (full)
; --- Settings ---
; Action on detect:     Ask after scan
; Scan objects: All objects
; Use iChecker: Yes
; Use iSwift:   Yes
; Try disinfect:        Yes
; Try delete:   Yes
; Try delete container: No
; Exclude by mask:      No
; Include by mask:      No
; Objects to scan:
;       "E:\54\"        Enable = Yes    Recursive = Yes
; ------------------
2017-09-16 15:58:01     Scan_Objects$0320         starting   1%
2017-09-16 15:58:01     E:\54\Save003.sav       ok
2017-09-16 15:58:01     Scan_Objects$0320         running    1%
2017-09-16 15:58:01     E:\54\saves.ini ok
2017-09-16 15:58:01     E:\54\Save001.sav       ok
2017-09-16 15:58:01     E:\54\Save002.sav       ok
2017-09-16 15:58:01     Scan_Objects$0320         completed
Info: task 'ods' finished, last error code 0
;  --- Statistics ---
; Time Start:   2017-09-16 15:58:01
; Time Finish:  2017-09-16 15:58:01
; Processed objects:    4
; Total OK:     4
; Total detected:       0
; Suspicions:   0
; Total skipped:        0
; Password protected:   0
; Corrupted:    0
; Errors:       0
;  ------------------
Be careful not to use Chinese file names as far as possible, or when scanning multiple files at once in the folder, because the random code does not know which file is toxic, but every time using single file scanning will not have this problem.
Middleware here does not choose big-time Apache or Tomcat, just use a small efficient server, I use nodeJS here, because the program is too short to write, to build an anti-virus server can be done in less than 100 lines of code.
First, make sure that you have deployed node and express framework on your computer. If you don't install Baidu on the left, then the main file of the program is written as follows. The following example is single file scanning, that is, the client uploads only one file to scan at a time.
index.js
var express = require('express');
var app = express();
var upload = require('./fileupload');
app.use(express.static('html'));

var process = require('child_process');

var anvirusSoftware = '"C:\\Program Files (x86)\\Kaspersky Lab\\Kaspersky Free 18.0.0\\avp.com" SCAN '

//File upload service
app.post('/upload', upload.single('virus_file'), function (req, res, next) {
    console.log('The uploaded documents are:'+req.file);
    if (req.file) {
        //res.send('file upload success');
        	console.log(req.file);
		var upload_directory = req.file.destination;
		var path = req.file.path;
		console.log('Uploaded files are stored in the target folder:'+upload_directory);
		console.log('The saved file path:'+upload_directory);
		console.log('=======');
        	console.log(req.body);
		console.log("Prepare to start the antivirus program")
		process.exec(anvirusSoftware + path,function (error, stdout, stderr) {
        	if (error !== null) {
          		console.log('exec error: ' + error);
        	} else if (stdout !== null){
			res.send(stdout);
			console.log('success: ' + stdout);
		}
		});
    } else {
		res.send('No files uploaded');
    }
});
app.get('/upload', function (req, res, next) {
	console.log('get Coming'+req.file);
	res.send('Do not use get request');
});
app.get('/', function (req, res) {
  res.send('Hello World!');
});

var server = app.listen(3000, function () {
  var host = server.address().address;
  var port = server.address().port;

  console.log('Example app listening at http://%s:%s', host, port);
});
Where the name attribute of < input > is determined in upload.single, this example is "virus_file"
The client uses POST to upload. The server address is 127.0.0.1:3000 and monitors the 3000 ports of all network cards. You can configure it yourself. The file upload module of nodeJS is used here. A special file is written to configure multer. This file configures the location of file storage after uploading, the name of file storage and other information. The return value is an instance of multer.
fileupload.js
var multer = require('multer');
var dstPath = process.cwd() + '/uploads';//Setting Upload File Path
var storage = multer.diskStorage({
    //Note: If destination: passes a function, you create folders, and if you pass a string, multer automatically creates folders.
    destination: dstPath,
    //TODO: File Differentiated Directory Storage
    //Rename uploaded files
    filename: function (req, file, cb) {
        cb(null, 'Documents received_'+file.originalname);
    }
});

//Add the configuration file to the muler object.
var upload = multer({
    storage: storage,
    //Refer to multer limits for other settings
    //limits:{}
});
//Export object
module.exports = upload;
Also show the dependency file Package.json. The command line can automatically download dependency packages online with npm install.
{
  "name": "anti_virus",
  "version": "1.0.0",
  "description": "",
  "main": "index.js",
  "scripts": {
    "test": "echo \"Error: no test specified\" && exit 1"
  },
  "author": "",
  "license": "ISC",
  "dependencies": {
    "child_process": "^1.0.2",
    "express": "^4.15.4",
    "multer": "^1.3.0"
  }
}
Among them, child_process is a dependency library for new processes to execute cmd commands, and multer is a dependency library for executing file storage and receiving.
In just a few lines, an anti-virus server has been set up.
For testing convenience, we write a simple front-end page, which is usually uploaded directly by Java or PHP. Note that the input name attribute here should be written as "virus_file" as specified in index.js above.
<head>
        <meta http-equiv="Content-Type" content="text/html; charset=utf-8" />
</head>
<body>
<form id='editfile' method='post' action='http://127.0.0.1:3000/upload' enctype='multipart/form-data'>

//Select the file to scan: <input name= "virus_file" type='file'/>.</br>
    <input type='submit' value='Submission'/>
</form>
</body>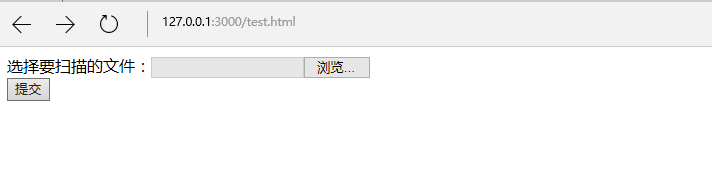
Then the command line cd goes to the folder of our node program, executes node index.js to start the server, observes whether the 3000 port is in the listening state, then accesses 127.0.0.1:3000/test.html, then you can select the file and click submit, after submitting, you will see the command line output the Kaspersky scanning process above, and then feedback the final results to the browser.
At the same time, the file appears in our node app folder uploads, the file name is "received file_"+the original file name, of course, generally speaking, it is better to use random letters.

EDGE browsers don't display newline characters, but there's nothing wrong with using JAVA or PHP. The nodeJS background log is as follows
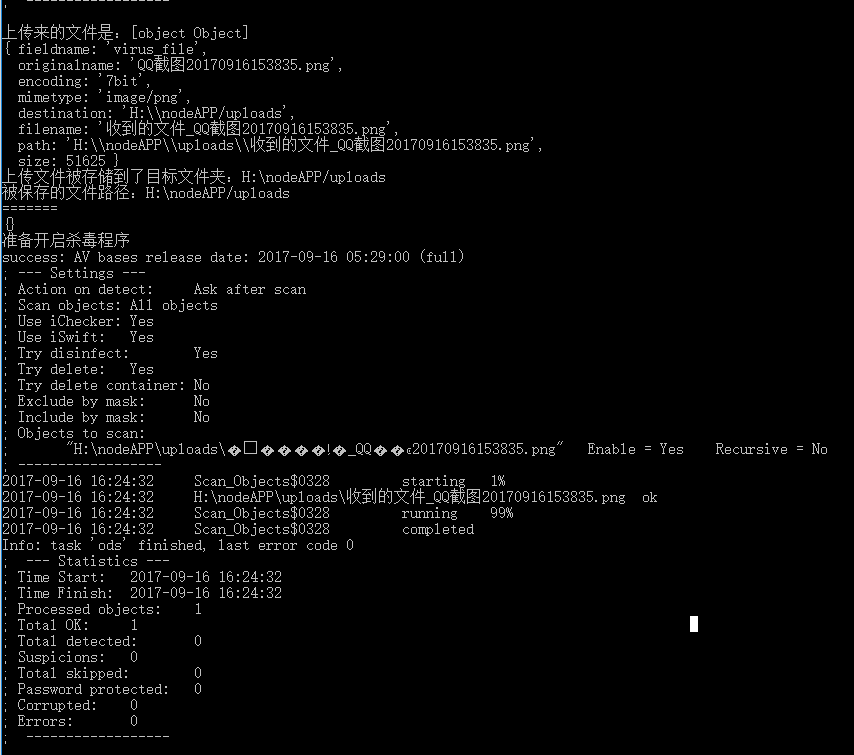
So we passed the test.
Single file upload and virus detection may frequently start and close the anti-virus engine, which is inefficient, so we can also set up a multi-file upload and anti-virus program. His core is Kaspersky's ability to scan folders.
The method is to set up a folder on NodeJS server for every file upload request. The name of this folder is randomly generated. This folder stores all the files uploaded by this request. When checking poison, you only need to let Kaspersky scan this folder to know which file is poisonous. Moreover, different file scanning requests initiated at the same time will not conflict, the results are accurate, and support a large amount of concurrency.
First of all, the most important thing is to modify the file fileupload.js so that it can intelligently create different folders for each different request. But because diskStorage is a method that every newly uploaded file will be executed once, the key is how to distinguish which request the current file belongs to. After all, our virus server may receive different requests from different settings at the same time. Several anti-virus requests were prepared.
The model multer gives req as an input parameter, so in order to identify whose req of the current file is, we can put a new member "dir_name" inside the object of req. This new member is a random number. For uploading multiple files at a time, the first file to be circulated puts this random number in and builds it according to this random number. Set up a local folder, and if the random number is checked in subsequent files, it will prove that the batch of documents were sent by the same request, then put them in which folder you just created.
/**
 *
 * @Description File Upload Configuration
 *
 */
var multer = require('multer');
var fs = require('fs');

var dstPath = process.cwd() + '/uploads/';//Setting Upload File Path

var storage = multer.diskStorage({
    //Note: If destination: passes a function, you create folders, and if you pass a string, multer automatically creates folders.
    destination: function (req, file, cb) {
	console.log('req.dir_name===='+req.dir_name);
	var upload_dir = dstPath + req.dir_name;
	if(!req.dir_name){//If this is the first file of this req, no relevant folder has been created yet.
		var dir_name = (Math.random()+"").slice(9);
		req.dir_name = dir_name;//Mark this req
		upload_dir = dstPath + dir_name;
		if (!fs.existsSync(upload_dir)) {
            		fs.mkdirSync(upload_dir);
	    		console.log('Successful folder creation:'+upload_dir);
        	}

	}
        cb(null, upload_dir);
    },
    //TODO: File Differentiated Directory Storage
    //Rename uploaded files
    filename: function (req, file, cb) {
        cb(null, 'Documents received_'+file.originalname);
    }
});

//Add the configuration file to the muler object.
var upload = multer({
    storage: storage,
    //Refer to multer limits for other settings
    //limits:{}
});
//Export object
module.exports = upload;var express = require('express');
var app = express();
app.use(express.static('html'));
var upload = require('./fileupload');
var process = require('child_process');
var anvirusSoftware = '"C:\\Program Files (x86)\\Kaspersky Lab\\Kaspersky Free 18.0.0\\avp.com" SCAN '
//File upload service
app.post('/upload', upload.array('virus_file',10), function (req, res, next) {
console.log(req.files);
if (req.files) {
//res.send('file upload success');
var length = req.files.length;
console.log('The number of uploaded files is:'+ length);
var upload_directory = req.files[0].destination;
console.log('Uploaded files are stored in the target folder:'+upload_directory);
for(var i=0;i<length;i++){
var path = req.files[i].path;
console.log('The full path of the saved file:'+path);
}
console.log('=======');
console.log(req.body);
console.log("Prepare to start the antivirus program");
process.exec(anvirusSoftware + upload_directory ,function (error, stdout, stderr) {
if (error !== null) {
console.log('exec error: ' + error);
} else if (stdout !== null){
res.send(stdout);
console.log('success: ' + stdout);
}
});
} else {
res.send('No files uploaded');
}
});
app.get('/upload', function (req, res, next) {
console.log('get Coming'+req.file);
res.send('Do not use get request');
});
app.get('/', function (req, res) {
res.send('Hello World!');
});
var server = app.listen(3000, function () {
var host = server.address().address;
var port = server.address().port;
console.log('Example app listening at http://%s:%s', host, port);
});Since the maximum number of files can be uploaded is 10, the HTML test page should be changed slightly.
<head>
        <meta http-equiv="Content-Type" content="text/html; charset=utf-8" />
</head>
<body>
<form id='editfile' method='post' action='http://127.0.0.1:3000/upload' enctype='multipart/form-data'>

Select the file to scan:<input name="virus_file"  type='file'/></br>
Select the file to scan:<input name="virus_file"  type='file'/></br>
Select the file to scan:<input name="virus_file"  type='file'/></br>
Select the file to scan:<input name="virus_file"  type='file'/></br>
Select the file to scan:<input name="virus_file"  type='file'/></br>
    <input type='submit' value='Submission'/>
</form>
</body>
At this point, we can upload either a single file or multiple files, as long as the maximum number does not exceed the index.js tag above, and we don't need to start with the first input box. It's OK to upload as I did above. After clicking submit, a message with scanned results will appear. You can see that both files were scanned (probably more for compressed files)
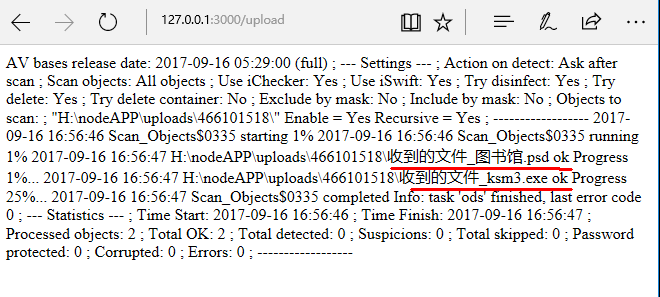
Then the uploaded file is stored separately in an uploads\01518\\\download. If it is uploaded again, it is in another random number folder:
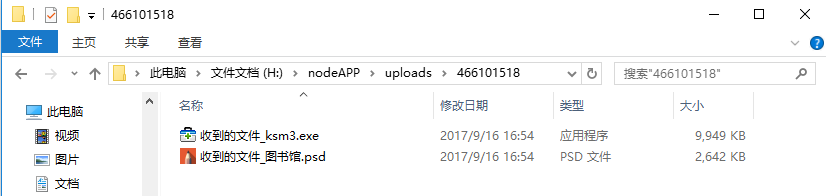
So our anti-virus server is set up.
In addition, besides Kaspersky's command line anti-virus tools under Windows, Avast and AVG anti-virus software also have, scanning speed is faster than Kaspersky, but according to the number of devices and time charges.