Recently, in the development of new projects, we need to use RESTful API to develop the docking IOS and Android applications, so we accidentally stepped into the pit of REST... There are still many receipts in the development process. This time, let's take a look at the idea and practice of token in API design.
technology stack
Using the Node.js Express The framework carries out our routing design. Mongoose Come and interact with Mongodb database connection, use Postman to debug our Api design, get started!
On RESTful API
There have been many introductions about RESTful on the Internet, and I won't repeat them too much here. What I want to say is that its main function is to divide the network application into two parts: front-end and back-end. However, the current development trend is to expand the demand of application platform (IOS, Android, Webapp, etc.).
Therefore, a unified mechanism is needed to facilitate the communication between front-end devices and back-end devices of different application platforms, that is, the separation of front-end and back-end. This has led to the popularity of API architecture, and even the emergence of "API First" design ideas. RESTful API is a relatively mature API design theory for Internet applications.
token's Thought in API Design
In API design, TOKEN is used to determine whether a user has access to API.TOKEN does not need encoding and decoding processing. Generally, TOKEN is an irreversible encryption of MD5 for some user names + time and other contents. Then, it can be used to determine whether the TOKEN contained in the user request is consistent with the TOKEN in the USER_TOKEN table.
The concrete practice process is mainly as follows:
Set a key such as key = 232323dsfadfewrasa3434'.
This key is known only to the sender and receiver.
When calling, the sender combines the parameters and generates an access_key with the key according to certain rules (sorting, MD5, ip, etc.). A post is submitted to the API interface together.
The receiver gets the parameters from the post and the access_key. As with sending, the same rules (sorting, MD5, ip, etc.) for each parameter with key also generate an access_key2.
Compare access_key with access_key2. Same. Operations are allowed, unlike returning errors or blacklisting.
Concrete practice of token design
No more nonsense, let's look at our dry goods first. This time, Node.js+experss and Mongoose are selected to enter the token practice of REST.
Project address: GitHub address
Or git clone https://github.com/Nicksapp/nAuth-restful-api.git
Integral framework
The conception of carrying out our design before development
-
Routing design
POST/api/signup: User registration
POST/api/user/access token: Account validation, get token
GET/api/user/user_info: Getting user information requires validation
-
user model design
Name: User name
password: password
Token: Verify the relevant token
New project
First look at our project folder
- routes/
---- index.js
---- users.js
- models/
---- user.js
- config.js
- package.json
- passport.js
- index.js
npm init creates our package.json
Then install the dependencies we need under the project root folder
npm install express body-parser morgan mongoose jsonwebtoken bcrypt passport passport-http-bearer --save
express: Our main development framework
mongoose: Framework for interacting with MongoDB database. Please install MongoDB on PC in advance.
morgan: Displays information about the procedure of the program request in Terminal so that we can debug the code.
JSON webtoken: Used to generate our token
passport: A very popular authorization Library
bcrypt: hash Encryption of User Password
- save writes the library files we installed into the dependencies of package.json so that others can open the project to install the required dependencies correctly.
User model
Define the user model we need for moogoose, create new models/user.js
const mongoose = require('mongoose');
const Schema = mongoose.Schema;
const bcrypt = require('bcrypt');

const UserSchema = new Schema({
  name: {
    type: String,
    unique: true, // Non-repeatable constraints
    require: true // Non-empty constraints
  },
  password: {
    type: String,
    require: true
  },
  token: {
    type: String
  }
});

// The middleware encrypts the password by bcrypt when adding user saves, so that the user's password is known only by the user himself.
UserSchema.pre('save', function (next) {
    var user = this;
    if (this.isModified('password') || this.isNew) {
        bcrypt.genSalt(10, function (err, salt) {
            if (err) {
                return next(err);
            }
            bcrypt.hash(user.password, salt, function (err, hash) {
                if (err) {
                    return next(err);
                }
                user.password = hash;
                next();
            });
        });
    } else {
        return next();
    }
});
// Verify that the user entered the password correctly
UserSchema.methods.comparePassword = function(passw, cb) {
    bcrypt.compare(passw, this.password, (err, isMatch) => {
        if (err) {
            return cb(err);
        }
        cb(null, isMatch);
    });
};

module.exports = mongoose.model('User', UserSchema);
configuration file
./config.jsUsed to configure our MongoDB Database Connection and token The key.module.exports = { 'secret': 'learnRestApiwithNickjs', // used when we create and verify JSON Web Tokens 'database': 'mongodb://localhost:27017/test'// Fill in the local mongodb connection address with xxx as the data table name };
Local Server Configuration
The. / index.js server configuration file is also the entry to the program.
Here we are mainly used to include the library files that our program needs to load and the dependencies needed to call the initialization program.
const express = require('express');
const app = express();
const bodyParser = require('body-parser');// Parsing body Field Module
const morgan = require('morgan'); // Command line log display
const mongoose = require('mongoose');
const passport = require('passport');// passport User Authentication Module
const Strategy = require('passport-http-bearer').Strategy;// token verification module
const routes = require('./routes');
const config = require('./config');

let port = process.env.PORT || 8080;

app.use(passport.initialize());// Initialize passport module
app.use(morgan('dev'));// Display program running log on command line for bug debugging
app.use(bodyParser.urlencoded({ extended: false }));
app.use(bodyParser.json()); // Call the body Parser module so that the program can correctly parse the body input value

routes(app); // Route introduction

mongoose.Promise = global.Promise;
mongoose.connect(config.database); // Connect to the database

app.listen(port, () => {
  console.log('listening on port : ' + port);
})
Routing configuration
. / routes mainly store routing-related files
. / routes/index.js routing total entry, introducing the used routing
module.exports = (app) => {
  app.get('/', (req, res) => {
    res.json({ message: 'hello index!'});
  });

  app.use('/api', require('./users')); // Add / api before all users routes
};
./routes/users.js
const express = require('express');
const User = require('../models/user');
const jwt = require('jsonwebtoken');
const config = require('../config');
const passport = require('passport');
const router = express.Router();

require('../passport')(passport);

// Registered accounts
router.post('/signup', (req, res) => {
  if (!req.body.name || !req.body.password) {
    res.json({success: false, message: 'Please enter your account password..'});
  } else {
    var newUser = new User({
      name: req.body.name,
      password: req.body.password
    });
    // Save user account
    newUser.save((err) => {
      if (err) {
        return res.json({success: false, message: 'login has failed!'});
      }
      res.json({success: true, message: 'Successful creation of new users!'});
    });
  }
});

// Check the username and password and generate an access token if validation passes
router.post('/user/accesstoken', (req, res) => {
  User.findOne({
    name: req.body.name
  }, (err, user) => {
    if (err) {
      throw err;
    }
    if (!user) {
      res.json({success: false, message:'Authentication failed,user does not exist!'});
    } else if(user) {
      // Check if the password is correct
      user.comparePassword(req.body.password, (err, isMatch) => {
        if (isMatch && !err) {
          var token = jwt.sign({name: user.name}, config.secret,{
            expiresIn: 10080
          });
          user.token = token;
          user.save(function(err){
            if (err) {
              res.send(err);
            }
          });
          res.json({
            success: true,
            message: 'Verify success!',
            token: 'Bearer ' + token,
            name: user.name
          });
        } else {
          res.send({success: false, message: 'Authentication failed,Password error!'});
        }
      });
    }
  });
});

// passport-http-bearer token middleware verification
// Send Authorization - > Bearer + token via header
// Or through?access_token = token
router.get('/users/info',
  passport.authenticate('bearer', { session: false }),
  function(req, res) {
    res.json({username: req.user.name});
});

module.exports = router;
passport configuration
. / passport.js configures the functions required by the permission module
const passport = require('passport');
const Strategy = require('passport-http-bearer').Strategy;

const User = require('./models/user');
const config = require('./config');

module.exports = function(passport) {
    passport.use(new Strategy(
        function(token, done) {
            User.findOne({
                token: token
            }, function(err, user) {
                if (err) {
                    return done(err);
                }
                if (!user) {
                    return done(null, false);
                }
                return done(null, user);
            });
        }
    ));
};
Mainly verify whether the token value sent matches the token value of the user server, and verify the information.
Specific debugging
Now we can run our code and see how it works! In order to facilitate debugging and parameter sending and receiving, we use postman (Can be installed on Chrome or Mac) to operate.
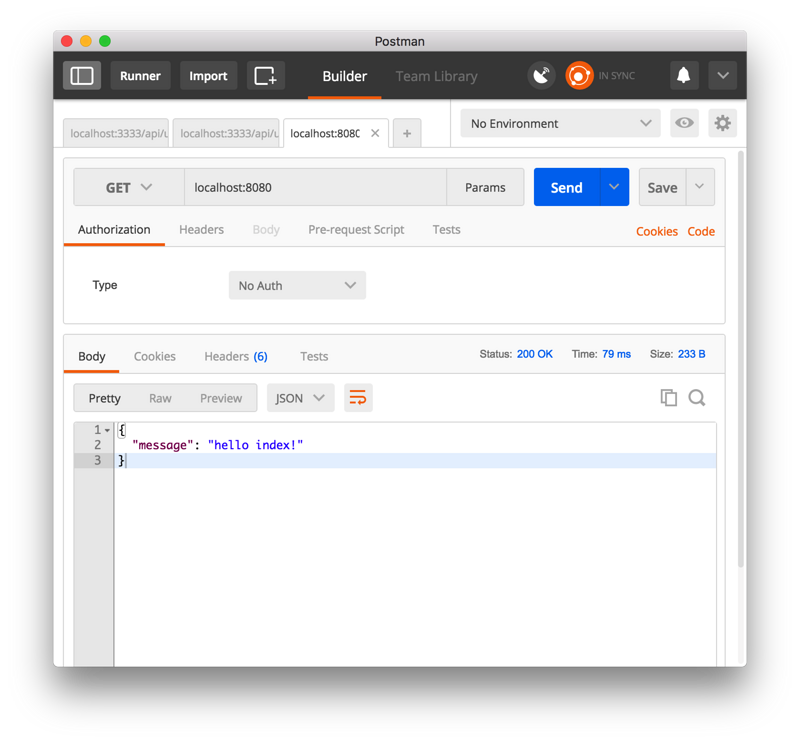
node index runs our local server and accesses [localhost:8080/]()
You should be able to see the initial json value we returned, but let's continue with our in-depth testing.
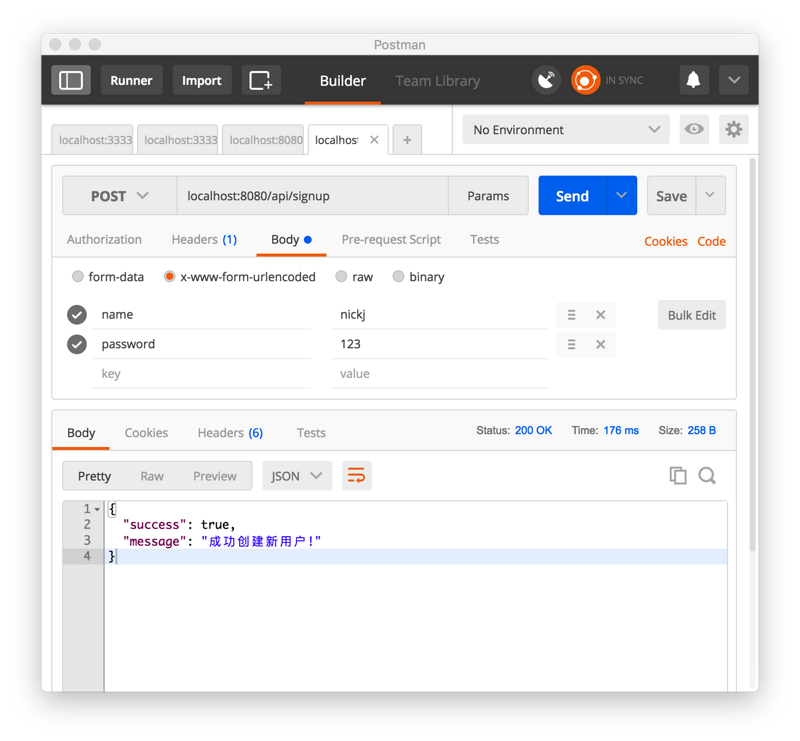
POST access [localhost:8080/api/signup] (), let's register a new user, pay attention to setting the body's Content-Type to x-www-form-urlencoded so that our body-parser can parse correctly. Okay, we successfully simulate the creation of our new user.
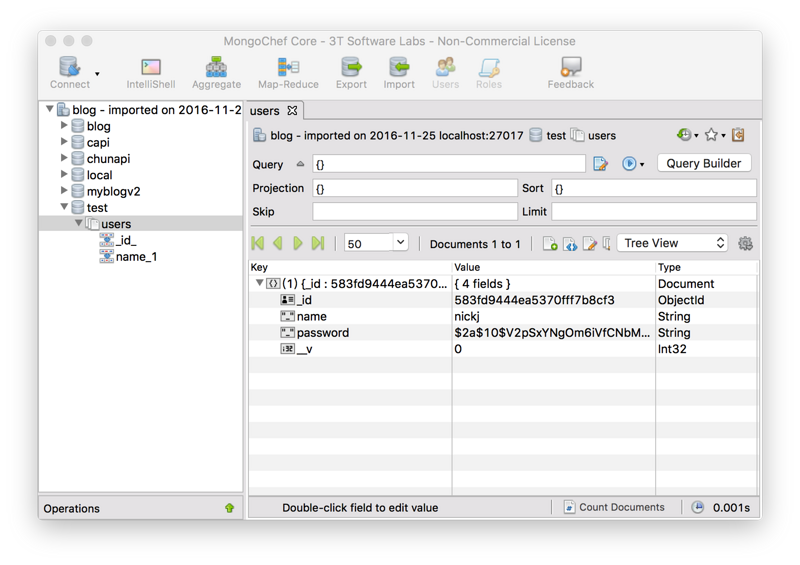
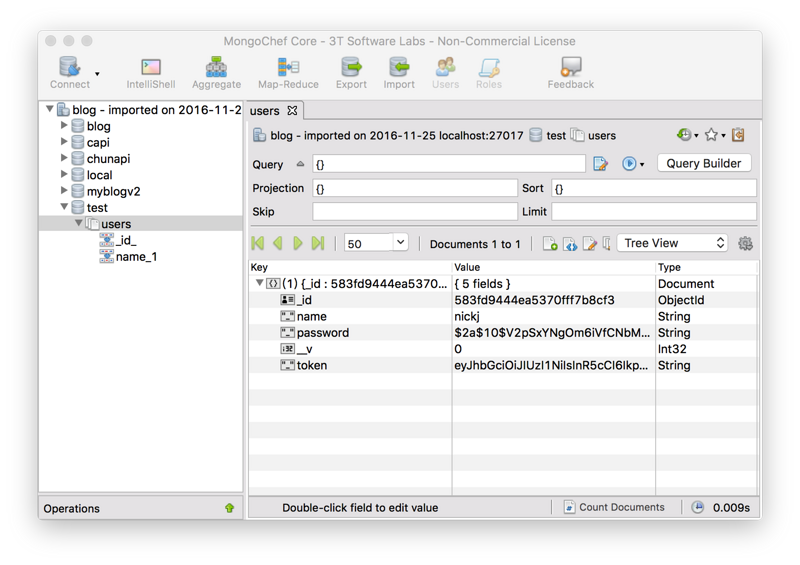
Connect to the database to see if our user information is stored correctly (Note: I use MongoChef, a very powerful MongoDB database management software), we can see that my password is also correctly encrypted and saved.
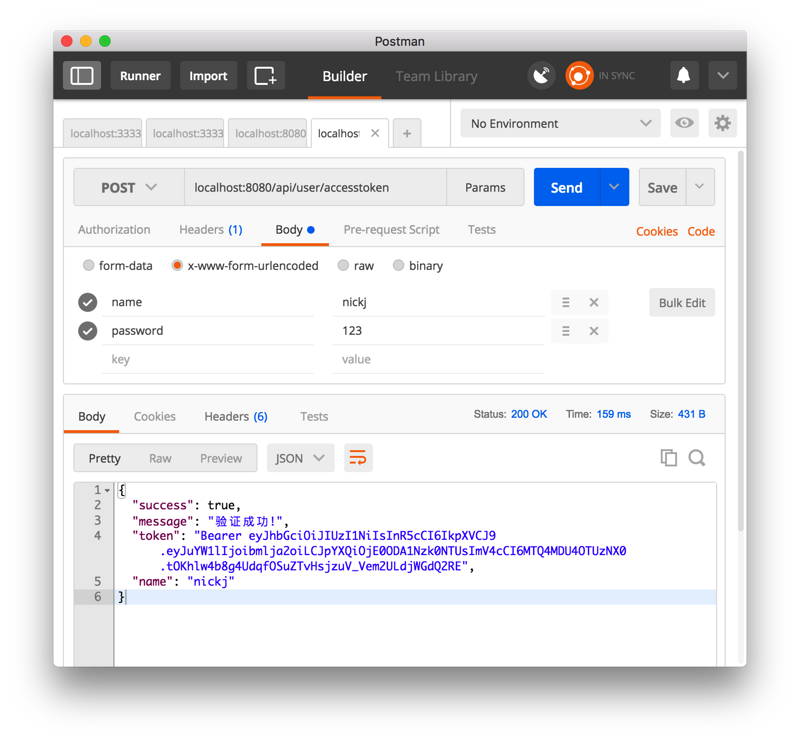
Then POST accesses [localhost: 8080/api/user/access token] () to obtain a proprietary token for my users. The POST process is related to registration, and you can see that our token value is also generated correctly.
Looking at the user information in our database, the token value is also stored in order to facilitate our subsequent authorization verification.
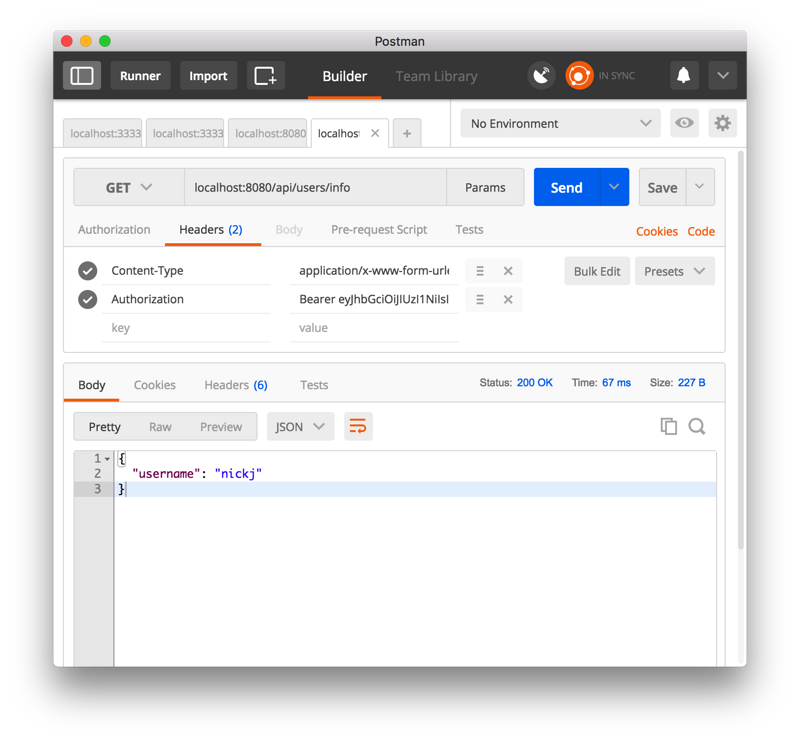
GET accesses [localhost:8080/api/users/info] (), while passing our token value in the Header as Authorization: token, and getting the user name correctly means that our access request has been validated.
If the token value is incorrect, put back Unauthorized and refuse access requests. At this point, our privilege verification function is basically realized.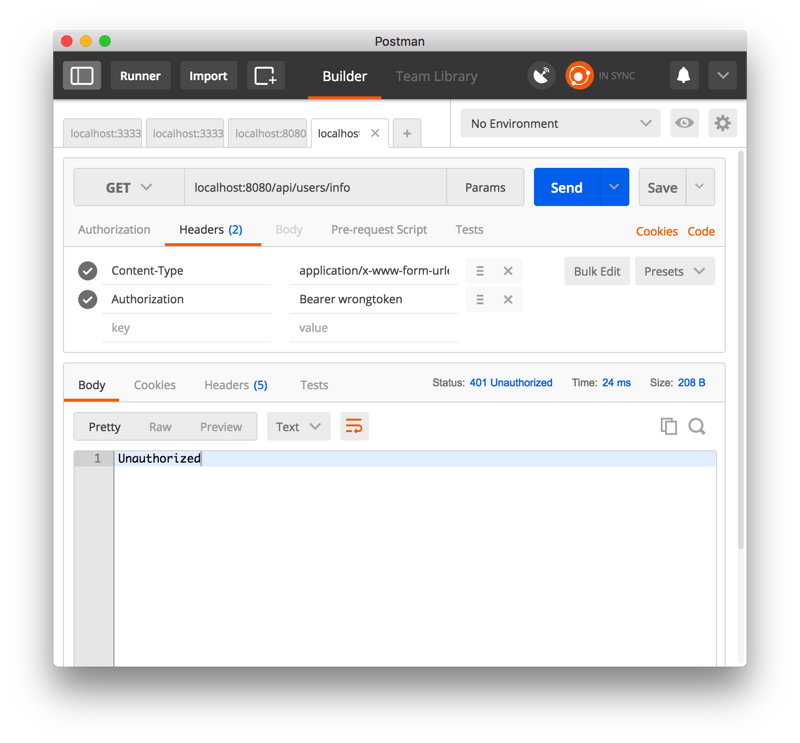
summary
I hope that after reading this tutorial, I can give you some inspiration on RESTful Api development. Young students are ignorant of learning, and what are the shortcomings in the process are also welcome to correct.