MongoDB, the representative of NoSQL, has been very popular recently. Although some functions are not perfect, it does not affect its fire.
Node.js is a JS language written in JavaScript that can run on the server side.
So, what kind of spark will the collision produce?
Today, I'll give you a simple example of how to create a new database file locally and display its contents in a browser form.
1. Preparations: The required tools IDE are WebStorm, MongoDB,Node.js.
1) First you need to download MongoDB and configure environment variables (Path points to the installation directory)
Step 1: Establish MongDB service input command mongod.exe --bind_ip 127.0.0.1 (local IP address) -- logpath "D: M_LOG mongodb.l"
L og append - dbpath, D: M_DB, port 27017, service Name, Mongod, service Display Name, Mongods, install ation
Step 2: Enter mongo from the command line into the mongoDB environment; Enter use dbtest (using dbtest as a database, if not automatically creating a new database);
Enter db.createCollection("table name") to create the table;
Enter db. table name. insert({"key1":"value1", "key2":"value2"}); create a data pool which is not a strictly meaningful database, so allow multiple different keys to exist;
Enter db. table name. find(); view the data in the table
2) Download Node.js for the next step, which automatically includes a package management tool npm.
3) Create a new Node.js Express APP project using WebStorm.
4) Place the downloaded modules in the node_moudles directory (cd node_moudles) from the command line of WebStorm as far as possible.
Enter npm install mongodb and download the modules Node.js needs to connect to MongoDB.
5) Enter npm install ejs in your own command line tool. Download ejs template;
2. Code section:
1) Find app.js in the new project directory and replace the template with ejs template
// view engine setup
app.set('views', path.join(__dirname, 'views'));
app.set('view engine', 'ejs');
3) Create three new EJS files for testing under the view folder of the project (new html file suffix changed to. ejs)app.listen(3000);
index1.ejs
<!DOCTYPE html>
<html>
<head>
    <title>my index</title>
    <link rel='stylesheet' href='/stylesheets/style.css' />
</head>
<body>
<h1>Hello World</h1>
<p>Welcome to</p>
<p><a href="login">Land</a></p>
</body>
</html><!DOCTYPE html>
<html>
<head>
<title>my login</title>
<link rel='stylesheet' href='/stylesheets/style.css' />
</head>
<body>
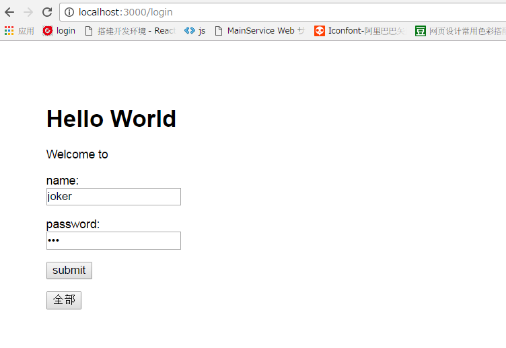
<h1>Hello World</h1>
<p>Welcome to</p>
<form action="ucenter" method="post">
<p>
<span>name:</span>
<br>
<input id="name" name="name" type="text">
</p>
<p>
<span>password:</span>
<br>
<input id="password" name="password" type="password">
</p>
<p><input type="submit" value="submit"></p>
</form>
<form action="checkall" method="get">
<input type="submit" value="whole">
</form>
</body>
</html><!DOCTYPE html>
<html>
<head>
<title>my checklist</title>
<link rel='stylesheet' href='/stylesheets/style.css' />
</head>
<body>
<%= datas %>
<br/>
<%= reason %>
<br/>
<%for(var i =0;i<datalist.length;i++){%>
<ol>
<li><%=datalist[i]._id%></li>
<li>
<%= datalist[i].name %>
<%= datalist[i].like%>
</li>
<li>
<%= datalist[i].password %>
<%= datalist[i].age%>
<%= datalist[i].info%>
</li>
</ol>
<%}%>
</body>
</html>var express = require('express');
var router = express.Router();
/*
var user = require('../bin/app2').user;
*/
var mongo = require('mongodb');// Loading mogodb module
var DB_CONN_STR = 'mongodb://localhost:27017/testdb1'; // database address
/* GET home page. Processing request information*/
router.get('/', function (req, res, next) {
res.render('index1', {title: 'index1'});
});
/* login */
router.get('/login', function (req, res) {
res.render('login', {title: 'login'});
});
/*Verify that the user exists*/
var selectData = function (db, str, callback) { // Find out if MongoDB contains the corresponding collection
//Connect to table
var collection2 = db.collection('user');
collection2.find(str).toArray(function (err, result) {
if (err) {
console.log('Error:' + err);
return;
}
callback(result);
});
}
router.post('/ucenter', function (req, res) { //Adding routing for validation requests
var query = {name: req.body.name, password: req.body.password};
mongo.connect(DB_CONN_STR, function (err, db) {
console.log("Connect successfully!");
selectData(db, query, function (result) {
if (result != 0) {
console.log(query.name + ": Landing successfully " + new Date());
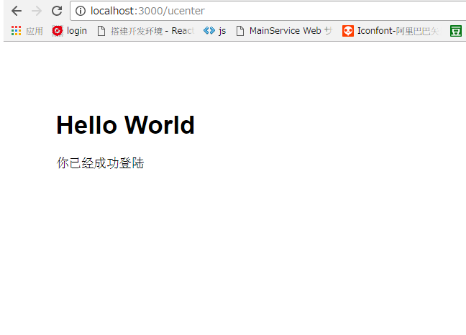
res.render('ucenter', {title: 'ucenter'});//Jump to the specified page
} else {
console.log(query.name + ": Landing failed " + new Date());
res.redirect('/');//Return to the current page
}
db.close();
})
});
});
/*Find all data*/
router.get("/checkall",function (req,res) {
mongo.connect(DB_CONN_STR,function (err,db) {
var collection = db.collection('user');
collection.find().toArray(function (err,result) {
if(err){
console.log('ERROR'+err);
res.redirect('/');
return;
}
console.log(result);
res.render('checkinfo',{
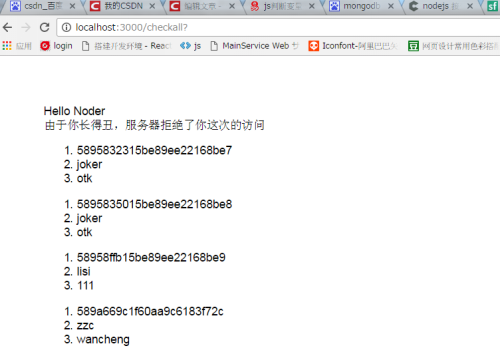
datas:"Hello Noder"
,datalist:result
,reason:"Because you are ugly, the server refused your visit."
});
db.close();
});
});
})
module.exports = router;
1) First look at the data in the MongoDB table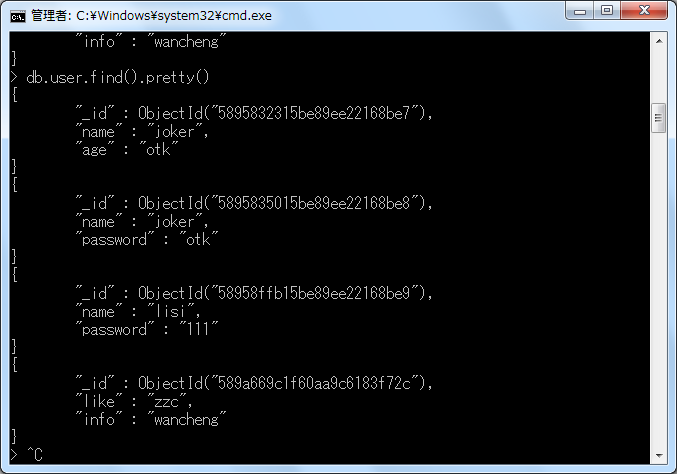
2) Login Interface
3) Successful landing
4) Page returns all data
Finally: see that it's not easy, send a project code