Article directory
- Preface:
- 1, Nginx service foundation
- 2, Nginx access control
- 3, Access control
- 3.1 install and configure DNS Service
- 3.2 test DNS resolution service
- 3.3 setting access control
- 3.4 client based access control
- 4, Nginx virtual host (three ways)
- 4.1 Nginx virtual host application
- 4.2 domain name based virtual host
- 4.3 port based virtual host
- 4.4 virtual host based on different IP
- summary
Preface:
- Among all kinds of web server software, besides Apache HTTP Server, there is also a lightweight HTTP server software - Nginx. Its stable and efficient features are gradually recognized by more and more users
- It publishes source code as a BSD like license, known for its stability, rich feature sets, sample profiles, and low system resource consumption
Its characteristics are: less memory and strong concurrency - Users of nginx websites in mainland China include Baidu, Jingdong, Sina, Netease, Tencent, Taobao, etc.
1, Nginx service foundation
1.1 overview of nginx
-
A high-performance, lightweight Web service software
High stability
Low system resource consumption
High processing power for HTTP concurrent connections
A single physical server can support 30000 ~ 50000 concurrent requests
Less memory and strong concurrency
1.2 manual compilation and installation of Nginx
- Install environment dependency package
[root@localhost ~]# yum -y install gcc gcc-c++ pcre-devel zlib-devel
.......Omit part of the content
- Create program user management nginx
[root@localhost ~]# useradd -M -s /sbin/nologin/ nginx #-M does not create home directory
- Mount shared files, compile and install Nginx
[root@localhost ~]# mount.cifs //192.168.181.1/LAMP-C7 /mnt
Password for root@//192.168.181.1/LAMP-C7:
[root@localhost ~]# cd /mnt/LNMP-C7/
[root@localhost LNMP-C7]# ls
Discuz_X3.4_SC_UTF8.zip  mysql-boost-5.7.20.tar.gz  nginx-1.12.2.tar.gz  php-7.1.10.tar.bz2  php-7.1.20.tar.gz
jdk-6u14-linux-x64.bin   ncurses-5.6.tar.gz         php-5.6.11.tar.bz2   php-7.1.20.tar.bz2  zend-loader-php5.6-linux-x86_64_update1.tar.gz
[root@localhost LNMP-C7]# tar zxvf nginx-1.12.2.tar.gz -C /opt/
...........Omit part of the content
[root@localhost LNMP-C7]# cd /opt/nginx-1.12.2/
[root@localhost nginx-1.12.2]# ./configure \
> --prefix=/usr/local/nginx \		#Specify nginx working directory
> --user=nginx \					#Specify users of nginx
> --group=nginx \					#Specify the basic group of nginx
> --with-http_stub_status_module	#Open the status statistics module of stub
......Omit part of the content
[root@localhost nginx-1.12.2]# make && make install
- Create soft link for system management
[root@localhost nginx-1.12.2]# ln -s /usr/local/nginx/sbin/nginx /usr/local/sbin/
1.3 operation control
- Check syntax
[root@localhost nginx-1.12.2]# nginx -t
nginx: the configuration file /usr/local/nginx/conf/nginx.conf syntax is ok
nginx: configuration file /usr/local/nginx/conf/nginx.conf test is successful
#The syntax of the catalog file is correct
#Profile configuration succeeded
Ps: the common operations of nginx are
nginx -t check
nginx start
Kill - 1 nginx restart
Kill - 3 nginx stop
- Add Nginx as a system service
Mode 1: use systemctl tool for management
[root@localhost nginx-1.12.2]# vim /lib/systemd/system/nginx.service
[Unit]
Description=nginx		#describe
After=network.target	#Describe service category

[Service]
Type=forking			#Background operation situation
PIDFile =/usr/local/nginx/logs/nginx.pid	#PID file location '
ExecStart=/usr/local/nginx/sbin/nginx		#Startup service
ExecReload=/usr/bin/kill -S HUP $MAINPID	#Overload configuration according to PID
ExecStop=/usr/bin/kill -S QUIT $MAINPID		#Terminate process according to PID
PrivateTmp=true

[Install]
WantedBy=multi-user.target
[root@localhost nginx-1.12.2]# chmod 754 /lib/systemd/system/nginx.service		#Setting 754 permission is a security optimization
Method 2: add service tool for management
vim /etc/init.d/nginx
#!/bin/bash
# chkconfig: - 99 20
# description: Nginx Service Control Script
PROG="/usr/local/nginx/sbin/nginx"
PIDF="/usr/local/nginx/logs/nginx.pid"
case "$1" in
   start)
   $PROG
   ;;
   stop)
   kill -s QUIT $(cat $PIDF)
   ;;
   restart)
   $0 stop
   $0 start
   ;;
   reload)
   kill -s HUP $(cat $PIDF)
   ;;
   *)
       echo "Usage: $0 {start|stop|restart|reload}"
       exit 1
esac
exit 0
Add execution permission, add script file to service list
[root@localhost nginx-1.12.2]# cd /etc/init.d
[root@localhost init.d]# chmod +x nginx
[root@localhost init.d]# chkconfig --add nginx
[root@localhost init.d]# chkconfig --level 35 nginx on #Boot from boot
[root@localhost init.d]# service nginx start
2, Nginx access control
2.1 profile introduction
- Global configuration
[root@localhost init.d]# vim /usr/local/nginx/conf/nginx.conf
#user nobody;					#Running user
worker_ processes 1;			#Number of working operations
#error_ log logs/error.log;		#Location of the error log file
#pid logs/nginx.pid;			#Location of PID files
- I/O event configuration
events {
       worker_connections  1024;      #1024 connections per process
}
- HTTP configuration
http {
    include       mime.types;
    default_type  application/octet-stream;

    #log_format  main  '$remote_addr - $remote_user [$time_local] "$request" '
    #                  '$status $body_bytes_sent "$http_referer" '
    #                  '"$http_user_agent" "$http_x_forwarded_for"';

    #access_log  logs/access.log  main;   #Access log location

    sendfile        on;                  #Support file sending (download)
    #tcp_nopush     on;

    #keepalive_timeout  0;
    keepalive_timeout  65;              #Connection hold timeout
    #gzip  on;

    server {   //Monitoring configuration of web server
        listen       80;               #Monitor port
        server_name  localhost;        #domain name

        #charset koi8-r;         #Default character set for web pages

        #access_log  logs/host.access.log  main;

        location / {
            root   html;
            index  index.html index.htm;
        }

        #error_page  404              /404.html;

        # redirect server error pages to the static page /50x.html
        #
        error_page   500 502 503 504  /50x.html;
        location = /50x.html {
        root   html;
        }
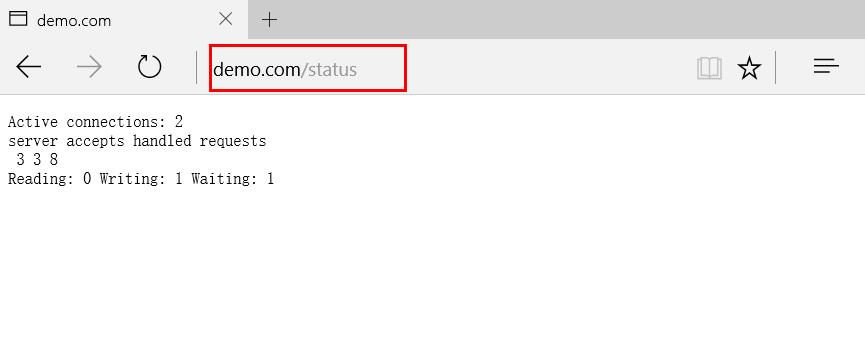
2.2 access status statistics
-
Status statistics module:
① nginx has built-in http ﹣ stub ﹣ status statistics module to feed back the current Web access situation. When configuring compilation parameters, you can add -- with HTTP ﹣ stub ﹣ status ﹣ module to enable the module support.
② You can use the command: / usr/local/nginx/sbin/nginx -V to see if the installed Nginx contains the http_stub_statusmodule.
③ In order to use the state statistics function of Nginx, in addition to enabling the built-in module, you need to modify the nginx.conf configuration file, specify the access location and add the stub_status configuration code.
-
Modify nginx main configuration file
#Search / server to modify three modules
server {
        listen       80;                #Monitor port
        server_name  www.test.com;      #1. Modify listening domain name

        charset utf-8;   				#2. Modify character set

        #access_log  logs/host.access.log;

        location / {
            root   html;
            index  index.html index.htm;
        }
        #3. Add a section of location /status status statistics function
        location /status {
            stub_status on;
            access_log off;
        }
}
#Note the scope of the brace overview when adding configuration information
- Restart service
[root@localhost init.d]# service nginx stop
[root@localhost init.d]# service nginx start
3, Access control
3.1 install and configure DNS Service
- Install bind package
yum -y install bind
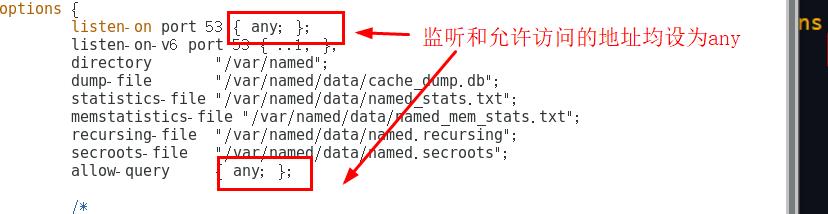
- Modify global profile
vim /etc/named.conf
- Modify zone profile
vim /etc/named.rfc1912.zones
#Add the following
zone "demo.com" IN {
        type master;
        file "demo.com.zone";
        allow-update { none; };
};
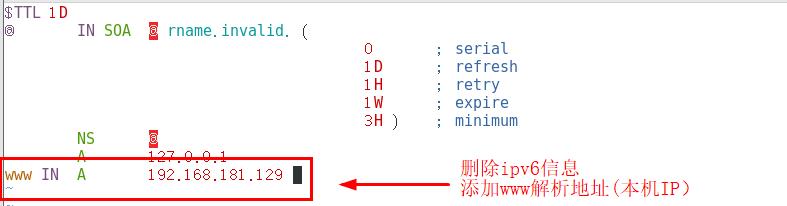
- Modify area data profile
[root@localhost named]# cp -p named.localhost demo.com.zone
[root@localhost named]# vim demo.com.zone
- Startup service
[root@localhost named]# systemctl start named
3.2 test DNS resolution service
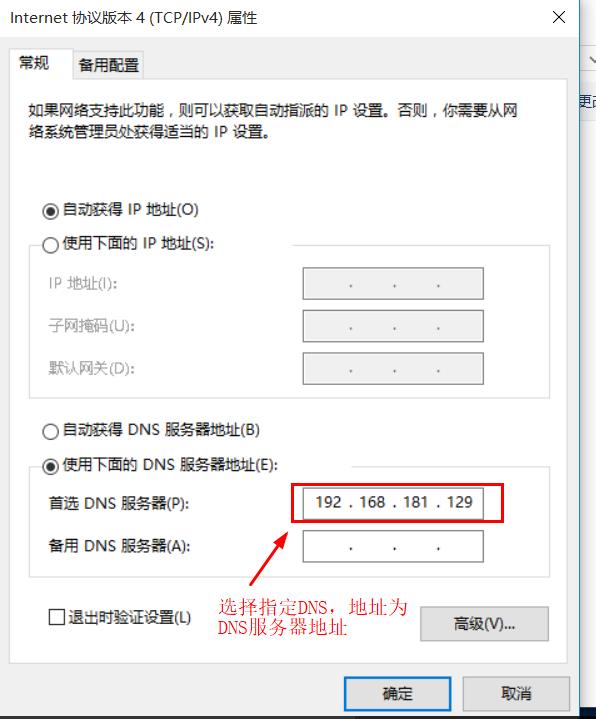
-
Modify win10 virtual machine network configuration
-
Try address resolution
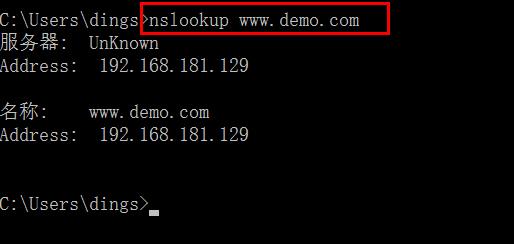
-
Test with browser
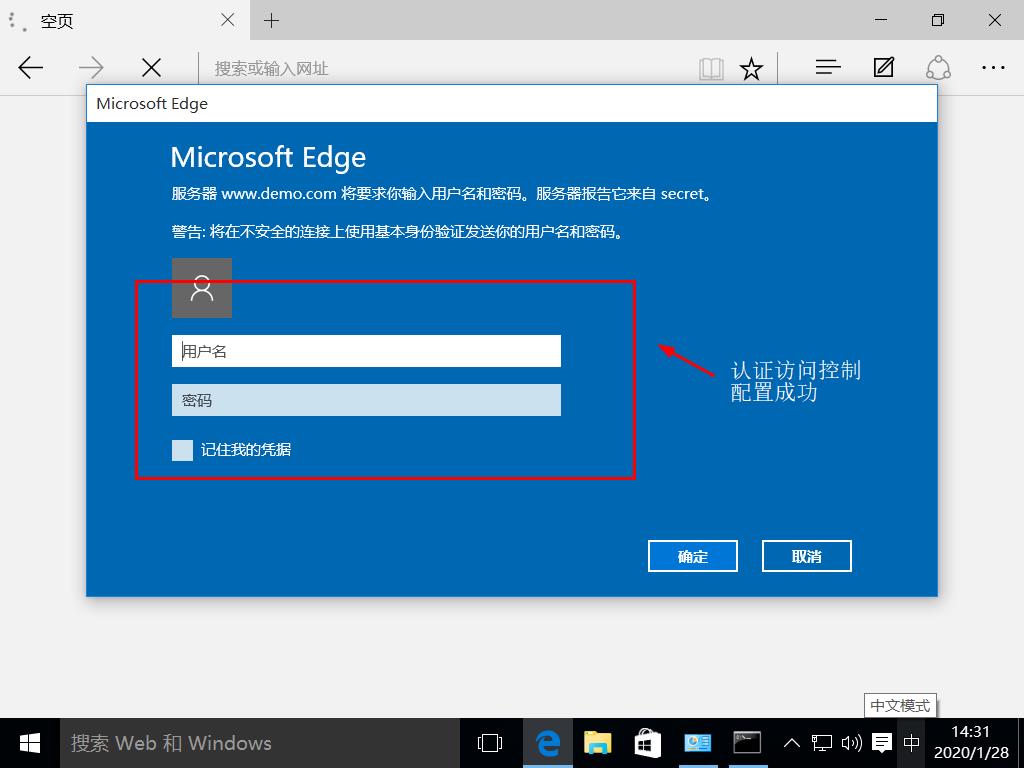
3.3 setting access control
-
Authorization based access control
Like Apache, Nginx can implement access control based on authorization. When the client wants to visit the website, it will require the user name and password to access it normally. The configuration steps are basically the same as Apache.
Authorization based access control configuration ideas:
- Generate user password authentication file
- Modify the main configuration file to the corresponding directory, and add the authentication configuration item
- Restart service, access test
3.3.1 modify main configuration file
- Modify the main configuration file nginx.conf and add the authentication configuration item
        location / {
            auth_basic "secret";		#Add authentication to home configuration item
            auth_basic_user_file /usr/local/nginx/passwd.db;			 #Add authentication to home configuration item
            root   html;
            index  index.html index.htm;
        }
c
- Install tools package
yum install httpd-tools -y
- Using htpasswd command to generate user authentication file
[root@localhost conf]# htpasswd -c /usr/local/nginx/passwd.db test01
New password:
Re-type new password:
Adding password for user test01
The user name and password of the above specified authentication are created
- Restart service
[root@localhost conf]# service nginx restart
3.3.2 test access control
3.4 client based access control
-
Determine whether to allow access to the page through the client IP address
-
Configuration rules
deny IP/IP segment: deny access to a client of an IP or IP network segment
allow IP/IP segment: allows client access to an IP or IP segment
The rule is executed from top to bottom. If the match is met, it will stop and will not continue to match from bottom
-
Configuration rules
Modify the main configuration file and add corresponding configuration items
        location / {
            deny 192.168.181.128;	#Access denied to 181.128 host (this is IP of win10 virtual machine)
            allow all;				#Allow all clients access
            auth_basic "secret";
            auth_basic_user_file /usr/local/nginx/passwd.db;
            root   html;
            index  index.html index.htm;
        }
- Restart Nginx
[root@localhost conf]# service nginx stop
[root@localhost conf]# service nginx start
- Using win10 virtual machine authentication
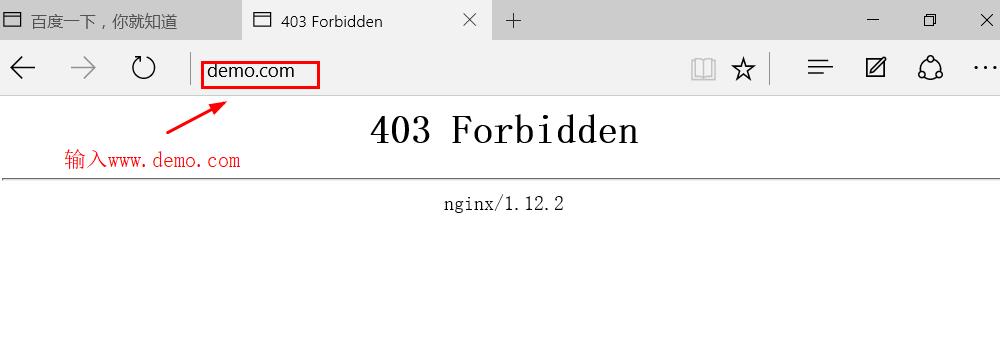
Summary: in the client based access control, although the root configuration item is configured to deny win10 access and allow all hosts to access, when the system detects, it will not match again from top to bottom after matching.
4, Nginx virtual host (three ways)
4.1 Nginx virtual host application
-
Domain name based virtual host
-
IP based virtual host
-
Port based virtual host
It is implemented in the configuration section of the main configuration file "server {}"
4.2 domain name based virtual host
Environment: manually compile and install Nginx, install and configure DNS Service
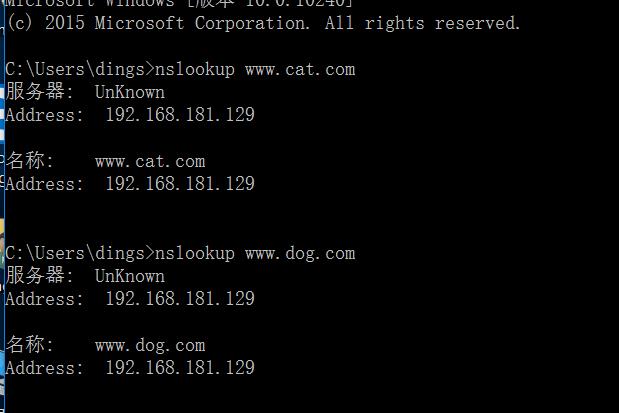
4.2.1 configure DNS
[root@localhost conf]# vim /etc/named.conf
options {
        listen-on port 53 { any; };		#Modified to any
        listen-on-v6 port 53 { ::1; };
        directory       "/var/named";
        dump-file       "/var/named/data/cache_dump.db";
        statistics-file "/var/named/data/named_stats.txt";
        memstatistics-file "/var/named/data/named_mem_stats.txt";
        recursing-file  "/var/named/data/named.recursing";
        secroots-file   "/var/named/data/named.secroots";
        allow-query     { any; };		#Modified to any

[root@localhost conf]# vim /etc/named.rfc1912.zones
zone "dog.com" IN {
        type master;
        file "dog.com.zone";
        allow-update { none; };
};

zone "cat.com" IN {
        type master;
        file "cat.com.zone";
        allow-update { none; };
};
#Add the above two pieces of information. Because the virtual host is configured based on the domain name, two domain names are required.
[root@localhost named]# mv named.localhost dog.com.zone
[root@localhost named]# cat dog.com.zone
$TTL 1D
@	IN SOA	@ rname.invalid. (
					0	; serial
					1D	; refresh
					1H	; retry
					1W	; expire
					3H )	; minimum
	NS	@
	A	127.0.0.1
www IN	A	192.168.181.129		#Delete ipv6 address, add native address
[root@localhost named]# cp -p dog.com.zone cat.com.zone
[root@localhost named]# ls
cat.com.zone  dog.com.zone  named.ca     named.localhost  slaves
data          dynamic       named.empty  named.loopback
[root@localhost named]# systemctl stop firewalld.service
[root@localhost named]# setenforce 0
[root@localhost named]# systemctl restart named
#Turn off firewall, enhance security function, turn on Service
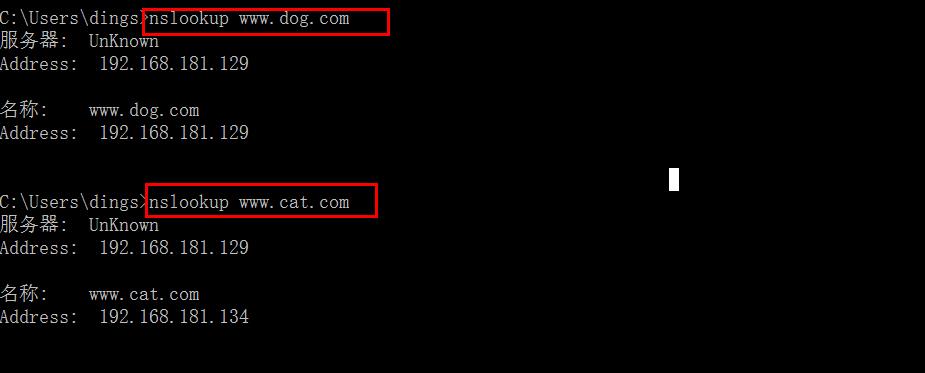
-
Use win10 to resolve DNS domain name
4.2.2 configuration steps of virtual host based on domain name
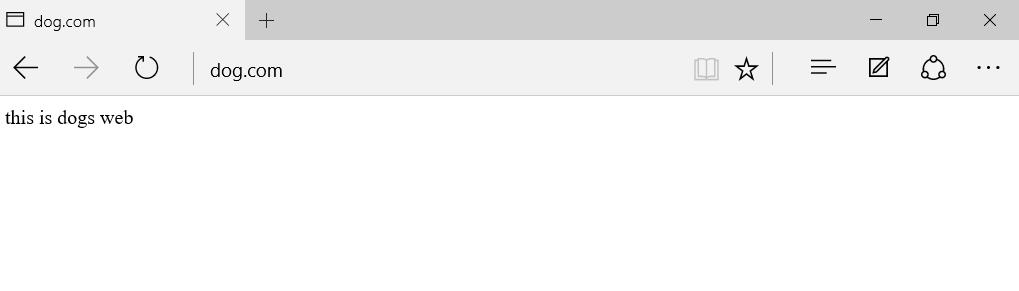
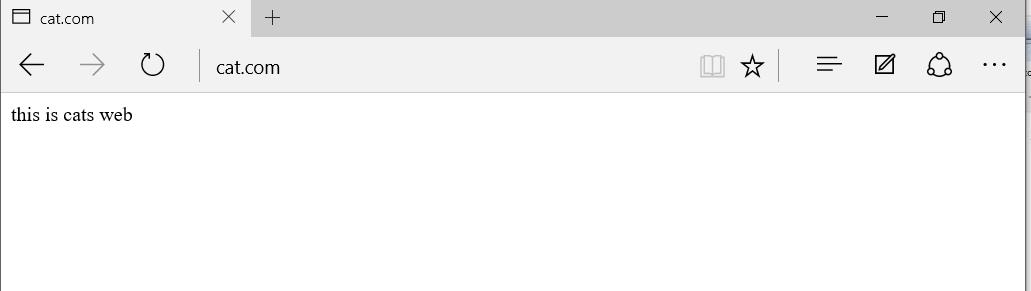
- ① Prepare website directory and test files
[root@localhost ~]# mkdir -p /var/www/html/dog
[root@localhost ~]# mkdir -p /var/www/html/cat
[root@localhost ~]# cd /var/www/html
[root@localhost html]# ls
cat  dog
[root@localhost html]# echo "this is dogs web" > dog/index.html
[root@localhost html]# echo "this is cats web" > cat/index.html
- ② Edit nginx main profile
server {
        listen       80;
        server_name  www.dog.com;	#Change localhost to www.dog.com
        charset utf-8;				#Open character set, change to utf-8
        access_log  logs/www.dog.com.access.log;	#Open the access log, add www.dog.com, and delete "main"
        location / {
            root   /var/www/html/dog;	#The homepage file of the site points to the file directory just created
            index  index.html index.htm;
        }
        error_page   500 502 503 504  /50x.html;
        location = /50x.html {			#Error message 50X
            root   html;				#Error message from site html (relative path of nginx working directory)
        }
    }

#Copy the above information, paste it and make simple modifications
server {
        listen       80;
        server_name  www.cat.com;		#Modify domain name
        charset utf-8;					#character set
        access_log  logs/www.cat.com.access.log;	#Access log name changed to www.cat.com
        location / {
            root   /var/www/html/cat;	#Site home page points to cat file directory
            index  index.html index.htm;
        }
        error_page   500 502 503 504  /50x.html;
        location = /50x.html {
            root   html;
        }
[root@localhost conf]# nginx -t		#Verification syntax
nginx: the configuration file /usr/local/nginx/conf/nginx.conf syntax is ok
nginx: configuration file /usr/local/nginx/conf/nginx.conf test is successful
[root@localhost conf]# service nginx restart	#Restart service
- ③ Verify that different domain names can be used for access
4.3 port based virtual host
- ① Create 8080 port test web page
[root@localhost conf]# mkdir -p /var/www/html/cat8080
[root@localhost conf]# echo "this is cats 8080 web" > /var/www/html/cat8080/index.html
[root@localhost conf]# cat /var/www/html/cat8080/index.html
this is cats 8080 web- ② Modify the nginx main configuration file and only the listening port
    server {
        listen       192.168.181.129:80;	#Modify listening address
        server_name  www.cat.com;
        charset utf-8;
        access_log  logs/www.cat.com.access.log;
        location / {
            root   /var/www/html/cat;
            index  index.html index.htm;
        }
        error_page   500 502 503 504  /50x.html;
        location = /50x.html {
            root   html;
        }
}
#Copy the above information and modify some contents
    server {
        listen       192.168.181.129:8080;	#Modify listening port
        server_name  www.cat.com;
        charset utf-8;
        access_log  logs/www.cat8080.com.access.log;	#Modify access log file name
        location / {
            root   /var/www/html/cat8080;	#Modify the file directory name of the site Homepage
            index  index.html index.htm;
        }
        error_page   500 502 503 504  /50x.html;
        location = /50x.html {
            root   html;
        }
}
-------->wq
[root@localhost conf]# nginx -t		#Check syntax
nginx: the configuration file /usr/local/nginx/conf/nginx.conf syntax is ok
nginx: configuration file /usr/local/nginx/conf/nginx.conf test is successful
[root@localhost conf]# service nginx stop
[root@localhost conf]# service nginx start
#Restart service
[root@localhost conf]# netstat -natp | grep nginx
tcp        0      0 192.168.181.129:8080    0.0.0.0:*               LISTEN      6017/nginx: master
tcp        0      0 192.168.181.129:80      0.0.0.0:*               LISTEN      6017/nginx: master
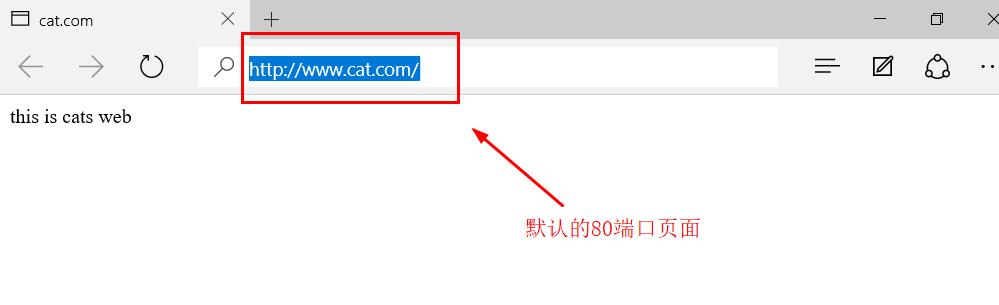
-
Access two different ports for authentication

4.4 virtual host based on different IP
- ① Add network card, modify domain name and IP
Environmental Science:
www.dog.com 192.168.181.129
www.cat.com 192.168.181.134
- Modify DNS zone data profile
[root@localhost conf]# cd /var/named
[root@localhost named]# vim cat.com.zone
www IN  A       192.168.181.134		#Change IP to 192.168.181.134
- Restart DNS Service
[root@localhost named]# systemctl restart named
- ② Modify nginx main configuration file
·   server {
        listen       192.168.181.134:80; #Just change the listening address (ens36)
        server_name  www.cat.com;
        charset utf-8;
        access_log  logs/www.cat.com.access.log;
        location / {
            root   /var/www/html/cat;
            index  index.html index.htm;
        }
        error_page   500 502 503 504  /50x.html;
        location = /50x.html {
            root   html;
        }
}

    server {
        listen       192.168.181.129:80;	#Address to ens33
        server_name  www.dog.com;
        charset utf-8;
        access_log  logs/www.dog.com.access.log;
        location / {
            root   /var/www/html/dog;
            index  index.html index.htm;
        }
        error_page   500 502 503 504  /50x.html;
        location = /50x.html {
            root   html;
        }
    }
------->wq
[root@localhost conf]# nginx -t
nginx: the configuration file /usr/local/nginx/conf/nginx.conf syntax is ok
nginx: configuration file /usr/local/nginx/conf/nginx.conf test is successful
- Restart service
[root@localhost conf]# service nginx stop
[root@localhost conf]# service nginx start
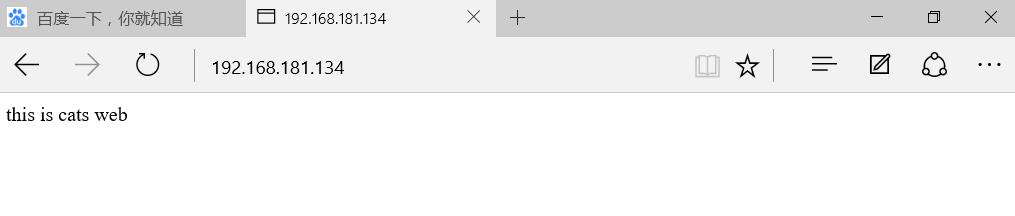
-
Verify DNS resolution and web page
Visit 192.168.181.129 and 192.168.181.134 by browser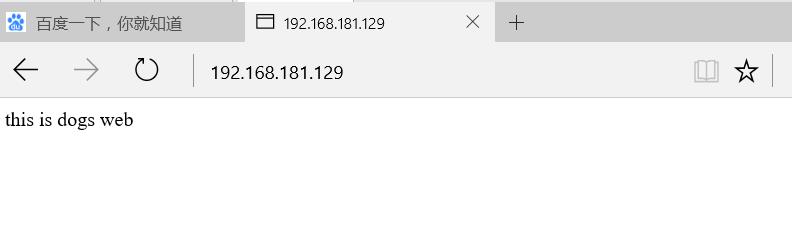
summary
Note: before modifying the configuration file in the current network environment, it is better to back up the configuration file. If the modification is wrong, it is quite troublesome to restore. When modifying and adding content in the configuration file, you must pay attention to the location range of "}". After configuration, check the syntax and start the service.

