Operation steps
1. Install nginx
[root@localhost ~]# yum -y install pcre-devel zlib-devel gcc gcc-c++ make
[root@localhost ~]# useradd -M -s /sbin/nologin nginx
[root@localhost opt]# cd nginx-1.12.0/
[root@localhost nginx-1.12.0]# ./configure \
> --prefix=/usr/local/nginx \
> --user=nginx \
> --group=nginx \
> --with-http_stub_status_module
[root@localhost nginx-1.12.0]# make && make install
[root@localhost nginx-1.12.0]# ln -s /usr/local/nginx/sbin/nginx /usr/local/sbin/
[root@localhost ~]# cd /etc/init.d/
[root@localhost init.d]# vim nginx
#!/bin/bash
#chkconfig: 35 99 20
#descripton:Nginx Service Control Script
cmd="/usr/local/nginx/sbin/nginx"
pid="/usr/local/nginx/logs/nginx.pid"
case $1 in
start)
$cmd
;;

stop)
kill -3 `cat $pid`
;;

restart)
$0 stop
$0 start
;;

reload)
kill -1 `cat $pid`
;;

*)
echo "please input start,stop,reload,restart:"
exit 0
;;
esac
exit 1
[root@localhost init.d]# chmod +x nginx
[root@localhost init.d]# chkconfig --add nginx
2. Hide version number
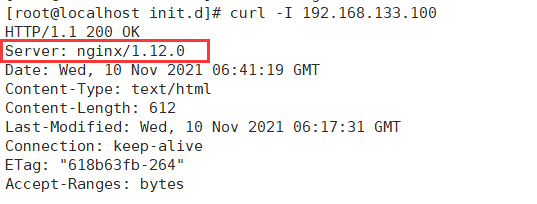
[root@localhost init.d]# service nginx start
[root@localhost init.d]# curl -I 192.168.133.100
HTTP/1.1 200 OK
Server: nginx/1.12.0
Date: Wed, 10 Nov 2021 06:41:19 GMT
Content-Type: text/html
Content-Length: 612
Last-Modified: Wed, 10 Nov 2021 06:17:31 GMT
Connection: keep-alive
ETag: "618b63fb-264"
Accept-Ranges: bytes
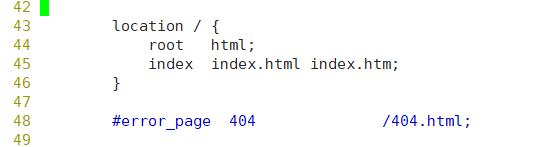
[root@localhost init.d]# vim /usr/local/nginx/conf/nginx.conf


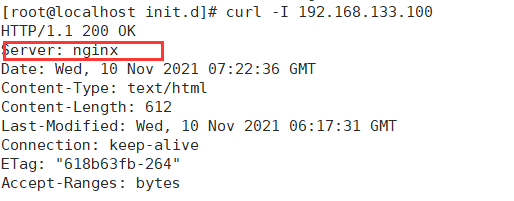
[root@localhost init.d]# service nginx restart
[root@localhost init.d]# curl -I 192.168.133.100
HTTP/1.1 200 OK
Server: nginx
Date: Wed, 10 Nov 2021 07:22:36 GMT
Content-Type: text/html
Content-Length: 612
Last-Modified: Wed, 10 Nov 2021 06:17:31 GMT
Connection: keep-alive
ETag: "618b63fb-264"
Accept-Ranges: bytes
[root@localhost init.d]# vim /opt/nginx-1.12.0/src/core/nginx.h

Change to

[root@localhost init.d]# cd /opt/nginx-1.12.0/
[root@localhost nginx-1.12.0]# ./configure \
> --prefix=/usr/local/nginx \
> --user=nginx \
> --group=nginx \
> --with-http_stub_status_module
[root@localhost nginx-1.12.0]# make && make install

Change to

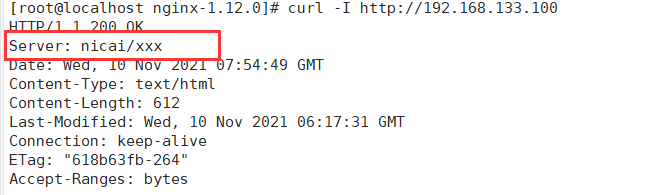
[root@localhost nginx-1.12.0]# service nginx restart
[root@localhost nginx-1.12.0]# curl -I http://192.168.133.100
3. Modify users and groups
[root@localhost init.d]# service nginx start
[root@localhost init.d]#  ps aux |grep nginx

[root@localhost conf]# useradd -s /sbin/nologin zhy
[root@localhost init.d]# cd /usr/local/nginx/conf/
[root@localhost conf]# vim nginx.conf

The second line should read

[root@localhost conf]# service nginx restart
[root@localhost conf]# ps aux |grep zhy
zhy       47188  0.0  0.0  23028  1384 ?        S    16:02   0:00 nginx: worker process
root      47190  0.0  0.0 112660   972 pts/0    S+   16:02   0:00 grep --color=auto zhy
4. Modify cache time
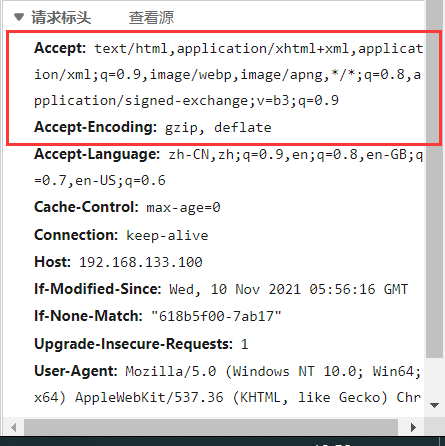
When nginx returns the web page data to the client, it can set the cache time to facilitate the direct return when requesting the same content in the future, avoid repeated requests and speed up the access speed. Generally, it is set for static web pages, and the cache time is not set for dynamic web pages.
[root@localhost conf]# vim nginx.conf
Add this paragraph here, 1d=1 day = 86400 seconds

[root@localhost conf]# nginx -t
nginx: the configuration file /usr/local/nginx/conf/nginx.conf syntax is ok
nginx: configuration file /usr/local/nginx/conf/nginx.conf test is successful
[root@localhost conf]# service nginx restart
The view on the web page has been changed successfully
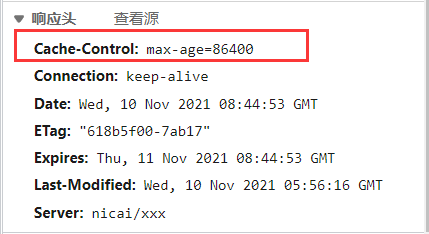
Cahce control: Max age = 86400 indicates that the cache time is 86400 seconds, that is, the cache time of one day
Time, within a day, the browser accesses this page with the data in the cache without having to re register to the Nginx server
New requests are issued, reducing the bandwidth used by the server.
5. Log cutting
As the running time of Nginx increases, the logs generated will gradually increase. In order to facilitate the operation of Nginx
Status, you need to pay attention to the Nginx log file at all times. Too large log files are a disaster for monitoring and are not easy to analyze
For troubleshooting, log files need to be cut regularly.
Need to write script
[root@localhost nginx]# cd logs
[root@localhost logs]# ls
access.log  error.log  nginx.pid
[root@localhost logs]# vim log.sh
#!/bin/bash
d=`date +%F -d -1day`
path="/var/log/nginx"
pid="/usr/local/nginx/logs/nginx.pid"
[ -d $path ] || mkdir -p $path
mv /usr/local/nginx/logs/access.log ${path}/192.168.133.100-$d
kill -USR1 $(cat $pid)
find $path -mtime +30 -delete
[root@localhost logs]# chmod +x log.sh
[root@localhost logs]# bash log.sh
[root@localhost nginx]# ls
192.168.133.100-  192.168.133.100-2021-11-09
6. Connection timeout setting
The HTTP service has a KeepAlive mode, which tells the web server to keep the TCP connection open after processing a request. If other requests from the same client are received, the server will make use of the unclosed connection without establishing a connection again
KeepAlive is kept open for a period of time. They will occupy resources during this period. Excessive occupation will affect the performance of the server
In the enterprise website, in order to avoid the same customer occupying the connection for a long time and causing a waste of resources, the corresponding connection can be set
Connect the timeout parameter to control the connection access time. You can modify the configuration file nginx.conf to set keepalive_timeout
Timeout.
[root@localhost conf]# vim //usr/local/nginx/conf/nginx.conf

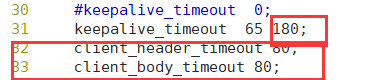
Change and add
[root@localhost conf]# nginx -t
nginx: the configuration file /usr/local/nginx/conf/nginx.conf syntax is ok
nginx: configuration file /usr/local/nginx/conf/nginx.conf test is successful
Specify the timeout of KeepAlive. Specify how long each tcP connection can last. The server will close the connection after this time.
The default value of Nginx is 65 seconds. Some browsers only hold it for 60 seconds at most, so it can be set to 60 seconds. If it is set to 0, keepalive connection is disabled.
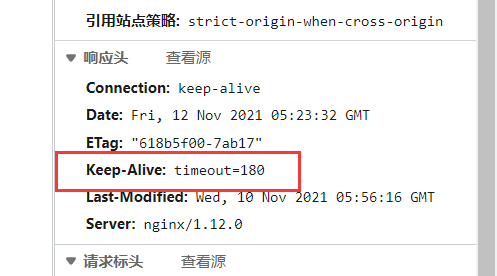
The second parameter (optional) specifies the time value 3 in the response header keep alive: timeout = time. This header enables some browsers to actively close the connection, so that the service tag does not have to close the connection. Without this parameter, Nginx will not send the keep alive response header.
Syntax client_header_timeout time
The default value is 60s
Context http server (which can be placed in http block and server block)
Description specifies the timeout for waiting for the client to send a request header (for example: GET / HTTP/1.1). Only if the request header is not received in one read,
If the client does not send anything within the timeout period, nginx returns the HTTP status code 408 ("Request timed out")
Syntax client_body_timeout time
The default value is 60s
Context http server location
Description this instruction sets the read timeout of the request body. Only if the request body is not obtained in one readstep,
After the timeout, nginx returns the HTTP status code 408 ("Request timed out")
7. Number of change request processes
In the high concurrency scenario, more Nginx processes need to be started to ensure fast response, to process user requests and avoid blocking
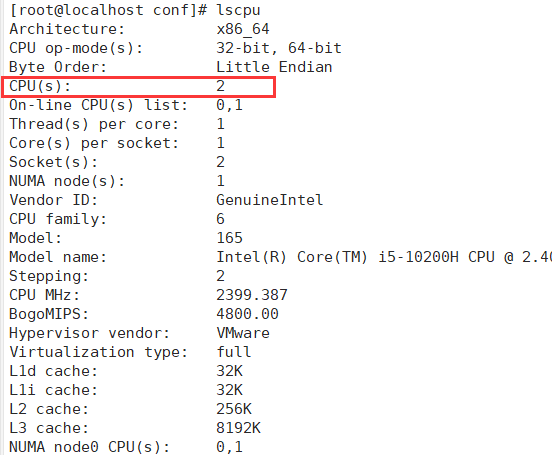
[root@localhost conf]# lscpu
[root@localhost conf]# ps aux|grep nginx

[root@localhost conf]# ! vim run last vim program
vim nginx.conf

Set to the number of CPU s on your machine

[root@localhost conf]# nginx -t
nginx: the configuration file /usr/local/nginx/conf/nginx.conf syntax is ok
nginx: configuration file /usr/local/nginx/conf/nginx.conf test is successful
[root@localhost conf]# service nginx restart
[root@localhost conf]# ps aux|grep nginx

Modify the worker_processes parameter of the configuration file of Nginx, which is generally set to the number of CPU s or cores,
In the case of high concurrency, it can be set to twice the number of CPUs or cores. You can view the number of cores of the CPU to determine the parameters
root@localhost conf]#vim /usr/local/nginx/conf/nginx.conf
worker_processes 4;
worker_cpu_affinity 01 10 0100 1000;
#Set each process to be processed by different CPUs. When the number of processes is set to 4, 0001 0010 0100 1000
8. Web page compression
The ngx_http_gzip_module compression module of Nginx provides the function of file content compression
The Nginx server is allowed to compress the output content before sending it to the client, so as to save the website bandwidth and improve the user's access experience. It is installed by default. Corresponding compression function parameters can be added to the configuration file to optimize the compression performance
gzip on:open gzip compression out;
gzip_min_length 1k:Used to set the minimum number of bytes allowed to compress the page;
gzip_buffers 4 16k:16 for 4 units k The memory of is cached as the compressed result stream. The default value is
 It is to apply for memory space with the same size as the original data for storage gzip Compression results;
Zip_http_version 1.0:Used to set identification http Protocol version. The default is 1.1,Most of the current browsing
 Device already supported gzip Decompression, but the processing is the slowest and consumes more servers CPU resources;
Gzip_comp_level 2:Used to specify gzip Compression ratio: 1. The compression ratio is the smallest and the processing speed is the fastest; 9
 The transmission speed is faster than the maximum, but the processing speed is the slowest. Use the default;
Gzip_vary on:Option allows the front-end cache server to cache through gzip Compressed pages
Gzip_types text/plain:The compression type is to enable the compression function for which web documents;
[root@localhost conf]# vim ,usr/local/nginx/conf/nginx.conf
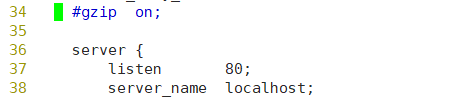
Uncomment and add

[root@localhost conf]# nginx -t
nginx: the configuration file /usr/local/nginx/conf/nginx.conf syntax is ok
nginx: configuration file /usr/local/nginx/conf/nginx.conf test is successful
[root@localhost conf]# service nginx restart
9. Anti theft chain
In the enterprise website service, it is generally necessary to configure the anti-theft chain function to prevent the website content from being illegally embezzled and causing economic losses
Loss and unnecessary bandwidth waste are avoided. Nginx's anti-theft chain function is also very powerful. By default, only
To carry out a very simple configuration, the anti-theft chain processing can be realized.
~* .(jpg|gif|swf)
:
this
paragraph
just
be
surface
reach
type
surface
show
Horse
match
no
area
branch
large
Small
write
,
with
.
j
p
g
or
.
g
i
f
or
.
s
w
f
junction
tail
of
writing
piece
V
a
l
i
d
r
e
f
e
r
e
r
s
:
set up
Set
letter
let
of
network
station
,
can
with
just
often
send
use
chart
slice
.
N
o
n
e
:
Liu
View
implement
in
r
e
f
e
r
e
r
by
empty
of
feeling
condition
,
Just
yes
straight
meet
stay
Liu
View
implement
interview
ask
chart
slice
.
B
l
o
c
k
e
d
:
r
e
f
e
r
e
r
no
by
empty
of
feeling
condition
,
but
yes
value
cover
generation
reason
or
Guard against
fire
wall
Delete
except
Yes
,
this
some
value
no
with
h
t
t
p
:
/
/
or
h
t
t
p
s
:
/
/
open
head
.
after
noodles
of
network
site
or
person
field
name
:
r
e
f
e
r
e
r
in
package
contain
mutually
shut
word
symbol
strand
of
network
site
.
I
f
language
sentence
:
as
fruit
chain
meet
of
come
source
field
name
no
stay
v
a
l
i
d
r
e
f
e
r
e
r
s
place
column
Out
of
column
surface
in
,
: this regular expression indicates matching files that are not case sensitive and end in. jpg or. gif or. swf. Valid_referers: set trusted websites to use pictures normally. None: if the referer in the browser is empty, the pictures can be accessed directly in the browser. Blocked: if the referer is not empty, but the values are deleted by the proxy or firewall, these values are not marked with HT TP: / / or https: / /. The following web address or domain name: the web address containing the relevant string in the referer. If statement: if the source domain name of the link is not in the list listed by valid_referers,
: this regular expression means to match files that are not case sensitive and end in. jpg or. gif or. swf. Validator:: References: set up trusted websites and use pictures normally. None: if the referer in the browser is empty, you can directly access the picture in the browser. Blocked: the referer is not empty, but the values are deleted by the proxy or firewall. These values do not start with http: / / or https: / /. The following URL or domain name: the URL containing the relevant string in the referer. If statement: if the source domain name of the link is not in the list listed by validr} eferers, it is invalid_referer is
1, perform the following operations, that is, rewrite or return to page 403.
Find a new machine
[root@localhost ~]# systemctl stop firewalld
[root@localhost ~]# setenforce 0
[root@localhost ~]# yum install -y httpd
[root@localhost ~]# cd /var/www/html/
[root@localhost html]# ls
[root@localhost html]# vim index.html

[root@localhost html]# vim /etc/hosts

[root@localhost html]# systemctl start httpd

Input on host
[root@localhost html]# vim index.html


Add the following paragraph

Add an error diagram to the web page
[root@localhost html]# ls
123.jpg  50x.html  error.png  index.html
So that others can no longer steal the pictures on your web page