I. Installation.Net Core
Refer to official documents: https://www.microsoft.com/net/core#linuxcentos
1. Add dotnet product Feed
Before installing.NET Core, you need to register for Microsoft Product Feed. This only needs to be done once. First, register the Microsoft signature key, then add the Microsoft product Feed
sudo rpm --import https://packages.microsoft.com/keys/microsoft.asc
sudo sh -c 'echo -e "[packages-microsoft-com-prod]\nname=packages-microsoft-com-prod \nbaseurl=https://packages.microsoft.com/yumrepos/microsoft-rhel7.3-prod\nenabled=1\ngpgcheck=1\ngpgkey=https://packages.microsoft.com/keys/microsoft.asc" > /etc/yum.repos.d/dotnetdev.repo'
2. Install.NET Core SDK
sudo yum update
sudo yum install libunwind libicu
sudo yum install dotnet-sdk-2.0.0
Run the command after
dotnet --info
You can see if the installation was successful. The.Net Core installation is now complete.
Of course, you can also install using decompression. reach https://www.microsoft.com/net/download/linux Download the sdk package for centos7 and unzip it to a custom installation path.
sudo mkdir -p /opt/dotnet && sudo tar zxf dotnet.tar.gz -C /opt/dotnet
# You can set up environment variables or make soft links in the following way, because/usr/local/bin is included in $PATH by default
sudo ln -s /opt/dotnet/dotnet /usr/local/bin
# Run to view installation results later
dotnet --info
2. Compile Running Projects
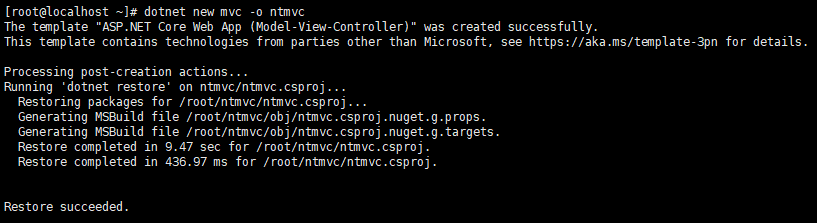
1. Create a new mvc project
dotnet new mvc -o ntmvc
As shown in the following figure:
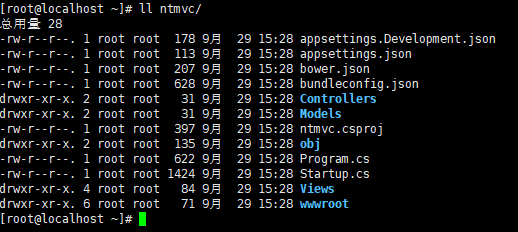
Looking at the ntmvc folder, you can see that a template for an mvc project has been built as follows:
2. Modify the Startup.cs file
You can use vscode to modify files directly from remote computers or virtual machines for reference http://www.cnblogs.com/learn21cn/p/6189023.html
Since nginx is later used to set up the reverse proxy, modify the code in the Startup.cs file here to add a reference to using Microsoft.AspNetCore.HttpOverrides;
Then add a piece of code to the Configure method of the Startup.cs file (see the complete Startup.cs file below):
using System;
using System.Collections.Generic;
using System.Linq;
using System.Threading.Tasks;
using Microsoft.AspNetCore.Builder;
using Microsoft.AspNetCore.Hosting;
using Microsoft.Extensions.Configuration;
using Microsoft.Extensions.DependencyInjection;
//Add Reference
using Microsoft.AspNetCore.HttpOverrides;

namespace ntmvc
{
    public class Startup
    {
        public Startup(IConfiguration configuration)
        {
            Configuration = configuration;
        }

        public IConfiguration Configuration { get; }

        // This method gets called by the runtime. Use this method to add services to the container.
        public void ConfigureServices(IServiceCollection services)
        {
            services.AddMvc();
        }

        // This method gets called by the runtime. Use this method to configure the HTTP request pipeline.
        public void Configure(IApplicationBuilder app, IHostingEnvironment env)
        {
            if (env.IsDevelopment())
            {
                app.UseDeveloperExceptionPage();
            }
            else
            {
                app.UseExceptionHandler("/Home/Error");
            }

            app.UseStaticFiles();

            app.UseMvc(routes =>
            {
                routes.MapRoute(
                    name: "default",
                    template: "{controller=Home}/{action=Index}/{id?}");
            });

            //Add the following code
            app.UseForwardedHeaders(new ForwardedHeadersOptions
            {
                ForwardedHeaders = ForwardedHeaders.XForwardedFor | ForwardedHeaders.XForwardedProto
            });

            app.UseAuthentication();
        }
    }
}
3. Build Project
First switch to the project directory ntmvc, then run the following command
dotnet publish -c Release
As follows:

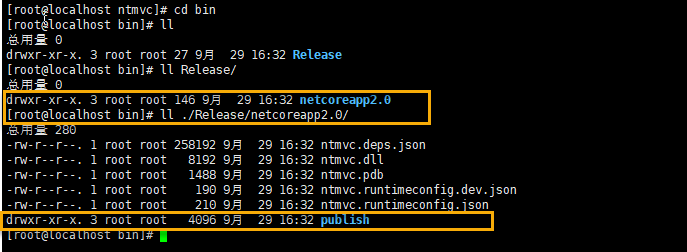
After running the command, there will be an additional bin folder in the project directory
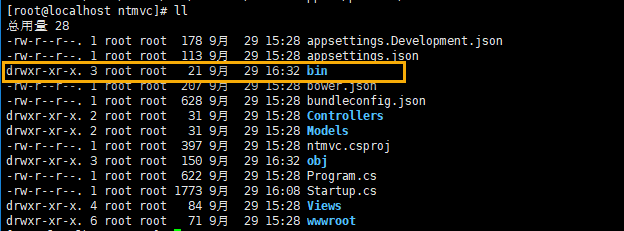
The Release folder is included in the bin folder, and the netcoreapp2.0 folder in the Release folder contains content that can be published, the publish folder.
Note: The contents outside the publish folder are the same as the files that were generated when we ran the dotnet run command, except that the Debug folder was replaced with its own named Release folder. In other words, running dotnet publish-c Release has one more publish folder than running dotnet run, which is exactly what you want to publish
4. Run Project
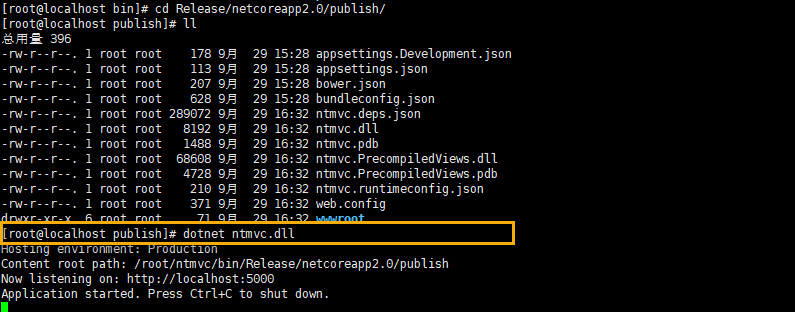
Switch to the publish folder and run the command
dotnet nmvc.dll
As shown in the following figure:
5. Auto-start of project
Next, set the project's startup autostart to create a new service file in/etc/systemd/system/
vim /etc/systemd/system/kestrel-ntmvc.service
The contents are as follows:
[Unit]
Description=Example .NET Web MVC Application running on Centos7

[Service]
WorkingDirectory=/root/ntmvc
ExecStart=/usr/bin/dotnet /root/ntmvc/bin/Release/netcoreapp2.0/publish/ntmvc.dll
Restart=always
RestartSec=10  # Restart service after 10 seconds if dotnet service crashes
SyslogIdentifier=dotnet-example
User=root
Environment=ASPNETCORE_ENVIRONMENT=Production

[Install]
WantedBy=multi-user.target
Then save and run the following command:
systemctl enable kestrel-ntmvc.service
systemctl start kestrel-ntmvc.service
systemctl status kestrel-ntmvc.service
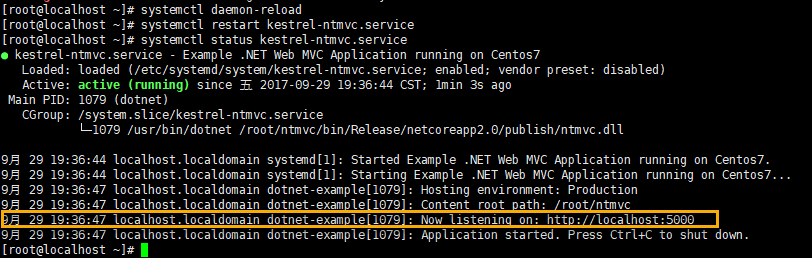
Note: If errors are detected, the kestrel-ntmvc.service file needs to be modified and, if correct, restarted by running the following command:
systemctl daemon-reload
systemctl restart kestrel-ntmvc.service
Here are the results after normal operation
 So far, a simple project can be accessed properly. Next, the project is transformed to introduce the use of nginx.
3. Compile and install nginx
1. Installation Dependencies
yum -y install gcc gcc-c++ pcre pcre-devel openssl openssl-devel zlib zlib-devel
2. Download the installation package
The latest download address is available on the official website.
wget http://nginx.org/download/nginx-1.13.5.tar.gz
3. Decompression
mkdir nginxfiles
tar -zxvf nginx-1.13.5.tar.gz -C nginxfiles
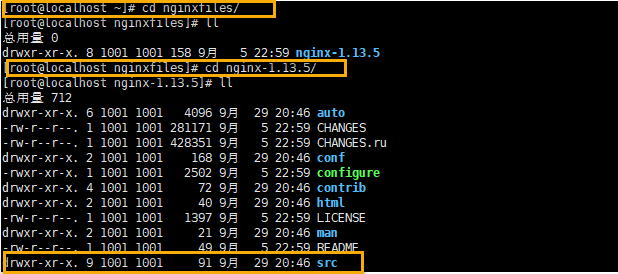
4. Switch directories
cd nginxfiles/
cd nginx-1.13.5/
As follows:
5. Compile and Install
Execute the following command
# Configuration: Additional modules need to be installed here
./configure --prefix=/usr/local/nginx --with-http_ssl_module --with-stream --with-mail=dynamic
# Compile
make
# install
make install
The following are the results of the installation

6. Create soft links
ln -s /usr/local/nginx/sbin/nginx /usr/local/bin
As mentioned above, this eliminates the need to set environment variables.

4. Certificate-related
To enhance the security of your project, you sometimes need to convert http access to https access. This can be achieved by setting up the ssl module in nginx.
Typically, this requires a CA to apply for a security certificate (commonly free: https://letsencrypt.org/ ).
Since this is for testing purposes only, use the certificate you generated.
1. Generation of certificates
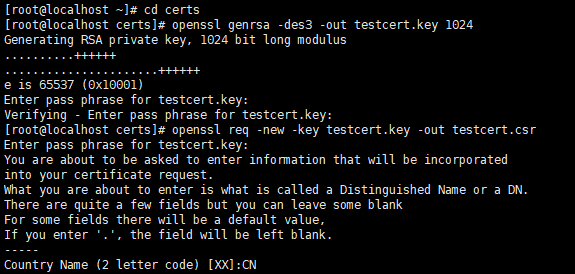
Create a certs folder in the root directory, switch to it, and run the following commands in turn:
# Create the server private key (the process requires a password, remember it) Generate the RSA key
openssl genrsa -des3 -out testcert.key 1024

# To generate a certificate request, you need to enter the country, region, organization, email, common name, etc. Common name can write your name or domain name. If you are applying for https, you must match the domain name or it will cause browser alerts.
openssl req -new -key testcert.key -out testcert.csr

# Generate key s that do not require a password
openssl rsa -in testcert.key -out testcert_nopwd.key

# Generate crt file
openssl x509 -req -days 365 -in testcert.csr -signkey testcert_nopwd.key -out testcert.crt
As shown in the following two pictures:

2. Location of certificate
Copy certificate to/etc/ssl/certs/directory
 cp testcert.crt /etc/ssl/certs/
 cp testcert_nopwd.key /etc/ssl/certs/testcert.key
As follows:
3. Duffy-Helman Key Exchange
In general, you can modify the nginx.conf configuration file later. For further security enhancements, a Duffy-Helman key exchange can be performed in the / etc/ssl/certs/directory
openssl dhparam -out dhparam.pem 4096
Here are the generated files

5. nginx profile related
1. Custom proxy.conf file
Create a new proxy.conf file in the /usr/local/nginx/cong/directory, which will be referenced later in nginx.conf.
proxy_redirect             off;
proxy_set_header         Host             $host;
proxy_set_header        X-Real-IP         $remote_addr;
proxy_set_header        X-Forwarded-For    $proxy_add_x_forwarded_for;
proxy_set_header    X-Forwarded-Proto $scheme;
client_max_body_size     10m;
client_body_buffer_size 128k;
proxy_connect_timeout     90;
proxy_send_timeout         90;
proxy_read_timeout         90;
proxy_buffers            32 4k;
2. Modify nginx.conf file
Modify the nginx.conf file in the /usr/local/nginx/cong/directory to emphasize that different colors have been used for labeling.
worker_processes  1;

events {
    worker_connections  1024;
}

http {
    include       proxy.conf;
    include       mime.types;
    default_type  application/octet-stream;

    limit_req_zone $binary_remote_addr zone=one:10m rate=5r/s;
    server_tokens off;

    sendfile        on;
    #tcp_nopush     on;

    keepalive_timeout  29;
    client_body_timeout 10;
    client_header_timeout 10;
    send_timeout 10;

    upstream ntmvc{
        server localhost:5000;
    }


    server {

        listen       80;
        add_header Strict-Transport-Security max-age=15768000;
        return 301 https://$host$request_uri;
    }


    # HTTPS server
    #
    server {
        listen *:443    ssl;
        server_name     localhost;
        ssl_certificate /etc/ssl/certs/testcert.crt;
        ssl_certificate_key /etc/ssl/certs/testcert.key;
        ssl_protocols TLSv1.1 TLSv1.2;
        ssl_prefer_server_ciphers on;
        ssl_dhparam /etc/ssl/certs/dhparam.pem;
        ssl_ciphers "EECDH+AESGCM:EDH+AESGCM:AES256+EECDH:AES256+EDH";
        ssl_ecdh_curve secp384r1;
        ssl_session_cache shared:SSL:10m;
        ssl_session_tickets off;
        ssl_stapling on; #ensure your cert is capable
        ssl_stapling_verify on; #ensure your cert is capable

        add_header Strict-Transport-Security "max-age=63072000; includeSubdomains; preload";
        add_header X-Frame-Options SAMEORIGIN;
        add_header X-Content-Type-Options nosniff;

        #Redirects all traffic
        location / {
            proxy_pass  http://ntmvc;
            limit_req   zone=one burst=10 nodelay;
            limit_req_status 503;
        }
    }
}
6. nginx start-up automatically
# Set nginx self-start to create a service file in / lib/systemd/system/directory
vim /lib/systemd/system/nginx.service
Note that the path here is / lib/systemd/system/, not / etc/systemd/system/ where the ntmvc project self-start service file above resides.
The contents are as follows:
[Unit]
Description=nginx - high performance web server
After=network.target remote-fs.target nss-lookup.target

[Service]
Type=forking
ExecStart=/usr/local/nginx/sbin/nginx -c /usr/local/nginx/conf/nginx.conf
ExecReload=/usr/local/nginx/sbin/nginx -s reload
ExecStop=/usr/local/nginx/sbin/nginx -s stop

[Install]
WantedBy=multi-user.target

After editing the file, run the following command to start the service:
systemctl enable nginx.service
# Start nginx service
systemctl start nginx.service
# View Status
systemctl status nginx.service
The results are as follows:
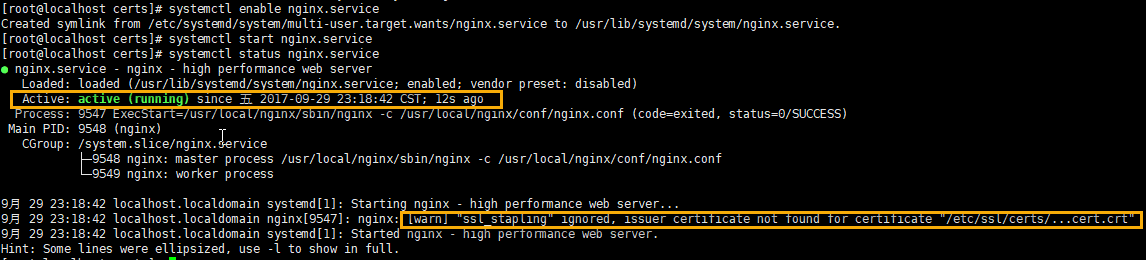
There is a warning here because the certificates we use are self-generated, not formal.
Typically, you need to restart the service after modifying the configuration file by executing the following commands:
# This is required if the file is modified
systemctl daemon-reload
# Restart Service
systemctl restart nginx.service
7. Firewall-related
The following three ports must be opened, other depending on the situation.
#port
firewall-cmd --zone=public --add-port=80/tcp --permanent
firewall-cmd --zone=public --add-port=5000/tcp --permanent
firewall-cmd --zone=public --add-port=443/tcp --permanent
#Port must be reloaded after opening
firewall-cmd --reload
# View all open ports:
firewall-cmd  --list-ports
The specific operation is shown in the diagram:

Reload and display port

8. Access-related
Once the above configuration is complete, if the environment is using a real physical machine or a bridged virtual machine, direct access to the ip address is sufficient.
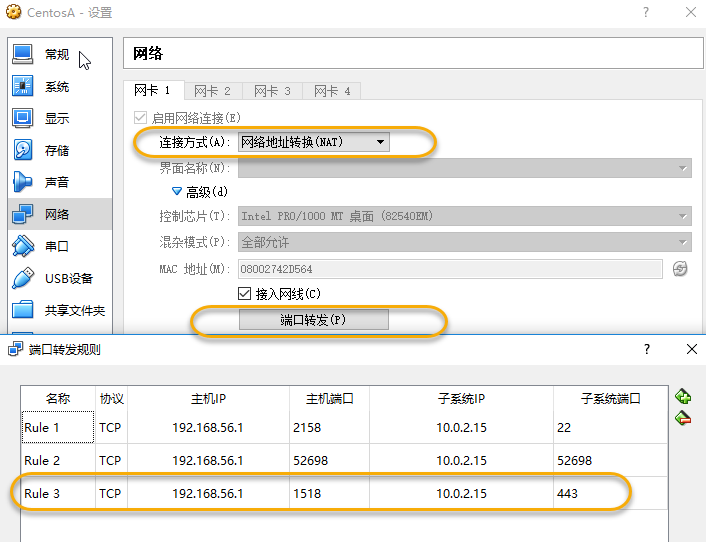
If it is a NAT-connected virtual machine, a port mapping is required. The virtual machine built by VirtualBox used in this experiment can be set up as an example by pressing the figure below.
If browsing directly in the virtual machine, browse 127.0.0.1 or localhost.
If accessed from a host, you can enter it in the host's browser https://192.168.56.1:1518 , which maps to port 443 of the virtual machine so that ntmvc projects in the virtual machine can be accessed through https.
Because add_is configured in nginx.conf Header Strict-Transport-Security max-age=15768000; That is, only https access is allowed, so enter http://192.168.56.1:1518 Errors will be prompted.
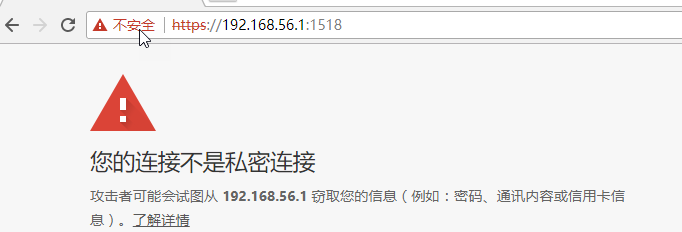
The normal access results are shown in the following image (Google Browser), and this prompt appears because the certificate used is self-generated.
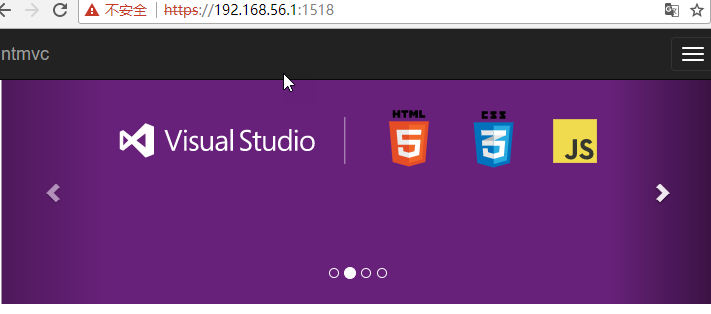
Continue to access the page in ntmvc, as shown below:
Official Reference Documents:
https://docs.microsoft.com/zh-cn/aspnet/core/publishing/linuxproduction?tabs=aspnetcore2x