Preface
In the past, we used Fragment transactions to add, delete, replace and so on. For rapid development, we will also encapsulate a Fragment controller ourselves. Last year, Google launched its Navigation library with the goal of managing fragments more elegantly.
text
Let's first review Fragment's transactions:
fragmentManager.beginTransaction().add(xxx).commit();
If it is a common multi Tab switch Fragment, we will use FrameLayout as the container of Fragment in XML, then create an instance of Fragment, and put it into FrameLayout according to different situations:
<?xml version="1.0" encoding="utf-8"?>
<LinearLayout xmlns:android="http://schemas.android.com/apk/res/android"
    android:layout_width="match_parent"
    android:layout_height="match_parent"
    android:orientation="vertical">

    <FrameLayout
        android:id="@+id/container"
        android:layout_width="match_parent"
        android:layout_height="match_parent" />

</LinearLayout>
If we want to read this code, frankly speaking, you can get very little information from this xml. You can only guess that this page may use Fragment. That's all. Then go to Java or Kotlin file to see what functional logic FrameLayout uses.
Navigation
Now we use the Navigation library to complete the multi Tab switching logic just now:
MainActivity Of xml Document:

<?xml version="1.0" encoding="utf-8"?>
<androidx.constraintlayout.widget.ConstraintLayout xmlns:android="http://schemas.android.com/apk/res/android"
    xmlns:app="http://schemas.android.com/apk/res-auto"
    xmlns:tools="http://schemas.android.com/tools"
    android:layout_width="match_parent"
    android:layout_height="match_parent"
    tools:context=".MainActivity">

    <!-- fragment Set -->
    <fragment
        android:id="@+id/nav_host_fragment"
        android:name="androidx.navigation.fragment.NavHostFragment"
        android:layout_width="0dp"
        android:layout_height="0dp"
        app:layout_constraintLeft_toLeftOf="parent"
        app:layout_constraintRight_toRightOf="parent"
        app:layout_constraintTop_toTopOf="parent"
        app:layout_constraintBottom_toBottomOf="parent"
        app:defaultNavHost="true"
        app:navGraph="@navigation/nav_graph" />

</androidx.constraintlayout.widget.ConstraintLayout>
nav_graph Document:
<?xml version="1.0" encoding="utf-8"?>
<navigation xmlns:android="http://schemas.android.com/apk/res/android"
xmlns:app="http://schemas.android.com/apk/res-auto"
xmlns:tools="http://schemas.android.com/tools"
android:id="@+id/nav_graph"
app:startDestination="@id/mainFragment"> <!-- Beginning fragment -->
<fragment
android:id="@+id/mainFragment"
android:name="com.lzp.navigation.fragment.MainFragment"
android:label="main"
tools:layout="@layout/fragment_main" />
<fragment
android:id="@+id/secondFragment"
android:name="com.lzp.navigation.fragment.SecondFragment"
android:label="second"
tools:layout="@layout/fragment_sec" />
</navigation>In terms of code quantity, it is increased, but the information that can be viewed in the corresponding XML is increased a lot. From the Activity XML, we encapsulate the usage area of Fragment into a Fragment, which is bound to a @ navigation / NAV graph file. In the NAV graph, we describe which fragments we will use.
Use of Navigation
From our example just now, we can see that the goal of Navigation is to move the maintenance of Fragment into XML, simplify the complexity of using Fragment as much as possible, and improve the readability and maintainability of code. You can regard the use of Navigation as a high-level Include, but its functions are more abundant and powerful.
Add Gradle dependency
 dependencies {
      def nav_version = "2.1.0"

      // Java
      implementation "androidx.navigation:navigation-fragment:$nav_version"
      implementation "androidx.navigation:navigation-ui:$nav_version"

      // Kotlin
      implementation "androidx.navigation:navigation-fragment-ktx:$nav_version"
      implementation "androidx.navigation:navigation-ui-ktx:$nav_version"

    }
Google offers Java and Kotlin. If you want to use Navigation, you have to support Android X. if you don't upgrade to Android x, you really need to hurry up.
Using NavHostFragment
<!-- fragment Set -->
    <fragment
        android:id="@+id/nav_host_fragment"
        android:name="androidx.navigation.fragment.NavHostFragment"
        android:layout_width="match_parent"
        android:layout_height="match_parent"
        app:defaultNavHost="true"
        app:navGraph="@navigation/nav_graph" />
Replace the FrameLayout container with NavHostFragment. App: NAV graph = "@ navigation / nav_graph" is the layout file corresponding to the binding. @Navigation is only supported in android studio 3.3 and above.
Create navGraph
Create the navigation folder under the res file, and create the xml you need under the folder: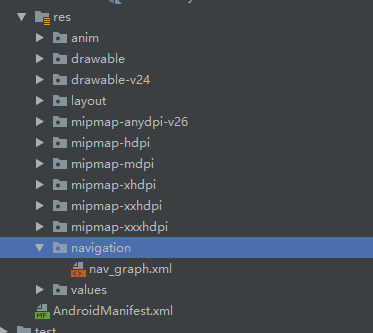
XML code of previous Demo:
<?xml version="1.0" encoding="utf-8"?>
<navigation xmlns:android="http://schemas.android.com/apk/res/android"
    xmlns:app="http://schemas.android.com/apk/res-auto"
    xmlns:tools="http://schemas.android.com/tools"
    android:id="@+id/nav_graph"
    app:startDestination="@id/mainFragment"> <!-- Beginning fragment -->

    <fragment
        android:id="@+id/mainFragment"
        android:name="com.lzp.navigation.fragment.MainFragment"
        android:label="main"
        tools:layout="@layout/fragment_main" />

    <fragment
        android:id="@+id/secondFragment"
        android:name="com.lzp.navigation.fragment.SecondFragment"
        android:label="second"
        tools:layout="@layout/fragment_sec" />

</navigation>
We will use two fragments, MainFragment and SecondFragment. We need to set the id for them, because the id is required for Fragment switching. app:startDestination="@id/mainFragment" must be set. Specify the id of the default added Fragment. If it is not set, it will crash directly.
Toggle Fragment
To switch from MainFragment to SecondFragment:
val navHostController = Navigation.findNavController(activity, R.id.nav_host_fragment)
// Jump to secondFragment
navHostController.navigate(R.id.secondFragment)
// Return to previous Fragment
navHostController.navigateUp()
More usage of Navigation
The use of Navigation is so simple. If you are a friend who is very familiar with Fragment, you can generally guess how Navigation is done. No more analysis will be done here. Next, let's see what other convenient methods are provided by Navigation.
The control of Fragment is almost all in NavController.
Setting NavGraph dynamically
val navController = Navigation.findNavController(this, R.id.nav_host_fragment)
// Similar to inflater, load the xml file
val navGraph = navController.navInflater.inflate(R.navigation.nav_graph)
// There are other overloaded ways to set up NavGraph
navController.setGraph(navGraph, Bundle())
Transition animation of Fragment
There are two ways to realize the transition animation of Fragment. The first is very simple, which is written directly in XML:
<fragment
        android:id="@+id/mainFragment"
        android:name="com.lzp.navigation.fragment.MainFragment"
        android:label="main"
        tools:layout="@layout/fragment_main">

        <action
            android:id="@+id/to_second"
            app:destination="@id/secondFragment"
            app:enterAnim="@anim/enter_anim"
            app:exitAnim="@anim/exit_anim"
            app:popEnterAnim="@anim/pop_enter_anim"
            app:popExitAnim="@anim/pop_exit_anim" />

    </fragment>
action can customize startup mode, startup animation, etc. id is required
App: enter anim = "@ anim / enter_anim" / / enter the animation of the page
App: exit anim = "@ anim / exit_anim" / / animation of the exited page
App: pop enter anim = "@ anim / pop \ enter \ anim" / / when you click to return or return to the previous page, enter the animation of the previous page
App: pop exit anim = "@ anim / pop_exit_anim" / / click to return to the previous page, the exit animation of the current page
Second, switch animation through code setting:
 navHostController.navigate(R.id.to_second, bundle, navOptions {
                anim {
                    enter = R.anim.enter_anim
                    exit = R.anim.exit_anim
                    popEnter = R.anim.pop_enter_anim
                    popExit = R.anim.pop_exit_anim
                }
})
The key point is to create NavOption, which contains various animations of jump. In addition to the examples, there are many other overloaded methods. We will not introduce them here, and you can view them by yourself.
Fragment switching
The switch of Fragment uses NavController's navigate() method. There are many overloaded methods. Only a few commonly used methods are introduced here.
- First, jump through Fragment id:
navHostController.navigate(R.id.secondFragment)
Please note that this jump will directly ignore the Action you set and directly display the Fragment of the corresponding id.
- Second, jump through the Action Id
// Use the configured action to jump
navHostController.navigate(R.id.to_second)
Third, customize NavDirections
// Customize NavDirections
            navHostController.navigate(object : NavDirections {

                override fun getArguments(): Bundle = bundle

                override fun getActionId(): Int = R.id.to_second

 })
The first two also have a jump method for the Bundle parameter, which gets the passed parameter in arguments.
Monitor Fragment switching
private val onDestinationChangedListener =
        NavController.OnDestinationChangedListener { _, destination, _ -> Log.e("lzp", destination.label.toString()) }
 val navHostController = Navigation.findNavController(this, R.id.nav_host_fragment)
 // Set up monitoring
 navHostController.addOnDestinationChangedListener(onDestinationChangedListener)
 // Remove listening
 navHostController.removeOnDestinationChangedListener(onDestinationChangedListener)
DeepLink
You can jump by configuring the Uri:
<?xml version="1.0" encoding="utf-8"?>
<navigation xmlns:android="http://schemas.android.com/apk/res/android"
    xmlns:app="http://schemas.android.com/apk/res-auto"
    xmlns:tools="http://schemas.android.com/tools"
    android:id="@+id/nav_graph"
    app:startDestination="@id/mainFragment"> <!-- Beginning fragment -->

    ...

    <fragment
        android:id="@+id/secondFragment"
        android:name="com.lzp.navigation.fragment.SecondFragment"
        android:label="second"
        tools:layout="@layout/fragment_sec">

        <deepLink app:uri="lzp://main/second" />

    </fragment>

    <activity
        android:id="@+id/to_second_activity"
        android:name="com.lzp.navigation.SecondActivity">

        <deepLink app:uri="lzp://second/main" />

    </activity>

</navigation>

// Use Uri for DeepLinkt jump
navHostController.navigate(Uri.parse("lzp://second/main"))
summary
Navigation is very simple to start with. From the source, it can be inferred that navigation will provide better support for ViewModel in the future. For more experience and usage of navigation, please leave a message to discuss and learn.