catalogue
1, Hardware principle
The difference between the keys on the expansion board and those on the foundation board:
Basic board: four keys are independent keys, and each key corresponds to an IO port;
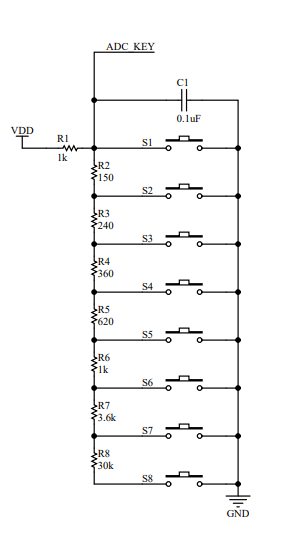
Expansion board: the eight keys are like independent keys rather than completely independent keys. Its principle is to connect the high-level terminal of the eight keys to our ADC_KEY pin: when each key is pressed, the potential of the pin will change, and we need to record the potential of the corresponding key through ad acquisition, so as to distinguish different keys according to different potentials;
The schematic diagram is as follows:
At this time, some friends may be worried. Will the button be pressed, and the collected potential will be similar and unable to prepare for judgment?
In fact, this phenomenon will not happen. Through actual inspection and measurement, it can be seen that when each key is pressed, the corresponding potential change is still relatively large, so there will be no misjudgment caused by pressing the key; If so, consider whether it is programming;
Since the boards obtained by each person may be different, the potential value measured by each person will also deviate, but this deviation will not be very large; (I suggest to re measure and write the judgment program during the competition, so as to ensure the safest and most reliable key error to the minimum.)
According to the adc button of my expansion board, I got the following data (the collected ad value will jump in a small range) for your reference;
| Key | ad value |
| nothing | 4096-4071 |
| K1 | 0-5 |
| K2 | 525-528 |
| K3 | 1139-1141 |
| K4 | 1737-1739 |
| K5 | 2351-2356 |
| K6 | 2861-2864 |
| K7 | 3486-3487 |
| K8 | 3965-3970 |
From the above table, we can see that the deviation of ad value of each key is relatively large, so we don't have to worry about misjudgment of each key;
2, CUBEMX configuration
We continue to modify and add CUBEMX on the previous nixie tube learning routine. Friends who are not clear about the use of nixie tubes can refer to my last article;
According to the official data, P4\P5 needs to be short circuited with jumper cap when using adc key. The connection is the PA5 pin on our chip, so we need to open the pin of PA5 on the CUBEMX and configure it accordingly;
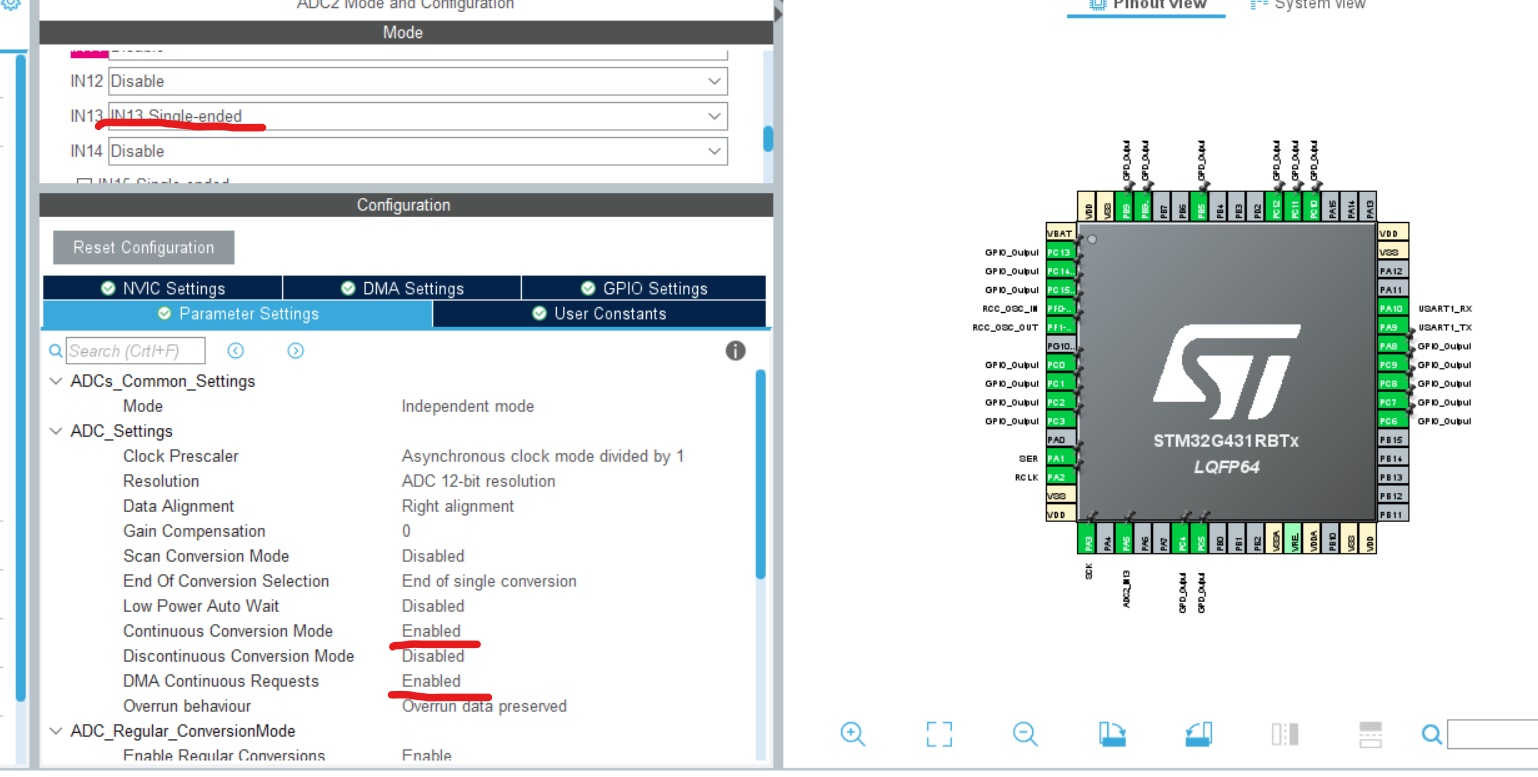
Turn on continuous conversion mode and DMA transfer. Using DMA transfer can reduce the workload of cpu.
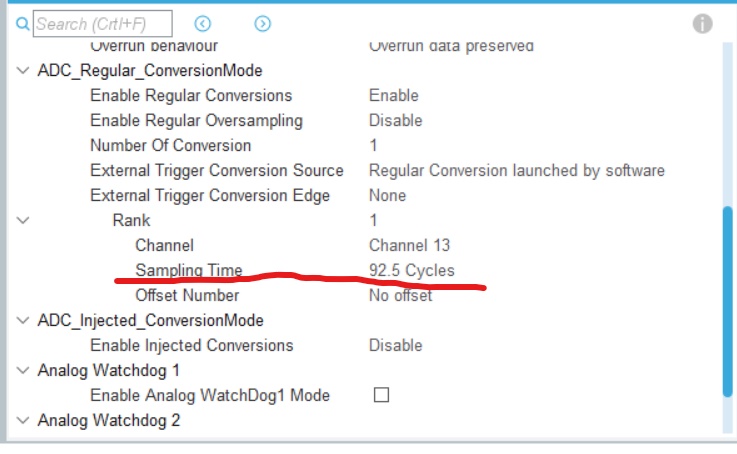
In the Rank option below, you can modify the Sampling Time value a little larger, which can reduce the error during ad acquisition;
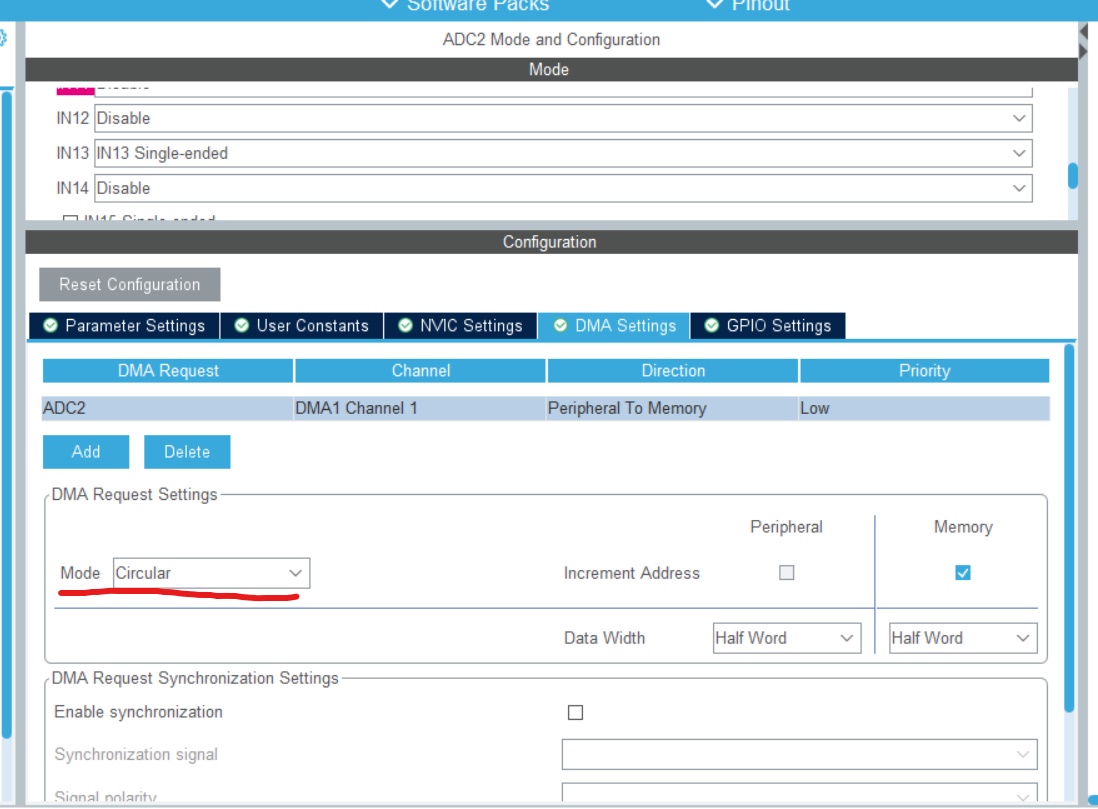
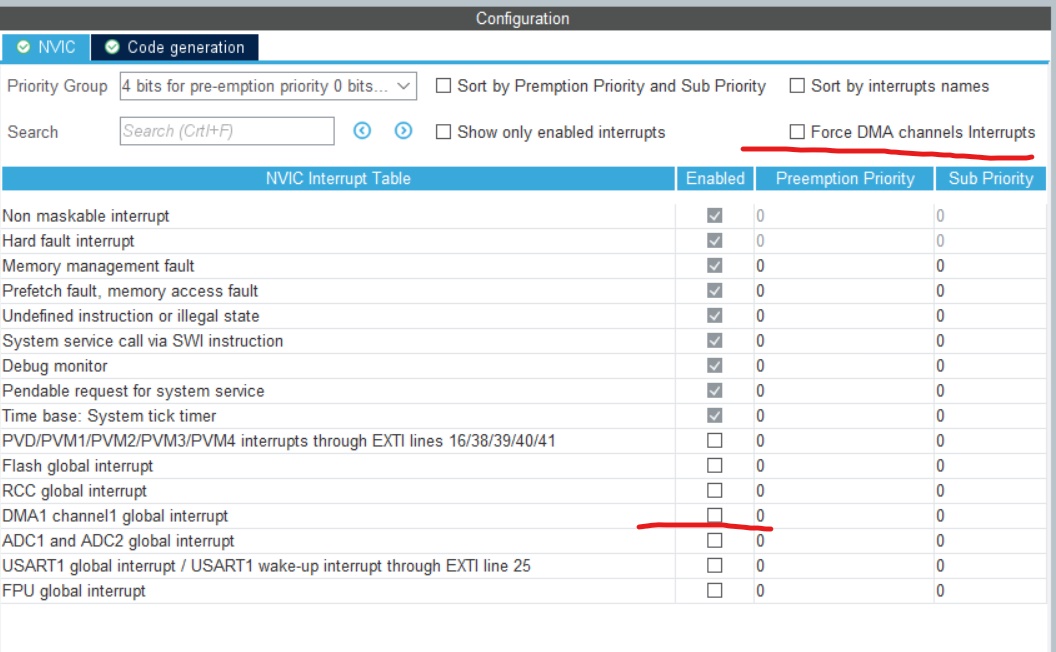
Go to the DMA Setting interface. One thing to note is to change the DMA mode to Circular mode. Otherwise, our DMA will only transmit data once.
Finally, turn off the DMA interrupt. Because we use real-time detection of ad value in the subsequent programming process, DMA only transmits one ad value at a time to realize real-time detection. If each transmission is interrupted once, the whole system will crash (interested partners can try).
Finally, generate the code, open KEIL and write the next program;
3, Programming
Step 1: open ADC acquisition and DMA transmission;
Set an array to store the ad value we collected, with a capacity of 1; Every time DMA transfers data, it will overwrite the last data, so as to achieve real-time detection of ad value.
uint16_t adc[1];
After creating the storage area, open adc and dma; Add the following code before the while {} loop body:
	HAL_ADCEx_Calibration_Start(&hadc2,ADC_SINGLE_ENDED);
	HAL_ADC_Start_DMA(&hadc2,(uint32_t *)adc,1);
The second step is to process the ad acquisition value;
After processing and judging the collected ad value, we will display the corresponding key value on the nixie tube;
Reference codes are as follows:
adc_key.c
#include "main.h"
#include "adc_key.h"
#include "lcd.h"
#include "stdio.h"
#include "seg.h"
int adc_key;
extern uint16_t adc[1];

unsigned char adckey_read(void)
{

  unsigned char adc_key=0;

	if(adc[0] < 5)
		adc_key = 1;
	if(adc[0] <528 && adc[0] > 525)
		adc_key = 2;
	if(adc[0] <1141 && adc[0] > 1139)
		adc_key = 3;
	if(adc[0] < 1739 && adc[0] > 1737)
		adc_key = 4 ;
	if(adc[0] == 2356)
		adc_key = 5;
	if(adc[0] ==2863)
		adc_key = 6;
	if(adc[0] <3487 && adc[0] > 3482)
		adc_key = 7;
	if(adc[0] == 3968)
		adc_key = 8;

	if(adc[0] > 4060)
		return 0xff;

return adc_key;
}

void key_proc(void)
{
  adc_key = adckey_read();

	if(adc_key == 1)
	{
	   Seg_ShowNum(0,0,1);
	}

	if(adc_key == 2)
	{
	   Seg_ShowNum(0,0,2);
	}

	if(adc_key == 3)
	{
	   Seg_ShowNum(0,0,3);
	}

	if(adc_key == 4)
	{
	   Seg_ShowNum(0,0,4);
	}

	if(adc_key == 5)
	{
	   Seg_ShowNum(0,0,5);
	}

	if(adc_key == 6)
	{
	  Seg_ShowNum(0,0,6);
	}

	if(adc_key == 7)
	{
	   Seg_ShowNum(0,0,7);
	}
	if(adc_key == 8)
	{
	   Seg_ShowNum(0,0,8);
	}

	if(adc_key == 0xff)
	{
	   Seg_ShowNum(0,0,0);
	}

}
adc_key.h
#ifndef __ADCKEY_H
#define  __ADCKEY_H

unsigned char adckey_read(void);
void key_proc(void);

#endif
Add the written AD acquisition function and ad processing function into the while {} loop body and burn the program;
4, Observation phenomenon
After writing our ad acquisition and processing program, let's observe the phenomenon.