I failed to install Mysql on Linux for many times, which was very painful. So I wrote a Mysql installation tutorial at night, hoping to avoid detours in the installation!
1, Package installation
1, First, prepare a clean Linux server, which should be emphasized here. Don't miss the Bug
[root@VM-0-2-centos /]# cd opt
2. Create a new MySQL folder and upload files to the MySQL folder at the same time
[root@VM-0-2-centos opt]# mkdir mysql
3. Enter the MySQL folder and unzip the MySQL installation package
[root@VM-0-2-centos mysql]# tar -zxvf mysql-5.7.26-linux-glibc2.12-x86_64.tar.gz
4. Move to / usr/local/mysql and rename to mysql
[root@VM-0-2-centos mysql]# mv mysql-5.7.26-linux-glibc2.12-x86_64 /usr/local/mysql
5. Switch to this directory
[root@VM-0-2-centos mysql]# cd /usr/local/mysql/
[root@VM-0-2-centos mysql]# pwd
/usr/local/mysql
6. Create a Mysql user and prohibit logging into our operating system. The user's group will be created automatically. We can view the current user through id mysql
[root@VM-0-2-centos mysql]# useradd -r -s /sbin/nologin mysql
[root@VM-0-2-centos mysql]# id mysql
uid=995(mysql) gid=993(mysql) groups=993(mysql)
7. Authorize the current folder to mysql user
[root@VM-0-2-centos mysql]# chown -R mysql.mysql /usr/local/mysql/
8. We can check it
[root@VM-0-2-centos mysql]# ll
total 52
drwxr-xr-x  2 mysql mysql  4096 Oct 29 21:43 bin
-rw-r--r--  1 mysql mysql 17987 Apr 13  2019 COPYING
drwxr-xr-x  2 mysql mysql  4096 Oct 29 21:43 docs
drwxr-xr-x  3 mysql mysql  4096 Oct 29 21:42 include
drwxr-xr-x  5 mysql mysql  4096 Oct 29 21:43 lib
drwxr-xr-x  4 mysql mysql  4096 Oct 29 21:43 man
-rw-r--r--  1 mysql mysql  2478 Apr 13  2019 README
drwxr-xr-x 28 mysql mysql  4096 Oct 29 21:43 share
drwxr-xr-x  2 mysql mysql  4096 Oct 29 21:43 support-files
9. Remove the Mysql branch, and Centos 7 will automatically help us decompress mariadb, which may easily lead to initialization failure, giant pit
[root@VM-0-2-centos mysql]# yum -y remove mariadb-libs
10. Dependencies required to install Mysql5.7
[root@VM-0-2-centos mysql]# yum -y install numactl
11. Initialize Mysql
[root@VM-0-2-centos mysql]# bin/mysqld --initialize --user=mysql
12. After initialization, we can check the current password, that is, the last sentence, BeYnU1qy_RbH
2021-10-30T02:13:08.202009Z 0 [Warning] TIMESTAMP with implicit DEFAULT value is deprecated. Please use --explicit_defaults_for_timestamp server option (see documentation for more details).
2021-10-30T02:13:08.527388Z 0 [Warning] InnoDB: New log files created, LSN=45790
2021-10-30T02:13:08.654975Z 0 [Warning] InnoDB: Creating foreign key constraint system tables.
2021-10-30T02:13:08.733851Z 0 [Warning] No existing UUID has been found, so we assume that this is the first time that this server has been started. Generating a new UUID: ece0cbc3-3926-11ec-bb90-5254005239db.
2021-10-30T02:13:08.741850Z 0 [Warning] Gtid table is not ready to be used. Table 'mysql.gtid_executed' cannot be opened.
2021-10-30T02:13:08.742424Z 1 [Note] A temporary password is generated for root@localhost: BeYnU1qy_RbH
13. Mysql is a CS architecture. We need to put the Server in the Linux initialization directory
[root@VM-0-2-centos mysql]# cp /usr/local/mysql/support-files/mysql.server /etc/init.d/mysql
14. Start the Mysql Server side, and you can see SUCCESS, indicating that the startup is successful
[root@VM-0-2-centos mysql]# service mysql start
Starting MySQL.Logging to '/usr/local/mysql/data/VM-0-2-centos.err'.
 SUCCESS!
15. Switch to the bin directory and start the Mysql client to connect to the Server
[root@VM-0-2-centos mysql]# cd bin
[root@VM-0-2-centos bin]# ./mysql -u root -p
16. Enter the first password just now, and you can see that we have successfully connected to Mysql, Ouye
[root@VM-0-2-centos bin]# ./mysql -u root -p
Enter password:
Welcome to the MySQL monitor.  Commands end with ; or \g.
Your MySQL connection id is 2
Server version: 5.7.26

Copyright (c) 2000, 2019, Oracle and/or its affiliates. All rights reserved.

Oracle is a registered trademark of Oracle Corporation and/or its
affiliates. Other names may be trademarks of their respective
owners.

Type 'help;' or '\h' for help. Type '\c' to clear the current input statement.

mysql>
17. In fact, the installation has been completed here, but the password is too long. We need to change the password. In addition, we don't want to start the Mysql Server every time. We hope it will start with the Linux system. Therefore, there are still some work to be completed
18. Change password
mysql> SET PASSWORD = PASSWORD('root');
Query OK, 0 rows affected, 1 warning (0.00 sec)
19. Set root to never expire
mysql> ALTER USER 'root'@'localhost' PASSWORD EXPIRE NEVER;
Query OK, 0 rows affected (0.00 sec)
20. Refresh, emm... In fact, you can not refresh. To be safe, brush it
mysql> FLUSH PRIVILEGES;
Query OK, 0 rows affected (0.00 sec)
21. Exit the Mysql Server and go to / In the usr/local/mysql/bin directory, give the mysql startup command to the environment variable, which is equivalent to setting the environment variable by Windows. For global startup, you can view the environment variable through the env command
[root@VM-0-2-centos bin]# ln -s /usr/local/mysql/bin/mysql /usr/bin
22. Set auto start
[root@VM-0-2-centos bin]# cp /usr/local/mysql/support-files/mysql.server /etc/rc.d/init.d/mysqld
[root@VM-0-2-centos bin]# chmod +x /etc/init.d/mysqld
[root@VM-0-2-centos bin]# chkconfig --add mysqld
23. We can view it through chkconfig --list. mysqld 2, 3, 4 and 5 are on, indicating that the automatic startup is set successfully
[root@VM-0-2-centos bin]# chkconfig --list

Note: This output shows SysV services only and does not include native
      systemd services. SysV configuration data might be overridden by native
      systemd configuration.

      If you want to list systemd services use 'systemctl list-unit-files'.
      To see services enabled on particular target use
      'systemctl list-dependencies [target]'.

mysqld          0:off   1:off   2:on    3:on    4:on    5:on    6:off
netconsole      0:off   1:off   2:off   3:off   4:off   5:off   6:off
network         0:off   1:off   2:on    3:on    4:on    5:on    6:off
24. Reconnect to mysql Server and use mysql's own database
[root@VM-0-2-centos bin]# mysql -u root -p
Enter password:
Welcome to the MySQL monitor.  Commands end with ; or \g.
Your MySQL connection id is 3
Server version: 5.7.26 MySQL Community Server (GPL)

Copyright (c) 2000, 2019, Oracle and/or its affiliates. All rights reserved.

Oracle is a registered trademark of Oracle Corporation and/or its
affiliates. Other names may be trademarks of their respective
owners.

Type 'help;' or '\h' for help. Type '\c' to clear the current input statement.

mysql> use mysql
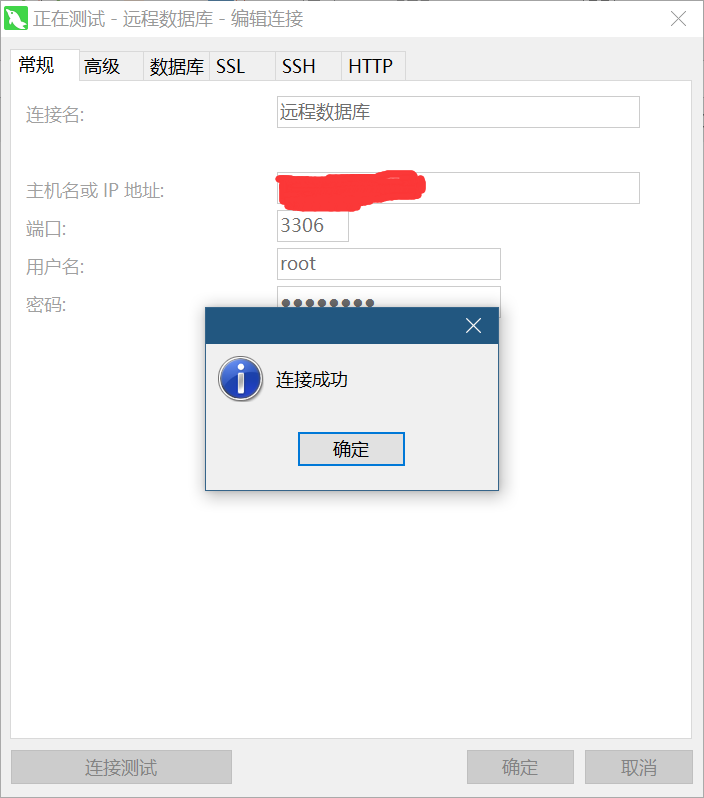
25. Set the open ip so that windows Navicat can connect and refresh. Note that remember to open the ECS port in the cloud security group
mysql> update user set host = '%' where user = 'root';
Query OK, 1 row affected (0.00 sec)
Rows matched: 1  Changed: 1  Warnings: 0

mysql> FLUSH PRIVILEGES;
Query OK, 0 rows affected (0.00 sec)
26. Check Navicat, Ok, it's done, hahaha