1, Environment deployment
192.168.113.129
193.168.113.130
For the binary deployment method of mysql5.7, see mysql5.7 binary deployment
2, mysql replication based on binary log points
1. Create a replication account on mysql master-slave
>create user slave@'192.168.113.%' identified by '123456';
2. Authorize the account to have all operation permissions of the master-slave database
>grant replication slave on *.* to slave@'192.168.113.%';
3. Configure the master database server
vim /etc/my.cnf
#Add class content under mysqld
log_bin=mysql-bin   #Open the binary log and specify the storage directory (MySQL bin). If the binary log is not started, it will take effect after restarting
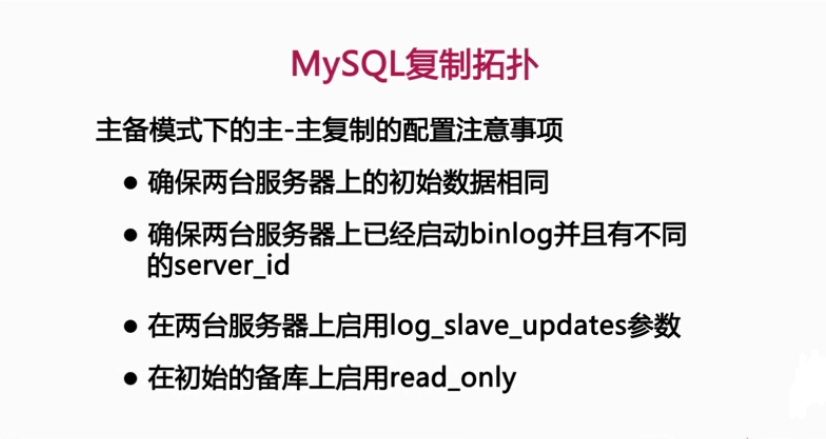
server-id=50        #The serverid needs to be specified. It must be unique in the replication cluster. The master-slave id cannot be the same. It is suggested that the server id can use the later segments of the host ip
binlog_format=row
4. Configure slave database server
vim /etc/my.cnf
log_bin=mysql-bin
binlog_format=row
server-id=51
relay_log=mysql-relay-bin
#log_slave_update=on
read_only=on       # Security configuration parameters to prevent writing from and read-only from the library
relay_log starts the master-slave replication by default, but the parameter name is the host name by default. If the naming policy of the host name is changed for some reason, the error that the original relay log cannot be found will be reported when the replication link of the slave server is started, thus interrupting the link of the master-slave replication. Therefore, change the name of the relay log, In this way, the replication link will not be interrupted
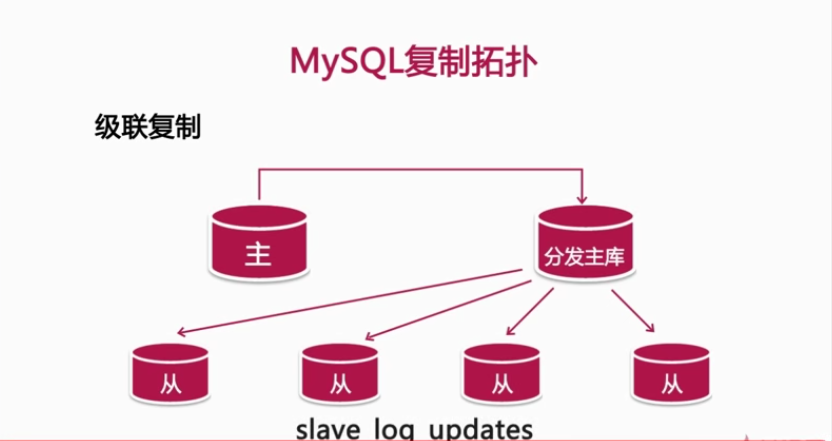
log_slave_update=on determines whether to record the relay log stored by the sql thread into the binary log of the slave server. If link replication is to be performed later, this parameter must be configured to use the slave server as the master server of other slaves
5. Initialize and synchronize all data of the master database from the database
Back up all data on the main library
 In order to maintain the consistency of the database, the main database should not have write operations
mysqldump -uroot -p --all-databases --skip-lock-tables > all.sql
scp all.sql root@192.168.113.130:/root
 Import data from library
mysql -uroot -p < all.sql
You can use xtrabackup – slave info hot standby tool for fast backup
6. Configure and start the master-slave configuration connection on the slave library
View on Main Library binlog log information
>show master status;
Configure links from library
>change master to master_host='192.168.113.129',master_user='slave',master_password='123456',MASTER_LOG_FILE='mysql-bin.000002', MASTER_LOG_POS=946;
>start slave;          #Start from
>show slave status\G;  # View status
 Pay attention to the firewall and selinux Settings for
7. Verification effect
You can create a new table from the library
Or insert data into the original table
Check whether there is new data from the library
advantage:
1. mysql is the earliest supported replication technology with relatively few bugs.
2. There are no restrictions on SQL queries.
3. Fault handling is relatively easy.
Disadvantages:
It is difficult to retrieve the log point information of the new master during failover.
Problems may occur when the specified offset is wrong
3, mysql GTID based replication
Starting from mysql 5.6, mysql supports GTID replication.
1. Disadvantages of log point based replication
Perform incremental synchronization from the offset of the binary log. If specified incorrectly, it will cause omission or duplication, resulting in inconsistent data.
GTID based replication:
The slave server will tell the master server the GTID value of the executed transaction.
The master library will tell the slave which GTID transactions have not been executed.
The same transaction is executed once in the specified slave library.
2. What is GTID
GTID is the global transaction ID, which ensures that a unique ID can be generated in the replication cluster for each transaction submitted on the master
GTID=source_id:transaction_id
source_id: is the server UUID of the main database, which is in the auto.cnf file of the data directory.
transaction_id: a sequence starting from 1.
3. Steps of GTID based replication
Create a copy account and authorization on the master database
>create user slave@'192.168.113.%' identified by '123456';
>grant all privileges  on *.* to slave@'192.168.113.%' identified by '123456';
4. Configure the master database configuration information
vim /etc/my.cnf
log_bin=mysql-bin
server_id=50
gtid-mode=on   #Open GTID
#Enforce transaction consistency to ensure transaction security
#Note that if the transaction point log based configuration is used, the following two situations cannot be used:
#1.create table . . select
#2. Use create temporary table to create temporary tables in transactions, and use association to update transaction tables and non transaction tables.
enforce_gtid_consistency
#The modification log sent from the master server (required before 5.7) is recorded from the server, which increases the IO load
log-slave-updates=on
5. Configure slave database server
vim /etc/my.cnf
server_id=51
log_bin=mysql-bin
relay_log=mysql-relay-bin
gtid-mode=on
enforce-gtid-consistency
read_only=on                   #Recommended configuration to ensure data security from the server
master_info_repository=TABLE   #The information and relay logs of connecting from the server to the master server are stored in the master_info, and relay_log.
relay_log_info_repository=TABLE
6. Initialize and synchronize all data of the master database from the database
Back up all data on the main library
 In order to maintain the consistency of the database, the main database should not have write operations
mysqldump -uroot -p --all-databases --skip-lock-tables > all.sql
scp all.sql root@192.168.113.130:/root
 Import data from library
mysql -uroot -p < all.sql
You can use xtrabackup – slave info hot standby tool for fast backup
7. Start GTID based replication from the library
>change master to master-host='192.168.113.130',master_user='slave',master_password='123456',master_auto_position=1
>start slave;         #Start slave Library
>show slave status\G; #View status
8. Verification effect
You can create a new table from the library
Or insert data into the original table
Check whether there is new data from the library
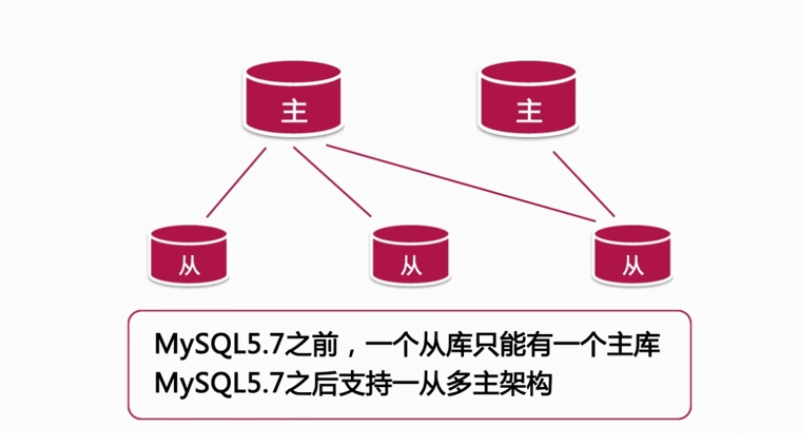
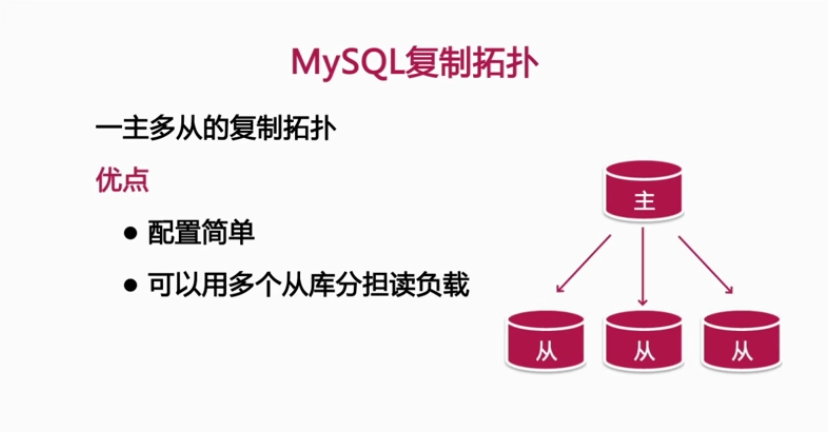
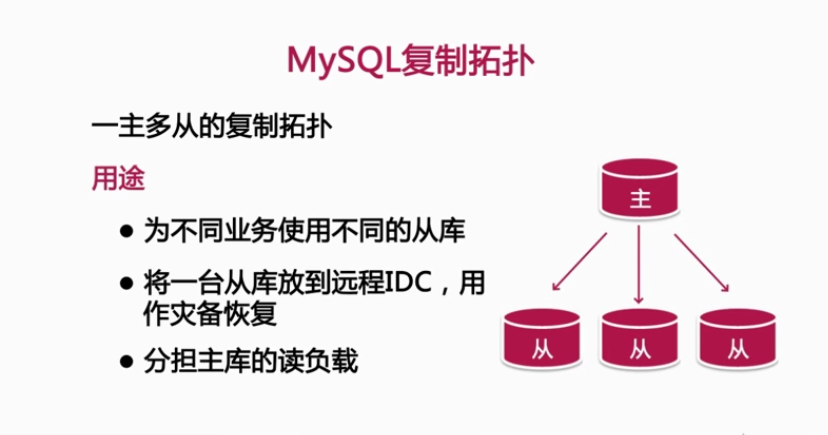
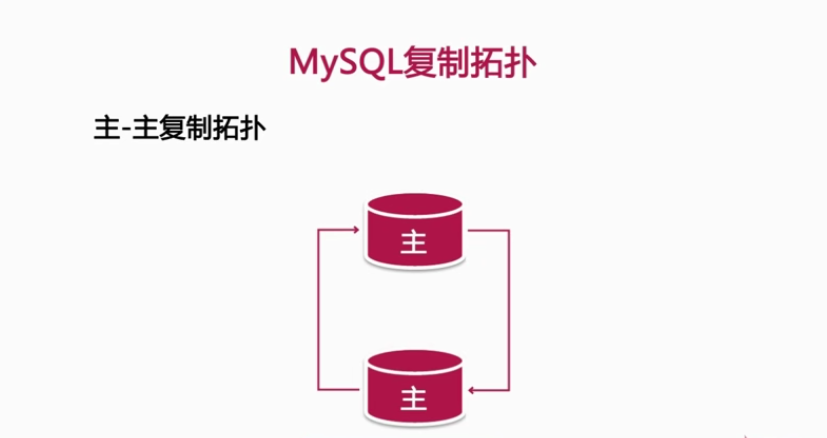
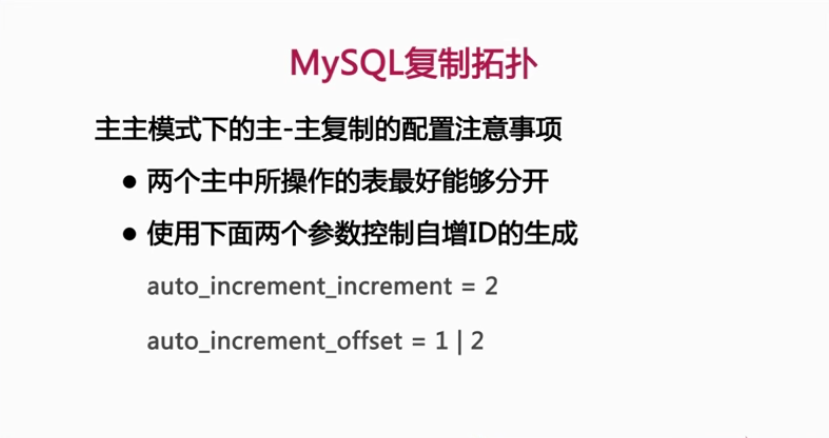
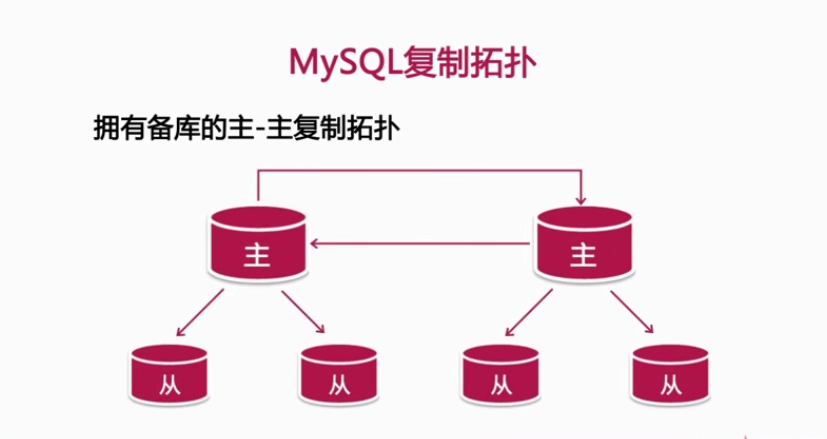
4, Common design replication topologies
